

Mobile mockups are in great demand these days. They are the perfect choice for displaying your mobile websites, designs, and apps. Rather than relying on stock photography, it is best to create your own set of screens in Photoshop. It gives you much flexibility to edit and modify your mockups as needed, and it allows you to keep your designs up to date with the rapidly-changing hardware and software of the industry.
In this tutorial, I’ll show you how to create a realistic iPhone 5 mockup in Photoshop. We’ll use various shape tools, filters, and different layer styling techniques to achieve the final result. Hopefully you will learn some useful tips along the way. So, let’s get started.
Resources: (Download the finished, layered PSD file.)
Potigo Chat App By Sencer Bugrahan
Final Result:

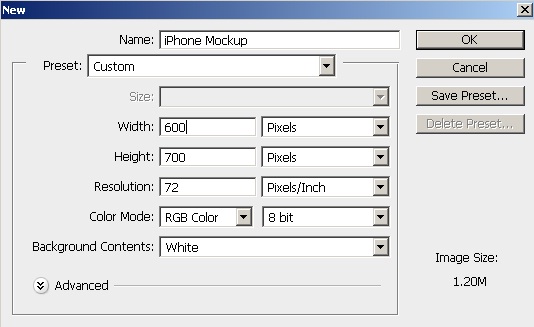
Step 1
Create a new document in Photoshop with a 600px width and a 700px height.
Step 2
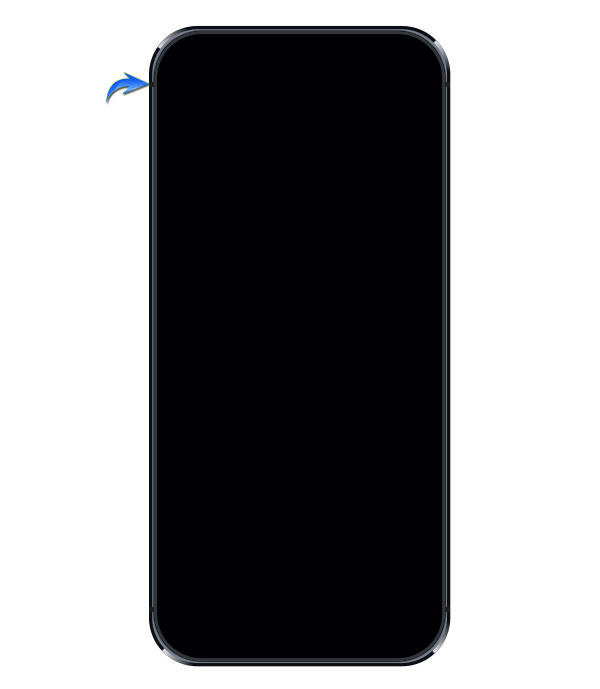
First, we’ll make the body of the iPhone. Set #000004 as your foreground color. Now, select the rounded rectangle tool, click the canvas, and put the following values into the options window, 285px width, 624px height, and 45px radius.

Step 3
Duplicate this rectangle, label it as “Frame1” and place it below the original body layer. Hide this new copy; we’ll work on the original layer now. Double-click on the body to open the layer style window and apply the following settings for Stroke and Outer Glow.


Step 4
Unhide the “Frame1” layer, and change its color to #767f8f. Slightly increase its size using the free transform tool (Ctrl+ “T”).
Step 5
To make “Frame2”, set #0b0e13 as the foreground color and input the following values for “Create Rounded Rectangle.” Make sure to place this rectangle below the rest of the layers.
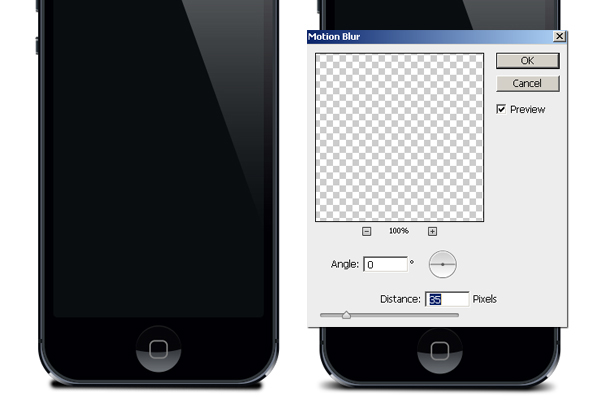
Step 6
Next, we’ll make highlights over “Frame2”. Create a new layer above it, and select a 10px soft round brush to draw a straight line in pure white. Press the “Shift” key while applying the brush to get a straight line. After that, go to “Filter” > “Blur” > “Motion Blur” and apply a 30px motion blur filter to this new layer.

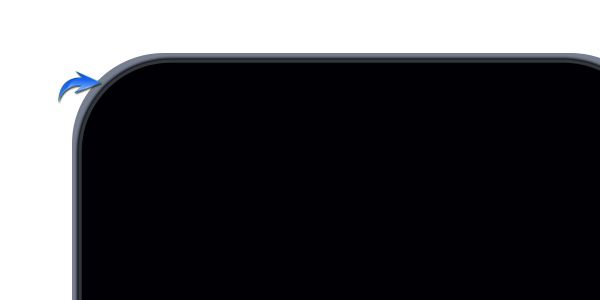
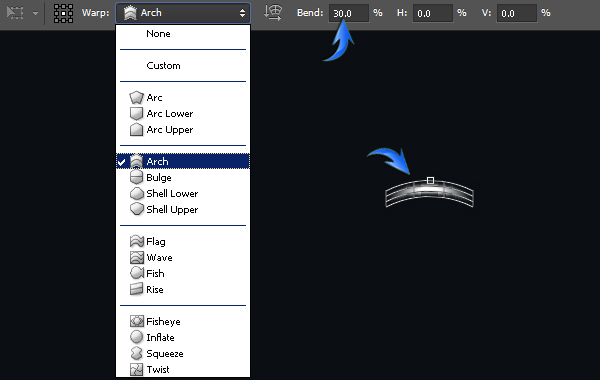
Step 7
Now go to “Edit” > “Transform” > “Warp”. Choose Arch with a 30% bend.
Step 8
Position the highlight over top-left corner at an angle using the free transform tool (Ctrl+ “T”). Now, pick the polygonal lasso tool (“L”) and select the triangular area shown below. After that, go to “Edit” > “Clear” to get rid of the lower portion of the highlight.

Duplicate the highlight and position it over the top-right corner using the free transform tool (Ctrl+ “T”). Duplicate both highlight layers and flip horizontally by going to “Edit” > “Transform” > “Flip Horizontal”. Position them over the bottom corners as shown below.

Step 9
Make a small rectangle using color #1b1f22, duplicate it three times, and position them as shown below.
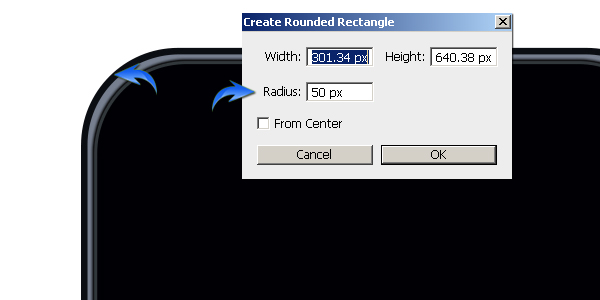
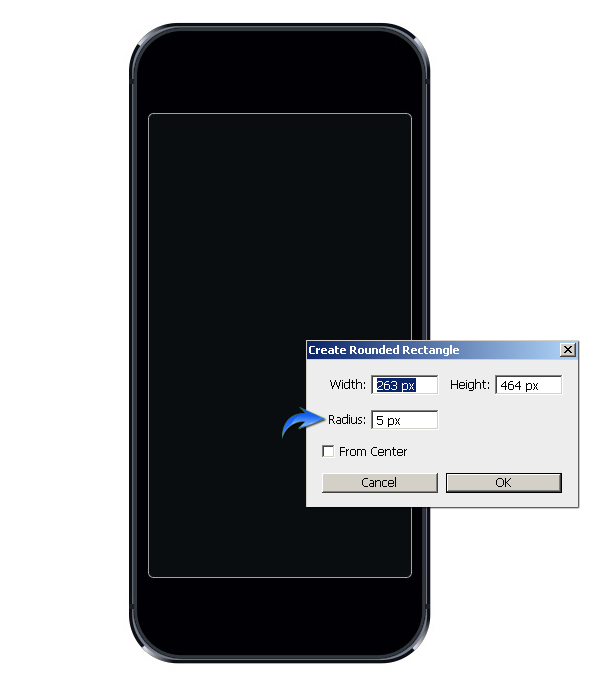
Step 10
To make the iPhone screen, draw another rectangle using the rounded rectangle tool with the following settings.
Step 11
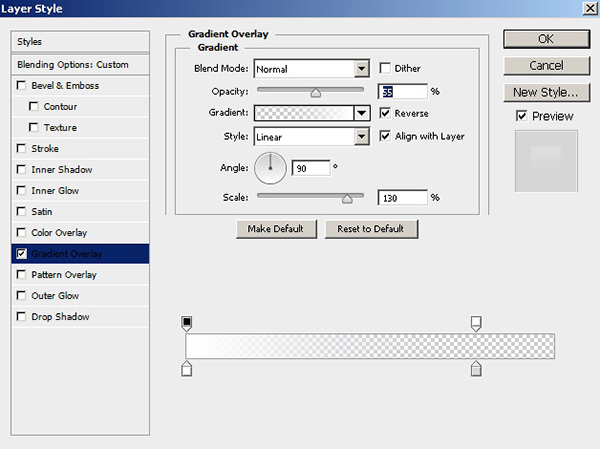
Next, we’ll make a light reflection. Draw a triangle above the rest of the layers.

Now, select the body layer and click on the icon to “Add Layer Mask,” which is found at the bottom of the layers panel. This would confine the reflection to the body. Set the fill of reflection to 0% and apply a white to transparent gradient to it.

Step 12
Next, we’ll make the buttons. Make a rectangle using the rounded rectangle tool with a 5px radius and #242b33 as your color. Now, press Ctrl + <click on the rectangle> to make selection around it. To make highlights, create a new layer above and apply a soft round brush (40-50% opacity) in pure white over the top edge within the selection. After that, apply the brush at the right and left borders.

Step 13
Make the side buttons using the same technique explained in step 12.

Step 14
Next, we’ll make the camera. Draw an ellipse using color #1e1e1e. To make a highlight, press ctrl + <click on the ellipse> to make selection around it. Create a new layer and apply a soft round brush on it with 20-30% opacity in white color shown below. Draw a smaller ellipse above it using #14171c color and make highlight over it.

Step 15
Make a smaller ellipse using color #0e1377 . Add some shading to it on a new layer using a black and white hard round brush. Reduce its opacity to 50%.

Step 16
Next, we’ll make the receiver. Draw a rectangle using the rounded rectangle tool with a 20px radius and color #191919. Make highlights over it on a new layer using the same technique, and reduce its opacity to 50%.

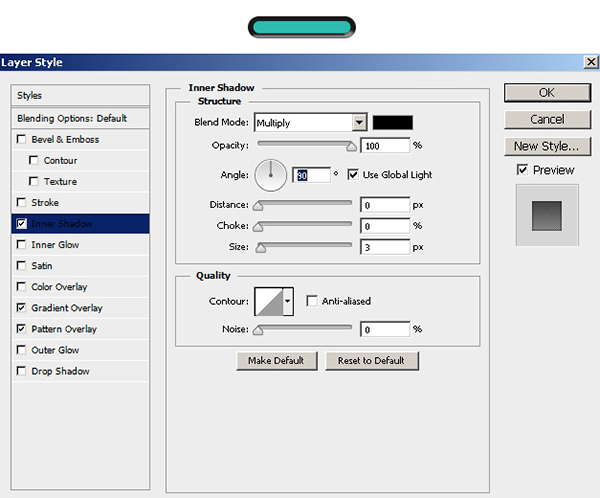
Step 17
Duplicate the rounded rectangle of the receiver, bring it above the highlights layer, and reduce its size. You can see it below in blue. Set its fill color to 0% and apply the following layer style settings to it.


You can make the pattern used here by creating a new 2px by 2px document with a transparent background. Fully magnify it using the zoom tool (“Z”) and draw the two white pixels shown below. After that, go to “Edit” > “Define Pattern” and save it.

Step 18
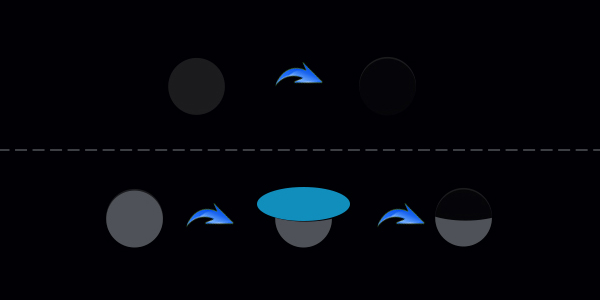
Next, we’ll make the home button. Draw an ellipse using color #1b1b1d. Duplicate it, change its color to #000004, and drag it one step downwards. To make a half-moon shaped highlight over it, duplicate the top ellipse and change its color to a lighter gray (#4f5259). Make an elongated ellipse covering its top as shown below. Now, select both the ellipses and go to “Layer” > “Combine shapes” > “Subtract Front Shape”.
Step 19
Apply the following gradient on half-moon shape.

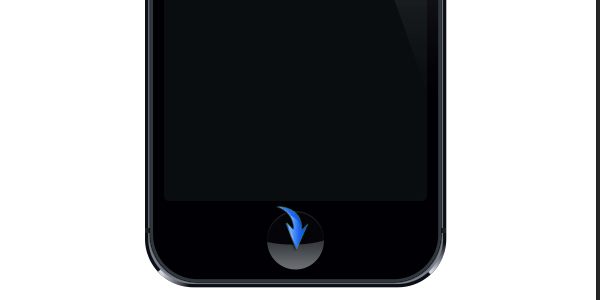
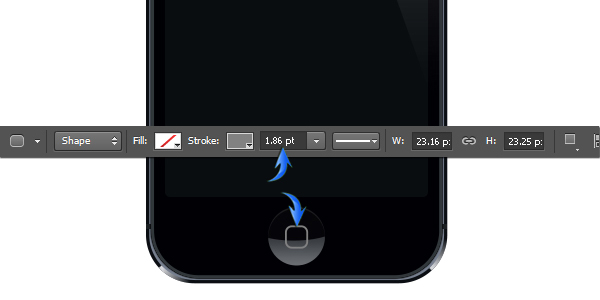
Set #676767 as your foreground color and select the rounded rectangle tool (Tool mode: Shape) with an 8px radius. Set its fill color to “none” and set a stroke of around 1.50-2pt in the top options bar to make a rectangular stroke.
Step 20
Next, we’ll make the shadow. Press “D” to pick the default colors and draw a straight line below the rest of the layers using a 14px Soft round brush. After that, apply a 35px motion blur filter on it to get the effect shown below.
Final result:
That’s it! The iPhone mockup is ready to display your app. I hope you enjoyed the tutorial and learned something interesting. Do share your thoughts!
//
Frequently Asked Questions (FAQs) about Creating a Realistic iPhone 5 Mockup in Photoshop
What are the basic tools in Photoshop that I need to create a realistic iPhone 5 mockup?
To create a realistic iPhone 5 mockup in Photoshop, you will need to familiarize yourself with several basic tools. These include the Rectangle Tool for creating the basic shape of the iPhone, the Rounded Rectangle Tool for the home button and screen, the Ellipse Tool for the camera and speaker, and the Gradient Tool for adding depth and dimension to your design. You will also need to use the Layer Styles panel to add effects such as drop shadows, gradients, and strokes.
How can I add realistic textures to my iPhone 5 mockup in Photoshop?
Adding realistic textures to your iPhone 5 mockup can be achieved by using the Noise Filter and the Brush Tool. The Noise Filter can be used to create a grainy texture that resembles the metallic finish of the iPhone. The Brush Tool, on the other hand, can be used to add subtle scratches and smudges to make the mockup look more realistic.
Can I use Photoshop on my iPhone to create a mockup?
Yes, you can use the mobile version of Photoshop on your iPhone to create a mockup. However, the mobile version has limited features compared to the desktop version. It’s recommended to use the desktop version for more complex projects like creating a realistic iPhone 5 mockup.
How can I create a realistic screen for my iPhone 5 mockup in Photoshop?
To create a realistic screen for your iPhone 5 mockup, you can use the Gradient Tool to create a gradient that mimics the look of a lit screen. You can also use the Text Tool to add icons and text to the screen. For more detailed designs, you can import images and use the Transform Tool to fit them into the screen.
What resolution should I use for my iPhone 5 mockup in Photoshop?
The resolution you should use for your iPhone 5 mockup depends on the purpose of the mockup. If it’s for web use, a resolution of 72 dpi is sufficient. However, if the mockup is for print, a higher resolution of 300 dpi is recommended.
How can I add shadows and highlights to my iPhone 5 mockup in Photoshop?
Shadows and highlights can be added to your iPhone 5 mockup using the Layer Styles panel. You can add a Drop Shadow to create a shadow effect and use the Gradient Overlay to create highlights. Adjusting the opacity and angle of these effects can help achieve a more realistic look.
Can I use my own images in the screen of the iPhone 5 mockup?
Yes, you can use your own images in the screen of the iPhone 5 mockup. You can import your images into Photoshop and use the Transform Tool to fit them into the screen. Make sure to adjust the perspective and size of the image to make it look realistic.
How can I save my iPhone 5 mockup in Photoshop for future use?
You can save your iPhone 5 mockup by going to File > Save As, and choosing the Photoshop (PSD) format. This will save your mockup with all its layers intact, allowing you to edit it in the future.
Can I share my iPhone 5 mockup created in Photoshop online?
Yes, you can share your iPhone 5 mockup online. You can save it as a JPEG or PNG file and upload it to your website, social media, or any other platform. Make sure to check the platform’s guidelines for image size and format before uploading.
How can I make my iPhone 5 mockup look more professional in Photoshop?
To make your iPhone 5 mockup look more professional, pay attention to details. Use high-quality textures, add realistic shadows and highlights, and make sure the proportions of the iPhone are accurate. Also, keep your layers organized and named properly to make your workflow more efficient.

