

Key Takeaways
- This guide provides step-by-step instructions on how to create a nature-inspired portrait in Photoshop, using tools such as shadowing and highlighting techniques, the burn and dodge tools, and nature-themed brush sets.
- The process includes a variety of techniques like lighting adjustments, the use of color balance, the addition of nature elements like leaves, flowers, and butterflies, and the application of bokeh and star effects for a stylized finish.
- The tutorial emphasizes the importance of layering, blending, and adjusting opacity levels for a realistic and visually appealing result, while also encouraging individual creativity in the placement and application of nature elements.
Anyone with moderate Photoshop skill can make basic improvements to a portrait image. Tasks like color correction, “red eye” removal, and lighting adjustments are often so easy that Photoshop does it for you with just a few commands and clicks of the mouse. But, adding some more significant enhancements to a portrait is a little bit harder. Let’s go beyond the basics with some serious portrait enhancements.
Today, I’ll show you how to create a nature-inspired portrait in Photoshop. Along the way, we’ll employ shadowing and highlighting techniques, as well as the burn and dodge tools to make the portrait nature themed, highly stylized, and embellished with nature ornaments.
Resources:
Model’s Image by Mya
Leaves And Butterflies Brushes by Lileya
Pink Lotus Flower by Bahman Farzad
Lithops dorotheae flowers by Martin Heigan
Star Brushes by JonasKr
Butterfly by Unfaithed
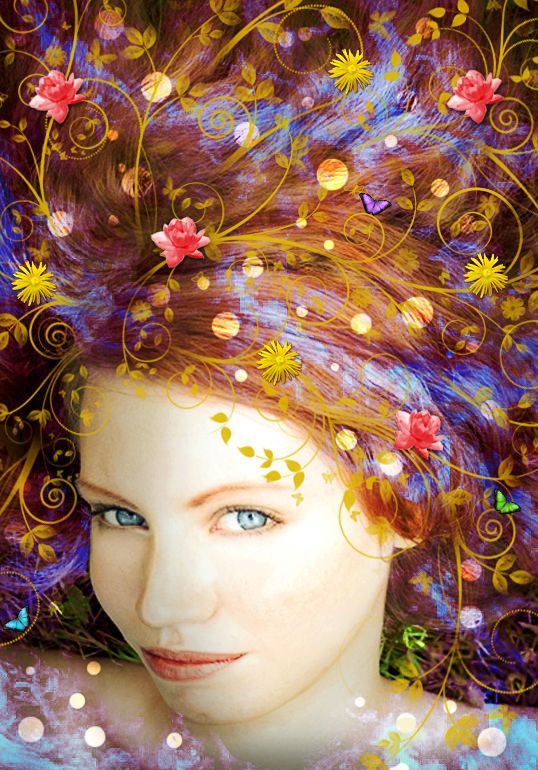
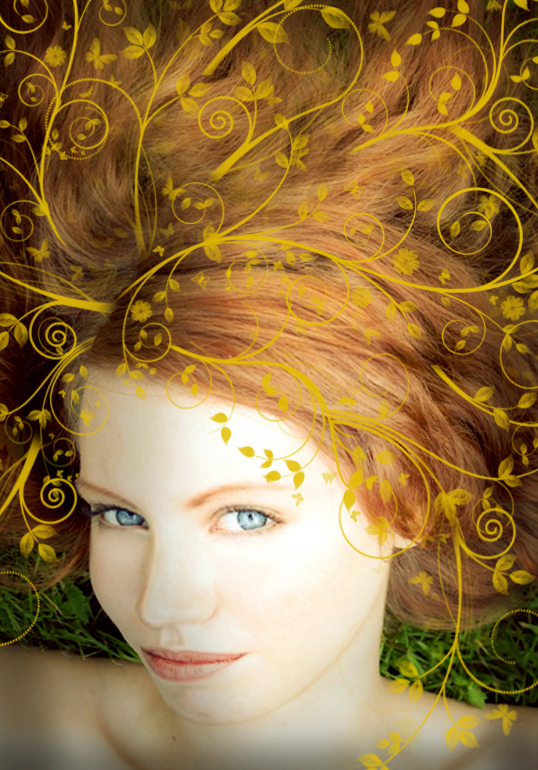
Before we start, let’s have a look at our final result.
Step 1
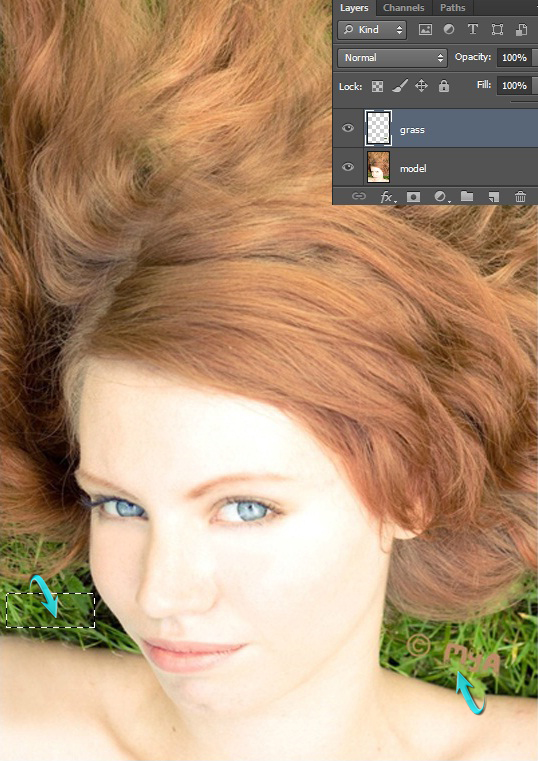
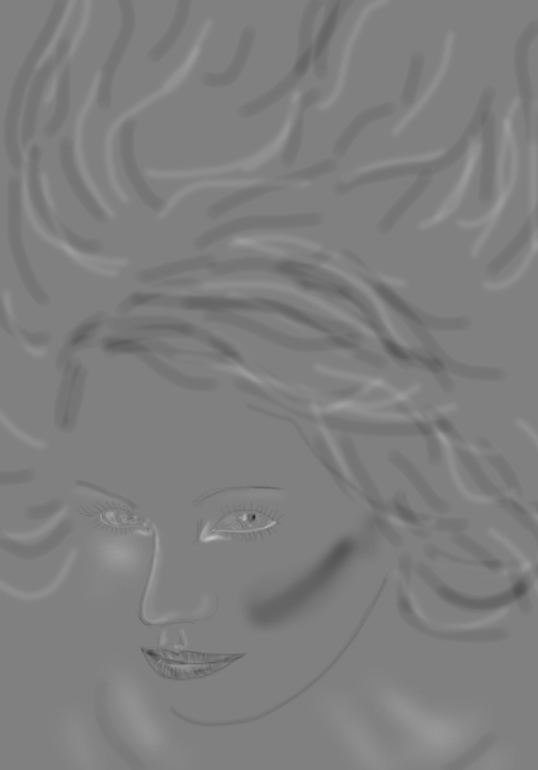
Open the model’s image in Photoshop. As you see, there is some text over the grass above the right shoulder of model; so we need to cover it up. Select the grass from the left side of image using the rectangular marquee tool and copy and paste this section on a new layer. Position it just above the text; you can erase its borders using soft round eraser tool. Merge the model and grass layers together once you are done by pressing Ctrl + “E”.
Step 2
Now, to add lighting to the image, duplicate the image by going to “Layer” > “Duplicate layer” and then go to “Filter” > “Render” > “Lighting effects.” Apply the following settings for lighting effects. Change the blending mode of this duplicated layer to “Soft light” and reduce its opacity to 50%.


Step 3
Create a new layer and set #000000 as your foreground color. Now select the soft round brush tool, reduce its opacity to 30%, and apply it at the borders on this new layer.
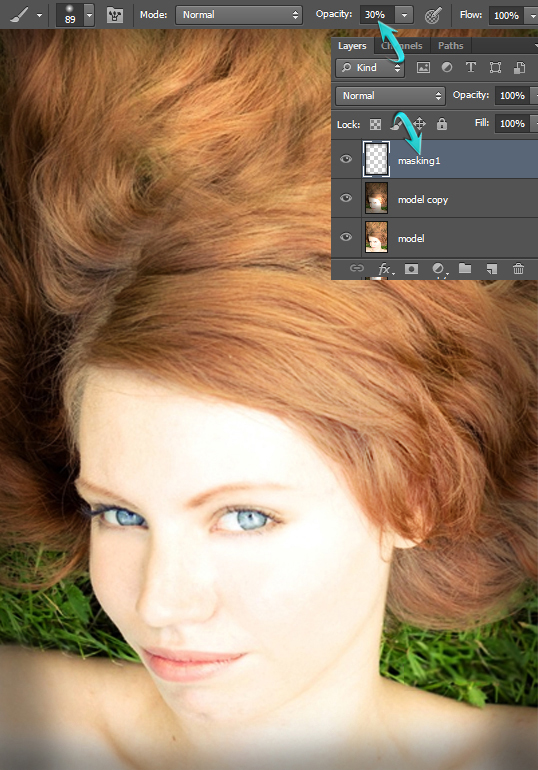
Now, reduce the opacity of the brush tool by an additional 20% and apply it over the model’s body, leaving the right side of face and hair above it.
Step 4
Create a new layer, go to “Edit” > “Fill.” Fill it with 50% gray and change the blending mode of this layer to “Overlay”; this will make the image below it visible. Now select the burn tool with “Shadow” range and 25% exposure, and apply it on this layer over the darker areas of eyes. Once you are done, select the dodge tool with “Highlights” Range and 25% exposure, and apply it to brighten the areas over the eyes as shown below.

Step 5
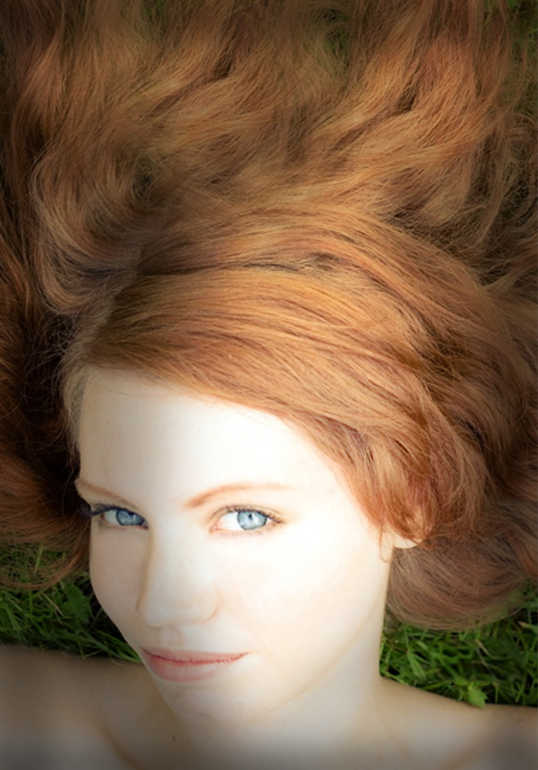
Use the burn and dodge tools over the rest of the features and hair of the model for shadowing and highlighting. The image below shows how I used these tools on the image.


Step 6
Click on the icon to “Create new fill or adjustment layer,” which is present at the bottom of the layers panel. Then, select the “Color Balance” adjustment layer. Use the values given here:


Step 7
Now we’ll add some floral elements to the canvas. Open the “Leaves and Butterflies” brushes in Photoshop. Set #e3bd00 as your foreground color and apply different brushes on separate new layers so you can edit them easily. You can arrange them using the free transform tool (Ctrl + “T”). Soften the starting ends of branches using the soft round eraser tool with 30% opacity.

Erase the overlapping tree brushes. You can use these brushes in your own creative way.
Step 8
Now we’ll darken some areas over these branches to give shadowing effect. Merge all the layers on which you’ve applied the leaves brushes and click on the icon to “Add layer mask,” which is present at the bottom of the layers panel. Then select the soft round brush with 30% opacity and apply it at different areas over the branches using color #000000.

Step 9
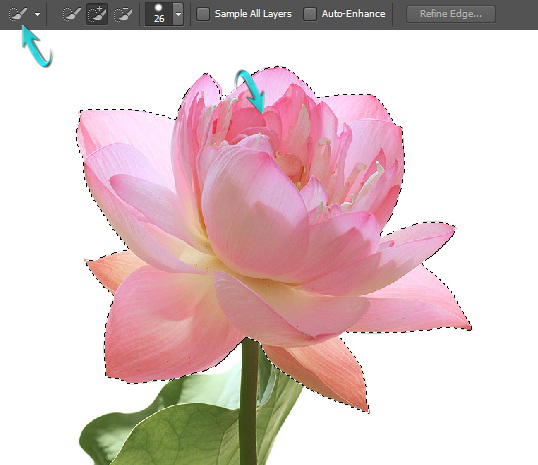
Open the pink lotus image in Photoshop. You can select it using any selection tool you like. I’ll be using the quick selection tool here. Copy and paste it into your Photoshop document.
Step 10
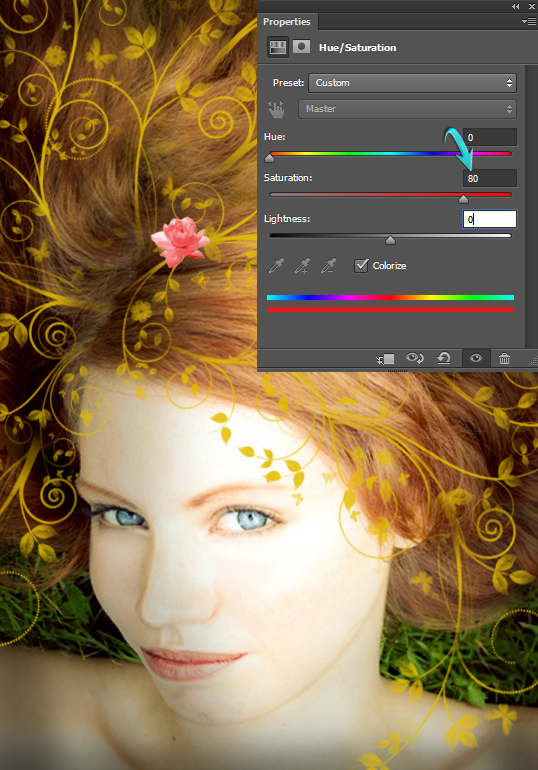
Decrease the pink lotus size using the free transform tool (Ctrl + “T”). Now, to adjust its color, press Ctrl + <click on the lotus layer> to select it, and then create a hue/saturation adjustment layer. Use the values provided here:
Step 11
Double-click on the lotus layer to open the layer styling window. Use the following settings to apply a drop shadow. After that, duplicate the flower a few times and arrange them at different angles.

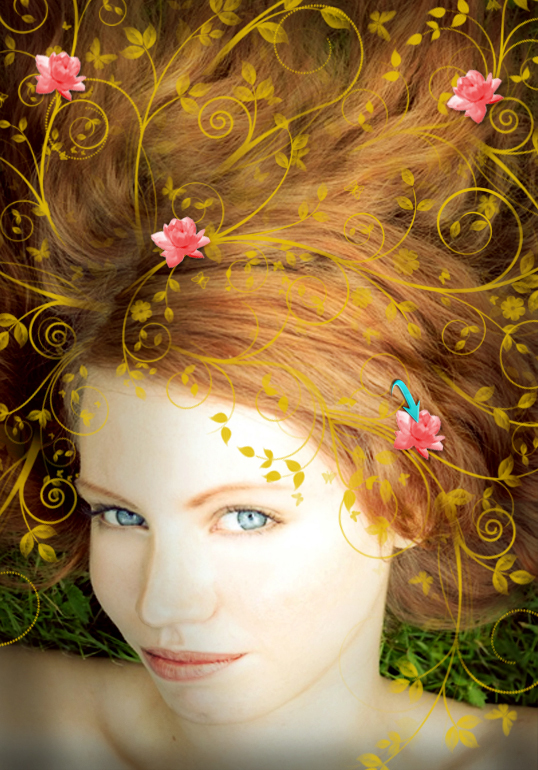
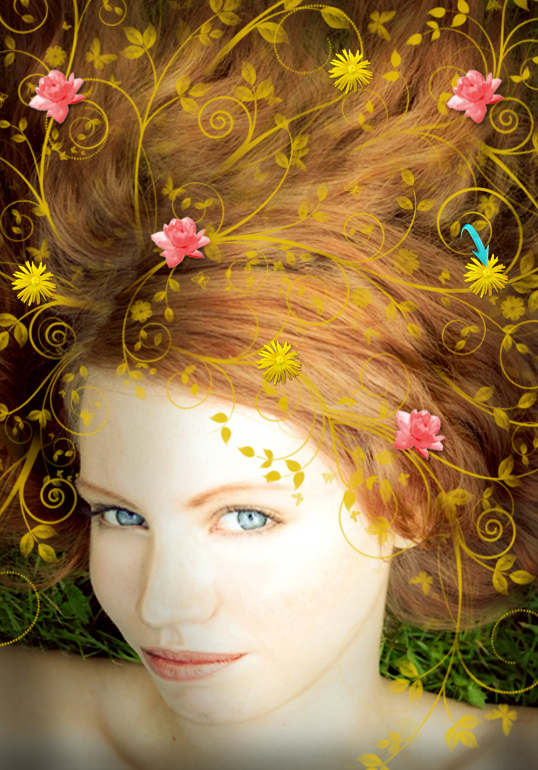
Step 12
Open the “lithops” image from our resources, select it, and copy and paste it into your Photoshop document. Apply the same drop shadow settings as shown in step 11. Arrange these flowers as below.
Step 13
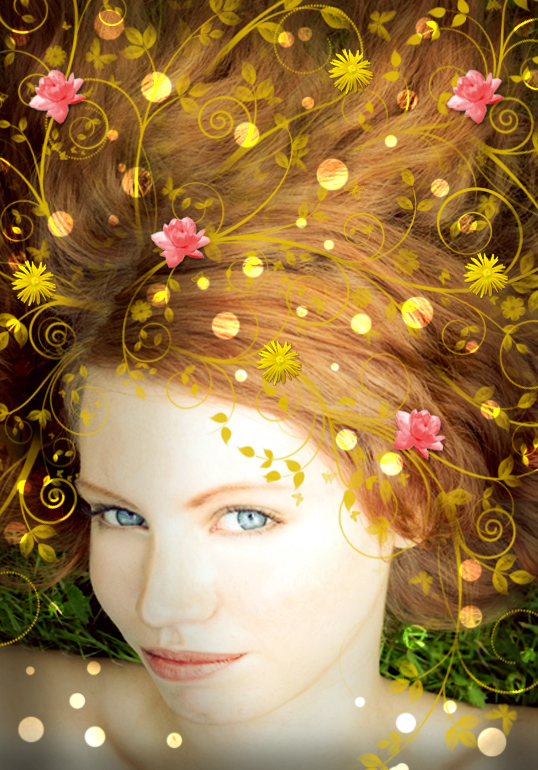
Select the hard round brush and press F5 to open the brush panel. Use the following settings.

Now, apply the brush on a new layer to achieve a bokeh effect.

Step 14
Change the blending mode of bokeh layer to “Overlay.”
Step 15
Next, to enhance the contrast at certain areas, create a new layer, select the soft round brush with 20% opacity and apply it as shown below using a black color.
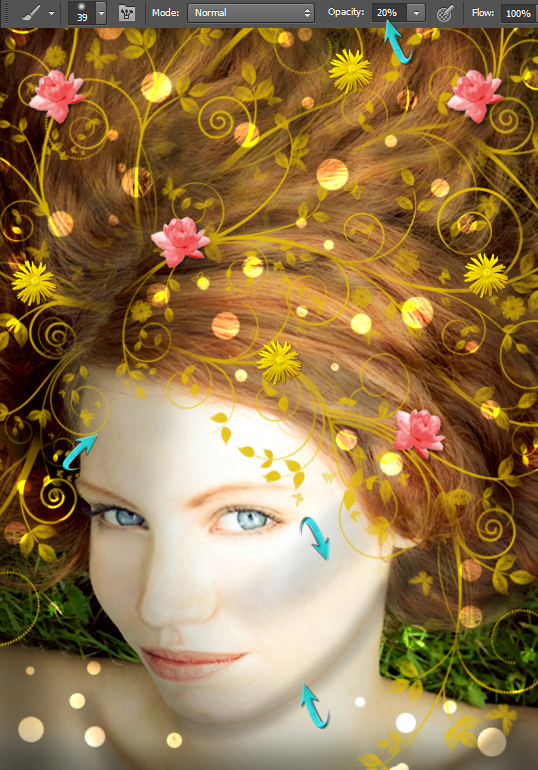
Change the blending mode of this layer to “Overlay.”

Step 16
Open the star brushes in Photoshop. Set #ce2497 as your foreground color, select the “Nebula” brush and apply it on a new layer randomly, leaving the face of model untouched.
Change its blending mode to “Color Dodge.” You can duplicate this layer if you want an intense effect.

Step 17
Press Ctrl + <click on nebula layer> to select it, and create a hue/saturation adjustment layer. Use the given values to give it bluish shade, as shown below.

Step 18
Open the butterfly image, select the butterfly, and copy and paste it in your Photoshop document. Duplicate it 1-2 times and arrange them as you like over the branches. You can change their color using a hue/saturation adjustment layer.

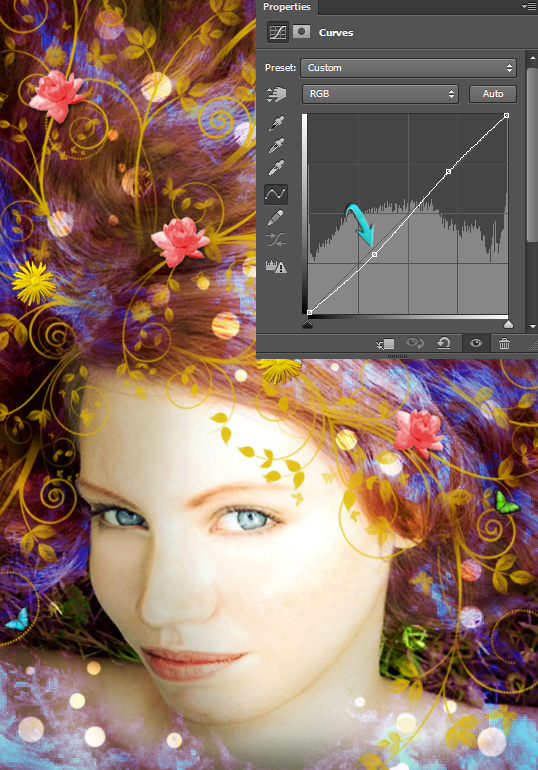
Step 19
Create a “Curves” adjustment layer and use the following settings.
Step 20
Collect all the layers in a group and merge it. Then go to “Filter” > “Sharpen > “Unsharp mask.” Use the following values to sharpen the image.


That’s all guys, hope you learned something useful. Let me know what you think!
Frequently Asked Questions about Creating a Nature-Inspired Portrait in Photoshop
How can I make my nature-inspired portrait look more realistic in Photoshop?
To make your nature-inspired portrait look more realistic, you can use various Photoshop tools and techniques. Start by using the right selection tools to isolate your subject from the background. The Pen tool or the Quick Selection tool can be very effective for this. Once you have your subject isolated, you can use adjustment layers to tweak the colors, contrast, and brightness to match the nature background. You can also use the Clone Stamp tool or the Healing Brush tool to remove any unwanted elements or imperfections. Finally, use the Blur tool to create a depth of field effect, making your subject stand out against the background.
What are some tips for blending my subject with the nature background?
Blending your subject with the nature background is crucial for creating a convincing nature-inspired portrait. Here are some tips: Use the Brush tool with a soft edge to blend the edges of your subject with the background. Adjust the opacity of the brush for a more subtle effect. Use adjustment layers to match the color and lighting of your subject with the background. You can also use the Blend If option in the Layer Style dialog box to blend the layers based on their luminosity values.
How can I add a creative touch to my nature-inspired portrait in Photoshop?
There are many ways to add a creative touch to your nature-inspired portrait in Photoshop. You can experiment with different blending modes to create unique effects. You can also use filters like the Oil Paint filter or the Watercolor filter to give your portrait an artistic look. Adding textures or patterns to your portrait can also add a creative touch. Finally, don’t forget to play with the color grading to create a mood or atmosphere that suits your vision.
How can I enhance the colors in my nature-inspired portrait?
Enhancing the colors in your nature-inspired portrait can make it more vibrant and eye-catching. You can use adjustment layers like Hue/Saturation, Color Balance, or Selective Color to tweak the colors in your image. You can also use the Vibrance or Saturation sliders to boost the overall color intensity. If you want to target specific colors, you can use the Color Range selection tool.
How can I use Photoshop to create a depth of field effect in my nature-inspired portrait?
Creating a depth of field effect can make your subject stand out against the background. You can use the Blur Gallery in Photoshop to create this effect. Start by duplicating your layer and then go to Filter > Blur Gallery > Field Blur. Adjust the blur amount to create a shallow depth of field effect. You can also use the Iris Blur or Tilt-Shift blur for more control over the blur effect.
How can I use Photoshop to create a dreamy effect in my nature-inspired portrait?
Creating a dreamy effect can add a magical touch to your nature-inspired portrait. You can use the Gaussian Blur filter to create this effect. Start by duplicating your layer and then go to Filter > Blur > Gaussian Blur. Adjust the radius to create a soft, dreamy effect. You can also lower the opacity of the blurred layer to make the effect more subtle.
How can I use Photoshop to create a vintage effect in my nature-inspired portrait?
Creating a vintage effect can give your nature-inspired portrait a timeless look. You can use adjustment layers like Curves, Color Balance, or Photo Filter to create this effect. You can also use the Gradient Map adjustment layer with a sepia or monochrome gradient to create a vintage color tone.
How can I use Photoshop to create a surreal effect in my nature-inspired portrait?
Creating a surreal effect can make your nature-inspired portrait more intriguing and thought-provoking. You can use various Photoshop tools and techniques to create this effect. For example, you can use the Liquify tool to distort your subject or the background. You can also use blending modes, filters, or adjustment layers to create surreal colors or lighting effects.
How can I use Photoshop to create a silhouette effect in my nature-inspired portrait?
Creating a silhouette effect can add a dramatic touch to your nature-inspired portrait. You can use the Levels or Curves adjustment layers to darken your subject and create a silhouette. You can also use the Brush tool with black color to paint over your subject and create a silhouette.
How can I use Photoshop to create a double exposure effect in my nature-inspired portrait?
Creating a double exposure effect can make your nature-inspired portrait more complex and visually interesting. You can use the Screen or Lighten blending modes to combine two images into one. You can also use the Layer Mask to control where the second image appears on your subject.

