

Key Takeaways
- Creating a flaming text effect in Photoshop involves blending fire effects with an object or text, which can be challenging due to the unpredictable nature of flames.
- The process involves creating a new document, selecting a bold typeface, and incorporating a fire image. The fire image is adjusted and blended with the text to create a realistic fire effect.
- The text layer is converted into a Smart Object to keep it editable, allowing for adjustments to filters and effects later on. The color of the text is then changed to black, and the flame layer is moved behind the text layer.
- Two methods are detailed in the guide: the first involves creating a fiery text effect, and the second creates a molten lava fire effect. Both methods utilize different combinations of blend modes and filters to simulate fire effects.
One of the hardest effects to recreate in Photoshop is fire. Flames are random and behave unexpectedly. One of the most difficult aspects of creating something out of flames in Photoshop is blending the fire effects with an object or text. It is difficult to alter the text or object convincingly so that it looks like it belongs with the flames.
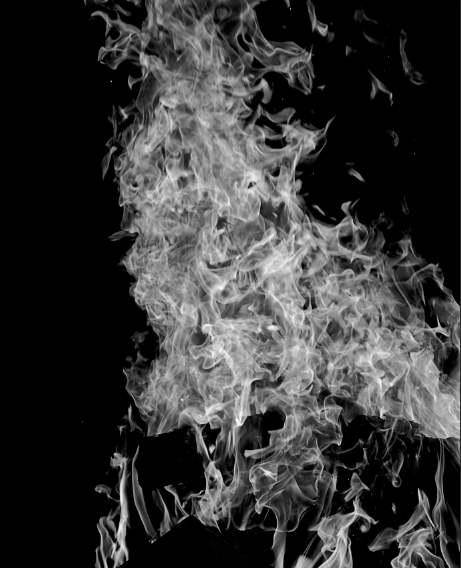
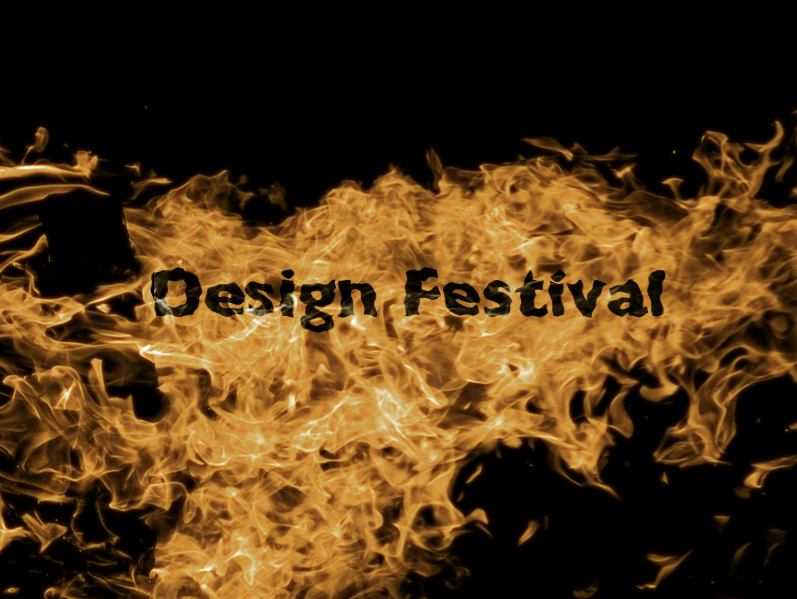
The effect that I am going to create will be text embedded within flames. Download the fire image here. We will be using the flames to create a fiery text effect that looks like it truly belongs with the flames.
First, create a new document. The one I am creating is 800px wide and 600px tall. Fill the background layer with black. This will increase contrast and help the flames to show up better. If you desire anything other than black as your background color, feel free to change it once we are finished creating the overall effect.

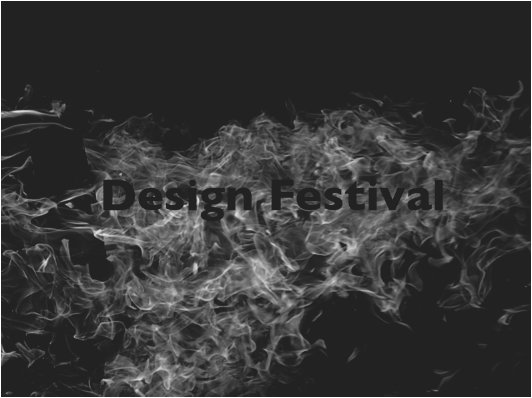
Next, select a bold typeface. Sans serif seems to show up the best. I ended up choosing Gill Sans as my typeface. Type your message and compose it within your document.

Open the flame image in a new document. The size doesn’t matter at the moment, because we will be resizing it once we move it over into our text document. Open the Channels Panel and select the channel with the most contrast. In this image, the green channel has the most contrast. The red channel seems blown out, so that is why we choose the green one.
Command/Ctrl + <click on the channel’s preview icon> to load it as a selection. Hit Command/Ctrl + “C” to copy the selection. Then, switch over to the text document that we created earlier, and hit Command/Ctrl + “V” to paste the flames onto their own layer. Hit Command/Ctrl + “T” to transform the flames and while holding Shift, click and drag the flames to resize them. Shrink and rotate the flames clockwise so that they slightly overlap the canvas of the type document.

Before we do anything else, we need to convert the text layer to a Smart Object. This is important, so that we can keep the text editable, in case we need to go back and make changes later. Right-click on the text layer and choose “Convert To Smart Object.” Now we can apply effects and filters to the text, but we will be able to go back and adjust the filters and effects, instead of having them applied as permanent, uneditable effects. Double-click the text and change the color to black.

Move the flames layer behind the text layer. Right now, out text is black and our flames are white. We need to add some color.
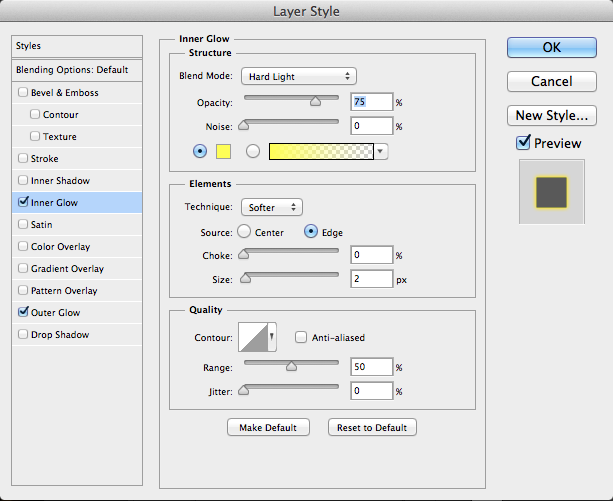
Double-click the flame layer to bring up the layer styles. Choose “Inner Glow” and select a bright yellow as your glow color. Choose “Hard Light” as the blend mode, and set the size to 2px. You don’t want it to be too big, because you need to have some light, almost white areas.
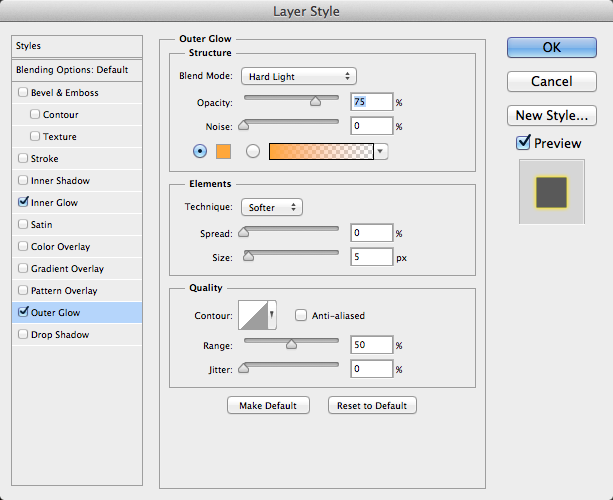
Then, choose “Outer Glow” and select an orange color. Again, choose “Hard light” as the blend mode, and leave the size as 5px. The fire should look fairly realistic now. The reason that we approach the fire effects this way is to maintain precise control the color of the fire to get the exact look that we want.
Next, select the text layer that we made into a smart object and go to “Filter” > “Distort” > “Ripple.” Set the amount to 50% and set the size to large. The text should roughly match the ripple of the fire.

You will immediately notice that the effect doesn’t look convincing, because fire isn’t flat. If there was a void within the fire itself, it would not be as crisp as the example above. The text matches the overall shape, but we need to blend the effect. To do this, Command/Ctrl + <click the fire layer> to load it as a selection. Go up to the text layer and click the Layer Mask icon to load the selection as a layer mask. Then, invert the mask to add variation, and view the results. I selected every part of the mask except where the type would be and filled it with white; I prefer not to mask areas that don’t need masking.

The result is shown below. The problem is that the effect is too light. It is difficult to read, but with the transparency of the mask, we have two options. The first option is to click on the layer mask and bring up the levels command. Here, you would darken the mask. The other option is to simply duplicate the layer until you are happy with the results. I duplicated the layer three times, producing the results below.
Method 2: Molten Lava Fire Effect
This effect is fairly simple, but it yields some interesting results. Create a new document. I created a new document that is 600px wide and 450px tall. Fill the background with black. Select a bold typeface for this effect, because the text will end up pretty distorted if you don’t. This effect is easier to pull off with a thick sans serif typeface. Make the text a bold orange. Mine is set to #ff8a00.

Next, double-click on the text layer to bring up the Layer Styles options. Choose “Inner Glow.” Set the glow to a bright yellow (#fcff00), and set the blend mode to “Hard Light.” Set the size to around 8px.

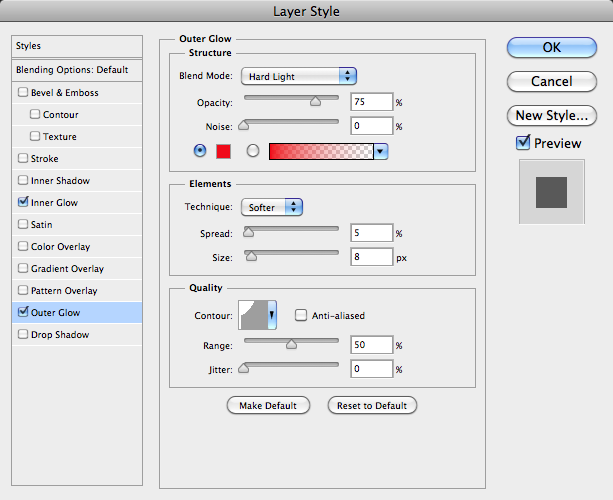
Then, add an Outer Glow, but this time use a strong red (#ee0909). Set the blend mode to “Hard Light.” Set the Spread to 5 % and the size to 8px. Set the Contour to “Cove-Shallow” under Quality.
Click “OK,” and you should see the results shown below. Right-click on the text layer and choose “Convert to Smart Object.” Duplicate this layer and hide the top one for now.

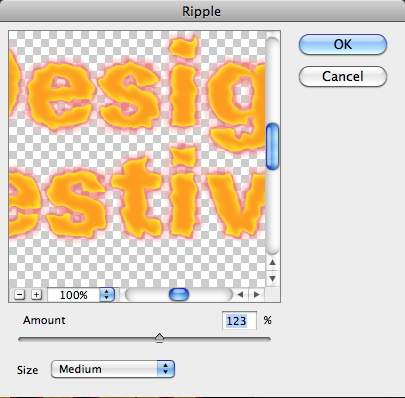
Next, go to “Filter” > “Distort” > “Ripple.” Set the amount to around 120-125%. Set the size of the ripple to medium.

Next, we need to repeat this action again. This time set the amount to a huge number. I set the example to 581%. Leave the ripple size at medium.

Unhide the second text layer and run the Ripple filter on it again. Like the first layer of text, set the ripple amount to around 120-125% and leave the size at medium.

Create a new blank layer above this text layer and fill it with white. Go to “Filter” > “Render” > “Clouds.” Then go to “Filter” > “Render” > “Difference clouds.” By using two different cloud renderings, you will get a much deeper cloud than by using just the basic clouds filter. Option/Alt-click between the layers to clip this layer to the text shape. Set the blend mode of this layer to “Overlay.” This adds dimension to the liquid-like lava effect. Notice the areas of light and shadow.

Create a new blank layer above all of the others. Fill it with white. Then, go to “Filter” > “Render” > “Fibers.” Set the Variance to 30-35 and the Strength to 4. Clip this layer to the text as well by Alt/Option-clicking between the layers. Next, go to “Filter” > “Distort” > “Ripple” and set the amount to 120-125% on the fibers layer. This will create a swirly effect within our lava-esque text. Set the blend mode to “Color Dodge.”

Conclusion
The options for simulating fire in Photoshop are endless. There are many different combinations of blend modes and filters that you can use to simulate effects found in nature. Fire can be a challenge to create from scratch, but if you find your own method, you can create a unique look that really gets the viewer’s attention. The “Color Dodge” blend mode we used at the end of our lava text made all the difference in creating an illuminated lava effect.
Do you know any tricks to simulating fire in Photoshop? If so, post them in the comments below.
Frequently Asked Questions about Creating a Flaming Text Effect in Photoshop
How can I create a flaming text effect in Photoshop without using any external plugins?
Creating a flaming text effect in Photoshop without using any external plugins is possible and quite simple. First, you need to create a new document and type your text. Then, you need to duplicate the text layer and apply a gradient overlay to the bottom layer. After that, you can use the smudge tool to create the flame effect. You can also use the dodge and burn tools to enhance the effect. Finally, you can add some sparks using the brush tool.
Can I use the flaming text effect on images?
Yes, you can use the flaming text effect on images. After creating the flaming text, you can simply drag and drop it onto your image. You can also adjust the blending mode and opacity of the text layer to make it blend well with the image.
How can I create a flaming text effect in Photoshop with different colors?
You can create a flaming text effect in Photoshop with different colors by changing the gradient overlay. You can choose any colors you like for the gradient. You can also adjust the angle and scale of the gradient to achieve different effects.
Can I save the flaming text effect as a preset in Photoshop?
Yes, you can save the flaming text effect as a preset in Photoshop. After creating the effect, you can go to the Styles panel and click on the New Style button. You can then name your style and click OK. Your flaming text effect will be saved as a style that you can apply to other texts with just one click.
How can I create a flaming text effect in Photoshop with a 3D effect?
You can create a flaming text effect in Photoshop with a 3D effect by using the 3D tools in Photoshop. After creating the flaming text, you can convert it to a 3D layer and use the 3D tools to adjust the depth and perspective of the text. You can also add a 3D light to enhance the effect.
Can I animate the flaming text effect in Photoshop?
Yes, you can animate the flaming text effect in Photoshop by using the Timeline panel. You can create a frame animation and change the position and opacity of the text in each frame to create the animation. You can also use the tween function to automatically create intermediate frames.
How can I create a flaming text effect in Photoshop with a realistic flame?
You can create a flaming text effect in Photoshop with a realistic flame by using a flame image. You can cut out the flame from the image and place it on your text. You can then use the blending modes and layer masks to blend the flame with the text.
Can I use the flaming text effect in other Adobe applications?
Yes, you can use the flaming text effect in other Adobe applications. After creating the effect in Photoshop, you can save it as a PSD file and import it into other Adobe applications like Illustrator or After Effects.
How can I create a flaming text effect in Photoshop with a glowing effect?
You can create a flaming text effect in Photoshop with a glowing effect by adding an outer glow to the text. You can adjust the color, size, and spread of the glow to achieve the desired effect.
Can I print the flaming text effect created in Photoshop?
Yes, you can print the flaming text effect created in Photoshop. Before printing, make sure to convert the color mode of your document to CMYK and adjust the resolution to at least 300 pixels per inch to ensure the best print quality.

