Back in January, I made it one of my New Year’s resolutions to walk 4000 kilometers for the sake of fitness. I’ve been documenting this virtual journey (which is taking place on a DIY treadmill desk), on a Ghost deployed blog.
My Ghost subscription has since expired, and due to a severe lack of even the most basic CMS features, and their lack of PayPal support, I redeployed my own instance on DigitalOcean. You might be wondering why I’m writing about Ghost on a PHP oriented channel – this series will be a showdown of all the various PHP based CMS’ I can find, benchmarked against each other and against Ghost, as I look for the next best alternative.
The setup
Since my DigitalOcean droplet already runs Nginx as a reverse proxy for the blog, I’ll also be deploying all the CMS’ on that same installation, each on its own subdomain. If I, for example, try out WordPress (I won’t be – WP is the only one I won’t be testing), it will be accessible live at wp.4kk.me. The default www subdomain will still serve the Ghost-based blog.
The server will also have TLS enabled, because it makes sense. I’ll be making sure I optimize all the installations to the best of my knowledge, and will be taking input from everyone on what else to do to to milk the apps for all they’ve got. Using app performance monitors like NewRelic and AppDynamics isn’t out of the question either, and all finished integrations will be perfomance audited. I intend to make this a community effort, and would like tips and input from as many sources as possible.
I’ll be using Nginx on Ubuntu 12.04, with PHP 5.5. Note that as soon as PHP updates to 5.6, the environment will be updated – there’s no point in using outdated software. Likewise, as soon as Ubuntu 14.04 is released, and is properly vetted by people capable of properly vetting it, we’ll be moving to that LTS version instead of 12.04. The upgrade procedure will be thoroughly documented when time comes.
The actual benchmarking will happen on my local SSD-powered machine, in a separate instance of an identical Vagrant box for each installation. This is so the tests can be performed on an identical server under identical conditions every time. Apache Benchmark will be used as the request bombing app. The first benchmarks will happen when we have at least 5 CMS installed and running both live and locally.
I’ll also be writing a custom data importer for all my 4kk posts for every CMS, so the full data is there and doesn’t need to be faked. These importers will be open sourced and you’ll be able to use them to export your Ghost data into any CMS we cover here.
If you’d like to fully follow along on your own DigitalOcean droplet, feel free to open an account via my referral link. Then, pick the basic server with Ubuntu 12.04. I picked a tier 2 droplet, the one with 1GB of RAM, purely due to the fact that we’ll be running so many apps on one server. If you don’t intend to follow along with every CMS, feel free to pick the smallest one.
If you’d like to install Ghost as well, you should follow this tutorial. Apply it to the most up to date version of Ghost, everything else remains the same.
Installing PHP on Nginx
On Ubuntu, we use the ondrej PPA to install the latest PHP without having to build from source. Ondrej’s versions are always at most one minor version away from the latest (e.g. 5.5.9 vs 5.5.10) and much simpler to install than the fully manual procedure.
sudo add-apt-repository ppa:ondrej/php5
sudo apt-get update
sudo apt-get upgrade
sudo apt-get install php5-fpm php5-dev
Modify your php.ini file for timezone, upload file size settings, etc. Don’t forget to activate OpCache at the end of the INI file if you’re using PHP 5.5+ like I am. It makes a world of difference, performance-wise.
Let’s define a subdomain to test our PHP on now. We’ll make sure the URL dev.4kk.me outputs phpinfo();. Naturally, you should replace all further instances of 4kk with your own domain name, or the IP address of your droplet if that’s what you’re using for testing.
Setting up a virtual host on a subdomain
I have created a non-root user for my droplet. DigitalOcean uses root as the default, but I tend to disable both root login and all password logins when using SSH, and instead create a key-only user through which I can then perform sudo commands on my server. I’ll assume you’ll do the same – for security’s sake, you should. Make a new user on your server, and follow this tutorial but for that user – not for root. You don’t want to be remotely logging in as root, ever.
In my case, this user is called “swader”, so I’ll be putting all the PHP apps we’ll be building in this series into the /home/swader/apps/php parent folder. Create it if it doesn’t exist, and add another subfolder: dev. Apply your own username to the path in all examples below.
mkdir -p ~/apps/php/dev
In this folder, create the standard phpinfo() file. Call it index.php:
<?php
    phpinfo();
Now we need to create a new virtualhost for Nginx that looks for PHP files in that folder. This is just a copy of the default Nginx Vhost template, we’ll be fine tuning Nginx later.
server {
        listen   dev.4kk.me:80; ## listen for ipv4; this line is default and implied
        listen   [::]:80 default_server ipv6only=on; ## listen for ipv6

        root /home/swader/apps/php/dev;
        index index.php index.html index.htm;

        # Make site accessible from dev.4kk.me
        server_name dev.4kk.me;

        location / {
                # First attempt to serve request as file, then
                # as directory, then fall back to displaying a 404.
                try_files $uri $uri/ /index.html;
                # Uncomment to enable naxsi on this location
                # include /etc/nginx/naxsi.rules
        }

        #error_page 404 /404.html;

        # redirect server error pages to the static page /50x.html
        #
        error_page 500 502 503 504 /50x.html;
        location = /50x.html {
                root /home/swader/apps/php/dev;
        }

        # pass the PHP scripts to FastCGI server listening on 127.0.0.1:9000
        #
        location ~ \.php$ {
                try_files $uri =404;
                fastcgi_split_path_info ^(.+\.php)(/.+)$;
                # NOTE: You should have "cgi.fix_pathinfo = 0;" in php.ini

                # With php5-cgi alone:
                #fastcgi_pass 127.0.0.1:9000;
                # With php5-fpm:
                fastcgi_pass unix:/var/run/php5-fpm.sock;
                fastcgi_index index.php;
                include fastcgi_params;
        }

        # deny access to .htaccess files, if Apache's document root
        # concurs with nginx's one
        #
        location ~ /\.ht {
                deny all;
        }
}
Accessing http://dev.4kk.me will now produce the phpinfo() screen:
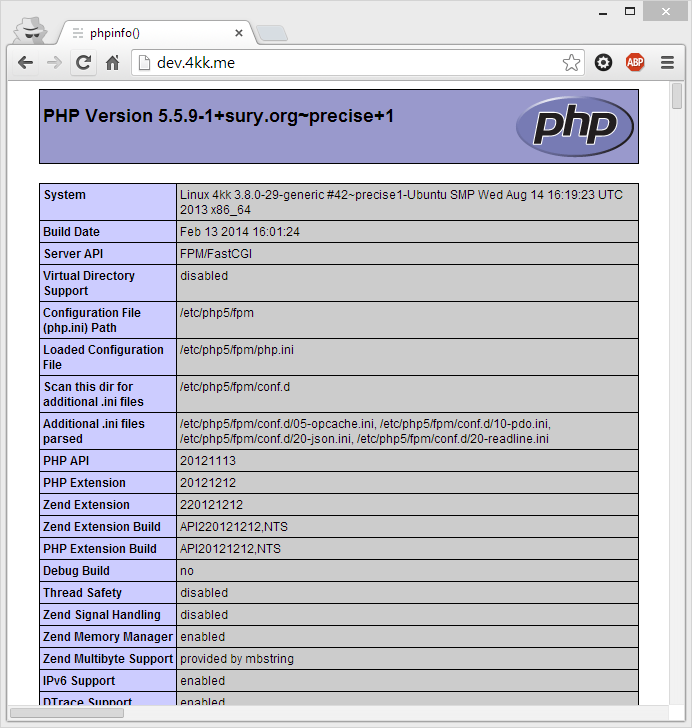
Our main domain now displays Ghost, and our subdomain displays the PHP content of the subdomain’s folder.
Phalcon
Seeing as one of the CMS we’ll be testing will be PhalconEye, we’ll need to install Phalcon as well. Best get it out of the way immediately. We’ll make a tools directory in the home folder of our user, and download and install from there:
mkdir ~/tools
cd ~/tools
Then, we follow the standard installation procedure.
git clone --depth=1 git://github.com/phalcon/cphalcon.git
cd cphalcon/build
sudo ./install
After you add the line extension=phalcon.so to your php.ini file(s), don’t forget to restart php5-fpm, as it’s running as a separate process in the case of Nginx, not as an Apache submodule which restarts every time Apache does, too:
sudo service php5-fpm restart
sudo service nginx restart
Phalcon should now be installed and you should be able to find it on the previous phpinfo dump.
Conclusion
In this part, we configured our DigitalOcean droplet, linked to some Ghost installation tutorials, and installed PHP and Phalcon. We also set up a subdomain on which to test our initial PHP file, to make sure everything works as intended. If you’d like a more in-depth look at how HTTPS was set up, please comment below – I’d be happy to write a dedicated tutorial to getting HTTPS running on Nginx. In the next part, we’ll be looking at our first CMS candidate.
 Bruno Skvorc
Bruno is a blockchain developer and technical educator at the Web3 Foundation, the foundation that's building the next generation of the free people's internet. He runs two newsletters you should subscribe to if you're interested in Web3.0: Dot Leap covers ecosystem and tech development of Web3, and NFT Review covers the evolution of the non-fungible token (digital collectibles) ecosystem inside this emerging new web. His current passion project is RMRK.app, the most advanced NFT system in the world, which allows NFTs to own other NFTs, NFTs to react to emotion, NFTs to be governed democratically, and NFTs to be multiple things at once.