

Following on from yesterday, where we looked at how to use the Quick Mask to make a better selection, I’m going to use my selection to make a clipping mask and apply a completely new textured dress for our model.
I’m using the same image as yesterday, and starting from the point where we had made a precise selection of the dress.
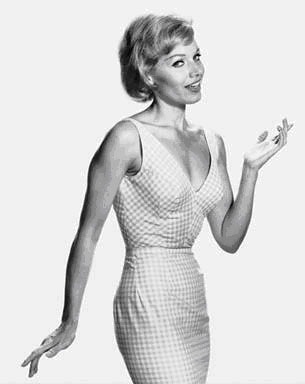
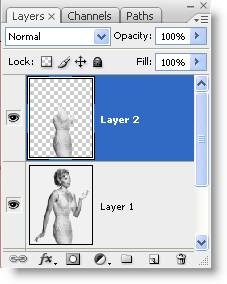
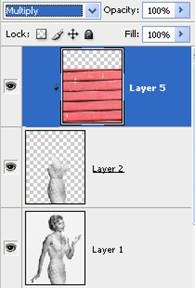
1. After you’ve made a precise selection of the dress, choose Layer > New > Layer Via Copy (or press Ctrl+ J /Cmd + J). Your layers should look like what you see below.
![]()
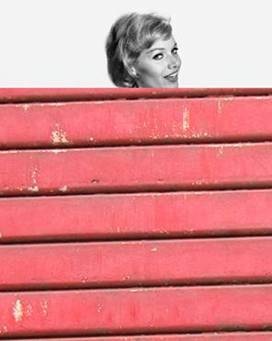
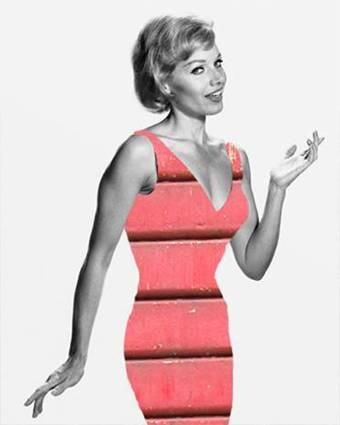
2. I picked up a few textures from Image After (a great website for free images of textures) and I copied and pasted this one – http://www.imageafter.com/image.php?image=b19metals050.jpg into my Photoshop file, so that the red garage door covered all of the dress.
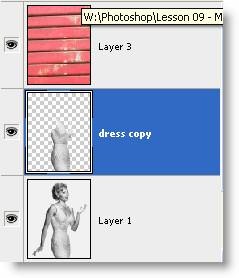
3. Move the contents of the garage door layer so that it completely covers the dress.
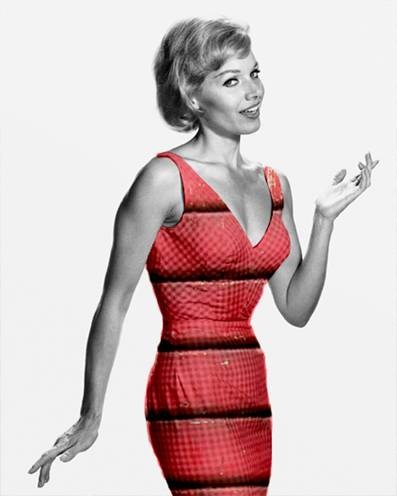
5. We now want to clip the garage door layer using the dress layer. To create a clipping mask, make sure the red garage door layer is selected, press Ctrl + Alt + G (windows) or Cmd + Option + G (Mac). The dress is now neatly clipped.
6. Now, to make it a little look a little more authentic, we need to have a play around with some of the blending modes on the top of the Layers palette. With the red garage door layer still selected, click on the drop down box to see the blending modes available. (By default the blending mode is set to “Normal”)
I liked how the linear burn looked best for this example, but it’s a good idea to run through all the blending modes as they can give very different results depending on the images used. You can now see the creases and shadows in the dress fabric.
That completes the image. I can see places where I’ve gone off the edge of the dress, so I can go back to my dress layer and erase those areas. The clipped layer above will instantly change.
I hope you found this useful. It is a good technique for applying different textures to an image or text and is used frequently in graphic design and illustration.
Related Reading:
Using The Quick Mask In Photoshop For A Better Selection
Frequently Asked Questions (FAQs) about Clipping Mask in Photoshop
How can I create a clipping mask in Photoshop with multiple layers?
Creating a clipping mask with multiple layers in Photoshop is a simple process. First, select the layers you want to include in the mask. You can do this by holding down the Shift key and clicking on each layer. Once you’ve selected all the layers, right-click on them and choose “Create Clipping Mask”. This will create a mask that applies to all the selected layers. You can then adjust the mask as needed by selecting the mask layer and using the brush tool to add or remove areas from the mask.
Can I use a clipping mask to change the color of a pattern or texture in Photoshop?
Yes, you can use a clipping mask to change the color of a pattern or texture in Photoshop. To do this, first create a new layer above the pattern or texture layer. Then, fill this layer with the color you want to apply to the pattern or texture. Next, create a clipping mask that uses the color layer as the mask. This will apply the color to the pattern or texture, effectively changing its color.
How can I edit a clipping mask in Photoshop?
Editing a clipping mask in Photoshop is straightforward. First, select the layer with the mask you want to edit. Then, select the brush tool and choose a brush size and hardness that suits your needs. You can then paint on the mask to add or remove areas. Remember, painting with black will add to the mask, while painting with white will remove from the mask.
Can I use a clipping mask with text in Photoshop?
Yes, you can use a clipping mask with text in Photoshop. To do this, first create a text layer and a layer with the image you want to use as the mask. Then, position the image layer above the text layer and create a clipping mask. This will apply the image to the text, creating a text effect that is filled with the image.
How can I remove a clipping mask in Photoshop?
To remove a clipping mask in Photoshop, simply right-click on the layer with the mask and select “Release Clipping Mask”. This will remove the mask from the layer, returning it to its original state.
Can I use a clipping mask to create a silhouette in Photoshop?
Yes, you can use a clipping mask to create a silhouette in Photoshop. To do this, first create a new layer and fill it with the color you want the silhouette to be. Then, position the layer with the image you want to silhouette above the color layer and create a clipping mask. This will create a silhouette effect, with the image appearing as a silhouette against the color background.
How can I use a clipping mask to blend images in Photoshop?
You can use a clipping mask to blend images in Photoshop by creating a mask that gradually transitions from one image to another. To do this, first position the two images you want to blend on separate layers. Then, create a gradient on a new layer that transitions from black to white. Finally, create a clipping mask that uses the gradient as the mask. This will create a blend effect, with one image gradually transitioning into the other.
Can I use a clipping mask to create a collage in Photoshop?
Yes, you can use a clipping mask to create a collage in Photoshop. To do this, first position the images you want to include in the collage on separate layers. Then, create a mask for each image that defines the area of the image you want to include in the collage. Finally, create a clipping mask for each image, using the corresponding mask as the mask. This will create a collage effect, with each image appearing in its defined area.
How can I use a clipping mask to create a double exposure effect in Photoshop?
You can use a clipping mask to create a double exposure effect in Photoshop by blending two images together. To do this, first position the two images you want to blend on separate layers. Then, create a mask for the top image that defines the area where you want the second image to appear. Finally, create a clipping mask that uses this mask. This will create a double exposure effect, with the second image appearing in the defined area of the first image.
Can I use a clipping mask to create a text effect in Photoshop?
Yes, you can use a clipping mask to create a text effect in Photoshop. To do this, first create a text layer and a layer with the image or pattern you want to use for the effect. Then, position the image or pattern layer above the text layer and create a clipping mask. This will apply the image or pattern to the text, creating a text effect that is filled with the image or pattern.