


Key Takeaways
- The Vue 3.0 Composition API allows for more accessible and intuitive definition of reactive component logic, making applications more scalable and reusable.
- The Vue Composition API can be installed globally in an application, and can be imported into specific components as needed.
- A Shopping List App can be built using the Vue Composition API, with functionality for adding and removing items. The state of the application and its methods are defined in the setup method.
- The Vue 3 Composition API improves the handling of methods and component state, making them more accessible and reactive. It can be used in existing projects alongside the Options API, and provides a more flexible reactive state for better state management.
This article will show how the Vue Composition API is a great way to make your code more readable and maintainable. An alternative to the Options API, the Composition API introduced in Vue 3 handles methods and component state more accessibly.
The Composition API is a new (and optional) way of creating and organizing components in a Vue 3 application. It allows reactive component logic to be defined more intuitively by allowing all the code for a specific feature (search, for example) to be grouped. Using the Vue Composition API will make your application more scalable and reusable between several components.
In this article, we’ll build a simple shopping List app with the Vue Composition API.
You can check out a live demo of the app we’re building.
Prerequisites
For this tutorial, you’ll need:
Setting Up the Vue Application
Now let’s start by installing Vue Cli:
npm install -g vue-cli
This command will install Vue globally.
We’ll use the Vue CLI to build a simple application. To do that, open up your terminal and type the following:
vue create vueshoppinglist
After installation, move into the folder using the cd vueshoppinglist and run npm run serve.
This starts a development server that allows you to view your app on localhost:8080.
It’s now time to set up a nice Vue project.
The Vue Composition API
To Install the Composition API from the root of your project, run the following:
npm install --save @vue/composition-api
After successfully installing, we’ll import it into our project.
Modify src/main.vue to register the Composition API globally in our application, so that we can use it in all our application components:
import Vue from 'vue'
import App from './App.vue'
import VueCompositionApi from '@vue/composition-api'
Vue.config.productionTip = false
Vue.use(VueCompositionApi)
new Vue({
  render: h => h(App),
}).$mount('#app')
Building Out the User Interface
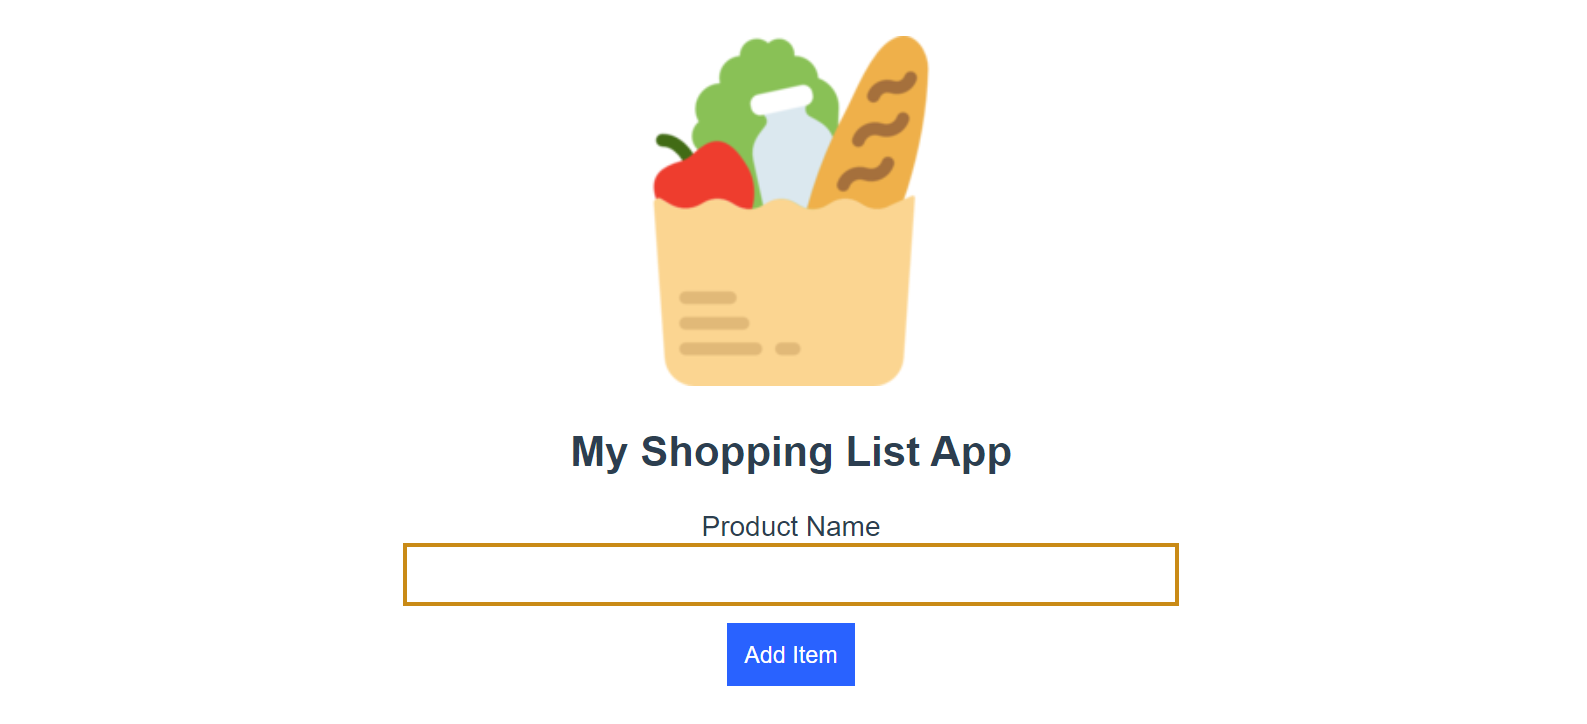
We’ll need a component that will house the UI of our app. Create a new ShoppingList.vue component in the src/components/ directory and paste the following into the file:
<template>
  <section>
    <div class="form-container">
      <h2>Add Item</h2>
      <form>
        <div>
          <label>Product name</label>
          <br />
          <input type="text" />
        </div>
        <div>
          <button type="submit" class="submit">Add Item</button>
        </div>
      </form>
    </div>
    <div class="list-container">
      <ul>
        <li>
          Shopping List app
          <span style="float:right;padding-right:10px;">
            <button>X</button>
          </span>
        </li>
      </ul>
    </div>
  </section>
</template>
<script>
export default {};
</script>
<style scoped>
input {
  width: 20%;
  height: 30px;
  border: 2px solid green;
}
.submit {
  margin: 10px;
  padding: 10px;
  border-radius: 0px;
  border: 0px;
  background: green;
  color: white;
}
ul li {
  list-style: none;
  border: 2px solid green;
  width: 30%;
  margin-top: 10px;
}
</style>
The code snippet above is the initial boilerplate of our UI. We’ll now import our new component ShoppingList.vue to App.vue as shown below:
<template>
  <div id="app">
    <img alt="Shoppingd List" src="./assets/shopping.png">
    <shopping-list msg="Welcome to Your Vue.js App"/>
  </div>
</template>
<script>
import ShoppingList from './components/ShoppingList.vue'
export default {
  name: 'App',
  components: {
    ShoppingList
  }
}
</script>
<style>
#app {
  font-family: Avenir, Helvetica, Arial, sans-serif;
  -webkit-font-smoothing: antialiased;
  -moz-osx-font-smoothing: grayscale;
  text-align: center;
  color: #2c3e50;
  margin-top: 60px;
}
</style>
Working with the Vue Composition API
Let’s get started by importing the Composition API to our component ShoppingList.Vue:
<script>
import { reactive } from "@vue/composition-api";
export default {};
</script>
Here, we’re importing reactive from the Vue Composition API.
We’ll now add some event listeners to the application by modifying our template to this:
<template>
  <section>
    <div class="form-container">
      <h2>My Shopping List App</h2>
      <form @submit.prevent="addItem">
        <div>
          <label> Product Name</label>
          <br />
          <input v-model="state.input" type="text" />
        </div>
        <div>
          <button type="submit" class="submit">Add Item</button>
        </div>
      </form>
    </div>
    <div class="list-container">
      <ul v-for="(Item,index) in state.Items" :key="index">
        <li>
          {{Item}}
          <span style="float:right;padding-right:10px;">
            <button @click="removeItem(index)">X</button>
          </span>
        </li>
      </ul>
    </div>
  </section>
</template>
Vue 3 uses the data and methods option to define state and add functions rather than accessing to a setup method. This method is called after the lifecycle hook beforeCreate and prior to create.
We’ll now declare the state variable and methods inside the setup method, as shown below:
<script>
  import { reactive } from "@vue/composition-api";
  export default {
  setup() {
      const { state, addItem, removeItem } = ItemList();
      return { state, addItem, removeItem };
    }
  };
</script>
After declaring Variables and methods, we need to define our component state:
<script>
import { reactive } from "@vue/composition-api";
export default {
setup() {
  const { state, addItem, removeItem } = ItemList();
  return { state, addItem, removeItem };
}
};
function ItemList() {
let state = reactive({
  input: "",
  Items: ["Grocery"]
});
return { state };
</script>
The state here is scoped to the ItemList function. We define our input state that we’ll bind to our input field and also define our Items array that will hold all our Items.
Let’s define our addItem function:
<script>
import { reactive } from "@vue/composition-api";
export default {
setup() {
    const { state, addItem, removeItem } = ItemList();
    return { state, addItem, removeItem };
  }
};
function ItemList() {
  let state = reactive({
    input: "",
    Items: ["Grocery"]
  });
 let addItem = () => {
    state.Items.push(state.input);
    state.input = "";
  };
  return { state, addItem };
</script>
The add functionality will take the data in the input field and push it into the Items array using the push method.
Let’s implement deleting an item. We’ll get the index of the Item and then remove the Item from the users array using the splice method:
<script>
import { reactive } from "@vue/composition-api";
export default {
setup() {
    const { state, addItem, removeItem } = ItemList();
    return { state, addItem, removeItem };
  }
};
function ItemList() {
  let state = reactive({
    input: "",
    Items: ["Grocery"]
  });
 let addItem = () => {
    state.Items.push(state.input);
    state.input = "";
  };

 let removeItem = i => {
    state.Items.splice(i, 1);
  };
  return { state, addItem, removeItem };
</script>
It’s important that everything we want to be able to access from the template is returned by both the itemList and setup() methods. At the end of the code snippet, we’re returning the state or method.
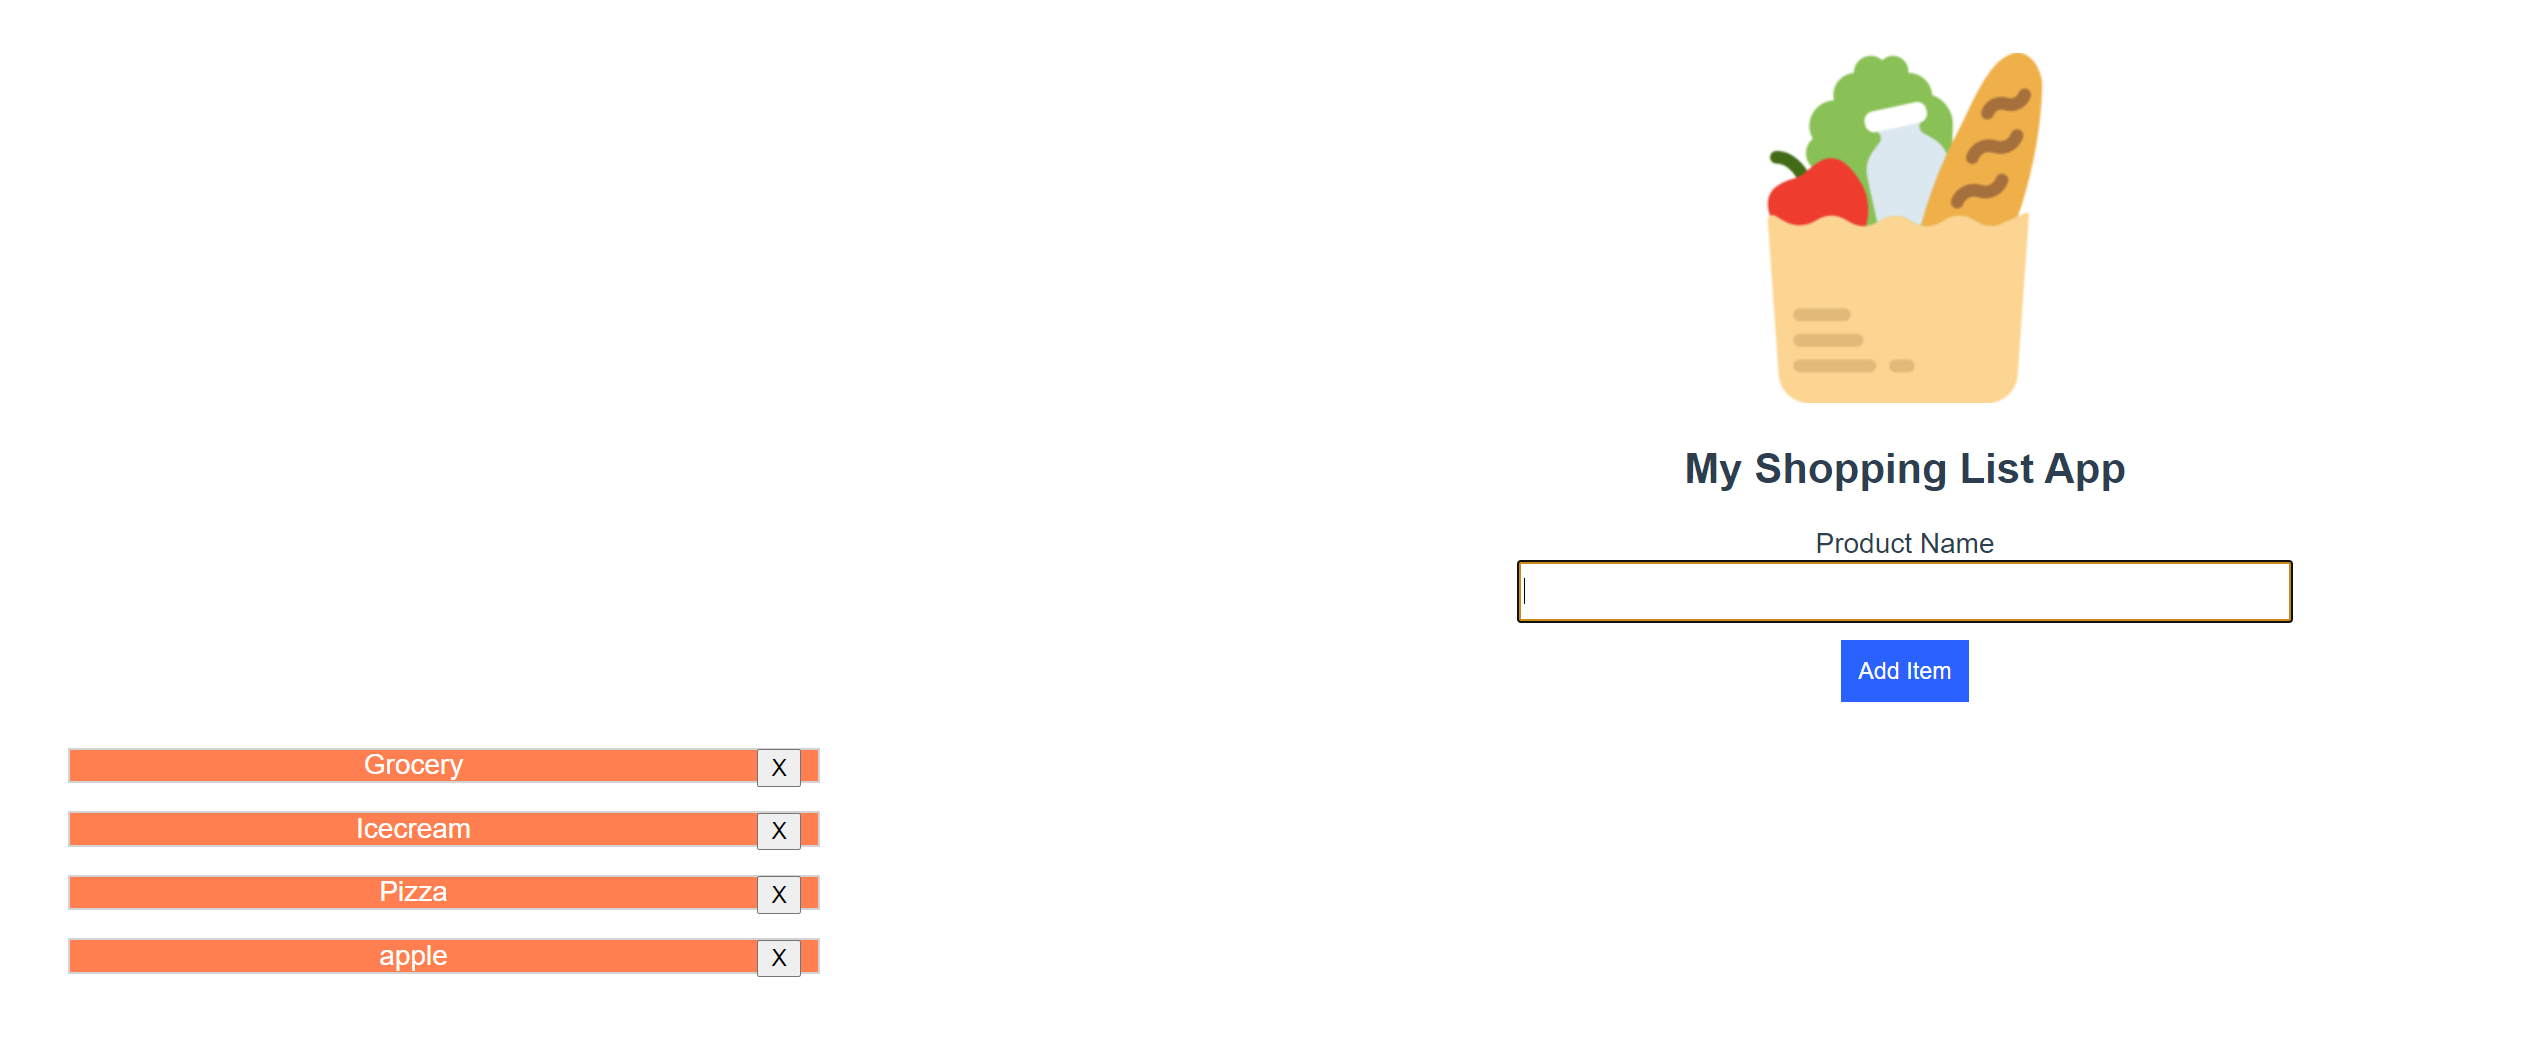
Our shopping list app is now complete:
Conclusion
Finally, we’ve built our Shopping List app with the Vue 3 Composition API. It’s interesting to see how the Composition API is used in Vue 2. One of its key advantages I’ve observed is the handling of methods, and component state is made more accessible and also its reactivity.
I hope you learned a few things about Vue. Hit me up on Twitter if you have any questions or feedback.
And feel free to add new features to the app, as this is a great way to learn. You can check out the source code here.
Frequently Asked Questions about Building a Shopping List App with Vue Composition API
How does Vue Composition API improve the development of a shopping list app?
Vue Composition API is a set of additive, function-based APIs that allow flexible composition of component logic. It provides a way to use Vue’s reactivity system outside of Vue components, which can be beneficial when building a shopping list app. It allows for better code organization, making it easier to understand and maintain. It also enables better code reuse, which can significantly speed up the development process.
Can I use Vue Composition API with an existing Vue project?
Yes, Vue Composition API is designed to be used alongside the Options API in existing projects. It’s an additive feature and can be adopted incrementally. This means you can start using it in parts of your application without having to rewrite existing code.
How does the Vue Composition API handle state management in a shopping list app?
The Vue Composition API provides a reactive state that can be used to manage the state of your shopping list app. This reactive state is similar to the data option in the Options API, but it’s more flexible and can be used outside of Vue components. This makes it easier to share state between components and to extract and reuse stateful logic.
What are the benefits of using Vue Composition API over other methods for building a shopping list app?
Vue Composition API offers several benefits over other methods. It allows for better code organization and reuse, which can speed up development and make the code easier to understand and maintain. It also provides a way to use Vue’s reactivity system outside of Vue components, which can be beneficial for complex applications like a shopping list app.
How can I start using Vue Composition API in my shopping list app?
To start using Vue Composition API, you need to install the @vue/composition-api plugin. Once installed, you can import the necessary functions from the plugin and use them in your components. The Vue Composition API documentation provides detailed guides and examples to help you get started.
Can I use Vue Composition API with other Vue plugins?
Yes, Vue Composition API is designed to work with other Vue plugins. It’s an additive feature and doesn’t interfere with the functionality of other plugins. This means you can continue using your favorite Vue plugins while also taking advantage of the benefits of the Composition API.
How does Vue Composition API handle component lifecycle hooks in a shopping list app?
Vue Composition API provides a set of functions that correspond to the Vue component lifecycle hooks. These functions can be used to control the behavior of your components at different stages of their lifecycle. This can be particularly useful in a shopping list app, where you might need to fetch data, update the UI, or perform other actions at specific points in the component lifecycle.
Is Vue Composition API suitable for large-scale shopping list apps?
Yes, Vue Composition API is suitable for large-scale applications. It provides a way to organize and reuse code, which can make the codebase easier to manage and maintain. It also allows for better control over component logic, which can be beneficial for complex, large-scale applications.
Can I use Vue Composition API with Vue 3?
Yes, Vue Composition API is a core feature of Vue 3. It’s fully integrated into the framework and can be used in all Vue 3 projects. This means you can start using it right away in your Vue 3 shopping list app.
How does Vue Composition API handle reactivity in a shopping list app?
Vue Composition API provides a reactive state that can be used to manage the state of your shopping list app. This reactive state is automatically tracked by Vue, and any changes to the state will trigger a re-render of the component. This makes it easy to keep the UI in sync with the state of your app.