- Where Do I Get One?
- What We’re Going To Build
- Starting Our Three.js Scene
- Controlling Our Camera
- Lighting Our Scene
- Creating a Floor
- Putting Together Our Particles
- The Weather API
- Local City Times Via TimeZoneDB
- Applying Weather Conditions
- Displaying Our Current City’s Name
- Keeping The Time
- Animation!
- In Action!
- Conclusion
- Frequently Asked Questions (FAQs) about VR and Three.js
Virtual reality is coming. You know that as a developer – you want in. The Oculus Rift, Gear VR, HTC Vive and more are making waves, yet many developers don’t realise just how much potential there is in the simplest of them all – Google Cardboard.
I’ve been doing a series of IoT related articles here at SitePoint, exploring connecting web APIs to almost anything. So far I’ve covered web APIs and the Unity game engine, the Jawbone Up API and Node.js and displaying web API data on an Arduino LCD via Node.js. In this article, I wanted to bring web APIs into the virtual reality world in a way that will allow JavaScript developers to get started easily. Google Cardboard and Three.js is the perfect first leap into this. It also means your users don’t have to install anything specific and you won’t need to spend hundreds of dollars on a VR headset. Just get a compatible smartphone, slip it into a cardboard headset and you’re ready to go.
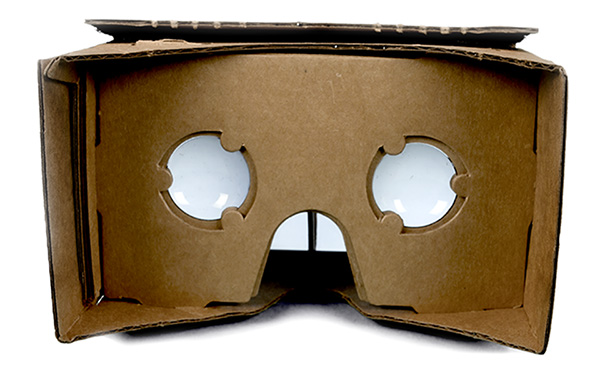
Where Do I Get One?
There are a tonne of different manufacturers that are producing Google Cardboard compatible headsets. Google have a great list on their Get Cardboard page. The one I’m most excited about is coming later this year – the relaunched View-Master® (that wonderful clicky slide toy!). The new View-Master® is going to be Google Cardboard compatible!
My current Google Cardboard headset is from the team at Dodocase. These guys have been absolutely brilliant. Their customer support are quite friendly and really quick to respond. If you’re more of a DIYer, you can source all the parts and make a headset yourself following the instructions also available on the Get Cardboard page.What We’re Going To Build
We’re going to build a relatively simple (yet still quite pretty) scene of glowing balls of light (we’ll be calling them “particles”) floating around our head. These particles will move and change color in response to the weather in various locations around the globe.
There is a working demo available here, all source code and such is non-minified and ready for you to look at and use however you wish. All of the source code is also available on GitHub.
Starting Our Three.js Scene
Our whole demo will be running on Three.js, a fantastic 3D JavaScript library that makes rendering 3D in the browser much simpler to grasp. If you haven’t used it before, there’s a bit of a learning curve but I’ll try to explain most things as we go.
We start by adding Three.js and a few key modules that also come with Three.js. These modules enable the functionality we want.
<script src="./js/three.min.js"></script>
<script src="./js/StereoEffect.js"></script>
<script src="./js/DeviceOrientationControls.js"></script>
<script src="./js/OrbitControls.js"></script>
<script src="./js/helvetiker_regular.typeface.js"></script>three.min.js– The main minified library for Three.js.StereoEffect.js– Allows us to turn a regular Three.js display into one that is split into two, giving the illusion of depth (an “off-axis stereoscopic effect”) for our VR experience.DeviceOrientationControls.js– Provides Three.js with the ability to tell where our device is facing and where it moves to. It follows the W3 DeviceOrientation Event specification.OrbitControls.js– Allows us to control the scene by dragging it around with our mouse or via touch events, in those cases when DeviceOrientation events aren’t available (usually just when you’re testing on your computer).helvetiker_regular.typeface.js– A font that we’ll be using within Three.js for our text.
In our JavaScript, we set up our initial global variables and call an init() function that will kick everything off.
Our init() function begins by setting up our scene variable as a Three.js Scene object. Every Three.js visualisation needs a scene because that is where every other element is placed.
function init() {
  scene = new THREE.Scene();
We then set up a Three.js PerspectiveCamera object which takes the following parameters: PerspectiveCamera(fov, aspect, near, far). They represent:
fov– the vertical field of view for the camera. Ours is set to 90 degrees which means we’ll see up and down at about 90 degrees whilst looking around.aspect– the aspect ratio for the camera. It is commonly set to be the width divided by the height of the viewport. Google has set it to1in one of their examples I’ve seen and that seemed to work too.nearandfar– any elements that are between thenearandfarvalues from our camera are rendered.
camera = new THREE.PerspectiveCamera(90, window.innerWidth / window.innerHeight, 0.001, 700);We set our camera’s initial position using camera.position.set(x,y,z). Mainly we want to set the y axis. This sets how tall we will be in our virtual world. I found 15 to be a reasonable height.
camera.position.set(0, 15, 0);Then we add the camera to our scene.
scene.add(camera);We need an element on the page to draw all of this onto, so we define our renderer and assign it to an element with the ID of webglviewer. In Three.js, we have two types of renderers which define how Three.js will render the 3D objects – CanvasRenderer and WebGLRenderer. The CanvasRenderer uses the 2D canvas context rather than WebGL. We don’t want that as we’ll be running this on Chrome for Android which supports WebGL quite well. Due to this, we set our renderer to a Three.js WebGLRenderer.
renderer = new THREE.WebGLRenderer();
element = renderer.domElement;
container = document.getElementById('webglviewer');
container.appendChild(element);
In order to have our VR stereoscopic view, we pass our renderer through the StereoEffect object that we imported in earlier in StereoEffect.js.
effect = new THREE.StereoEffect(renderer);Controlling Our Camera
Our controls for moving the camera around using the mouse or touch events are defined next. We pass in our camera and the DOM element which we’ll be attaching our event listeners to. We set the target spot we rotate around to be 0.15 more than the camera’s x position, but the same y and z points.
We also turn panning and zooming off as we want to stay where we are and just look around. Zooming would also complicate things.
controls = new THREE.OrbitControls(camera, element);
controls.target.set(
  camera.position.x + 0.15,
  camera.position.y,
  camera.position.z
);
controls.noPan = true;
controls.noZoom = true;
Next up, we set up our DeviceOrientation event listener that will allow us to track the motion of the phone in our Google Cardboard device. This uses the JS module we imported in earlier in DeviceOrientationControls.js. We add the listener a little bit further down in our code like so:
window.addEventListener('deviceorientation', setOrientationControls, true);The function we will be attaching to our event listener is setOrientationControls(). That is defined just above the addEventListener for it. The DeviceOrientation event listener returns three values when it has found a compatible device – alpha, beta and gamma. We check for the alpha value at the start of our function to ensure that event data is coming through as expected.
function setOrientationControls(e) {
  if (!e.alpha) {
    return;
  }
If we do have a device which supports the DeviceOrientation spec (our Google Chrome mobile browser), then we take our the controls variable which previously had our OrbitControls object, and replace it with our DeviceOrientationControls object. This switches the way compatible browsers will interact with the scene. Instead of mouse or touch events, they will now move the device around. We then run the connect() and update() functions which come with the DeviceOrientationControls object that set everything up for us.
controls = new THREE.DeviceOrientationControls(camera, true);
controls.connect();
controls.update();
We also add an event for these mobile devices which sets our browser into full screen on click, as viewing this on Google Cardboard looks best without the address bar in view.
element.addEventListener('click', fullscreen, false);Finally, once we’ve set up our DeviceOrientationControls object, we can remove the DeviceOrientation listener.
window.removeEventListener('deviceorientation', setOrientationControls, true);Lighting Our Scene
I’ve placed rather simple lighting into this scene just so that the floor (which we’ll define next) is visible and you’ve got a sense of depth. I’ve got two point lights with the same brightness and color, just angled at different points in the scene. light is at more of an angle whilst lightScene points straight down to light up around where we’ll be standing. Lighting is a tricky art and I’m certain that there’s someone out there that could make this lighting look much more exciting than it currently does!
var light = new THREE.PointLight(0x999999, 2, 100);
light.position.set(50, 50, 50);
scene.add(light);

var lightScene = new THREE.PointLight(0x999999, 2, 100);
lightScene.position.set(0, 5, 0);
scene.add(lightScene);
Creating a Floor
Even though we won’t be having gravity or anything like that in the scene (we will be standing totally still and just looking around), having a floor there just makes this feel a little bit more natural for people to look at. We’re already spinning shiny particles around them at various speeds, it feels necessary to give them something that is stationary to stand on.
Our floor will use a repeated texture stored under the variable floorTexture. We load in an image file called 'textures/wood.jpg' and then set it to repeat in both directions on whatever object it is placed on. new THREE.Vector2(50, 50) sets the size of this texture that we’re repeating.
var floorTexture = THREE.ImageUtils.loadTexture('textures/wood.jpg');
floorTexture.wrapS = THREE.RepeatWrapping;
floorTexture.wrapT = THREE.RepeatWrapping;
floorTexture.repeat = new THREE.Vector2(50, 50);
By default, textures come out a bit blurry to speed things up (and sometimes slightly blurred looks better), however because we’ve got a rather detailed texture of floor boards which we’d prefer to look sharp, we set anisotropy to renderer.getMaxAnisotropy.
floorTexture.anisotropy = renderer.getMaxAnisotropy();Our floor needs both a texture and a material. The material controls how our floor will react to lighting. We use the MeshPhongMaterial as it makes our object react to light and look nice and shiny. Within this material is where we set the floorTexture we defined earlier to be used.
var floorMaterial = new THREE.MeshPhongMaterial({
  color: 0xffffff,
  specular: 0xffffff,
  shininess: 20,
  shading: THREE.FlatShading,
  map: floorTexture
});
In order to set up the shape we want our floor to be, we’ve got to create an object defining which geometry we’d like it to have. Three.js has a range of geometries, such as cube, cylinder, sphere, ring and more. We’ll be sticking with a very simple bit of geometry, a plane. One thing to note is that I have used the PlaneBufferGeometry type of plane. You could use PlaneGeometry here too, however it can take up a bit more memory (and we really don’t need anything too fancy here… it is a floor!). We define it with a height and width of 1000.
var geometry = new THREE.PlaneBufferGeometry(1000, 1000);Our floor itself needs to have a physical representation that puts our geometry and the material we defined together into an actual object we can add to our scene. We do this with a Mesh. When adding a mesh, it gets placed into the scene standing upright (more of a wall than a floor), so we rotate it so that it is flat underneath our virtual feet before adding it to our scene.
var floor = new THREE.Mesh(geometry, floorMaterial);
floor.rotation.x = -Math.PI / 2;
scene.add(floor);
Putting Together Our Particles
At the very top of our script, we set up a few global variables for our particles and set up a particles object that will store all our floating particles. We’ll go over the below variables in more detail when we reach them in the code, just be aware that this is where these values are coming from.
particles = new THREE.Object3D(),
totalParticles = 200,
maxParticleSize = 200,
particleRotationSpeed = 0,
particleRotationDeg = 0,
lastColorRange = [0, 0.3],
currentColorRange = [0, 0.3],
Let’s begin looking at our particle code with a high level overview. We initially set the texture for our particles to be a transparent png at 'textures/particle.png'. Then we iterate through the number of particles we define in totalParticles. If you’d like to change how many particles appear in the scene, you can increase this number and it will generate more and arrange them for you.
Once we’ve iterated through all of them and added them to our particles object, we raise it up so that it will be floating around our camera. Then we add our particles object to our scene.
var particleTexture = THREE.ImageUtils.loadTexture('textures/particle.png'),
    spriteMaterial = new THREE.SpriteMaterial({
    map: particleTexture,
    color: 0xffffff
  });

for (var i = 0; i < totalParticles; i++) {
  // Code setting up all our particles!
}

particles.position.y = 70;
scene.add(particles);
Now we’ll look at exactly what’s happening in our for loop. We start by creating a new Three.js Sprite object and assigning our spriteMaterial to it. Then we scale it to be 64×64 (the same size as our texture) and position it. We want our particles to be in random positions around us, so we set them to have x and y values between -0.5 and 0.5 using Math.random() - 0.5 and a z value between -0.75 and 0.25 using Math.random() - 0.75. Why these values? After a bit of experimenting, I thought these gave the best effect when floating around the camera.
for (var i = 0; i < totalParticles; i++) {
  var sprite = new THREE.Sprite(spriteMaterial);

  sprite.scale.set(64, 64, 1.0);
  sprite.position.set(Math.random() - 0.5, Math.random() - 0.5, Math.random() - 0.75);
We then set the size of each particle to be somewhere between 0 and the maxParticleSize we set earlier.
sprite.position.setLength(maxParticleSize * Math.random());A key part of making these look like glowing particles is the THREE.AdditiveBlending blending style in Three.js. This adds the color of the texture to the color of the one behind it, giving us more of a glow effect above the other particles and our floor. We apply that and then finish up by adding each sprite to our particles object.
sprite.material.blending = THREE.AdditiveBlending;

  particles.add(sprite);
}
The Weather API
All of this up until now has gotten us to the state where we have a static set of particles prepared in a scene with a floor and lighting. Let’s make things a bit more interesting by adding in a web API to bring the scene to life. We’ll be using the OpenWeatherMap API to get the weather conditions in various cities.
The function we’ll set up to connect up to a weather API is adjustToWeatherConditions(). We’ll take a look at the code as a whole and then go over what it is doing.
The OpenWeatherMap API works best if we complete our call for multiple cities in one HTTP request. To do this, we create a new string called cityIDs which starts out empty. We then add a list of city IDs into here that can be passed into the GET request. If you’d like a list of cities to choose from, they have a whole list of worldwide cities and their associated IDs within their download samples at http://78.46.48.103/sample/city.list.json.gz.
function adjustToWeatherConditions() {
  var cityIDs = '';
  for (var i = 0; i < cities.length; i++) {
    cityIDs += cities[i][1];
    if (i != cities.length - 1) cityIDs += ',';
  }
Our array of cities at the start of our script contains both names and IDs. This is because we also want to display the name of the city we’re showing the weather data for. The API provides a name that you could use, however I preferred to define it myself.
To be able to make calls to this API, you’ll need an API key to pass into the APPID GET parameter. To get an API key, create an account at http://openweathermap.org and then go to your “My Home” page.
The getURL() function in our example is a really really simple XMLHttpRequest call. If you do have cross-origin errors, you may need to switch this function to something that uses JSONP. From what I’ve seen in my demos whilst developing, using the XMLHttpRequest seemed to work alright with these APIs.
Once our GET request is successful, we have a callback function that retrieves our weather data for all cities under the variable cityWeather. All the info we want is within info.list in our returned JSON.
getURL('http://api.openweathermap.org/data/2.5/group?id=' + cityIDs + '&APPID=kj34723jkh23kj89dfkh2b28ey982hwm223iuyhe2c', function(info) {
  cityWeather = info.list;
Next up we will be looking up the time in each location.
Local City Times Via TimeZoneDB
TimeZoneDB are kind enough to have a neat little JavaScript library which we’ll be using to keep things nice and simple:
<script src="timezonedb.js" type="text/javascript"></script>Once we’ve retrieved our weather data in adjustToWeatherConditions(), we call our next function lookupTimezones() which will retrieve what time it is in each location. We pass it a value of zero to tell it we want to look up the timezone for the first city and we pass in our weather array’s length so that it knows how many more cities we want to loop through after that.
lookupTimezones(0, cityWeather.length);Our lookupTimezones() function itself begins by using the TimeZoneDB object which we have access to from timezonedb.js. Then we pair up TimeZoneDB’s getJSON() function with the latitude and longitude of each location which we retrieve from our weather API’s cityWeather array series of data. It retrieves the time at each location and we store it in an array called cityTimes. We run it for as long as we have more cities to lookup (t keeps track of what index we’re up to and len has the length of our weather data array). Once we’ve looped through them all, we run applyWeatherConditions().
Update: A thank you to Voycie in the comments who noticed the TimeZoneDB had begun to return a 503 error due to too many calls within a second. To fix this, the code below now surrounds our loop of lookupTimezones(t, len); in a setTimeout() which waits 1200 milliseconds before hitting the API again.
function lookupTimezones(t, len) {
  var tz = new TimeZoneDB;

  tz.getJSON({
    key: "KH3KH239D1S",
    lat: cityWeather[t].coord.lat,
    lng: cityWeather[t].coord.lon
  }, function(timeZone){
    cityTimes.push(new Date(timeZone.timestamp * 1000));

    t++;

    if (t < len) {
      setTimeout(function() {
        lookupTimezones(t, len);
      }, 1200);
    } else {
      applyWeatherConditions();
    }
  });
}
Applying Weather Conditions
Now that we have all the data we need, we just need to apply effects and movement in response to this data. The applyWeatherConditions() function is quite a big one, so we’ll look at it step by step.
At the start of our JavaScript within our variable declarations, we set a variable like so:
currentCity = 0This is its time to shine! We use this variable to keep track of which city we’re displaying in our series of cities. You’ll see it used a lot within applyWeatherConditions().
We run a function called displayCurrentCityName() at the start of our applyWeatherConditions() function which adds a bit of 3D text that shows our current city name. We’ll explain how that works in more detail afterwards. I found it works best to have it at the start of this function so that if there are any delays in the processing of all these colors, we’ve at least got a few milliseconds of the city name as a response first.
Then, we assign the weather data for the current city to the info variable to make it clearer to reference throughout our function.
function applyWeatherConditions() {
  displayCurrentCityName(cities[currentCity][0]);

  var info = cityWeather[currentCity];
Next up, we set our two variables that relate to wind. particleRotationSpeed will be the wind speed in miles per second divided by two (to slow it down a little so we can see the particles) and particleRotationDeg will represent the wind direction in degrees.
particleRotationSpeed = info.wind.speed / 2; // dividing by 2 just to slow things down
particleRotationDeg = info.wind.deg;
We retrieve the time of day at this location from our cityTimes array. The times are represented in UTC time, so we use the getUTCHours() function to pull out just the hour value. If for whatever reason there isn’t a time available there, we’ll just use 0.
var timeThere = cityTimes[currentCity] ? cityTimes[currentCity].getUTCHours() : 0In order to show day and night in this demo, we’ll be using a very broad estimation. If the hour is between 6 and 18 inclusively, then it’s day time. Otherwise, it is night time. You could theoretically do a bunch of calculations on sun position or find a different API which includes info on day/night if you desired, however for the purposes of a basic visualisation I thought this would be enough.
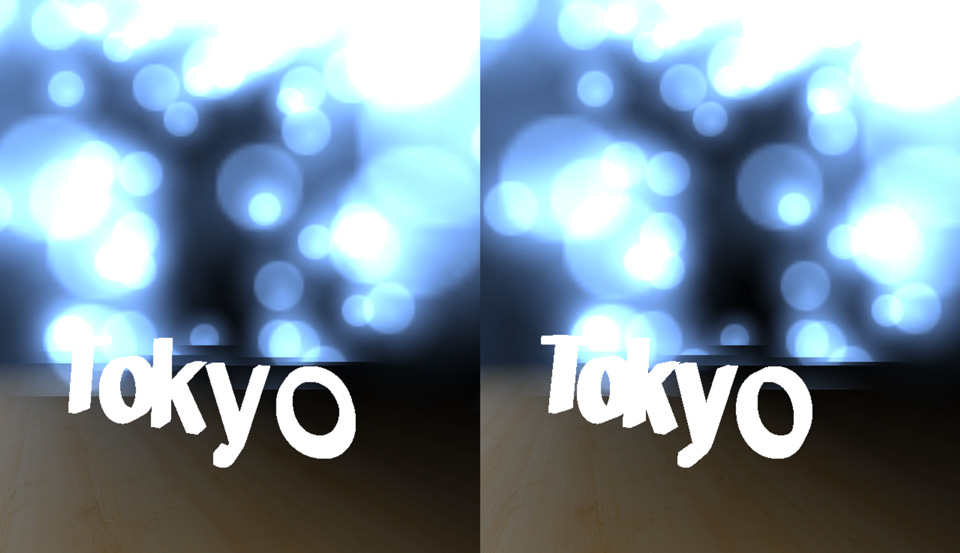
isDay = timeThere >= 6 && timeThere <= 18;If it is daytime, then we adjust the colors of our particles in relation to our weather data. We use a switch statement to look at the main key of our weather data. This is a series of values from the OpenWeatherData API that represent a general categorisation of the weather in that location. We’ll be watching out for either “Clouds”, “Rain” or “Clear”. I look out for these values and set the color range of our particles depending on this.
Our color range will be represented in HSL, so currentColorRange[0] represents the hue of our color and currentColorRange[1] represents the saturation. When it’s cloudy, we set the hue to be 0, so it is white. When it is rainy, we set the hue to blue but turn it darker with the saturation value. When clear, we show this with a nice light blue. If it is night, then we set the hue and saturation to be a lighter purple.
if (isDay) {
  switch (info.weather[0].main) {
    case 'Clouds':
      currentColorRange = [0, 0.01];
      break;
    case 'Rain':
      currentColorRange = [0.7, 0.1];
      break;
    case 'Clear':
    default:
      currentColorRange = [0.6, 0.7];
      break;
  }
} else {
  currentColorRange = [0.69, 0.6];
}
At the end of our function, we either go to the next city or loop to the first one. Then we set a timeout that will rerun our applyWeatherConditions() function in 5 seconds with the new currentCity value. This is what sets up our loop through each city.
if (currentCity < cities.length-1) currentCity++;
else currentCity = 0;

setTimeout(applyWeatherConditions, 5000);
Displaying Our Current City’s Name
To display our current city name, we remove any previous Three.js mesh stored in a variable called currentCityTextMesh (in the situation where this has been run already) and then we recreate it with our new city’s name. We use the Three.js TextGeometry object which lets us pass in the text we want and set the size and depth of it.
function displayCurrentCityName(name) {
  scene.remove(currentCityTextMesh);

  currentCityText = new THREE.TextGeometry(name, {
    size: 4,
    height: 1
  });
Then, we set up a mesh that is a simple, fully opaque white. We position it using the position and rotation parameters and then add it to our scene.
currentCityTextMesh = new THREE.Mesh(currentCityText, new THREE.MeshBasicMaterial({
  color: 0xffffff, opacity: 1
}));

currentCityTextMesh.position.y = 10;
currentCityTextMesh.position.z = 20;
currentCityTextMesh.rotation.x = 0;
currentCityTextMesh.rotation.y = -180;

scene.add(currentCityTextMesh);
Keeping The Time
In order to keep track of the time in our running Three.js experience, we create a clock variable that contains a Three.js Clock() object. This keeps track of the time between each render. We set this up near the end of our init() function.
clock = new THREE.Clock();Animation!
Finally, we want everything to move and refresh on each frame. For this we run a function we’ll call animate(). We first run it at the end of our init() function. Our animate() function starts by getting the number of seconds that the Three.js scene has been running. It stores that within elapsedSeconds. We also decide which direction our particles should be rotating, if the wind is less than or equal to 180, we’ll rotate them clockwise, if not, we’ll rotate them anti-clockwise.
function animate() {
  var elapsedSeconds = clock.getElapsedTime(),
      particleRotationDirection = particleRotationDeg <= 180 ? -1 : 1;
To actually rotate them in each frame of our Three.js animation, we calculate the number of seconds our animation has been running, multiplied by the speed we want our particles to have travelled and the direction we want them to go. This determines the y value of our particles group rotation.
particles.rotation.y = elapsedSeconds * particleRotationSpeed * particleRotationDirection;We also keep track of what the current and last colors were, so we know in which frames we need to change them. By knowing what they were in the last frame, we avoid recalculating everything for the frames in which we haven’t changed city yet. If they are different, then we set the HSL value for each particle in our particles object to that new color, but with a randomised value for the lightness that is between 0.2 and 0.7.
if (lastColorRange[0] != currentColorRange[0] && lastColorRange[1] != currentColorRange[1]) {
  for (var i = 0; i < totalParticles; i++) {
    particles.children[i].material.color.setHSL(currentColorRange[0], currentColorRange[1], (Math.random() * (0.7 - 0.2) + 0.2));
  }

  lastColorRange = currentColorRange;
}
Then we set our animate() function to run again next animation frame:
requestAnimationFrame(animate);And finally we run two functions that keep everything running smoothly.
update(clock.getDelta()) keeps our renderer, camera object and controls matching the browser viewport size.
render(clock.getDelta()) renders our scene each frame. Within that function, we call this on effect to render it using the stereoscopic effect we set up earlier:
effect.render(scene, camera);In Action!
Put that onto a public facing web server, load it up on your phone using Google Chrome, tap it to make it full screen and then put it into your Google Cardboard headset. With all of that running, you should have a wonderful sight like so that is controlled by your head movements:
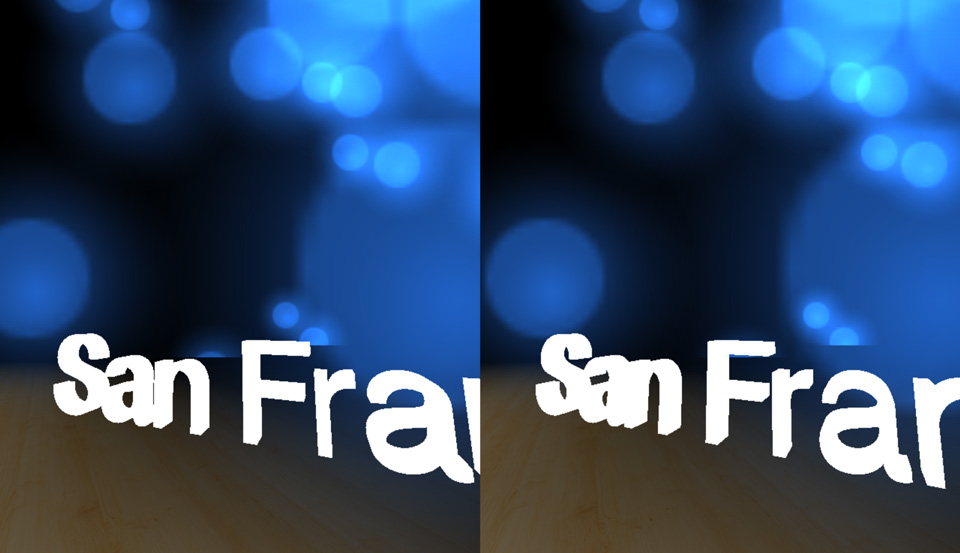
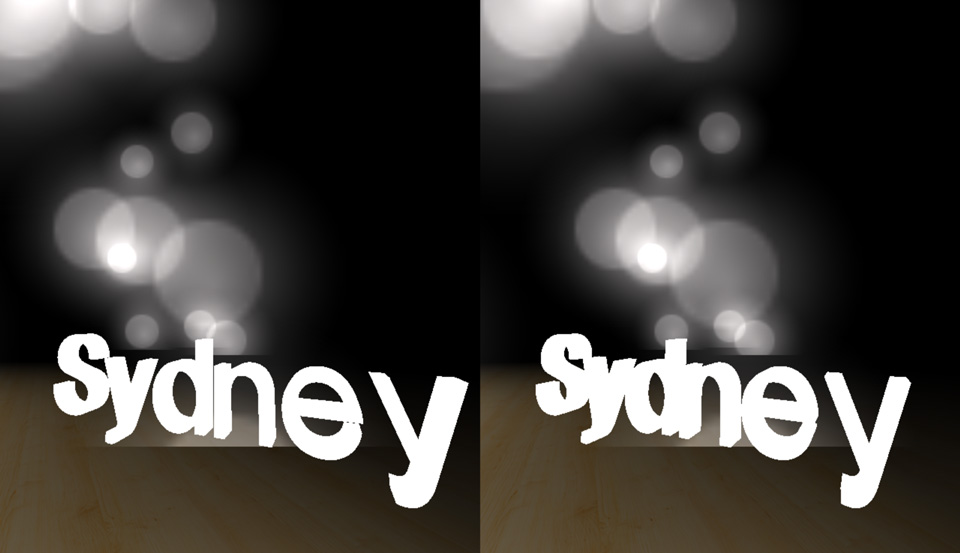
Comparing it to the weather outside my window in Sydney, it appears accurate!

Feel free to customise it with new cities, change the colors, speeds and all to your own preferences, or create a totally new visualisation. That’s all part of the fun!
Conclusion
You should now have a pretty good level of knowledge in what’s required to get a 3D VR experience going in Google Cardboard and Three.js. If you do make something based upon this code, leave a note in the comments or get in touch with me on Twitter (@thatpatrickguy), I’d love to check it out!
Frequently Asked Questions (FAQs) about VR and Three.js
What is Three.js and how does it relate to VR?
Three.js is a cross-browser JavaScript library and Application Programming Interface (API) that is used to create and display animated 3D computer graphics in a web browser. It uses WebGL to render graphics. In relation to Virtual Reality (VR), Three.js provides the necessary tools to create immersive 3D experiences that can be accessed directly from a web browser. This makes it a powerful tool for developers looking to create VR experiences that are easily accessible to a wide audience.
How can I get started with Google Cardboard and Three.js?
To get started with Google Cardboard and Three.js, you first need to have a basic understanding of HTML, CSS, and JavaScript. Once you have these basics, you can start learning about Three.js and how to use it to create 3D graphics. Google Cardboard is a VR platform developed by Google for use with a head mount for a smartphone. It is intended as a low-cost system to encourage interest and development in VR applications.
What are some examples of VR experiences created with Three.js?
There are many examples of VR experiences created with Three.js. These range from simple 3D animations to complex, interactive VR games. One notable example is the VR Rollercoaster demo on the Three.js website. This demo showcases the capabilities of Three.js in creating a fully immersive VR experience.
How can I create my own VR experiences with Three.js?
Creating your own VR experiences with Three.js involves learning how to use the library to create 3D graphics, and then applying this knowledge to create interactive VR experiences. This can involve creating 3D models, animating them, and adding interactivity. There are many tutorials and resources available online to help you get started with this process.
What are the benefits of using Three.js for VR development?
There are several benefits to using Three.js for VR development. Firstly, it is a powerful and flexible tool that allows for the creation of a wide range of 3D graphics. Secondly, it is a cross-browser library, meaning it can be used to create VR experiences that can be accessed from any web browser. Finally, it is a well-documented and widely used library, meaning there is a large community of developers who can provide support and resources.
Can I use Google Cardboard without a smartphone?
Google Cardboard is designed to work with a smartphone. The smartphone acts as the display and processing unit for the VR experience. Without a smartphone, you would not be able to use Google Cardboard.
What devices are compatible with Google Cardboard?
Google Cardboard is compatible with most smartphones. The device needs to have a gyroscope and accelerometer for head tracking, and a screen size between 4 and 6 inches.
How can I optimize my VR experiences for Google Cardboard?
Optimizing VR experiences for Google Cardboard involves ensuring that the experience runs smoothly on a wide range of smartphones. This can involve optimizing 3D models and animations, ensuring that the experience is not too demanding for lower-end devices, and testing the experience on a range of different devices.
What are the limitations of using Three.js for VR development?
While Three.js is a powerful tool for creating 3D graphics, it does have some limitations when it comes to VR development. For example, it does not support some of the more advanced features of VR headsets, such as positional tracking and hand tracking. Additionally, performance can be an issue on lower-end devices.
Can I use other programming languages with Three.js?
Three.js is a JavaScript library, so it is primarily used with JavaScript. However, it can be used with other programming languages that can compile to JavaScript, such as TypeScript.
 Patrick Catanzariti
PatCat is the founder of Dev Diner, a site that explores developing for emerging tech such as virtual and augmented reality, the Internet of Things, artificial intelligence and wearables. He is a SitePoint contributing editor for emerging tech, an instructor at SitePoint Premium and O'Reilly, a Meta Pioneer and freelance developer who loves every opportunity to tinker with something new in a tech demo.