Paging Results with ASP.NET’s PagedDataSource
Paging with ASP.NET? You all know what I’m talking about — those numbers, or next/previous buttons that Google, Yahoo!, etc. have at the bottom of search results? Well, that’s paging. And anyone who’s done it with ASP will know how much of a pain in the neck it can actually be.
But with ASP.NET, Microsoft has been nice enough to build the paging functionality into the DataGrid Web Control! Nice of them, eh? With just a few simple properties set to “true”, you can easily page any data source… but only if you use a DataGrid!
But what happens if you need to show only a list of links, or some images? The DataGrid carries a large overhead due to the amount of functionality that comes with it. So, to display information, the lightweight Repeater or DataList Web Controls will usually suffice.
“But they lack paging support!” you say. Well… they do and they don’t. They lack integrated paging support, but using the PagedDataSource class, we can easily add paging abilities to DataLists and Repeaters, even RadioButton, Checkbox and DropDown lists! PagedDataSource encapsulates all the functionality of DataGrid‘s paging facility. Let’s see how!
Prerequisites
For this article, you should have basic knowledge of ASP.NET and Web Forms.
Key Takeaways
- PagedDataSource in ASP.NET simplifies the implementation of paging functionality, allowing for the easy addition of page navigation to data-bound controls like DataLists and Repeaters.
- The class provides essential properties such as PageSize, AllowPaging, CurrentPageIndex, and DataSource, which help configure and manage paging behavior effectively.
- PagedDataSource works with various data sources that support indexed access, such as HashTables and DataSets, enhancing its flexibility.
- Setting up PagedDataSource involves creating an instance, setting its properties, and binding it to a data-bound control, allowing for modular coding and easy maintenance.
- Navigation between pages is managed through the CurrentPageIndex property, and visual elements like “next” and “previous” buttons can be dynamically shown or hidden based on the page status.
- The practical application of PagedDataSource can be extended beyond simple examples to real-world scenarios involving database data, demonstrating its robustness and utility in enterprise environments.
The PagedDataSource Class
This class comes from the System.Web.UI.WebControls Namespace, so you don’t have to import any additional namespaces to the page.
If you’ve used the paging capabilities of the DataGrid, then you’re probably already familiar with all the PagedDataSource properties, and can probably skip this section. If not, here are the properties we’ll cover:
- PageSize – This property takes an integer (by default it’s set at 10), and defines how many records are displayed on a page.
- AllowPaging – This property determines whether the paging should be turned on or off (Boolean “true” or “false”). By default it’s set to “false”.
- CurrentPageIndex – This returns/sets the current page number. By default it returns 0.
- PageCount – Returns a count of the total number of pages that are available.
- DataSource – The value of this property will be the source of the data you want to page.
- IsFirstPage – Returns “true” or “false”, depending on whether the current page is the first page in the series.
- IsLastPage – As above, but for the last page.
The data source used has to support indexed access, which means we can’t use a DataAdapter (SQL or OLDB). Data sources that we can use include HashTables and DataSets, both of which we’ll look at.
Creating an Instance
You can create an instance of the PagedDataSource class in the same way you’d create an instance of anything else:
Dim pagedData As New PagedDataSource()

pagedData.DataSource = mockData

pagedData.AllowPaging = True

pagedData.PageSize = 5
On the first line, we created a new instance of the PageDataSource object, while on the next we set the DataSource. If we left AllowPaging to default, the results wouldn’t page, so on the third line we set this property to “true“. And on the last line we set the PageSize to 5.
The DataSource
In the example above, we set the DataSource of our instance to mockData. Now, let’s create the data source.
For this simple first example, we’re going to create a simple HashTable:
Dim mockData As New HashTable()

Dim IDx As Integer = 0

Do Until IDx = 500

   mockData.Add(IDx.toString(), (IDx * 101).toString)

IDx += 1

Loop
On the first line, we create a new instance of the HashTable, and them declare an integer variable. This variable will be used to control the count of the Do Until... Loop statement, and create the data for the table. Lines 3-6 show the Do Until... Loop that creates the data in the HashTable.
The Full Sub-Routine
OK, let’s pull all the ASP.NET code together. We’ll use it in its own sub-routine, instead of in the Page_Load. Why? For modularity, of course: if it’s in its own sub-routine, we’ll find it easier to transfer it to another page, put it in a code-behind, or turn it into a Web Control.
Let’s take a look at it:
Sub doPaging()

   Dim mockData As New Hash   Dim IDx As Integer = 0

   Do Until IDx = 500

      mockData.Add(IDx.toString(), (IDx * 101).toString)

      IDx += 1

   Loop


   Dim pagedData As New PagedDataSource()

   pagedData.DataSource = mockData

   pagedData.AllowPaging = True

   pagedData.PageSize = 5


   theDataList.DataSource = pagedData

   theDataList.DataBind()

End Sub
Now we’ve got our basic sub-routine done. We’ll be building on this as we go, but that is essentially the nuts and bolts we need.
The DataList
So we’ve created our PagedDataSource instance and our data source. Now, let’s make a DataList to display it!
<asp:DataList id="theDataList" runat="server">

  <ItemTemplate>

    <hr size="0" />

    Department: <%# DataBinder.Eval(Container.DataItem,

    "Key") %><br />

    Employee ID: <%# DataBinder.Eval(Container.DataItem,

    "Value") %></a><br />

  </ItemTemplate>

</asp:DataList>
That’s it! As you can see, we’ve created a simple DataList.
Putting it Together
Now, let’s put the code and DataList together to create the actual page:
<%@ Page Language="VB" %>

<script language="VB" runat="server">

Sub Page_Load(byVal obj As Object, byVal e As EventArgs)

   doPaging()

End Sub


Sub doPaging()

      Dim mockData As New HashTable()

   Dim IDx As Integer = 0

   Do Until IDx = 500

      mockData.Add(IDx.toString(), (IDx * 101).toString)

      IDx += 1

   Loop


   Dim pagedData As New PagedDataSource()

   pagedData.DataSource = mockData

   pagedData.AllowPaging = True

   pagedData.PageSize = 5


   theDataList.DataSource = pagedData

   theDataList.DataBind()

End Sub

</script>


<!DOCTYPE HTML PUBLIC "-//W3C//DTD HTML 4.01 Transitional//EN">

<html>

   <head>

      <title>Paging Example 1</title>

   </head>


   <body>

      <asp:DataList id="theDataList" runat="server">

         <ItemTemplate>

            <hr size="0" />

            Department: <%# DataBinder.Eval(Container.DataItem,

            "Key") %><br />

            Employee ID: <%# DataBinder.Eval(Container.DataItem,

            "Value") %></a><br />

         </ItemTemplate>

      </asp:DataList>

   </body>

</html>
See what happens? When the page is loaded, the Page_Load sub-routine is run, which then checks to see if the page has been posted back. If it hasn’t, it then runs the doPaging() sub-routine.
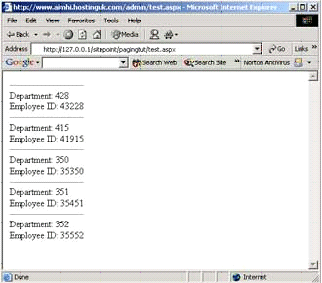
What does our page look like? Run it and see! Here’s the result you can expect:

The Actual Paging
As you can see, we’re sending 5 items to the browser. Fantastic… but how do we page? Well, let’s look at it.
First, we’ll create “next” and “previous” buttons. So, below or above the DataList, add the following:
<asp:LinkButton id="btnPrev" Text="<" OnClick="Prev_Click"
runat="server" />
<asp:LinkButton id="btnNext" Text=">" OnClick="Next_Click"
runat="server" />This will create < and > wherever you’ve placed the code. If you save the page and refresh it, an error will be displayed saying ‘Prev_Click‘ is not a member of ‘ASP.pageName_aspx‘”. That’s ok, we’ll fix this error shortly.
Get Paging
So far, we’re returning 5 records to the page and next/previous buttons, so it looks like it’s paging, but we still can’t actually page. Well, my impatient friend, we will soon! First off, let’s create the two sub-routines that are called by the paging buttons, Prev_Click and Next_Click. Just below our doPaging() sub-routine, add the following code:
Public Sub Prev_Click(ByVal obj As Object, ByVal e As EventArgs)

   Response.Redirect(Request.CurrentExecutionFilePath

   & "?Page=" & (pagedData.CurrentPageIndex - 1))

End Sub


Public Sub Next_Click(ByVal obj As Object, ByVal e As EventArgs)

   Response.Redirect(Request.CurrentExecutionFilePath

   & "?Page=" & (pagedData.CurrentPageIndex + 1))

End Sub
If you add this code and save it, the page will actually return an error, saying: “Name 'pagedData' is not declared“. This error is returned because the object is only declared inside the doPaging() sub-routine, and we’re trying to access a property of it in each of the two new functions. To fix this error, what we have to do is make the PagedDataSource object available tall the code in the page. To accomplish this, we simply remove this line from inside doPaging() and place it just above all the sub-routines:
Dim pagedData As New PagedDataSource()With this done, our code now looks like this:
Dim pagedData As New PagedDataSource()

Sub Page_Load(byVal obj As Object, byVal e As EventArgs)

   doPaging()

End Sub


Sub doPaging()

   Dim mockData As New HashTable()

   Dim IDx As Integer = 0

   Do Until IDx = 500

      mockData.Add(IDx.toString(), (IDx * 101).toString)

      IDx += 1

   Loop


   pagedData.DataSource = mockData

   pagedData.AllowPaging = True

   pagedData.PageSize = 5


   theDataList.DataSource = pagedData

   theDataList.DataBind()

End Sub


Public Sub Prev_Click(ByVal obj As Object, ByVal e As EventArgs)

   Response.Redirect(Request.CurrentExecutionFilePath

   & "?Page=" & (pagedData.CurrentPageIndex - 1))

End Sub


Public Sub Next_Click(ByVal obj As Object, ByVal e As EventArgs)

   Response.Redirect(Request.CurrentExecutionFilePath

   & "?Page=" & (pagedData.CurrentPageIndex + 1))

End Sub
The two new functions access the CurrentPageIndex of the PagedDataSource object, which returns the index of the current page. The Next_Click function adds 1 to it, and then redirects your browser with the value appended to the URL as a Querystring. The Prev_Click does the same, but takes 1 away.
But… nothing seems to be happening, right? Ok, let’s remedy that. Below you will find a revised version of the doPaging() sub-routine. The new lines are in bold:
Sub doPaging()

   Dim mockData As New HashTable()

   Dim IDx As Integer = 0

   Do Until IDx = 500

      mockData.Add(IDx.toString(), (IDx * 101).toString)

      IDx += 1

   Loop


   pagedData.DataSource = mockData

   pagedData.AllowPaging = True

   pagedData.PageSize = 5


   Try

      pagedData.CurrentPageIndex =

Int32.Parse(Request.QueryString("Page")).ToString()

   Catch ex As Exception

      pagedData.CurrentPageIndex = 0

   End Try


   btnPrev.Visible = ( NOT pagedData.IsFirstPage )

   btnNext.Visible = ( NOT pagedData.IsLastPage )


   theDataList.DataSource = pagedData

   theDataList.DataBind()

End Sub
Try it, and watch it page!
We use the Try... Catch statement to parse out the page number supplied by the QueryString, and change the PagedDataSource object’s CurrentPageIndex. If it isn’t a number, the Catch block will run and set it to 0 — making this the first page!
The two lines below simply make the Next/Previous buttons disappear at the appropriate time!
btnPrev.Visible = ( NOT pagedData.IsFirstPage )

btnNext.Visible = ( NOT pagedData.IsLastPage )
This code works by accessing the IsFirstPage and IsLastPage properties of the PagedDataSource object, which returns a Boolean.
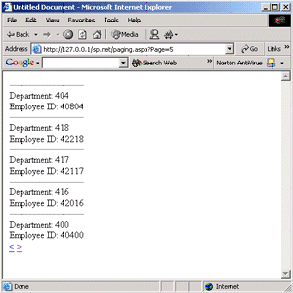
It couldn’t be simpler! Below you can find a screenshot of what the code produces:

A Real World Example
The example we covered isn’t very good at showing the PagedDataSource in a practical sense, so now we’ll go over using it with some data pulled from a database. For this example, we’ll use the Microsoft Northwind SQL Server database.
To start with, we have to get the data from the database. We’ll work with the customers table because it has the most records.
First off, we need to import the required namespaces:
<%@ Page Language="VB" %>

<%@ Import Namespace="System.Data" %>

<%@ Import Namespace="System.Data.SQLClient" %>
This allows us to access all the relevant classes and objects for accessing and working with data.
And, speaking of data, let’s look at retrieving ours. For easier modularity, we’re going to use a different sub-routine to retrieve our code:
Function getTheData() As DataTable

   Dim DS As New DataSet()

   Dim strConnect As New SQLConnection("server=localhost;

   uid=sa;pwd=;Database=Northwind")

   Dim objSQLAdapter As New SQLDataAdapter("SELECT

   companyName, contactName, contactTitle FROM customers", strConnect)

   objSQLAdapter.Fill(DS, "customers")


   Return DS.Tables("customers").Copy

End Function
We start the function, declaring that we’re going to return a DataTable.
Function getTheData() As DataTable With the first line of the function we create a new DataSet, which will store the data we’ll use.
Dim DS As New DataSet()Next, we define our connection to the Northwind database, and create our actual SQLDataAdapter to return the data.
   Dim strConnect As New SQLConnection("server=localhost;

   uid=sa;pwd=;Database=Northwind")

   Dim objSQLAdapter As New SQLDataAdapter("SELECT companyName,

   contactName, contactTitle FROM customers", strConnect)
On the next line of the function, we fill the DataSet with data from the customers table and then, on the last line, we return a copy of the DataTable.
objSQLAdapter.Fill(DS, "customers")


Return DS.Tables("customers").Copy
What this means is that we’ve separated the data retrieval from the actual paging functionality. Therefore, if we ever had to change the data, we could do it in this function — without affecting the paging code!
The paging code will more or less be the same as before; the only change we have to make is to remove the code for the HashTable and access the function we just covered. So the new code will look like this:
Sub doPaging()

   pagedData.DataSource = getTheData().DefaultView

   pagedData.AllowPaging = True

   pagedData.PageSize = 5


   Try

      pagedData.CurrentPageIndex = Int32.Parse

      (Request.QueryString("Page")).ToString()

   Catch ex As Exception

      pagedData.CurrentPageIndex = 0

   End Try


   btnPrev.Visible = ( NOT pagedData.IsFirstPage )

   btnNext.Visible = ( NOT pagedData.IsLastPage )


   theDataList.DataSource = pagedData

   theDataList.DataBind()

End Sub
The line we edited is the one in bold, where, as you can see, we added a call to the data function. As the function returns a DataTable, we don’t need to worry about anything else.
Almost there! Our last call of the day is creating the Web Form to display the page:
<form runat="server">
<font size="-1" face="Verdana, Arial, Helvetica, sans-
serif"><asp:label id="pageNumber" runat="server" /></font>
<asp:DataList id="theDataList" runat="server">
<ItemTemplate>
<table border="0" cellpadding="0" cellspacing="0"
width="500">
<tr>
<td width="140"><font size="-1" face="Verdana, Arial,
Helvetica, sans-serif"><strong>Company Name</strong>:</font></td>
<td><font size="-1" face="Verdana, Arial, Helvetica,
sans-serif"><%# DataBinder.Eval(Container.DataItem, "companyName")
%></font></td>
</tr>
<tr>
<td width="110"><font size="-1" face="Verdana, Arial,
Helvetica, sans-serif"><strong>Contact Name</strong>:</font></td>
<td><font size="-1" face="Verdana, Arial, Helvetica,
sans-serif"><%# DataBinder.Eval(Container.DataItem, "contactName")
%></td>
</tr>
<tr>
<td width="110"><font size="-1" face="Verdana, Arial,
Helvetica, sans-serif"><strong>Contact Title</strong>:</font></td>
<td><font size="-1" face="Verdana, Arial, Helvetica,
sans-serif"><%# DataBinder.Eval(Container.DataItem, "contactTitle")
%></font></td>
</tr>
</table>
</ItemTemplate>
<separatortemplate>
<hr color="#0099FF" />
</separatortemplate>
</asp:DataList>
<asp:LinkButton id="btnPrev" Text="<" OnClick="Prev_Click"
runat="server" />
<asp:LinkButton id="btnNext" Text=">" OnClick="Next_Click"
runat="server" />
</form>And that’s it! We keep the Page_Load sub routine and the line to declare the PagedDataSource object the same as before:
Dim pagedData As New PagedDataSource


Sub Page_Load(byVal obj As Object, byVal e As EventArgs)

   doPaging()

End Sub
It’s that simple to add paging functionality to a DataList. If you wanted the above to be a Repeater list, all you’d have to do would be to replace the DataList tags with Repeater.
Something Like Homework
As I said before, the PagedDataSource also works with RadioButton, CheckBox and DropDown lists. Try it out — I’m not 100% sure what actual functionality that will offer, but it’s handy to know.
There’s a whole host of things you can do with this object:
- have page numbers as well as the Previous/Next buttons,
- have a Previous/Next 10 button or
- have a jump to the end button.
All these tasks can be easily accomplished using the PagedDataSource object.
You can also download all the code used in this article in a handy zip. The examples are in three languages: VB.NET, C# and Jscript.NET. So there’s something for everyone!
Signing Off
The .NET Framework is packed full of classes like these, that are aimed at making your life easier — it’s just a matter of finding and working with them. For this, I use the .NET Framework SDK Documentation. When you have some spare time, have a browse through and see what other useful classes you can find!
Frequently Asked Questions (FAQs) about ASP.NET’s PagedDataSource
What is the main function of PagedDataSource in ASP.NET?
PagedDataSource is a class in ASP.NET that provides paging functionality to data-bound controls. It allows you to display your data in a paginated format, which is particularly useful when dealing with large amounts of data. By using PagedDataSource, you can control the number of records displayed per page, navigate through pages, and manage the overall presentation of your data.
How do I implement PagedDataSource in my ASP.NET application?
To implement PagedDataSource in your ASP.NET application, you first need to create an instance of the PagedDataSource class. Then, you can set its properties such as DataSource, AllowPaging, PageSize, and CurrentPageIndex. After setting these properties, you can bind the PagedDataSource object to your data-bound control.
Can I use PagedDataSource with different types of data sources?
Yes, PagedDataSource is versatile and can work with various types of data sources. It can be used with collections, lists, data sets, and data views. This makes it a flexible tool for managing and displaying data in your ASP.NET applications.
How can I control the number of records displayed per page using PagedDataSource?
You can control the number of records displayed per page by setting the PageSize property of the PagedDataSource object. This property determines how many items are displayed on each page.
How does PagedDataSource handle navigation between pages?
PagedDataSource handles navigation between pages using the CurrentPageIndex property. This property gets or sets the index of the current page. You can increment or decrement this value to navigate to the next or previous page.
Can I sort data using PagedDataSource?
PagedDataSource does not directly support sorting. However, you can sort your data before assigning it to the DataSource property of the PagedDataSource object. This way, your paginated data will be displayed in a sorted manner.
How can I filter data using PagedDataSource?
Similar to sorting, PagedDataSource does not directly support filtering. But you can filter your data before assigning it to the DataSource property. This allows you to display only the data that meets certain criteria.
Can I use PagedDataSource with data-bound controls other than GridView?
Yes, PagedDataSource can be used with any data-bound control in ASP.NET. This includes controls like DataList, Repeater, and ListView. This makes PagedDataSource a flexible tool for managing paginated data in various scenarios.
How does PagedDataSource handle large amounts of data?
PagedDataSource handles large amounts of data by dividing it into smaller, manageable pages. This not only improves the performance of your application but also enhances the user experience by making the data easier to navigate and understand.
Can I customize the appearance of pages using PagedDataSource?
While PagedDataSource does not directly control the appearance of pages, you can customize the appearance of your data-bound control to change how the pages look. This includes customizing the layout, styles, and templates of the control.
Chris works as a Web Developer for a Scottish based web design firm, and is a partner at NMC Group, Inc.. His pride and joy, apart from his fiancee, is his e4ums site, which offers free ASP applications.


