Use Channels To Create A Silhouette In Photoshop
In recent times silhouettes have been associated with the Apple iPod ads, but they have been used as an eyecatching graphic design device for years in everything from logos to poster design. This tutorial is in two parts, the first part is how to select the object you want to make a silhouette from using Channels, the second part is how to create that silhouette and add a color layer.
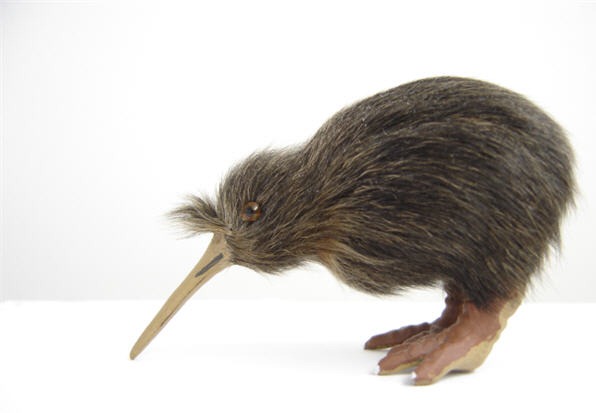
1. Open an image that contains an object that you want to turn into a silhouette. I’m using an image of a cute little kiwi by mmgallen which is free to download from Stock Xchng.
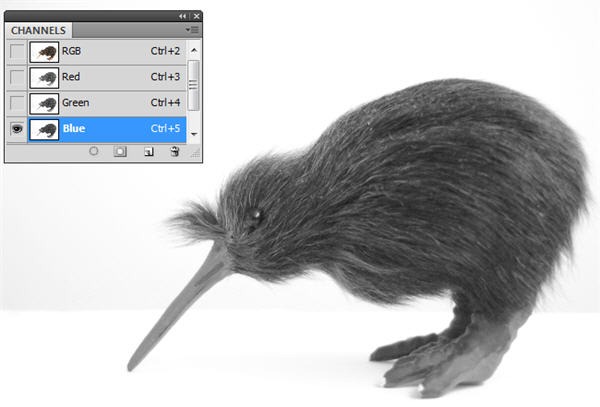
2. Open the Channel panel and click through each Channel (Red, Green and Blue) to see where the kiwi appears darkest. Usually this is the blue channel.
3. Duplicate the blue channel by Right-Clicking (PC) or Ctrl-clicking (Mac) the channel in the Channels panel and select Duplicate Channel from the shortcut menu. We’re duplicating it so that any changes we make will not adversely affect the original image. Photoshop puts the duplicate channel at the bottom of your Channels panel and names it “Blue copy.”
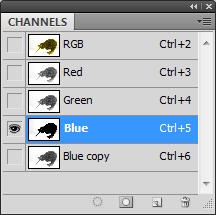
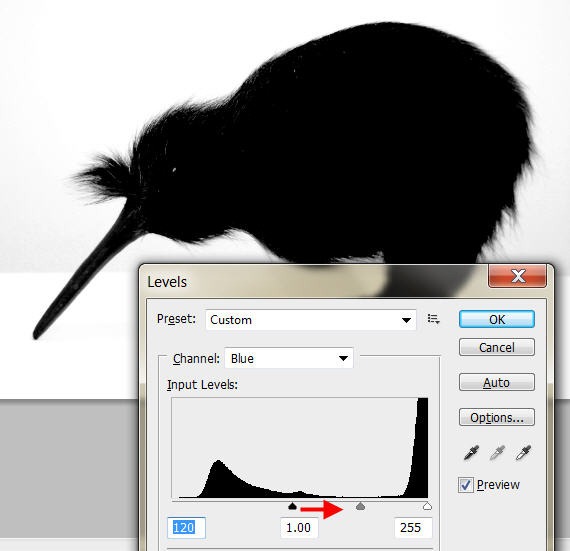
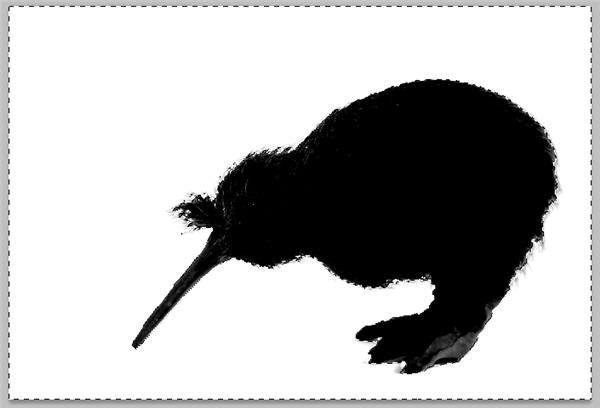
4. Choose Image > Adjustments > Levels to adjust the duplicate blue channel’s Levels to make the kiwi black and the background completely white. To make the kiwi darker, in the
Input Levels section of the dialog box, drag the shadows slider (the little black triangle) to the right until the kiwi turns almost black. Don’t close the Levels dialog box yet.
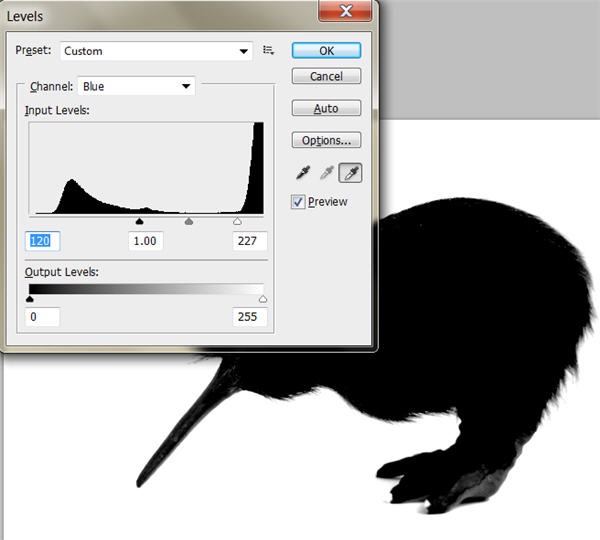
5. Using the white eyedropper on the right side of the dialog box, click on the blue gray background to make it white. This technique is known as “resetting the white point. Click once to select the eyedropper mouse over to your document, and then click a gray part of the background. Keep clicking on different gray areas until the background is white. When you’re finished,
click OK to close the Levels dialog box.
6. If you want to you can easily, touch up the kiwi with black paint and the background with white paint, but you should have a fairly good black and white image now.
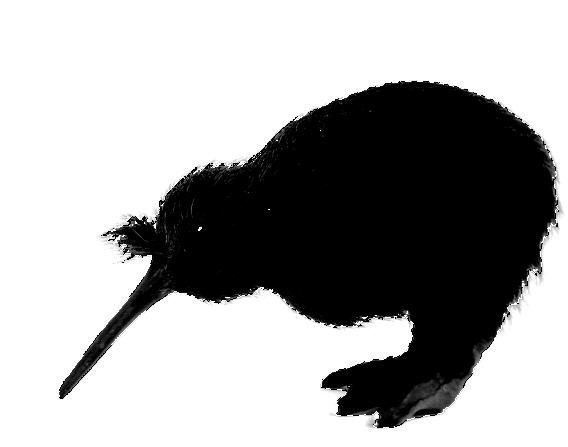
7. In the Channels panel, load the duplicate blue channel as a selection by Ctrl-clicking (PC) or -clicking (Mac) the channel’s thumbnail or clicking the “Load channel
as selection” button (the dotted circle) at the bottom of the panel.
This makes a selection around the background of the image, so choose Select > Inverse to make the selection go around your Kiwi instead of the whole document. That completes our selection setup using the Channels. This is a good way to make some fairly intricate selections, note the little hairy bits on the kiwi’s behind which would be quite difficult to select with a selection tool.
9. In the Channels panel, turn on the composite channel (RGB) so you can see the full color version of your image and hide the duplicate blue channel.
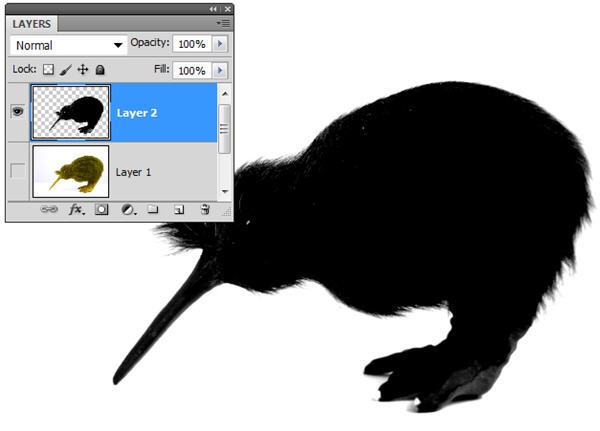
10. Add a new layer at the top of your layers stack by clicking the “Create a new layer” button at the bottom of the panel. Then drag the new layer to the top of the layers stack and turn
off the visibility of the original photo layer.
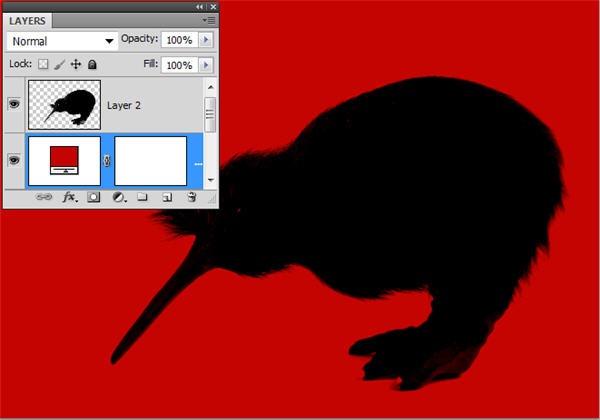
11. Fill your selection with black by choosing Edit > Fill and pick black from the Use popup menu, and then click OK to close the Fill dialog box. Your silhouette is finished. Now you can add any color background you like.
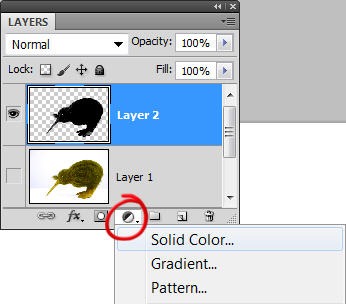
12. At the bottom of your Layers panel and click the Adjustment layer icon. Choose Solid Color from the menu that appears to make Photoshop
open the Color Picker; pick a bright color and then click OK.
13. Drag the new Fill layer below the silhouette layer in the layers stack.
If you want to go back and change the background color simply double-click the Solid Color Fill layer and pick a new color from the resulting Color Picker.
To finish up, I added some text on top of black rectangle.
As a final step you could sharpen the silhouette by using the Unsharp mask. Choose Filter > Sharpen > Unsharp Mask. Et voila!
Frequently Asked Questions about Creating a Silhouette in Photoshop
How can I create a silhouette from a colored image in Photoshop?
To create a silhouette from a colored image in Photoshop, you first need to open the image in Photoshop. Then, select the subject of your image using the Quick Selection Tool or the Pen Tool. Once you have your subject selected, create a new layer and fill the selection with black color. This will create a silhouette of your subject. You can then remove the original layer to have a clean silhouette on a transparent background.
Can I create a silhouette with a specific color other than black?
Yes, you can create a silhouette with any color you want. After selecting your subject, instead of filling the selection with black, you can choose any color you want. This will create a silhouette in the color of your choice.
How can I create a silhouette with a gradient effect?
To create a silhouette with a gradient effect, you need to first create a silhouette as described above. Then, select the Gradient Tool and choose the colors you want for your gradient. Apply the gradient to your silhouette by dragging the Gradient Tool across it.
How can I create a silhouette from a complex image with multiple subjects?
Creating a silhouette from a complex image with multiple subjects can be a bit tricky. You need to select each subject individually using the Quick Selection Tool or the Pen Tool. Once you have all your subjects selected, you can create a new layer and fill the selection with black to create a silhouette.
Can I create a silhouette from a black and white image?
Yes, you can create a silhouette from a black and white image. The process is the same as creating a silhouette from a colored image. You just need to select your subject and fill the selection with black.
How can I create a silhouette with a textured background?
To create a silhouette with a textured background, you first need to create a silhouette as described above. Then, open the texture image in Photoshop and drag it to your silhouette image. Position the texture layer below the silhouette layer to create a silhouette with a textured background.
How can I create a silhouette with a transparent background?
To create a silhouette with a transparent background, you need to first create a silhouette as described above. Then, hide or delete the original layer to have a clean silhouette on a transparent background.
Can I create a silhouette from a photo with a busy background?
Yes, you can create a silhouette from a photo with a busy background. However, it might be a bit difficult to select the subject. You can use the Quick Selection Tool or the Pen Tool to carefully select your subject.
How can I create a silhouette with a shadow effect?
To create a silhouette with a shadow effect, you first need to create a silhouette as described above. Then, duplicate the silhouette layer and apply a black color overlay to it. Use the Transform Tool to skew and position the duplicate layer to create a shadow effect.
Can I create a silhouette from a low-resolution image?
Yes, you can create a silhouette from a low-resolution image. However, the quality of the silhouette might not be as good as from a high-resolution image. The edges of the silhouette might be pixelated or blurry.
Jennifer Farley is a designer, illustrator and design instructor based in Ireland. She writes about design and illustration on her blog at Laughing Lion Design.
