


One of nicest features of Java is its rich, multifaceted nature. Sure, building traditional desktop and even mobile applications is all well and fine. But what if you want to leave your current background behind and start stepping on the web terrain? The good news is that the language ships with the fully-fledged Servlet API, which lets you build robust web applications without much hassle.
The question that must be spinning in your mind now is “How?”, am I right?
Key Takeaways
- Java Servlets serve as a dynamic, robust solution for handling web requests and responses, allowing developers to manipulate data like cookies, session parameters, and perform server-side processing before sending responses back to clients.
- The deployment descriptor (web.xml) is crucial in defining servlet behaviors and environment settings, ensuring that applications deploy correctly within servlet containers like Tomcat or Jetty.
- Effective use of Java Server Pages (JSP), Java Standard Tag Library (JSTL), and Java Expression Language (JEL) simplifies the creation of dynamic web content, enabling developers to easily display data and handle errors in web forms.
- Building a web application with servlets involves setting up a Maven project to manage dependencies, creating servlets to process user data, and configuring JSP views to handle user interaction and display results.
- The article provides a practical example of developing a simple web application that allows user registration and data validation, demonstrating the power and simplicity of using servlets and JSP without the need for more complex frameworks.
A Quick and Dirty Introduction to Java Servlets
Enter servlets, a specific type of Java program executed within the scope of a web container (also called servlet containers, Tomcat and Jetty are prime examples), which allows to handle client requests and server responses in a straightforward and performant fashion. This isn’t the place and time for boring you to tears with academic definitions on what a servlet is. Suffice it to say that servlets are instantiated and destroyed by their containers instead of the developer and act as a middle layer between clients (usually web browsers) and other applications running on the server (databases, for example).
Servlets are powerful creatures, which, among other nifty things, can grab data from the client, typically through GET and POST requests, handle cookies and session parameters, process the data via additional application layers, and send the output back to the client in both text and binary formats (HTML, XML, PDF, JPG, GIF, and so on), in many cases by using a Java Server Pages (JSP) file.
The best way to get started using servlets is with a concrete example. Thus, in the next few lines I’m going to build up a simple web application that will let customers sign up using a plain HTML form. Data submitted by customers will be collected by a servlet and validated at a very basic level through some static helpers.
Consuming the HTTP Client-Server Model
To have a clear idea on how the customer application will be structured, here’s how it will be laid out:
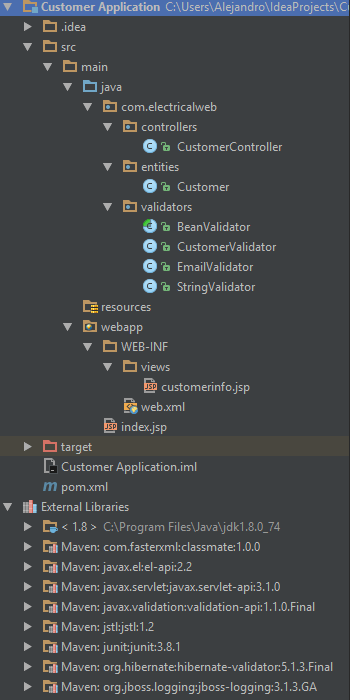
Nothing unexpected, right? But first things first.
The first step we need to take to build the application is to define the so-called deployment descriptor (DD). As the name suggests, it specifies how an application should be deployed in a specific environment. Not surprisingly when it comes to web applications, the deployment descriptor is a plain XML file called web.xml and is part of the standard Java EE specification. In this particular case, it’ll look like this:
<?xml version="1.0" encoding="UTF-8"?>

<web-app version="3.1"
             xmlns="http://xmlns.jcp.org/xml/ns/javaee"
             xmlns:xsi="https://www.w3.org/2001/XMLSchema-instance"
             xsi:schemaLocation="http://xmlns.jcp.org/xml/ns/javaee http://xmlns.jcp.org/xml/ns/javaee/web-app_3_1.xsd"
             metadata-complete="false">

</web-app>
As shown above, the web.xml file contains no directives at all and only defines the version of the Java Servlet Specification (3.1) that we’ll be using across the application. It can of course hold a lot more content, including servlet mapping directives, intialization parameters, a list of welcome files and a few additional settings. But to keep the whole development process easy to follow, I’ll keep the file that simple.
Since the sample application will consume the Servlet API and also use Java Server Pages for displaying customer data, we need to grab all the required JARs. Maven will do the tough work for us, so here’s how the POM file will be defined:
<project xmlns="http://maven.apache.org/POM/4.0.0" xmlns:xsi="https://www.w3.org/2001/XMLSchema-instance"
             xsi:schemaLocation="http://maven.apache.org/POM/4.0.0 http://maven.apache.org/maven-v4_0_0.xsd">
    <modelVersion>4.0.0</modelVersion>
    <groupId>com.electricalweb.customerapplication</groupId>
    <artifactId>customerapplication</artifactId>
    <packaging>war</packaging>
    <version>1.0-SNAPSHOT</version>
    <name>Customer Application</name>
    <url>http://maven.apache.org</url>

    <dependencies>
        <dependency>
            <groupId>junit</groupId>
            <artifactId>junit</artifactId>
            <version>4.12</version>
            <scope>test</scope>
        </dependency>

        <dependency>
            <groupId>javax.servlet</groupId>
            <artifactId>javax.servlet-api</artifactId>
            <version>3.1.0</version>
        </dependency>

        <dependency>
            <groupId>jstl</groupId>
            <artifactId>jstl</artifactId>
            <version>1.2</version>
        </dependency>

        <dependency>
            <groupId>javax.el</groupId>
            <artifactId>el-api</artifactId>
            <version>2.2</version>
        </dependency>
    </dependencies>

    <build>
        <finalName>Customer Application</finalName>
    </build>
</project>
In a nutshell, the pom.xml file defines all the dependencies required for working with servlets: JSP, the Java Standard Tag Library (JSTL), and the Java Expression Language (JEL).
At this point, we’ve managed to create the customer app configuration files. However, in its current state the application literally does nothing. Yikes! Since the primary goal here is to let customers sign up using an HTML form, the next thing we need to do is to define the JSP files tasked with rendering the aforementioned form and with displaying customer data once the signup process has been successfully completed. That’s exactly the topic covered in the next section.
Creating the Sign-up and Welcome Views
The presentation layer will be made up of two JSP files – in an MVC context, these are called views. The first one will be responsible for rendering the signup form and for displaying eventual errors triggered after validating the inputted data. The second one will be a typical welcome page, which will show the data submitted by the customer after successfully completing the signup process.
Here’s the first JSP file:
<%@ taglib prefix="c" uri="http://java.sun.com/jsp/jstl/core" %>
<!DOCTYPE html>
<html lang="en">
<head>
    <meta charset="UTF-8">
    <title>Customer Sign Up</title>
</head>
<body>
    <h1>Customer Sign Up</h1>

    <c:if test="${violations != null}">
        <c:forEach items="${violations}" var="violation">
            <p>${violation}.</p>
        </c:forEach>
    </c:if>

    <form action="${pageContext.request.contextPath}/processcustomer" method="post">
        <label for="firstname">First Name : </label>
        <input type="text" name="firstname" id="firstname" value="${firstname}">
        <label for="lastname">Last Name:</label>
        <input type="text" name="lastname" id="lastname" value="${lastname}">
        <label for="email">Email: </label>
        <input type="text" name="email" id="email" value="${email}">
        <input type="submit" name="signup" value="Sign Up">
    </form>
</body>
</html>
The file contains plain HTML with a few tweaks. That’s the beauty of the JSP technology when coupled to JSTL and JEL. Notice how easy it is to check for validation violations and loop over them at the top of the file by using standard tags, like <c:if> and <c:forEach>.
The signup form’s action attribute points to the following URL: ${pageContext.request.contextPath}/processcustomer. In short, this means each time a customer tries to sign up, the data will be submitted to processcustomer regardless of the application’s context path. So no matter under which URL the signup form will eventually be available, the action’s URL is always relative to that. This is achieved thanks to the functionality of objects accessible from within a JSP file, such as request.
We will see below how the servlet is mapped to the processcustomer URL and how it controls the inputted data. But before I define the servlet in question, here’s the JSP file that renders the welcome page:
<%@ taglib prefix="c" uri="http://java.sun.com/jsp/jstl/core" %>
<!DOCTYPE html>
<html lang="en">
<head>
    <meta charset="UTF-8">
    <title>Customer Data</title>
</head>
<body>
    <h1>Thanks for signing up with us!</h1>
    <h2>You provided the following data:</h2>
    <p><strong>First Name:</strong> ${firstname}</p>
    <p><strong>Last Name:</strong> ${lastname}</p>
    <p><strong>Email: </strong>${email}</p>
</body>
</html>
So far, so good. With the presentational layer already set, the next step is to create the servlet responsible for collecting customer data from POST requests and validate the data in a basic fashion.
Building a Customer Controller
Defining a servlet capable of grabbing the data entered in the previous signup form is a breeze, trust me. All that we need to do is subclass the native HttpServlet class and implement its doGet() or doPost() methods (or both when required). In this particular case, the customer servlet will intercept data coming from POST requests.
Its definition is as follows:
@WebServlet(name = "CustomerController", urlPatterns = "/processcustomer")
public class CustomerController extends HttpServlet {

    @Override
    protected void doPost(
            HttpServletRequest request, HttpServletResponse response)
            throws ServletException, IOException {

        RequestCustomer customer = RequestCustomer.fromRequestParameters(request);
        customer.setAsRequestAttributes(request);
        List<String> violations = customer.validate();

        if (!violations.isEmpty()) {
            request.setAttribute("violations", violations);
        }

        String url = determineUrl(violations);
        request.getRequestDispatcher(url).forward(request, response);
    }

    private String determineUrl(List<String> violations) {
        if (!violations.isEmpty()) {
            return "/";
        } else {
            return "/WEB-INF/views/customerinfo.jsp";
        }
    }

    private static class RequestCustomer {

        private final String firstName;
        private final String lastName;
        private final String email;

        private RequestCustomer(String firstName, String lastName, String email) {
            this.firstName = firstName;
            this.lastName = lastName;
            this.email = email;
        }

        public static RequestCustomer fromRequestParameters(
            HttpServletRequest request) {
            return new RequestCustomer(
                    request.getParameter("firstname"),
                    request.getParameter("lastname"),
                    request.getParameter("email"));
        }

        public void setAsRequestAttributes(HttpServletRequest request) {
            request.setAttribute("firstname", firstName);
            request.setAttribute("lastname", lastName);
            request.setAttribute("email", email);
        }

        public List<String> validate() {
            List<String> violations = new ArrayList<>();
            if (!StringValidator.validate(firstName)) {
                    violations.add("First Name is mandatory");
            }
            if (!StringValidator.validate(lastName)) {
                    violations.add("Last Name is mandatory");
            }
            if (!EmailValidator.validate(email)) {
                    violations.add("Email must be a well-formed address");
            }
            return violations;
        }

    }

}
The first point to stress here is the use of the @WebServlet(name = "CustomerController", urlPatterns = "/processcustomer") annotation. It tells the servlet container to use the CustomerController class to handle HTTP requests to the /processcustomer URL. It’s possible to achieve the same behavior by including servlet mapping directives in the web.xml file, as shown here, but since I’m using the Servlet Specification 3.1, there’s not need to resort to mapping directives in the deployment descriptor. Just plain class-level annotations handle the mapping process for us.
In this case, I named the servlet CustomerController as I’m clinging to a basic Model – View – Controller schema, hence the servlet behaves like a typical action controller. It’s feasible, however, to name it anything else, as long as the naming convention is consistent across the application. In general, it’s considered good practice to use the servlet class name as value for the @WebServlet annotation’s name attribute. Otherwise, some servlet containers will fail to do the mapping and throw an ugly HTTP status 404 error, telling you that the requested resource (the servlet itself) is not available.
That said, the CustomerController class itself performs a few simple tasks. First of all, it collects the data entered in the signup form by using an implementation of the native HttpServletRequest interface, which holds the values corresponding to the firstname,lastname and email fields of the signup form. Secondly, it sets these values as request attributes, so they can be redisplayed either in the signup form view, or in the result view. Lastly, the data is validated by using a couple of static helpers, which check for empty strings and well-formed email addresses.
The validators themselves are simple classes, checking a couple of desired properties, for example whether the name is non-empty and the email address looks like, well, an email address. If you want to know how they are implemented, you can look at them here.
The result of the validation process basically controls the application’s flow: If the data isn’t valid, the customer is forwarded through a request dispatcher object to the signup form view, and the errors are shown right there. Otherwise, the welcome page is rendered, as the customer has successfully signed up.
At this point we’ve built a fully-functional web application that lets customers register by using an HTML form, a basic servlet, and a couple of JSP files. Maybe the biggest pitfall here is the use of static helpers for checking customer data instead of appealing to a standard approach, such as validating domain objects and even entire object graphs by using Java Bean Validation. The details on how to do this will be left as the topic of an upcoming article.

Running the app
If you’re anything like me, you should feel eager to run the application on your own development platform, that way can see for yourself if it works as sweet as I promised you at face value. To do so, just follow the steps below:
-
As prerequisites you need Git (make sure to pick up the version that works with your operating system), Maven, and a servlet container (among others, Apache Tomcat, Jetty, or JBoss Wildfly). It is possible that your IDE ships with one or more of these systems, in which case you can use the embedded versions.
-
Use Git to clone the application repository to your local machine and import it into your IDE, preferably as a Maven project.
-
Deploy the whole project to the servlet container and run it. Deploying the project means building a WAR file (Web archive) or an exploded WAR (aka exploded deployment) and placing it in the servlet container’s default deployment folder. In many cases your IDE will deploy the project automatically for you, whenever you hit the Run button, so don’t mess up your life trying perform this task manually unless you have to. Check your IDE’s documentation for details (here it is for IntelliJ IDEA. Once the project has been properly deployed, and if everything goes as expected, the default browser will pop up and you’ll see the customer signup form.
-
Try submitting the form with no values at all, or even with some missing values (there’s plenty of room to experiment here). You’ll see the errors nicely displayed on top of the form according to the offending inputs. Finally, if you’re nice and provide the mandatory data, you’ll be confronted with the welcome page.
Feel free to pat yourself in the back. Congratulations! You’ve developed a fully-functional Java web application.
Final Thoughts
At this point you have acquired all the skills required to kick off building your own Java web application and, best of all, without having to resort to the complexities of any framework at all. All you need is to consume the Servlet API, use some kind of rendering technology, such as JSP and plain Java. Isn’t that great?
It’s worth noting that the implementation of the CustomerController class highlights the virtues and flaws exposed by servlets: On one hand it shows in a nutshell how easy it is to handle request parameters and send responses back to the client in different formats. But this functionality comes at a price: Both implementations of the HttpServletRequest and HttpServletResponse interfaces are plain service locators. This is not inherently bad, as the locators are just data holders. Unfortunately, whenever you drop a servlet into your application scope, you’ll have those implementations coupled to it.
If you want to give the customer application a try and play around with it, just clone the repository from GitLab. Feel free to leave me your comments. I’ll try to reply as soon as possible.
Frequently Asked Questions (FAQs) about Building Web App with Java Servlets
What are the prerequisites for building a web app with Java Servlets?
Before you start building a web app with Java Servlets, you need to have a basic understanding of Java programming language, HTML, and HTTP protocol. You should also have Java Development Kit (JDK) and a Java-enabled server like Apache Tomcat installed on your system. Familiarity with Integrated Development Environment (IDE) like Eclipse or IntelliJ IDEA can also be beneficial.
How do I set up my development environment for Java Servlets?
Setting up your development environment involves installing JDK and a Java-enabled server like Apache Tomcat. You also need to set up an IDE like Eclipse or IntelliJ IDEA. After installing these, you need to configure your IDE to recognize the Java Servlet API and the server.
What is the role of a servlet in a web application?
A servlet acts as a middle layer between a request coming from a web browser or other HTTP client and databases or applications on the HTTP server. It is used to extend the capabilities of servers that host applications accessed by means of a request-response programming model. Servlets are capable of handling complex requests obtained from web servers.
How do I create a servlet in Java?
Creating a servlet in Java involves several steps. First, you need to create a new Java class that extends the HttpServlet class. Then, you need to override doGet() or doPost() methods from the HttpServlet class. These methods will handle GET and POST requests respectively.
How do I deploy a servlet?
To deploy a servlet, you need to create a deployment descriptor file (web.xml) in the WEB-INF directory of your web application. This file is used to map servlets to URL patterns. After creating this file, you can deploy your web application on a server like Apache Tomcat.
What is the servlet life cycle?
The servlet life cycle consists of three main phases: initialization, service, and destruction. In the initialization phase, the servlet is loaded and initialized. In the service phase, the servlet handles zero or more client requests. In the destruction phase, the servlet is unloaded.
How do I handle form data in a servlet?
Form data can be handled in a servlet by using the request object’s getParameter() method. This method returns the value of a request parameter as a String.
How do I manage sessions in a servlet?
Sessions in a servlet can be managed using HttpSession interface. This interface provides a way to identify a user across multiple page requests.
How do I send a redirect from a servlet?
You can send a redirect from a servlet by using the response object’s sendRedirect() method. This method sends a temporary redirect response to the client using the specified redirect location URL.
How do I handle exceptions in a servlet?
Exceptions in a servlet can be handled using the Java exception handling mechanism. You can use a try-catch block to catch exceptions. You can also use the @WebServlet annotation’s errorPage attribute to specify an error page for a servlet.