

Applications which can work online and offline are an advantage to mobile users. For example, someone traveling by air generally has no internet connection. With a well designed app they can still work in offline mode and synchronize the offline data with an application server.
Key Takeaways
- PouchDB is an open-source JavaScript database that facilitates the development of applications that can function in both online and offline modes. It stores data in HTML 5 local storage and session storage objects when offline and synchronizes changes to a central database when online.
- The tutorial guides through creating an expense logger mobile application using the IONIC framework and PouchDB for the backend. The app allows users to add expense items and amounts, which are stored locally when offline and replicated to a remote server when online.
- The tutorial uses CouchDB for the server-side database. It is installed and set up to allow cross-domain requests from PouchDB. The data is saved in the local PouchDB database (dbLocal) and replicated to the remote CouchDB database (dbRemote) when online.
- The tutorial demonstrates the use of PouchDB’s put API to create new documents, allDocs API to fetch documents, and replicate API to replicate data to the remote server. It also illustrates the implementation of an AngularJS factory service, a controller, and a user interface for adding expense items.
How Does This Work?
When the application is offline, the data is stored using HTML 5 local storage and session storage objects to store data in the browser or WebView. When the application is online, its programming logic will synchronize changes to a central database.
PouchDb
PouchDb is an open source JavaScript database inspired by CouchDb which helps developers build applications that work in offline and online modes.
What We’;Ll Build
We’ll be using the IONIC framework to create an expense logger mobile application making use of PouchDB for the back end.
The source code for this tutorial is available on GitHub.
Getting Started
Start by installing IONIC using the node package manager (npm).
npm install -g cordova ionicOnce IONIC has installed, create a blank project called iPouch.
ionic start iPouch blankNavigate to the project directory and install the required dependencies.
cd iPouch
npm install
Run the following command in the terminal to start the app in the web browser
ionic serveDownload and add the PouchDB JavaScript to the iPouch/www/js folder.
Add a reference to the pouchdb-4.0.x.min.js script in the iPouchDb/www/index.html page.
<script src="js/pouchdb-4.0.0.min.js"></script>(replacing x with the current version number)
Setting up CouchDb
Use of your platforms package manager of choice to install CouchDb.
sudo apt-get install couchdb // For Ubuntu
brew install couchdb  //  For MAC
And start couchdb with the couchdb command.
To allow cross domain requests from PouchDb to CouchDb we need to install add-cors-to-couchdb.
npm install -g add-cors-to-couchdbOnce installed enable the CORS by running the following command:
add-cors-to-couchdbCouch Db should be running at port 5984. Try browsing http://localhost:5984/ .
Adding the PouchDb Service
Let’s start by creating a controller for our application. Add a file called controller.js to the iPouch/js folder. Add a reference to the controller in index.html:
<script type="text/javascript" src="js/controller.js"></script>Inside controller.js define a module called starter.controllers.
angular.module('starter.controllers', ['ionic'])Define a controller called HomeCtrl.
.controller('HomeCtrl', ['$scope', function($scope) {

}])
Create an AngularJS factory service which will return the PouchDb object.
.factory('pouchdb', function() {
  return new PouchDB('myApp');
});
Inject the pouchdb service into HomeCtrl and create a new pouch database for both the local pouch db and the remote couch db.
.controller('HomeCtrl', ['$scope','pouchdb', function($scope,pouchdb) {

    var dbLocal = new PouchDB('dbname');

    var dbRemote = new PouchDB('http://localhost:5984/dbname');
}])
Here is the complete controller.js file so far.
angular.module('starter.controllers', ['ionic'])

.controller('HomeCtrl', ['$scope','pouchdb', function($scope,pouchdb) {

    var dbLocal = new PouchDB('dbname');

    var dbRemote = new PouchDB('http://localhost:5984/dbname');
}])

.factory('pouchdb', function() {
  return new PouchDB('myApp');
});
Add the starter.controllers module to application by injecting the module in app.js.
angular.module('starter', ['ionic','starter.controllers'])Add Expense Tracking Functionality
Let’s start creating a user interface for adding expense items and amounts. Open www/index.html and change the existing body content as shown below :
<body ng-app="starter" ng-controller="HomeCtrl">
<ion-pane>
<ion-header-bar class="bar-stable">
<h1 class="title">Expense Checker</h1>
<button class="button" ng-click="openModal()">Add</button>
</ion-header-bar>
</ion-pane>
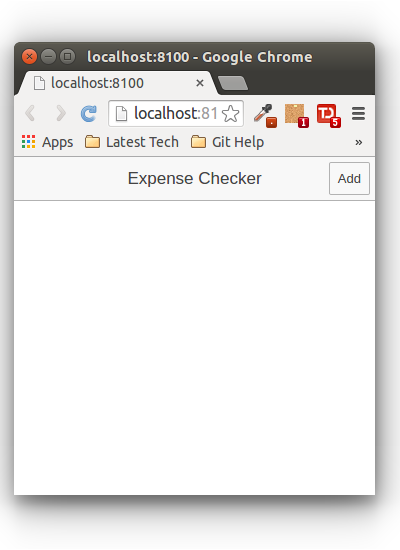
</body>Here we created a home page with the header button on the right side of the screen. We added a click event on the button which will open a modal window. Save the changes and you should be able to view the home screen.
We’ll use IONIC modals to show the modal pop up. Add the following template code for a modal pop up to the index.html page after the ion-pane ending tag.
<script id="my-modal.html" type="text/ng-template">

    <ion-modal-view>
        <ion-header-bar>
            <h1 class="title">Add Expense</h1>
        </ion-header-bar>
        <ion-content>


            <div class="list">
                <label class="item item-input">
                    <input type="text" ng-model="item.expense" placeholder="Expense">
                </label>
                <label class="item item-input">
                    <input type="number" ng-model="item.amount" placeholder="Amount">
                </label>
                <button ng-click="add()" class="button button-full button-positive">
                    Add Expense
                </button>

            </div>
        </ion-content>
    </ion-modal-view>
</script>
To show the modal, inject $ionicModal into the controller.
.controller('HomeCtrl',['$scope','pouchdb','$ionicModal',function($scope,pouchdb,$ionicModal)Initialize the modal pop inside the HomeCtrl controller.
$ionicModal.fromTemplateUrl('my-modal.html', {
    scope: $scope,
    animation: 'slide-in-up'
}).then(function(modal) {
    $scope.modal = modal;
});
Add two functions inside the HomeCtrl to show and close the modal pop up.
$scope.openModal = function() {
    $scope.modal.show();
};

$scope.closeModal = function() {
    $scope.modal.hide();
};

$scope.$on('$destroy', function() {
        $scope.modal.remove();
});
In the above code I have an extra destroy event call to clean up the modal pop up. Here is how the pop up looks:

Define the add function to add the data to pouchdb.
$scope.add = function(){
    // Code would be here !!
};
We’ll make use of the db.put() API to create a new document in pouchdb. Start by creating an item object to save.
var timeStamp = String(new Date().getTime());

var item = {
        "_id": timeStamp,
        "expense": $scope.item.expense,
        "amount": $scope.item.amount
};
Once we have the item object, we’ll post it to pouchdb. On success we’ll add the item to the items array which will later populate the display.
dbLocal.put(
    item
).then(function (response) {
    $scope.items.push(item);   // Add to items array
    $scope.closeModal();      // Close the modal
}).catch(function (err) {
    console.log(err);
});
Once the data is added we’ll use the db.allDocs API to fetch the documents added to pouchdb. Inside the Home controller add the following code to get all documents from pouchdb.
dbLocal.allDocs({
    include_docs: true
}).then(function(result) {
   console.log(result)
}).catch(function(err) {
    console.log(err);
});
We’ll iterate through the results and push item objects into an items array. Define an items array in the Home controller.
$scope.item = {};
$scope.items = [];
Iterate through the results received, creating and inserting an item object into the array list. Update dbLocal.allDocs to the following:
dbLocal.allDocs({
    include_docs: true
}).then(function (result) {
    console.log('re    var dbLocal = new s is',result.rows);
    for(var i=0;i<result.rows.length;i++){
        var obj = {
            "_id": result.rows[i].doc.id,
            "expense": result.rows[i].doc.expense,
            "amount": result.rows[i].doc.amount
        }
        $scope.items.push(obj);
        $scope.$apply();
    }
    console.log($scope.items);
}).catch(function (err) {
    console.log(err);
});
$scope.$apply() is to update the bindings. To display the content of items we’ll use the AngularJS ngRepeat directive. In index.html add the following code to display ul element.
<ion-view title="iPouch">
<ion-content>
<ul class="list">
<li ng-repeat="i in items" class="item">
Amount spent on {{i.expense}} is {{i.amount}}
</li>
</ul>
</ion-content>
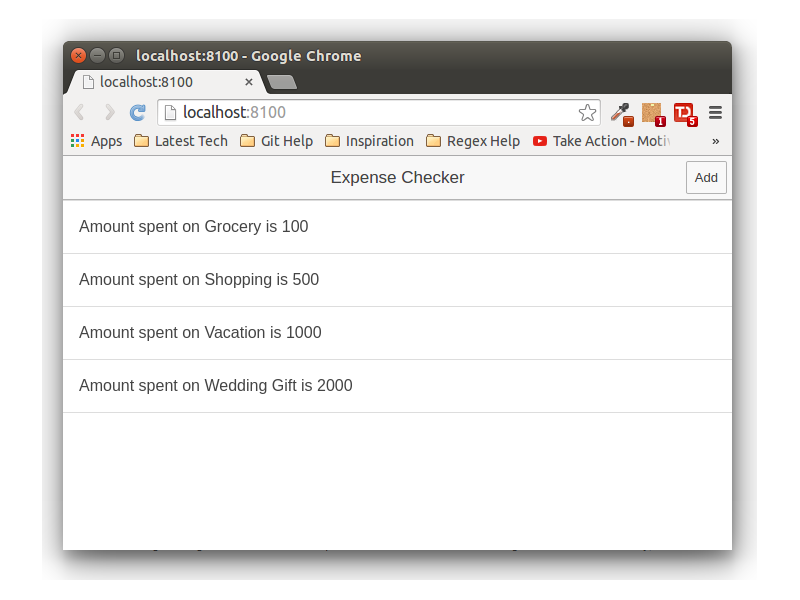
</ion-view>Save the above changes and try adding a new expense using the application. Once added you should be able to view the data on the screen as shown:
Sync Data When Offline
As you would have noticed we have defined two database in the Home controller, dbLocal and dbRemote. We save the data in the dbLocal database which is the pouchdb database. Once we have the data in the local database we can replicate the data to a remote server. This way when the application is offline the data is saved in the local database and when online, replicated to the remote server.
We’ll make use of the replicate API to replicate data to the remote when online. Add the following line of code to replicate data to remote.
dbLocal.replicate.to(dbRemote,{live:true},function(err){
        console.log(err);
});
We have specified the live : true option to allow live replication. Save the above changes and add a new item. Items replicated to the remote couch database are visible using the remote url in browser.
http://localhost:5984/dbnameConclusion
In this tutorial, we learned how to create an IONIC application with a pouchdb back end. We saw how to store data locally when offline and replicate it to the server when online.
Read the pouchdb documentation to get a detailed insight about more of the features available to your application.
Let me know your thoughts, suggestions or corrections in the comments below.
Frequently Asked Questions (FAQs) about Synchronizing Offline App Data with PouchDB
What is the main difference between PouchDB and CouchDB?
PouchDB and CouchDB are both open-source databases, but they serve different purposes. CouchDB is a server-side database that runs on a server, while PouchDB is a client-side database that runs inside a browser. PouchDB was designed to leverage and synchronize with CouchDB seamlessly, enabling applications to work both online and offline.
How does PouchDB handle data synchronization?
PouchDB uses a replication protocol to synchronize data. This protocol is designed to handle data conflicts and interruptions gracefully. When the application goes online, PouchDB automatically syncs the local changes to the remote CouchDB server, ensuring data consistency.
Can I use PouchDB without CouchDB?
Yes, you can use PouchDB without CouchDB. PouchDB is a standalone database that can work independently. However, if you want to sync data between multiple clients or between client and server, you will need a compatible server-side database like CouchDB.
How secure is data stored in PouchDB?
PouchDB uses the same security model as the browser. It relies on the same-origin policy and web storage APIs for data security. However, for sensitive data, it’s recommended to use additional encryption or not store such data in PouchDB at all.
How does PouchDB handle data conflicts?
PouchDB handles data conflicts by keeping multiple revisions of a document. When a conflict occurs, PouchDB keeps both versions of the document and marks one as ‘winning’ based on a deterministic algorithm. Developers can also provide a custom conflict resolution strategy.
What types of applications can benefit from PouchDB?
Applications that need to work offline or have intermittent network connectivity can greatly benefit from PouchDB. This includes mobile apps, Progressive Web Apps (PWAs), and applications deployed in remote or rural areas.
How does PouchDB compare to other client-side databases?
PouchDB stands out for its seamless data synchronization capabilities with CouchDB. It also supports a wide range of browsers and has a simple and intuitive API. However, for applications that don’t need offline capabilities or data sync, other databases might be more suitable.
Can PouchDB handle large amounts of data?
PouchDB can handle a reasonable amount of data, but it’s limited by the storage capacity of the browser. For large datasets, it’s recommended to use a server-side database like CouchDB and sync only necessary data to PouchDB.
How do I start using PouchDB in my application?
To start using PouchDB, you need to include the PouchDB library in your project. You can then create a new PouchDB instance and start using its API to perform CRUD operations. To sync data with CouchDB, you can use the replicate or sync methods.
What are the limitations of PouchDB?
PouchDB is limited by the storage capacity and security model of the browser. It’s also not designed for complex queries or transactions. For applications that need these features, a server-side database or a different client-side database might be more suitable.