Introduction
In the previous article of this series Storing Mobile Positions in a Remote Database we considered the architecture of the application and began by designing the database where we would store mobile positions.
In this second part we’ll design the client side portion and add the code that manages the communication between the native mobile app and the database.
What is the WAF?
Before starting the design and development of our mobile app, we should take a tour and explain some important parts used by Wakanda to manage the Ajax call to the Wakanda Server, which is the Wakanda Ajax Framework, or WAF.
WAF is a client side and server side JavaScript framework that allows communication using REST/JSON or JSON-RPC services (which is not used in this article). The WAF architecture could be represented by the following image:
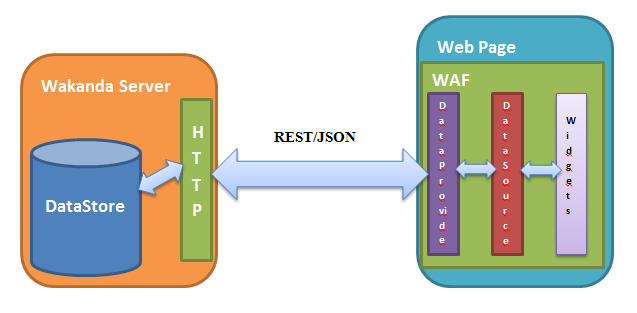
The Server side part of the WAF
This could be considered as the part responsible for handling the HTTP call to the server (the HTTP Wakanda Server) from the client side WAF and converting them to database queries. It’s the controller in the MVC architecture seen in the previous article.
Note:
The Server side WAF contains many other JavaScript APIs that could be used, like the File and Folder API, SystemWorker, SharedWorker, NET module, etc.
The Client side part of the WAF
This is automatically loaded by the web browser and contains many APIs developed by Wakanda engineers or integrated into the Wakanda WAF, like jQuery, jQueryUI, Raphael, and more. The three parts that will be used in our application and that are present in the above image are:
DataProvider
This is the part that communicates directly and automatically with the server using the XMLHttpRequest object to send the Rest/JSON requests to the server via HTTP. It’s providing a proxy object for each dataClass in the Server side Datastore. A ds object represents the public part of the Datastore, so on the client side we could query the Datastore directly using this object. For example:
// get all entities from the Position dataClass
ds.Position.all();

// get the longitude of the position with key equal to 1

ds.Position(1).longitude;
For more details about the DataProvider API and how to use it to query the Datastore, take a look at this doc.
Datasource
This is a set of APIs that automates the management of the data represented in the widgets. The advantage of using data in the page using a Datasource is that the data represented in the widget is independent from the widgets, and has its own event management system. So when the data is modified, an event is fired. Datasource also gives you the ability to query the collection of entities represented in the widgets.
For more details about the Datasource API, see this doc.
Widgets
Widgets are Wakanda’s HTML5, CSS3, and JavaScript-based interface elements. Wakanda has three types of widgets: Desktop, Tablet, and Mobile. Widgets can load data directly from the Datasource object.
For more details about the widget APIs, see this doc.
Developing the mobile App:
Before starting work on the mobile application, I should note that the development is done using a specific Wakanda build and the community version of the Wakanda Studio Extension:
-
Machine: Windows 7 ,64xbits and 6 Go.
-
Wakanda version/build: 4.132351. (The same build should be used)
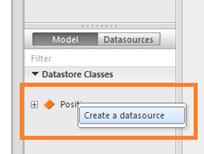
1. Creating the position Datasource in the page
In the bottom of the right panel, right click the “Position” Datastore class and select Create datasource:
2. Designing the User interface
In the client side mobile page we will design the user interface by adding widgets and modifying some of their style properties. Specifically, the button and text field to send the position to the backend database.
As I explained in this article, switch to the SmartPhone page for more details about page routing in Wakanda. Take a look at this doc.
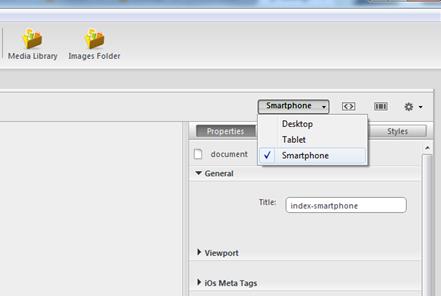
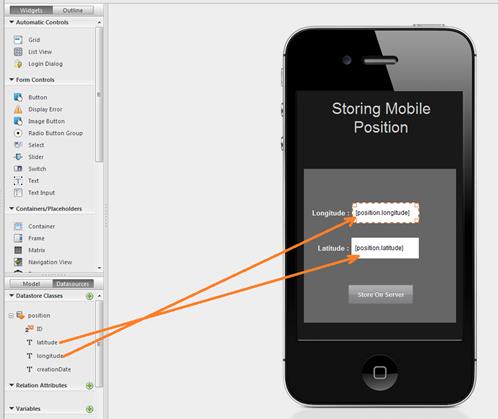
Next, modify the background color of the home page using the Styles panel. The mobile page contains two textField widgets that are read only, along with a button to send the geolocation position to the backend Wakanda Server. The longitude and latitude attributes should be set as sources for the two textFields widget, as the following image shows:
3. Coding the button event
We will then add an onClick event to the button. With this event, we’ll get the mobile position using the PhoneGap geolocation API and send it to the server using the WAF Datasource API. So to add an onClick event to the “Store in Server” button, go to the right Panel, choose the Events tab, and click on the onClick icon. Add:
button2.click = function button2_click(event) {

    // Get the current position from the mobile using the geolocation API
    navigator.geolocation.getCurrentPosition(Success, Error);

    function Success(position) {

        // Create a new position datasource entity
        sources.position.addNewElement()

        // Set the entity longitude and latitude
        sources.position.longitude = position.coords.longitude;
        sources.position.latitude = position.coords.latitude;

        // Set the creation Date as the current date
        sources.position.creationDate = new Date();

        // Save the entity in the remote Wakanda server
        sources.position.save({
            onSuccess: function (e) {
                alert("saved");
            },

            onError: function (err) {
                alert(err.message);
            }

        });

    }

    function Error(err) {
        alert(err.message);
    }

};
4. Explaining the code
The first line of code uses the Geolocation Phonegap API to get the current position of the mobile. Two callback functions are passed as arguments to the getCurrentPosition() method. The first one is executed when the action succeeds and the second one when there is an error:
navigator.geolocation.getCurrentPosition(Success, Error);In the success function, when the position of the mobile is retrieved, first we create a new empty entity using the method newEntity(), which is a part of the WAF:
sources.position.addNewElement();Next we instantiate the new entity using the position longitude and latitude retrieved, and the current date for the creationDate attribute:
// set the longitude and latitude to the datasource

sources.position.longitude = position.coords.longitude;
sources.position.latitude = position.coords.latitude;

sources.position.creationDate = new Date();
Next, we should save the created entity in the remote Datastore using the save() method. This method is executed asynchronously, so we use two callback functions as used in the PhoneGap API: getCurrentPosition(), the onSuccess argument “event” contains the newly saved entity and the onError argument “error” contains the reason why the save has failed:
sources.position.save({

    onSuccess: function (e) {
        alert("saved");
    },

    onError: function (err) {
        alert(err.message);
    }

});
5. Test the Web project using Ripple:
Before packaging the web app and going native, we should test that the web part is working correctly. If it’s work correctly as a web application, it should work inside the PhoneGap web container. For that we will use a mobile web emulator extension for Google Chrome called Ripple that can emulate native mobile features.
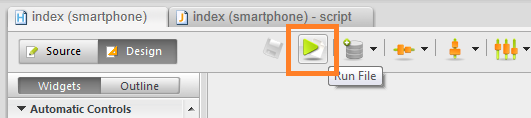
First, install the plugin on Google Chrome, and run the SmartPhone page from Wakanda Studio by clicking on the “run File” button:
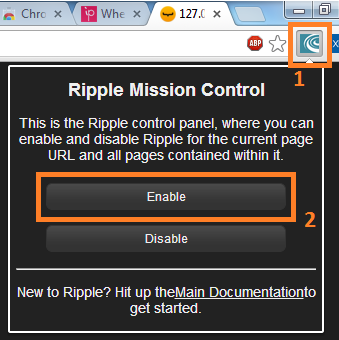
Now we can enable the Ripple plugin.
Click on the Ripple icon on the right side of the page, then click the “enable” button:
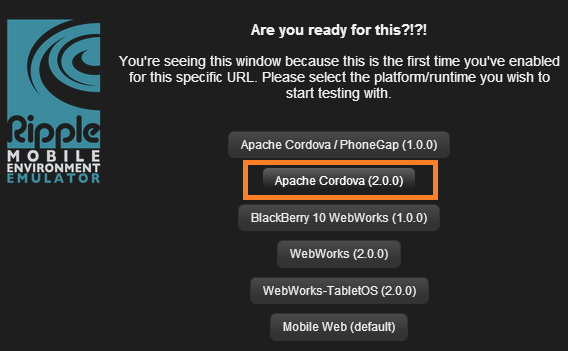
Choose Apache Cordova 2.0.0 as the platform:
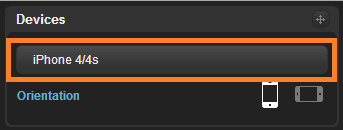
In the left side menu, choose iPhone 4/4S as the device:
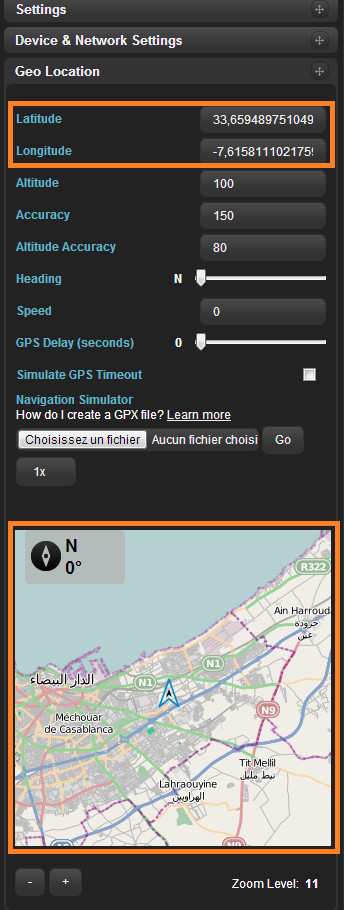
Then go to the right side menu, click on Geolocation, and navigate through the map to modify the current mobile position:
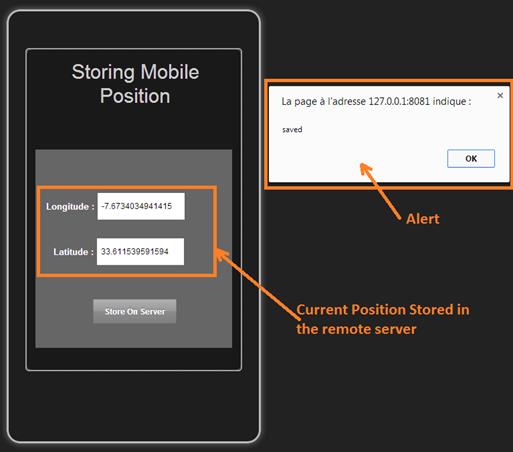
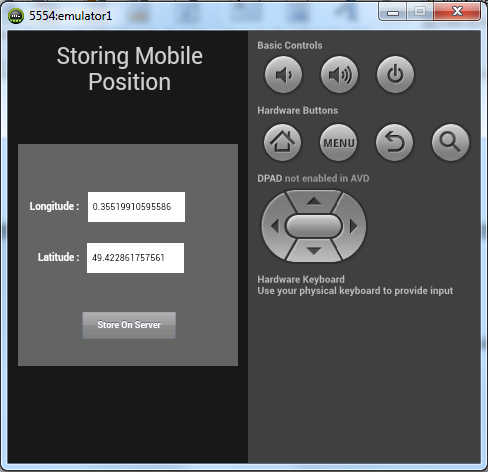
After preparing the Ripple emulator, we should now test the application by clicking on the Store on Server button to send the position to the remote server. The new position should appear in the textFields and an alert message will be displayed if the operation succeeds:
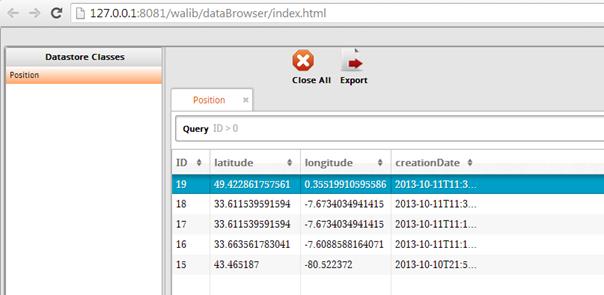
To make sure that the positions is stored correctly in the Wakanda Server Datastore, go to the Wakanda Studio and click on the Data Browser icon to see the full data in the Datastore:
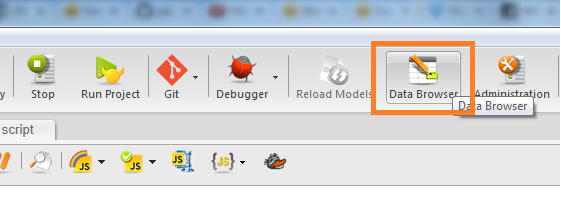
A new page will be opened to display all the Position dataClass entities in a dataGrid:
Refer to my article Cut Mobile App Dev Time with PhoneGap Wakanda Studio extension to follow the complete step-by-step description of the packaging process. Don’t forget to check the “Set Preferences” checkbox to allow the application to use the Geolocation API of PhoneGap.
Note:
I have done a native test of the application on an android emulator, so I added the IP address and port in the IP address of my machine and not the loopback IP: 127.0.0.1, because the use of the loopback IP could causes a port conflict in the Android emulator.
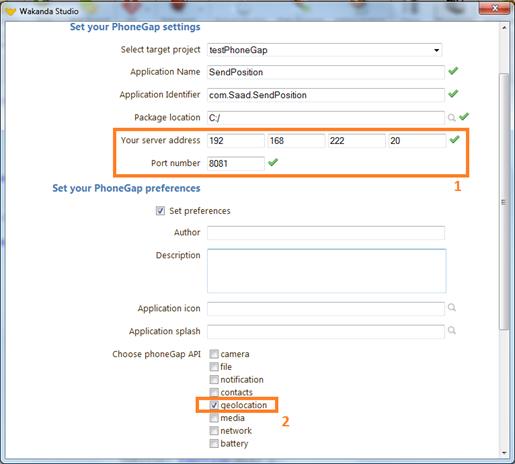
If you need to test the application on a device, enter a correct public IP address that can be accessed by the device and make sure that a firewall doesn’t block access to the given port.
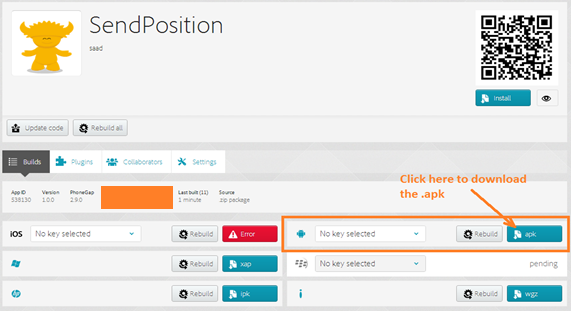
After completing all the mandatory settings, click on the package button to get the .zip file that should be sent to the PhoneGap build website and get the .apk file. The whole process is explained in a previous article.
Notes:
Don’t forget to restart the Wakanda Server after using the PhoneGap extension. This restart is mandatory to activate the bootstrap file added to the project.
You Could unzip the .zip file and test the index.html page in ripple, before uploading your application to the PhoneGap Build website and it should work correctly.
Here you will find how to install the .apk file using adb command in the Android emulator.
Now the app is installed in the emulator and we could test it as a native Android application:
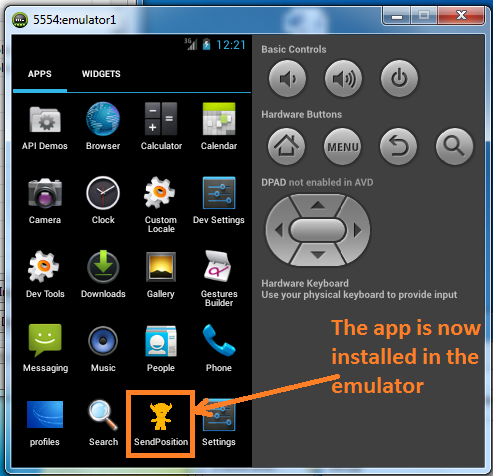
By clicking the icon of the app in the Android emulator we can launch it and start our tests:
Conclusion
In this article, we have seen how to develop a mobile web application using Wakanda Studio, how to code the function that send data to the Server using the WAF and how to package and test the application on the Android emulator. Many ideas and mobile applications could be developed using the same process and deployed on IOS, Android or any other mobile OS.
We’ve come to the conclusion of this tutorial series, where we have followed the whole process of mobile applications development using Wakanda and PhoneGap. I hope this will help other developers create a mobile app using the same tools.
Resources
-
Get the PhoneGap extension: https://www.dropbox.com/s/xt6zwelglx789i4/PhoneGap_Extension.zip
-
The Wakanda Solution can also be found on GitHub: https://github.com/saadmos/SendMobilePosition
 Saad Mousliki
Telecom and computer science engineer. ITIL-v3 and 70-480 : Microsoft programming in HTML5 with JavaScript and CSS3 certified, with more than 4 years experience programming for desktop and web. My first program was on assembly and Turbo Pascal. I have created applications using ASP.NET and C#, and now I’m more interested to JavaScript, HTML5, SSJS, Cloud, and mobile.