Key Takeaways
- Sinatra Flash, an extension written by Stephen Eley, offers all the functionality of the Rails Flash but with less code, aligning with Sinatra’s minimalist nature.
- To utilize Sinatra Flash, the ‘sinatra-flash’ gem must first be installed. This allows for the storage of temporary values like error messages between requests, which can then be retrieved on the next request.
- The ‘flash’ method is used to set and display flash messages. The syntax ‘flash[:key]’ is used, where ‘:key’ can be any chosen identifier. This method is used in handlers to set the flash and in views to retrieve it.
- Sinatra Flash allows for different keys to be used for different purposes, enabling the display of various messages. The ‘styled_flash’ helper method can be used to display all messages stored in the flash, each within its own div element that has the same class as the flash key.
Installation
First of all we need to install the sinatra-flash gem, like so:gem install sinatra-flash __END__ declaration at the bottom of your file and write the view code afterwards. Here is a very basic HTML5 layout and view that just displays a heading.
[gist id=”2983537″]
Let’s test this out. Open up a command-line prompt and navigate to the folder that contains the main.rb file, then type the following:
$> ruby main.rb 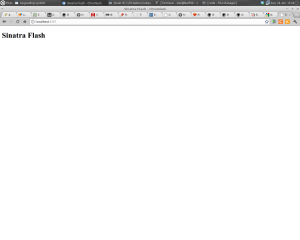
Getting Flashy
Now let’s have a go at using the Flash. The usual reason that you would want to use this functionality is when somebody interacts with your site by pressing a button or visiting an url. Your app will go off to the relevant url, process some information and then redirect the user to another url. The flash allows you to give some feedback from when the information was processed that would otherwise have been lost. To demonstrate this, let’s add a button to the index page. Change the@@index view code to the following:
[gist id=”2983542″]
This just adds a button that will send a post request to the server. We need to add a handler to deal with this request, so add the following code after the root handler:
[gist id=”2983543″]
This sets an instance variable called @time and then redirects us back to the index page. Let’s try to access the @time variable on the index page. Add the following to the @@index view:
[gist id=”2983546″]
Now, restart the server (press ‘Ctrl’ and ‘C’ together and then retype ruby main.rb in the command line) and have a look at the page. Try pressing the ‘What Time Is It?’ button and you should see the following:
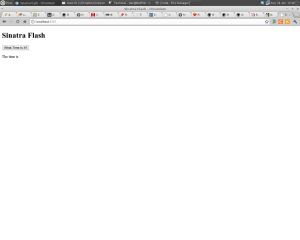 That’s right, the time isn’t showing. This is because the value of
 @time was lost once we redirected to the index page. We need to use the flash to pass it on to the next request. Change the post handler to the following:
[gist id=”2983549″]
And change the index view to the following:
[gist id=”2983550″]
Now restart the server, reload the page and try pressing the ‘What Time Is It?’ button. If everything is working correctly, you should see the time displayed:
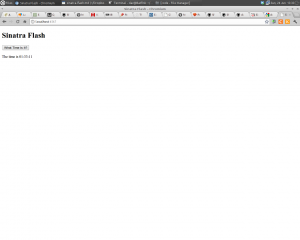 The previous example showed how to set and display the flash, using the syntax
 flash[:time], where :time is a key that can be anything you like. The flash[:key] helper method is used in handlers to set the flash and then used in views to retrieve it. You can use different keys to correspond to different messages, as we’ll see in the next section.
The Flash Farm Shop
Now we’ve seen the flash in action, I’m going to build a simple e-shop style site that shows off the most common use-cases of the flash. I’ve created some animal pictures to show off the livestock of our store that you can see below: ***pictures of the animals To begin, let’s change the index view so that it shows off some products to sell: [gist id=”2983553″] Note that you will need to save the pictures of the animals in a folder called ‘public’ in the same directory as themain.rb file.
Each animal has an ‘Add to Basket’ button underneath it’s button, so let’s add a handler to do this when the button is pressed. Add the following code after the other handlers:
[gist id=”2983556″]
This uses the paramater :animal in the url that Sinatra makes available in the params hash. This can be used to create a generalised url for adding an animal to the shopping basket. We’re not actually going to implement any e-store functionality in this tutorial, just mimic it, so the comment at the start of the handler just shows that this is where your logic for implementing the next big thing in e-commerce would go. Then we store a message in the flash to say that the process was carried out successfully. If you try testing this out at the moment, nothing will appear because we haven’t placed the message in the view. We’re going to put the message in the layout so that it appears at the top of the main page and also so it will show on all pages. Change the layout view to the following:
[gist id=”2983557″]
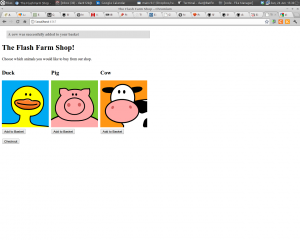
This should work – when you click on the ‘Add to Basket’ button under each animal, a message should appear at the top of the page.
You might notice that there is also a link to a stylesheet in the layout. This is because now our flash functionality is working, it’s time to give it a bit of style. One of the things I love about trying things out in Sinatra is how you can add new functionality really easily in the same file. To add styles using Sass all we need to do is add a new view at the bottom of main.rb. Here are a few styles to get started:
[gist id=”2983559″]
Now all we need is to place the following handler to make sure that scss is used to pre-process those styles:
[gist id=”2983560″]
Now restart the server and page and you should see a much nicer looking shop front!
Different Flashes
As we saw before, you can use different keys in the flash for different purposes. Let’s say that we also want to provide some additional information when a duck is ordered. Let’s modify the handler to add this extra information to the flash: [gist id=”2983565″] To make sure any flash messages with the key of:info
are shown, we need to add a couple of extra lines to the layout:
[gist id=”2983568″]
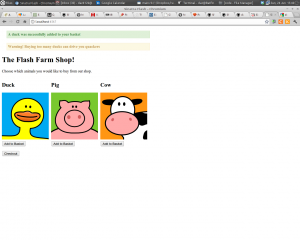
Adding all these lines of code for every different type of of flash message has the potential to get very annoying and isn’t very DRY. Another problem might be that you don’t know which flash keys will be used when the layout is created. This is easily solved by the very handy styled_flash helper method. This goes in any of your views and iterates over the whole flash, displaying all of the messages inside their own div element that has the same class as the flash key. All we need to do is change our layout to the following:
[gist id=”2983569″]
This will create the following markup:
[gist id=”2983571″]
We now have some styling hooks that allow us to style each type of message a bit differently. Below are a few styles that I’ve nicked from the Twitter Bootstrap notifications:
[gist id=”2983576″]
Restart the server and test this out and you should see a nicely styled page that looks just like how the pros do it:
Checkout
Now that we have lots of different styles, it’s time to test them all out. To do this I am going to implement a mock checkout function. The button is already there in the layout, so all we need is a handler to deal with it: [gist id=”2983577″] I’ve contrived an example here that allows us to give different messages to the users. To start with Flash Farm’s payment processing is not up to scratch and there is a 1 in 3 chance that something goes wrong, so an error message is displayed in the flash. To make up for this there is a 1 in 3 chance that a discount will be applied. This involves redirecting to the ‘/discount’ page, so let’s add a handler for this: [gist id=”2983578″] You’ll also notice that when the checkout process has finished, you get redirected to the ‘/finish’ page, so that will also need a handler: [gist id=”2983581″] I’m reusing the@@index view here, so it will look just the same as the root url, but in the future it might show other products that the shopper may be interested in. For now, let’s just display a nice thank you message for our loyal shoppers.
If you have a go and testing this out, you should notice there are a few problems. Nothing is actually wrong – the flash is just working the way we described earlier. First of all, if a discount is applied, then the message about the discount is displayed, but the message that the payment was successful is not. This is because the flash discards all messages after one request, so the success message was removed when it was redirected to the discount page. There is a simple way to get round this using the handy flash.keep method:
[gist id=”2983582″]
This just keeps all the messages that are stored in the flash for one more request, so now both messages will be shown if a discount is applied.
The other problem is that the message that says thank you for shopping at Flash farm is not shown when we visit the ‘/finish’ page. Again, nothing is wrong here, it’s just that the flash is supposed to be shown on the next request, not the current request. Try reloading the page and the message will then be displayed. As you might have guessed there’s also a method to get round this, flash.now.
[gist id=”2983587″]
This displays the flash message straight away on the current request. This is particularly useful if you use Ajax to process any requests in the background, as a redirect is not used, so you need to show the message on the current request.
That’s All Folks
That’s about all there is to the sinatra-flash gem. It’s a neat little piece of code that does its job brilliantly, I hope you find it useful. It is also a great example of how to make a Sinatra Extension. If you look at the code on Git Hub, you’ll see that there’s less than 50 lines of code. Stop by and have a read – you’ll pick up some good pointers about how Sinatra’s extensions work. I’ve uploaded the finished Flash Farm site on Heroku and put the code on Git Hub. Feel free to ask any questions in the comments below.Frequently Asked Questions (FAQs) about Sinatra Flash
How do I install Sinatra Flash in my application?
To install Sinatra Flash in your application, you need to add the Sinatra Flash gem to your Gemfile. Open your Gemfile and add the following line: gem 'sinatra-flash'. Then, run bundle install in your terminal to install the gem. After the gem is installed, you can require it in your main application file with require 'sinatra/flash'. Now, you can use Sinatra Flash in your application.
How do I use Sinatra Flash to display flash messages?
Sinatra Flash allows you to display flash messages in your application. To do this, you first need to enable sessions in your Sinatra application by adding enable :sessions in your main application file. Then, you can set a flash message with flash[:notice] = "Your message". You can display this message in your views with <%= flash[:notice] %>.
Why am I getting an error when trying to use Sinatra Flash?
If you’re getting an error when trying to use Sinatra Flash, it could be due to several reasons. One common reason is that you haven’t enabled sessions in your Sinatra application. You can do this by adding enable :sessions in your main application file. Another reason could be that you haven’t required the Sinatra Flash gem in your main application file. You can do this with require 'sinatra/flash'.
Can I use Sinatra Flash with other Sinatra extensions?
Yes, you can use Sinatra Flash with other Sinatra extensions. Just make sure to require the Sinatra Flash gem in your main application file with require 'sinatra/flash'. Then, you can use Sinatra Flash as you would with any other Sinatra extension.
How do I customize the style of my flash messages?
You can customize the style of your flash messages by adding CSS classes to your flash messages. For example, you can add a CSS class to your flash message with flash[:notice] = "<div class='my-class'>Your message</div>". Then, you can style this class in your CSS file.
Can I use Sinatra Flash with Rails?
Sinatra Flash is specifically designed for Sinatra applications, so it may not work with Rails. However, Rails has its own built-in flash messaging system that you can use.
How do I clear flash messages?
Sinatra Flash automatically clears flash messages after they are displayed once. If you want to manually clear flash messages, you can do so with flash.clear.
Can I set multiple flash messages at once?
Yes, you can set multiple flash messages at once with Sinatra Flash. You can do this by setting multiple flash messages with different keys. For example, you can set two flash messages with flash[:notice] = "Your first message" and flash[:alert] = "Your second message".
How do I test flash messages in my Sinatra application?
You can test flash messages in your Sinatra application by setting a flash message in your test and then checking if this message is displayed in the response. You can do this with the last_response method provided by Sinatra.
Can I use Sinatra Flash with Sinatra’s modular style?
Yes, you can use Sinatra Flash with Sinatra’s modular style. Just make sure to register the Sinatra Flash extension in your modular application with register Sinatra::Flash.
Darren loves building web apps and coding in JavaScript, Haskell and Ruby. He is the author of Learn to Code using JavaScript, JavaScript: Novice to Ninja and Jump Start Sinatra.He is also the creator of Nanny State, a tiny alternative to React. He can be found on Twitter @daz4126.