Ruby Social Gems: LinkedIn

Key Takeaways
- The LinkedIn gem and APIs are simple and accessible tools for integrating LinkedIn data into a Ruby on Rails application. They allow user data from LinkedIn to be imported into Rails app models and displayed as needed.
- The tutorial provides a step-by-step guide to building an application with the LinkedIn gem. It includes creating a new Rails app, initializing the project, creating a user model and bootstrap styling, configuring views, and setting up the LinkedIn controller for authentication and API queries.
- The tutorial also covers creating and configuring various models to store LinkedIn data, including basic and full profiles, positions, education, and user associations. It also demonstrates how to query the LinkedIn APIs and import the data into Rails models.
Introduction to the Ruby Social Gems series
In this series, we are going to cover gems based around social media and social media services, such as LinkedIn, Twitter, Facebook, Youtube, and any other suggested gems.
LinkedIn Gem
The first gem in the series is the LinkedIn gem, and the LinkedIn APIs. We’ll see how simple and clear the LinkedIn API is, and how the gem makes it more accessible.
I should point out, before we start, another important gem: omniauth and omniauth-linkedin. These gems allow the user to login with their LinkedIn account, or Facebook, or Twitter, etc. We’ll dedicate a tutorial to Omniauth later, but we’ll use Devise to create simple user accounts in this article.
The Demo Application
The application we are going to build with the LinkeIn gem is pretty straightforward. We will get all the user data from LinkedIn into our rails app models, so we can display it in whatever format we want.
Starting with the application:
You can download the full source code of the tutorial form github here
Create a new rails app:
rails new rsg_linkedin_gem
Add the linkedin, devise, bootstrap gems in path/to/project/Gemfile
[gist id=”3926303″]
And then run
bundle install
We are going to use bootstrap for the UI component.
Initializing
Before we start, we need to run few commands to initialize the project.
Create the User Model and Bootstrap Styling
The following commands are found on the github page of the devise project and the twitter bootstrap project
To install devise
rails generate devise:install
To create the user model
rails generate devise user
To configure views
rails generate devise:views
To install bootstrap
rails g bootstrap:install
To set a layout bootstrap
rails g bootstrap:layout application fixed
Remove the index file from
path/to/project/public/index.html
Application Structure
Controllers
We will need only to create one controller, which will handle the connection to LinkedIn. The controller will pull the data from the API and push it to our models.
rails g controller linkedin
Add the following line at the beginning of the linkedin controller
[gist id=”3926307″]
We’ll add a few helper methods to handle the authentication and APIs queries.
First, and before diving into any methods, we should define the configuration hash. The hash holds all the information to negotiate a connecion with the LinkedIn APIs. The request_token_path element grants permissions to access the different parts of the APIs, such as r_fullprofile for a full profile or r_network for connections.
You could add more tokens to request_token_path element by concatenating them with a +, such as:
/uas/oauth/requestToken?scope=r_basicprofile+r_fullprofile+r_emailaddress+r_network
The full object, which we will add at the top of the LinkedIn controller, is below:
[gist id=”3926308″]
The LinkedinOauthSetting object is used to store the access token, and access secret.
The purpose of generate_linkedin_oauth_url method is to generate the linkedin authentication uri, which asks the user for permissions. The method checks first if the object already exists for the current user. If not, it’ll create a linkedin client object and build the request_token object with the oauth_callback. This callback is the method that will be called after the user grants the access. Now, store the request_token.token and request_token.secret in the session, as they will be used to create the persisted access tokens. Finally, redirect the user to the authorize_url. If the user has been here before, it will redirect them to the /oauth_account action directly.
generate_linkedin_oauth_url
[gist id=”3926310″]
The authentication method, which is set as the callback in the request_token object, authenticates the user for the first time. If the user is already authenticated, it will redirect the user to home without doing anything.
oauth_account
[gist id=”3926311″]
First, we create a linkedin client object with our keys (‘your-api-key’, ‘your-secret-key’) which you get after registering your application on the linked-in api. If the oauth_verifier params exists, which is passed by LinkedIn, the user has granted access to the application so we’ll authorize the client. When we authorize for the first time, we need to store and get the access token and secret to retrieve them later.
The get_client helper simply returns an authorized linkedin client object. Here, the linkedin_oauth_setting object is retrieved from database and authorizes the client object.
get_client
[gist id=”3926313″]
Here is the root action. It checks if this user already has a linkedin oauth setting. If so,it’ll redirect them to the linkedin_profile action.
index
[gist id=”3926314″]
Here we show simple html page of the data pulled from the linkedin APIs.
linkedin_profile
[gist id=”3926316″]
Routes
Add the following to path/to/project/config/routes
[gist id=”3926317″]
Views
We should make few changes before running the server.
Modify the layout view path/to/project/app/views/layouts/application.html.erb
by removing the following block 65-75, and then replacing the following lines 50-52 with
[gist id=”3926321″]
Modify the index view [path/to/project/app/views/linkedin/index.html.erb]:
[gist id=”3926323″]
Models
We should stop here to look at the LinkedIn APIs and what we are going to cover here. We will also learn the specification of the models we need to create in our application.
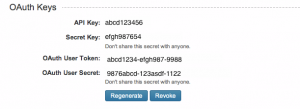
The LinkedIn developer site is the best place, this Quick Start Guide is comprehensive. The guide shows how to create the application on the LinkedIn, as well as how to get your API Key and Secret Key (which you should “never share with anyone”).
You’ll see a demonstration of how to connect with a ruby script without any gems which takes much more time than the gem.
The table on the Authentication page lists the permissions, which we’ll see how to use it later.
Here’s few of them:
| Permission | Scope |
|---|---|
| Your Profile Overview | r_basicprofile |
| Your Full Profile | r_fullprofile |
| Your Email Address | r_emailaddress |
| Your Connections | r_network |
We’ll focus on the Profile Fields part of the APIs, because we can’t cover the whole API. I think you’ll get a good sense of how the gem works by writing this demo application.
Let’s focus first on the Basic Profile Fields. This will be the first part from the API to map to our rails application.
LinkedinOauthSetting
This is an important model that stores two important values for each user that allow access their account without asking for permission each time.
Run the following commands to generate the above model:
rails g model linkedin_oauth_setting atoken:string asecret:string user_id:integer
rake db:migrate
Remember always to check this line above each table “These fields require the r_basicprofile member permission” to use this permission params later.
Add the association to the linkedin_oauth_setting model:
path/to/project/app/models/linkedin_oauth_setting.rb
[gist id=”3926324″]
BasicProfile
Selecting few attributes to add to the model, and here’s a list of them:
| Field | Description |
|---|---|
| first-name | the member’s first name |
| last-name | the member’s last name |
| maiden-name | the member’s maiden name |
| formatted-name | the member’s name formatted based on language |
| headline | the member’s headline (often “Job Title at Company”) |
| location:(name) | Generic name of the location of the LinkedIn member, (ex: “San Francisco Bay Area”) |
| industry | the industry the LinkedIn member has indicated their profile belongs to (Industry Codes) |
| summary | A long-form text area where the member describes their professional profile |
| specialties | A short-form text area where the member enumerates their specialties |
| picture-url | A URL to the profile picture, if the member has associated one with their profile and it is visible to the requestor |
| public-profile-url | A URL to the member’s public profile, if enabled |
Now run the following command to create the basic_profiles table:
rails g model basic_profile first_name:string last_name:string maiden_name:string formatted_name:string headline:string location:string industry:string summary:string specialties:string picture_url:string public_profile_url:string user_id:integer
rake db:migrate
Add the association to the basic_profile model:
path/to/project/app/models/basic_profile.rb
[gist id=”3926409″]
FullProfile
Selecting few attributes to add to the model, you’ll notice that the full_profile table contains many other complex objects like (publications, patents, languages, skills, etc) We are going to build separate models for a few of them. Here’s a list of them:
| Field | Description |
|---|---|
| associations | A short-form text area enumerating the Associations a member has |
| honors | A short-form text area describing what Honors the member may have |
| interests | A short-form text area describing the member’s interests |
Now run the following command to create the full_profiles table:
rails g model full_profile associations:string honors:string interests:string user_id:integer
rake db:migrate
Add the association to the full_profile model:
path/to/project/app/models/full_profile.rb
[gist id=”3926410″]
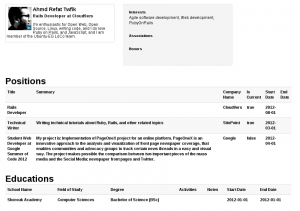
Position
Let’s add a few attributes to the model:
| Field | Description |
|---|---|
| title | the job title held at the position, as indicated by the member |
| summary | a summary of the member’s position |
| start-date | a structured object with month and year fields indicating when the position began |
| end-date | a structured object with month and year fields indicating when the position ended |
| is-current | a “true” or “false” value, depending on whether it is marked current |
| company | the company the member works for |
Now run the following command to create the positions table:
rails g model position title:string summary:string start_date:date end_date:date is_current:boolean company:string full_profile_id:integer
rake db:migrate
Add the association to the position model:
path/to/project/app/models/position.rb
[gist id=”3926411″]
Education
For the Education model we have:
| Field | Description |
|---|---|
| school-name | the name of the school, as indicated by the member |
| field-of-study | the field of study at the school, as indicated by the member |
| start-date | a structured object a year field indicating when the education began |
| end-date | a structured object with a year field indicating when the education ended |
| degree | a string describing the degree, if any, received at this institution |
| activities | a string describing activities the member was involved in while a student at this institution |
| notes | a string describing other details on the member’s studies |
Now run the following command to create the educations table:
rails g model education school_name:string field_of_study:string start_date:date end_date:date degree:string activities:string notes:string full_profile_id:integer
rake db:migrate
Add the association to the model:
path/to/project/app/models/education.rb
[gist id=”3926414″]
User
Add the association to the model:
path/to/project/app/models/user.rb
[gist id=”3926326″]
LinkedIn APIs Inquiries
Now we have in the linkedin controller the required helper methods for authentication. We have stored the required tokens for later access, so it is time to write some helper methods to inquiry the APIs. We will use are model objects for this portion.
Querying the APIs is very simple with the gem. After authorizing the client object, you call the profile method on the object and pass whatever fields you want to get, for example:
client.profile(:fields => [:first_name, :last_name, :maiden_name , :formatted_name ,:headline])
The following methods are used to pull the data from the APIs and push it into rails models. As you can see, we are creating the object with the retrieved json object from the APIs with a few customizations.
get_basic_profile
[gist id=”3926328″]
get_full_profile
[gist id=”3926330″]
get_positions
[gist id=”3926332″]
get_educations
[gist id=”3926334″]
There are a couple of examples in the gem repo on github, for example:
[gist id=”ff8ff0e199bf4131bd59″]
Let’s the put it all together and build a simple view to display for our application to display the stored data.
Here’s the view path/to/project/linkedin/linkedin_profile.html.erb
[gist id=”3926338″]
Wrapping up
Well, I hope this tutorial to be useful, and be a good introduction to using LinkedIn gem, and the APIs in general, if you would like to suggest the next gem to cover, we’ll go for it, and thanks for reading.
I'm enthusiastic for Open Web, Open Source, Linux, writing code, and I do love Ruby on Rails, and JavaScript, and I am member of the Ubuntu-EG LoCo team.