The Spot Healing Brush is basically a round brush used for fixing up spots on skin, moles and blemishes. This is truly a wondrous tool because it is so quick and so easy. The magic here is that when you click on a spot with this tool, Photoshop looks at all of the pixels around the edge of the cursor and blends them with the pixels where you have clicked. It’s perfect for removing specks, scratches and dust in old photographs or anything reasonably small and round. As well as the one click approach, you can also remove lines from solid backgrounds. If you’re using Photoshop CS5, you can also use the Spot Healing Brush in conjunction with the new Content Aware Fill. As long as you have CS2 or later you will be able to zap spots with one click. Here’s how it works.
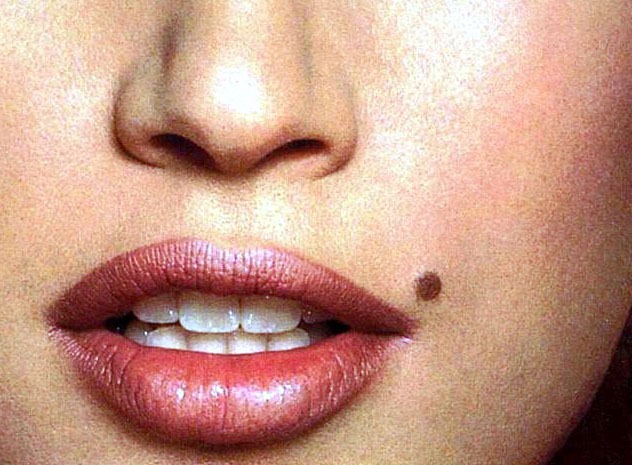
1. Open up a picture with a spot, freckle, blemish, dust or scratch that you want to remove. Here’s a picture of a well-known supermodel, with a well-known mole.
2. Select the Spot Healing Brush tool from the Toolbox, or press J.
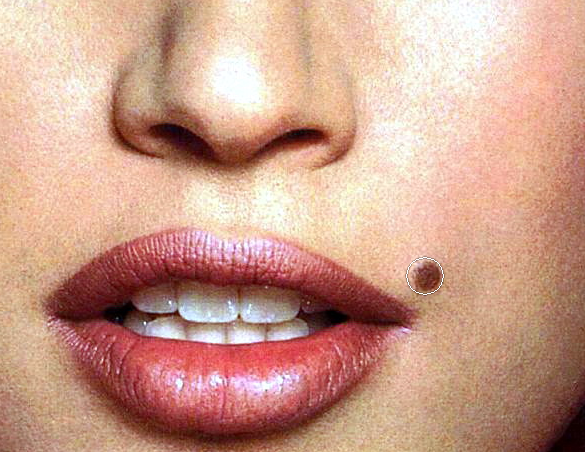
3. Hover your cursor over the offending blemish and adjust the cursor’s size so it’s slightly larger than the area you want to fix. A quick way to change the size of your brush is to press the square bracket keys on your keyboard: press the left bracket key ([) to go down in size, and the right bracket key (]) to go up.
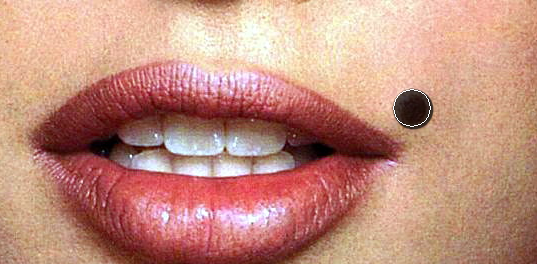
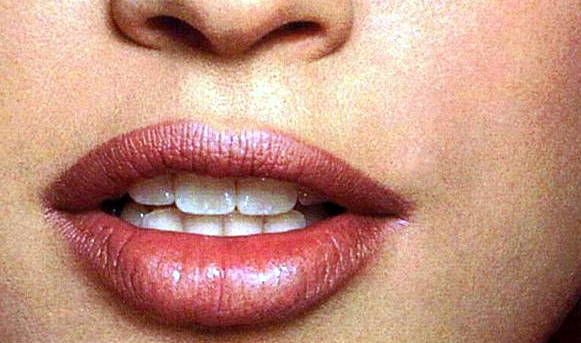
4. Click once. Notice that the cursor momentarily looks as if it’s filled with black. Once you release the mouse, it will magically remove the offending article.
Et voila!
In the Options bar you can change settings for the tool to get different results. Note this screengrab and these options are from CS5 but they are very similar on all versions since CS2.
In the Options bar, you can control exactly how the Spot Healing Brush works with these settings:
• Mode. Multiply, Screen, Darken, Lighten, Color, Luminosity, and Replace. Normal mode tends to work very well.
• Type.
- Proximity Match is the factory default and uses pixels just outside the edge of your cursor to fix the blemish.
- Create Texture. Suitable if the area you want to fix is surrounded by a lot of details.
- Content-Aware Fill. New in Photoshop CS5, it is useful for removing larger objects. You can either single click or drag to remove the item and Photoshop fills in the area with surrounding pixels.
• Sample All Layers. Turn on this option to have Photoshop sample pixel info from all layers instead of just the one you’re on. This lets you heal on another layer instead of your original image.
Frequently Asked Questions about the Spot Healing Brush in Photoshop
What is the Spot Healing Brush tool in Photoshop and how does it work?
The Spot Healing Brush tool in Photoshop is a powerful feature that allows you to remove unwanted spots or blemishes from your images with just a single click. It works by sampling pixels around the spot you want to remove and then replacing the spot with these sampled pixels. This tool is particularly useful for removing small imperfections like dust, scratches, or acne in portrait photos.
How do I select the Spot Healing Brush tool in Photoshop?
To select the Spot Healing Brush tool in Photoshop, you can either click on its icon in the Tools panel or press the shortcut key ‘J’ on your keyboard. The icon looks like a band-aid. Once selected, you can adjust the size and hardness of the brush in the options bar at the top of the screen.
What are the different types of Spot Healing Brush modes?
There are three types of Spot Healing Brush modes in Photoshop: Proximity Match, Create Texture, and Content-Aware. Proximity Match uses the pixels around the edge of the selection to fix the spot. Create Texture generates a texture to fix the spot. Content-Aware uses the entire image to come up with a fix.
How can I use the Spot Healing Brush tool to remove blemishes?
To remove blemishes using the Spot Healing Brush tool, first, zoom in on the area you want to fix. Then, select the Spot Healing Brush tool and adjust the size of the brush so it’s slightly larger than the blemish. Click on the blemish to remove it. Photoshop will automatically replace the blemish with pixels that match the surrounding area.
Can I use the Spot Healing Brush tool on a separate layer?
Yes, you can use the Spot Healing Brush tool on a separate layer. This is a non-destructive way of editing your image, as it allows you to make changes without affecting the original image. To do this, create a new layer, select the Spot Healing Brush tool, and then check the ‘Sample All Layers’ box in the options bar.
What should I do if the Spot Healing Brush tool isn’t removing a spot effectively?
If the Spot Healing Brush tool isn’t removing a spot effectively, you can try adjusting the size of the brush or changing the mode. If this doesn’t work, you might need to use a different tool, like the Clone Stamp tool or the Patch tool.
Can I use the Spot Healing Brush tool to remove larger objects?
The Spot Healing Brush tool is best used for removing small spots or blemishes. For larger objects, you might need to use a different tool, like the Patch tool or the Content-Aware Fill feature.
How can I improve my skills with the Spot Healing Brush tool?
The best way to improve your skills with the Spot Healing Brush tool is to practice. Try removing spots from a variety of images to get a feel for how the tool works. You can also watch tutorials or read articles to learn more advanced techniques.
What’s the difference between the Healing Brush tool and the Spot Healing Brush tool?
The main difference between the Healing Brush tool and the Spot Healing Brush tool is that the Healing Brush tool requires you to select a source point to sample pixels from, while the Spot Healing Brush tool automatically samples from around the spot.
Can I use the Spot Healing Brush tool in other Adobe applications?
The Spot Healing Brush tool is specific to Adobe Photoshop. However, other Adobe applications like Lightroom and Photoshop Elements have similar tools for removing spots or blemishes.


