

In this article, we’ll learn what a monorepo is, and how monorepos help in developing applications faster with a better development experience. We’ll discuss the advantages of using the Nx development tools for managing a monorepo, and learn how to use those tools to build a Next.js application.
The code for this article is available on GitHub. You can find a working demo of the app we’re building here.
Key Takeaways
- Utilize Nx to manage a monorepo, allowing for easier updates, centralized configuration, and streamlined publishing processes which significantly enhance development workflows.
- Create a Next.js application within an Nx workspace to leverage the benefits of a monorepo setup including consistent CI/CD pipelines and simplified refactoring across projects.
- Integrate TypeScript and Styled Components in the Next.js application to ensure type safety and scalable styling solutions that can be reused across different components and applications.
- Utilize GraphQL with the help of graphql-hooks and graphql-hooks-memcache for efficient data fetching and state management in the Next.js application.
- Demonstrate how to build and structure a reusable component library within the Nx monorepo to promote code reusability and maintainability across multiple projects or applications.
What a Monorepo Is, and Why We Should Consider Using One
A monorepo is a single repository that contains the apps, tools and configurations of multiple projects or project components. It’s an alternative to creating separate repositories for each project or part of a project.
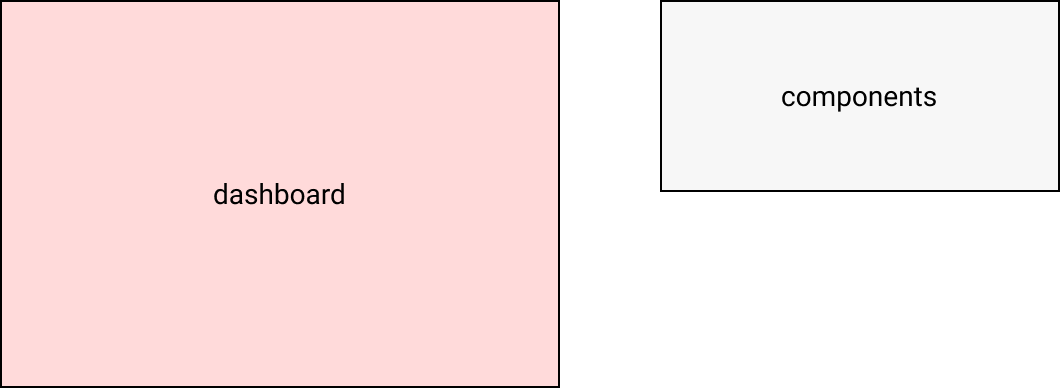
Consider a scenario where we’re building a dashboard application using some front-end library or framework. The code for this front-end application might be stored in the dashboard repository. The UI components that this repository uses might be stored in another repository named components. Now, every time we update the components repository, we’d have to go into the dashboard repository and update the components dependency.
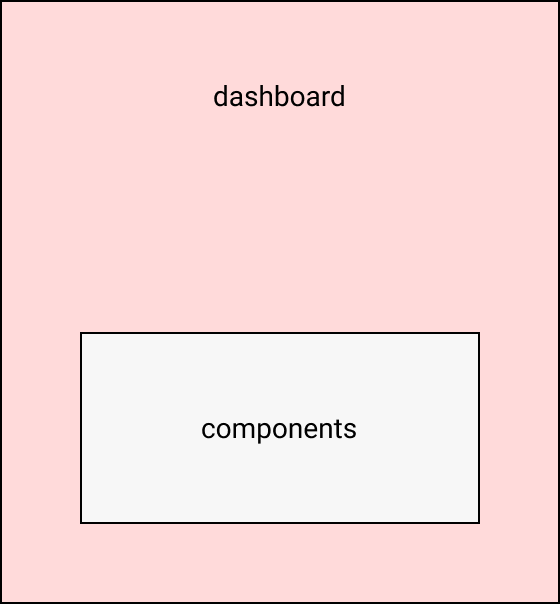
To alleviate this problem, we could merge the components repo with the dashboard repo.
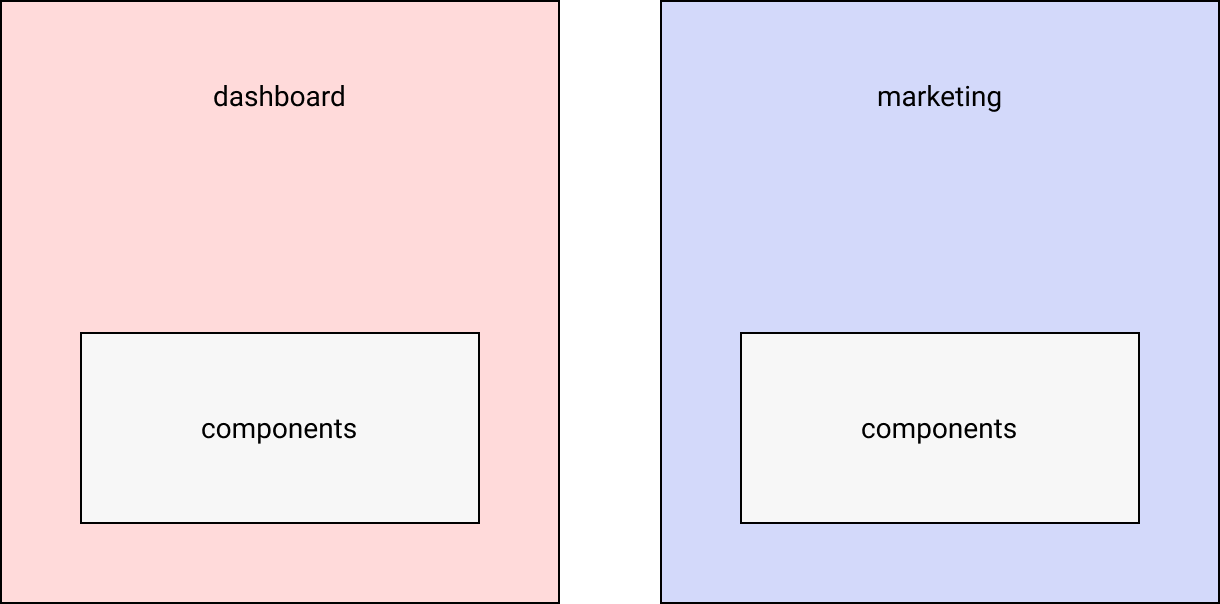
However, there might be another front-end application for the marketing site that’s stored in the marketing repository and which depends on components repository. So, we’ll have to duplicate components and merge it with marketing as well. However, because of this, any change related to components will have to be made in two places, which isn’t ideal.
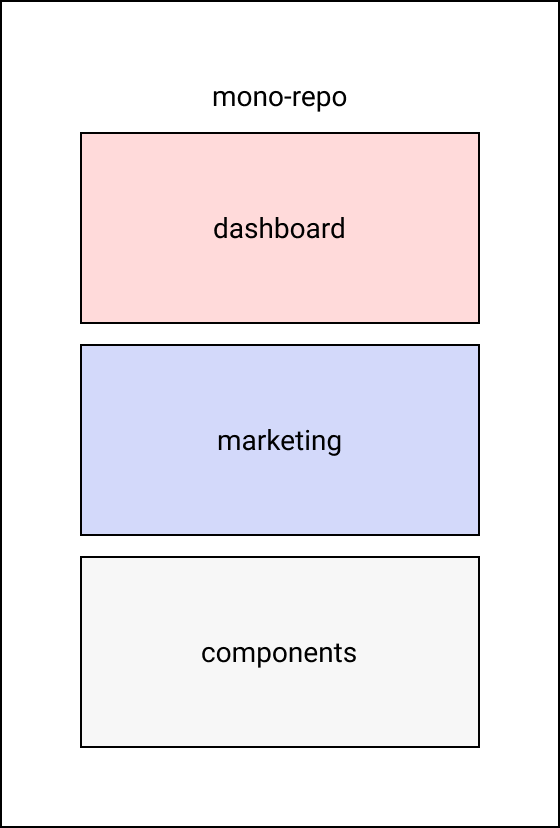
The above issue can be resolved by using a monorepo, where the dashboard, components and marketing components reside in one single repository.
There are various advantages of using a monorepo:
- Updating of packages is much easier, since all applications and libraries are inside a single repository. Since all applications and packages are under the same repository, adding new code or modifying existing code can be easily tested and shipped.
- Refactoring of code is much easier, as we’ll only have to do it in a single place instead of replicating the same stuff across multiple repositories.
- A monorepo allows for onsistent configuration for CI/CD pipelines, which can be reused by all the applications and libraries present in the same repository.
- Publishing of packages also becomes much easier, due to tools like Nx.
The Nx CLI will help us in generating new Next.js applications and React component libraries. It will also help us in running a development web server with hot module reload. It can also do a bunch of other important things like linting, formatting and generating code. The advantage of using a CLI like this that it will provide a sense of standardization in our codebase. As our codebase grows, it’s very difficult to manage and understand the underlying complexities. Nx CLI takes away most of those complexities by providing tools to automate the generation of code.
Software Required
We’ll need the following installed for the purposes of running our app:
These technologies will be used in the app:
- Next.js for building our app
- Styled Components for adding styles to our app
Note: you can read more about how to install multiple versions of Node.js using nvm if you want to get up to speed with that.
We’ll also need a Product Hunt account.
Installing and Bootstrapping an Nx Workspace
We can install the Nx CLI using the following command:
npm install nx -g
The above command will install the Nx CLI globally. This is useful because now we can create a new Next.js application using this CLI from any directory.
Next, we need to run the following command inside the directory where we want to create our monorepo:
npx create-nx-workspace@latest nx-nextjs-monorepo
The above command will create an Nx workspace. All Nx applications can reside inside an Nx workspace.
You might need to replace nx-nextjs-monorepo with the name of your workspace. It can be named anything you like. The name of the workspace is generally the name of an organization, company, etc.
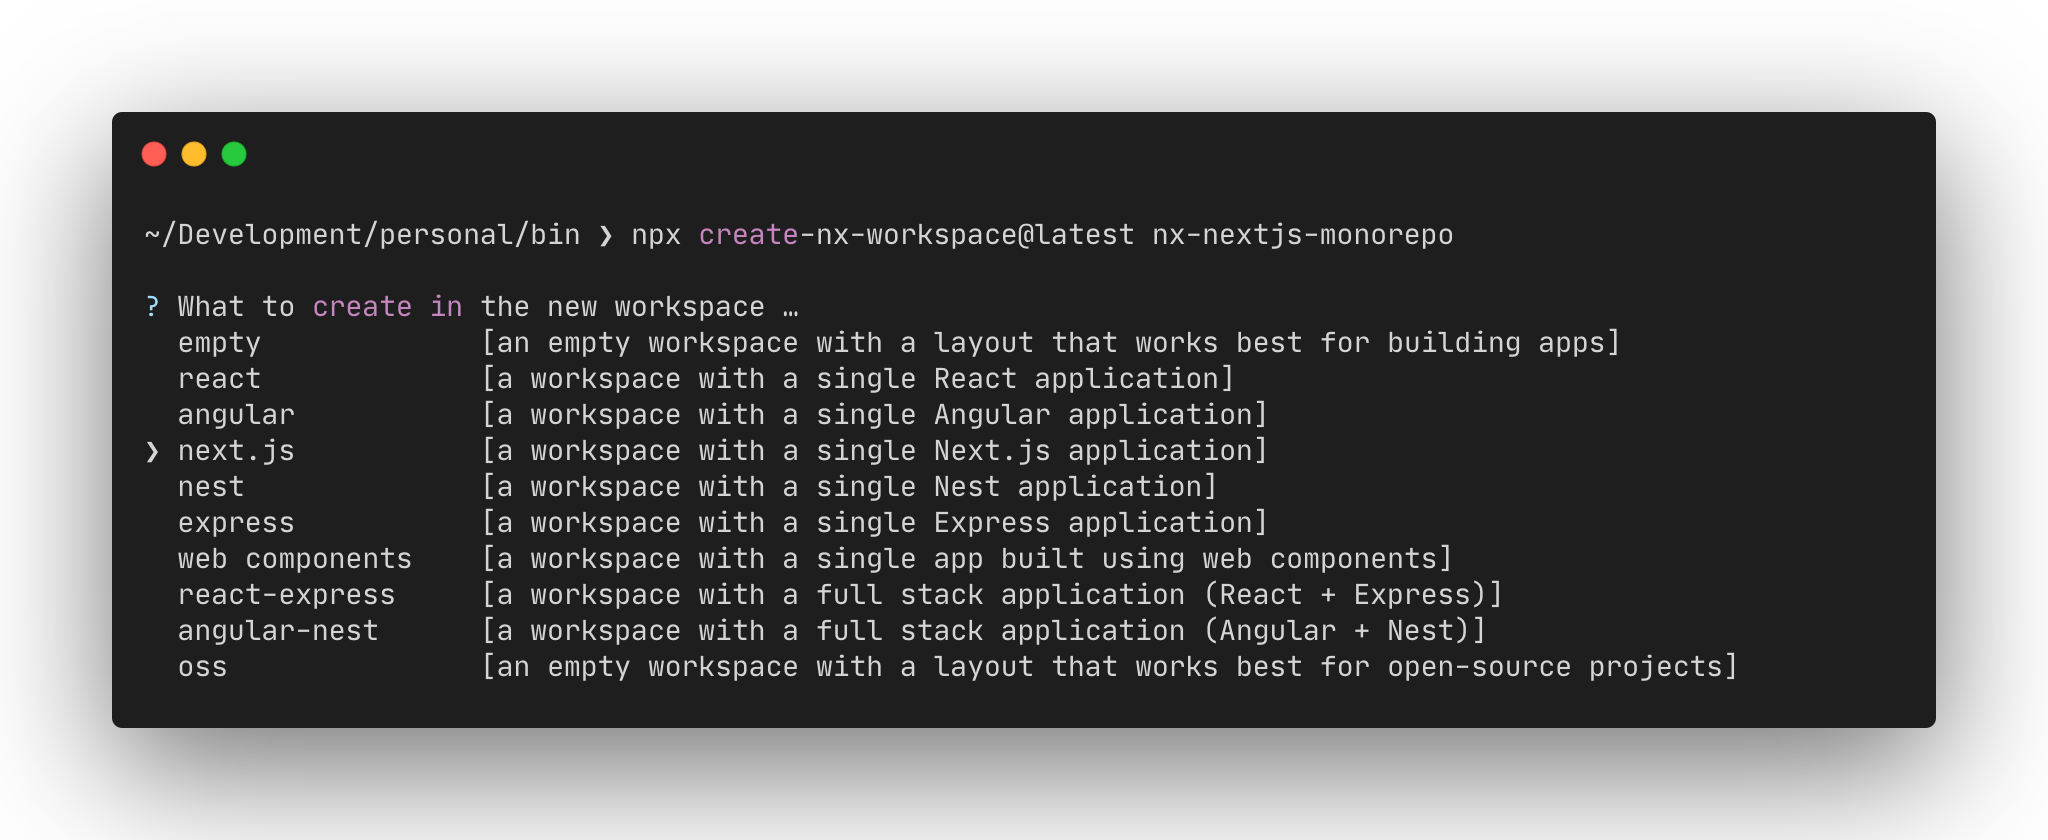
When we run the above command, we’ll be given a set of steps that will create what type of applications we want to create with Nx.
-
Step 1: It will first ask what type of application we want to create. We’ll select Next.js from the list of options.
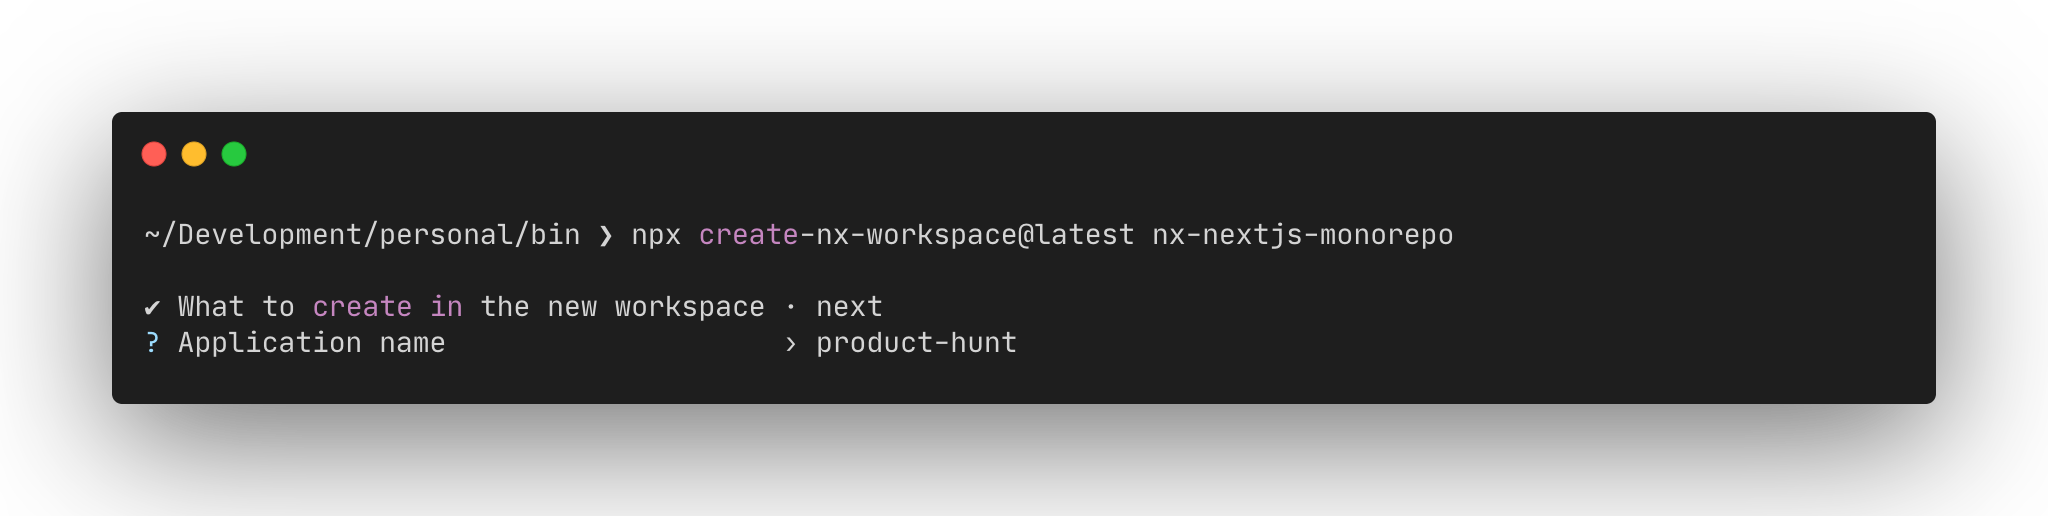
-
Step 2: It will ask us for the name of the application we want to create. We can call it anything. In this case, we’ll name it as “product-hunt”.
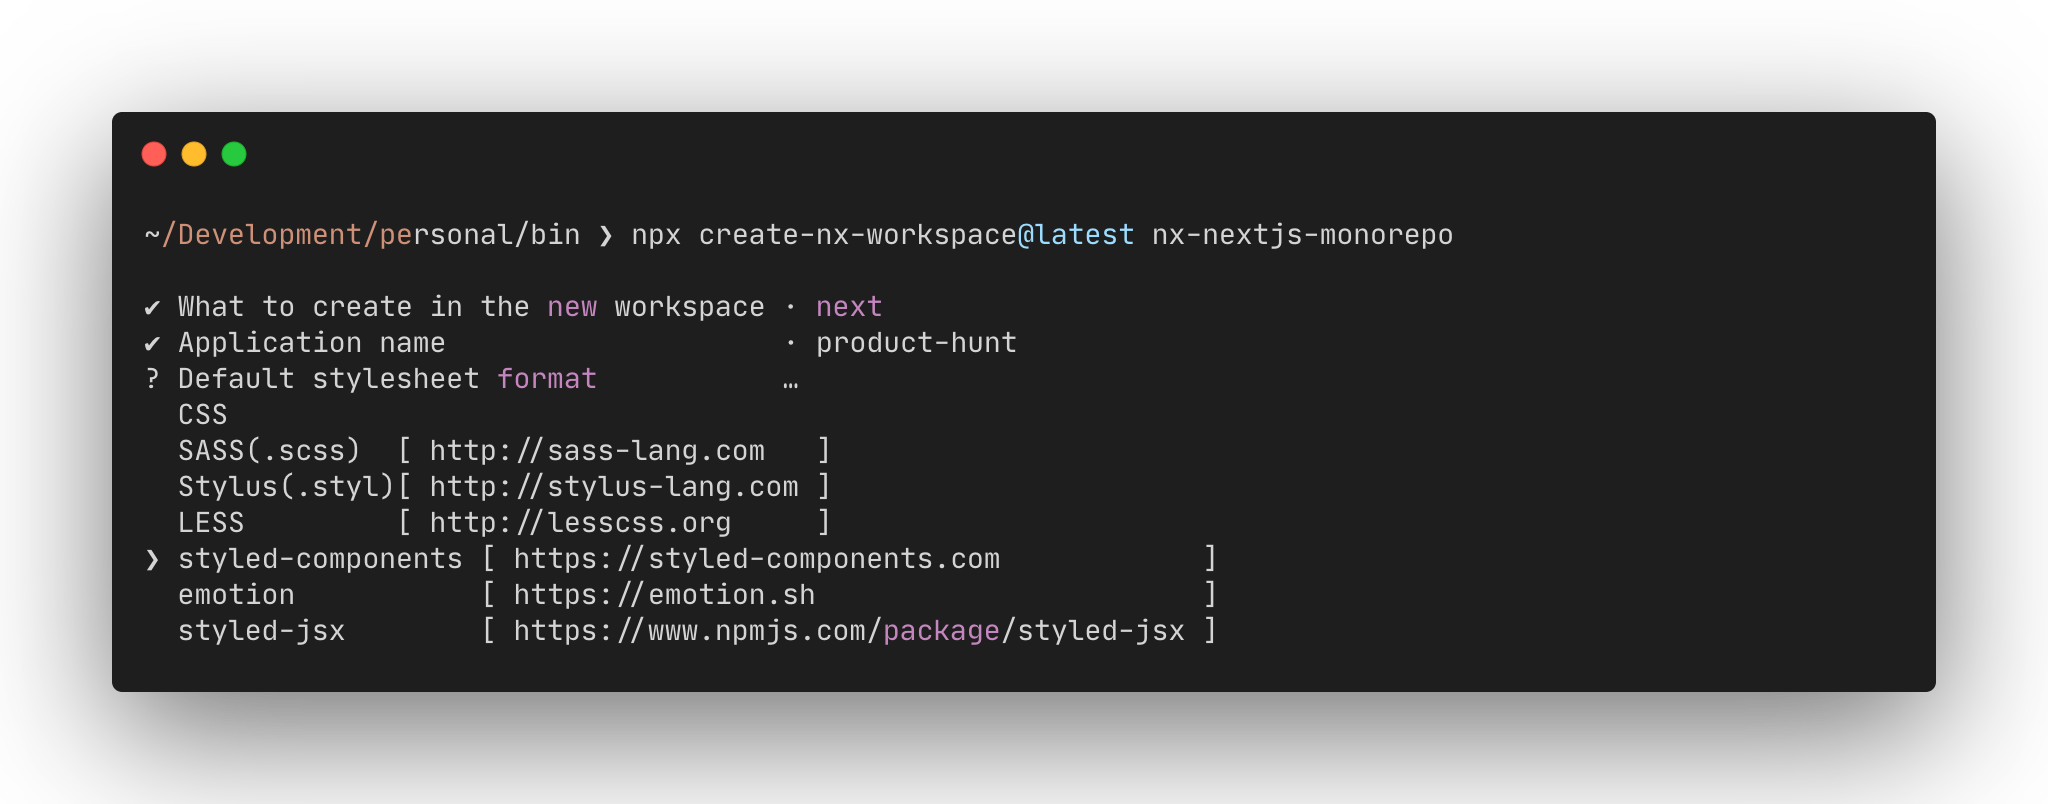
-
Step 3: It will ask us what type of stylesheet we want to use. We’ll choose Styled Components.
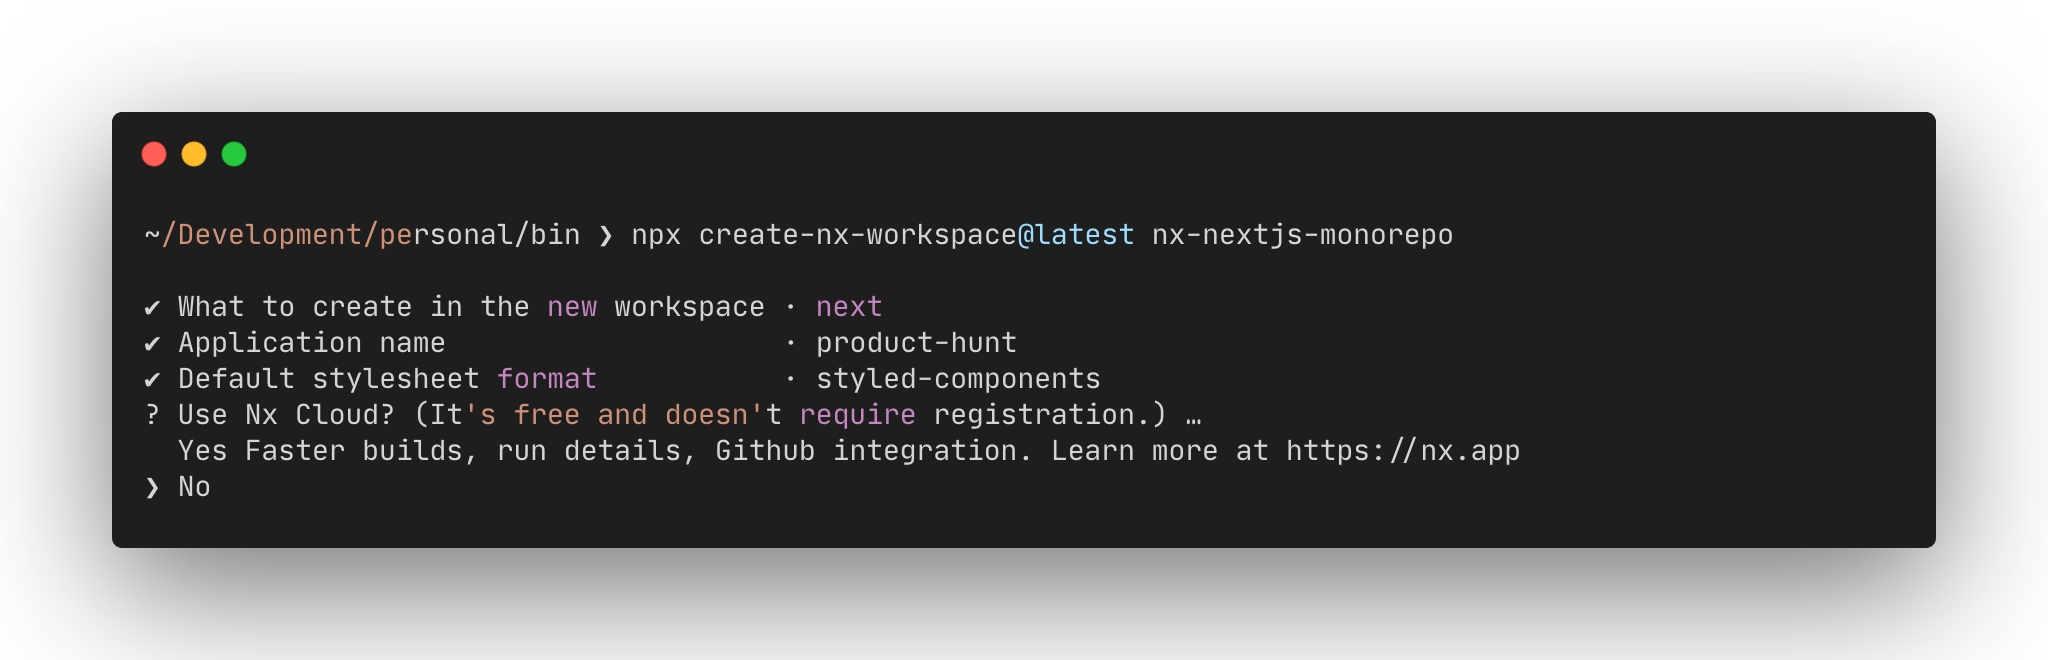
-
Step 4: It will ask us if we want to use Nx Cloud, which is a platform for speeding up the builds of Nx applications. In this case, we’ll choose No, but please check it out.
Nx will now scaffold all the files and directories and generate the following structure for us.
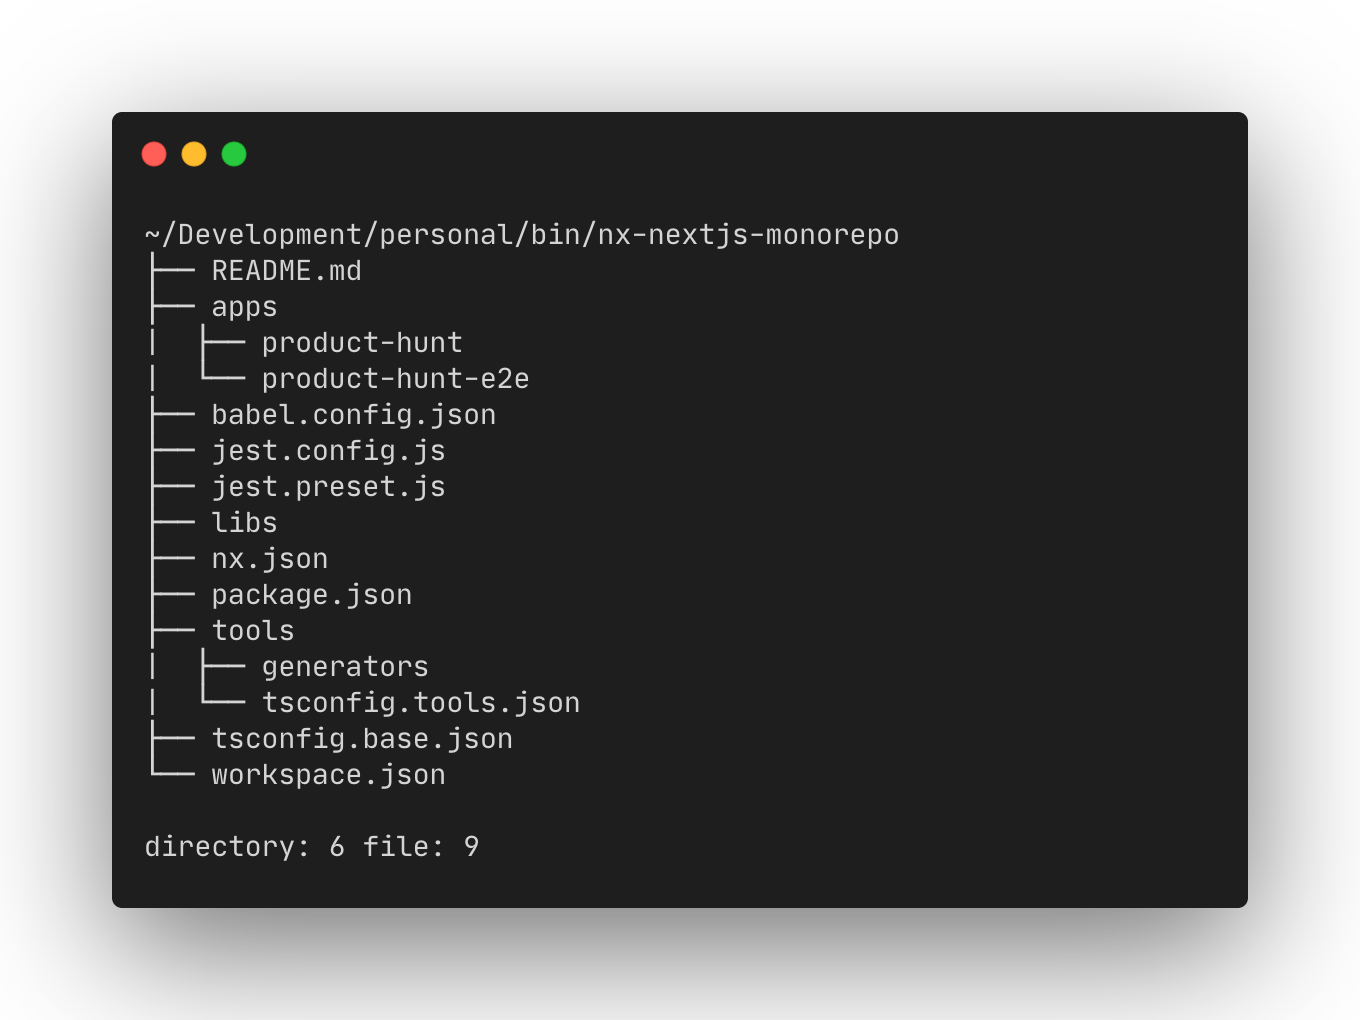
The apps directory contains all our applications. In our case, this directory will contain the Next.js application that we’re building (named product-hunt). This directory also contains the end-to-end test applications (named product-hunt-e2e) scaffolded using Cypress.
The libs directory contains all the libraries like components, utility functions, and so on. These libraries can be used by any of the applications present in the apps directory.
The tools directory contains all the custom scripts, codemods, and so on, which are used to make certain modifications to our codebase.
Note: more information regarding the directory structure is available here.
Building the Front Page of Product Hunt using Next.js
In this step, we’ll build the front-page of Producthunt. We’ll fetch data from the official Product Hunt API. The Product Hunt API provides a GraphQL interface that’s present at https://api.producthunt.com/v2/api/graphql. It can be accessed via an access_token, which can be generated from the Product Hunt API Dashboard.
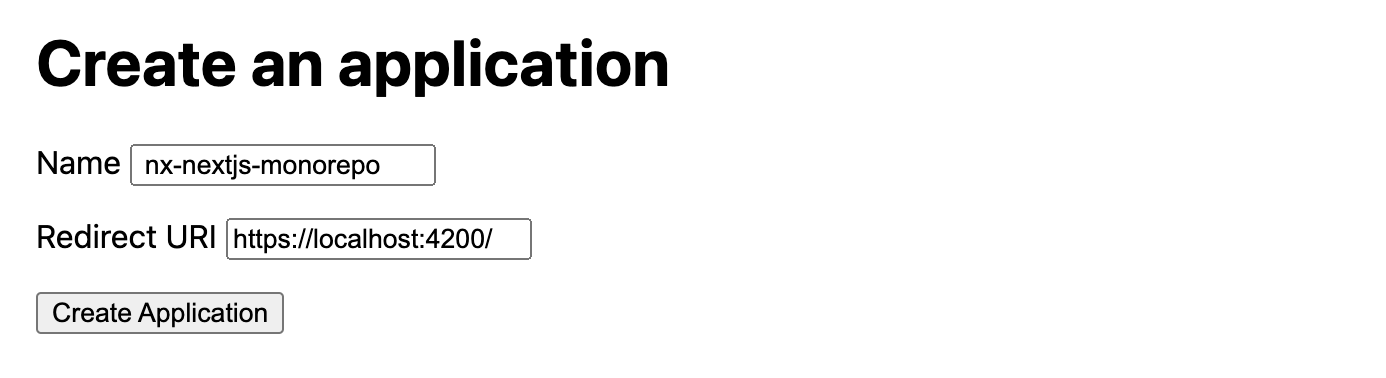
To create a new application, we need to click on the ADD AN APPLICATION button.

Next, we can add a Name for our application and https://localhost:4200/ as the Redirect URI for our new application and click on the Create Application button.
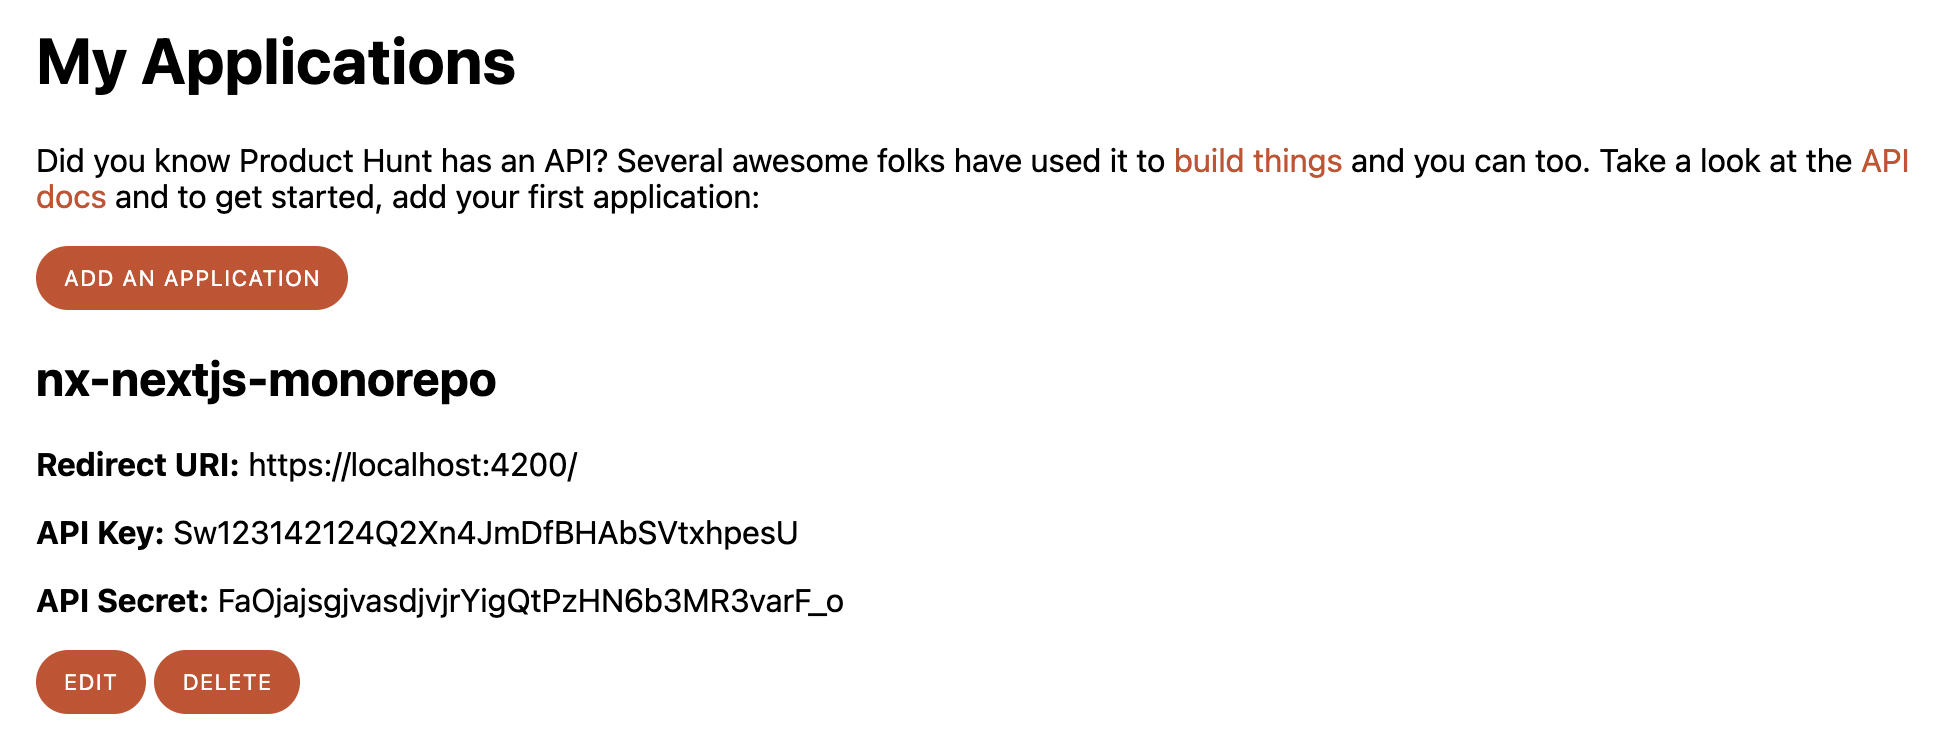
We’ll now be able to view the credentials of our new application.
Next, we need to generate a Developer Token by clicking on the CREATE TOKEN button in the same page.
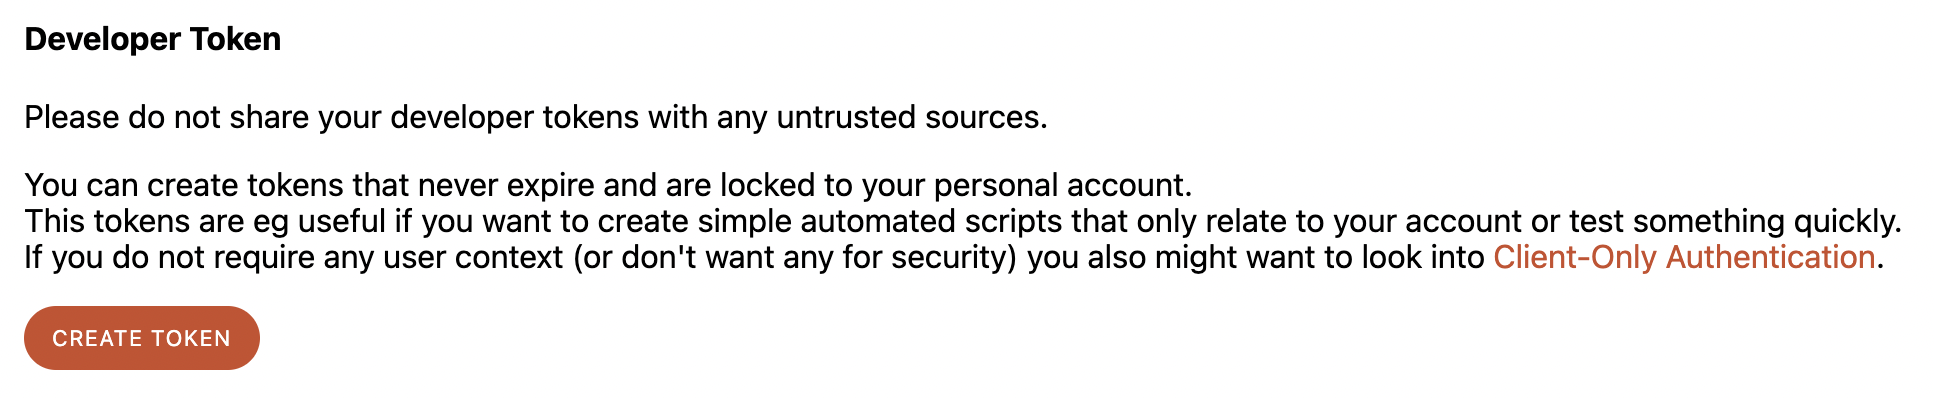
This will generate a new token and show it on the page.
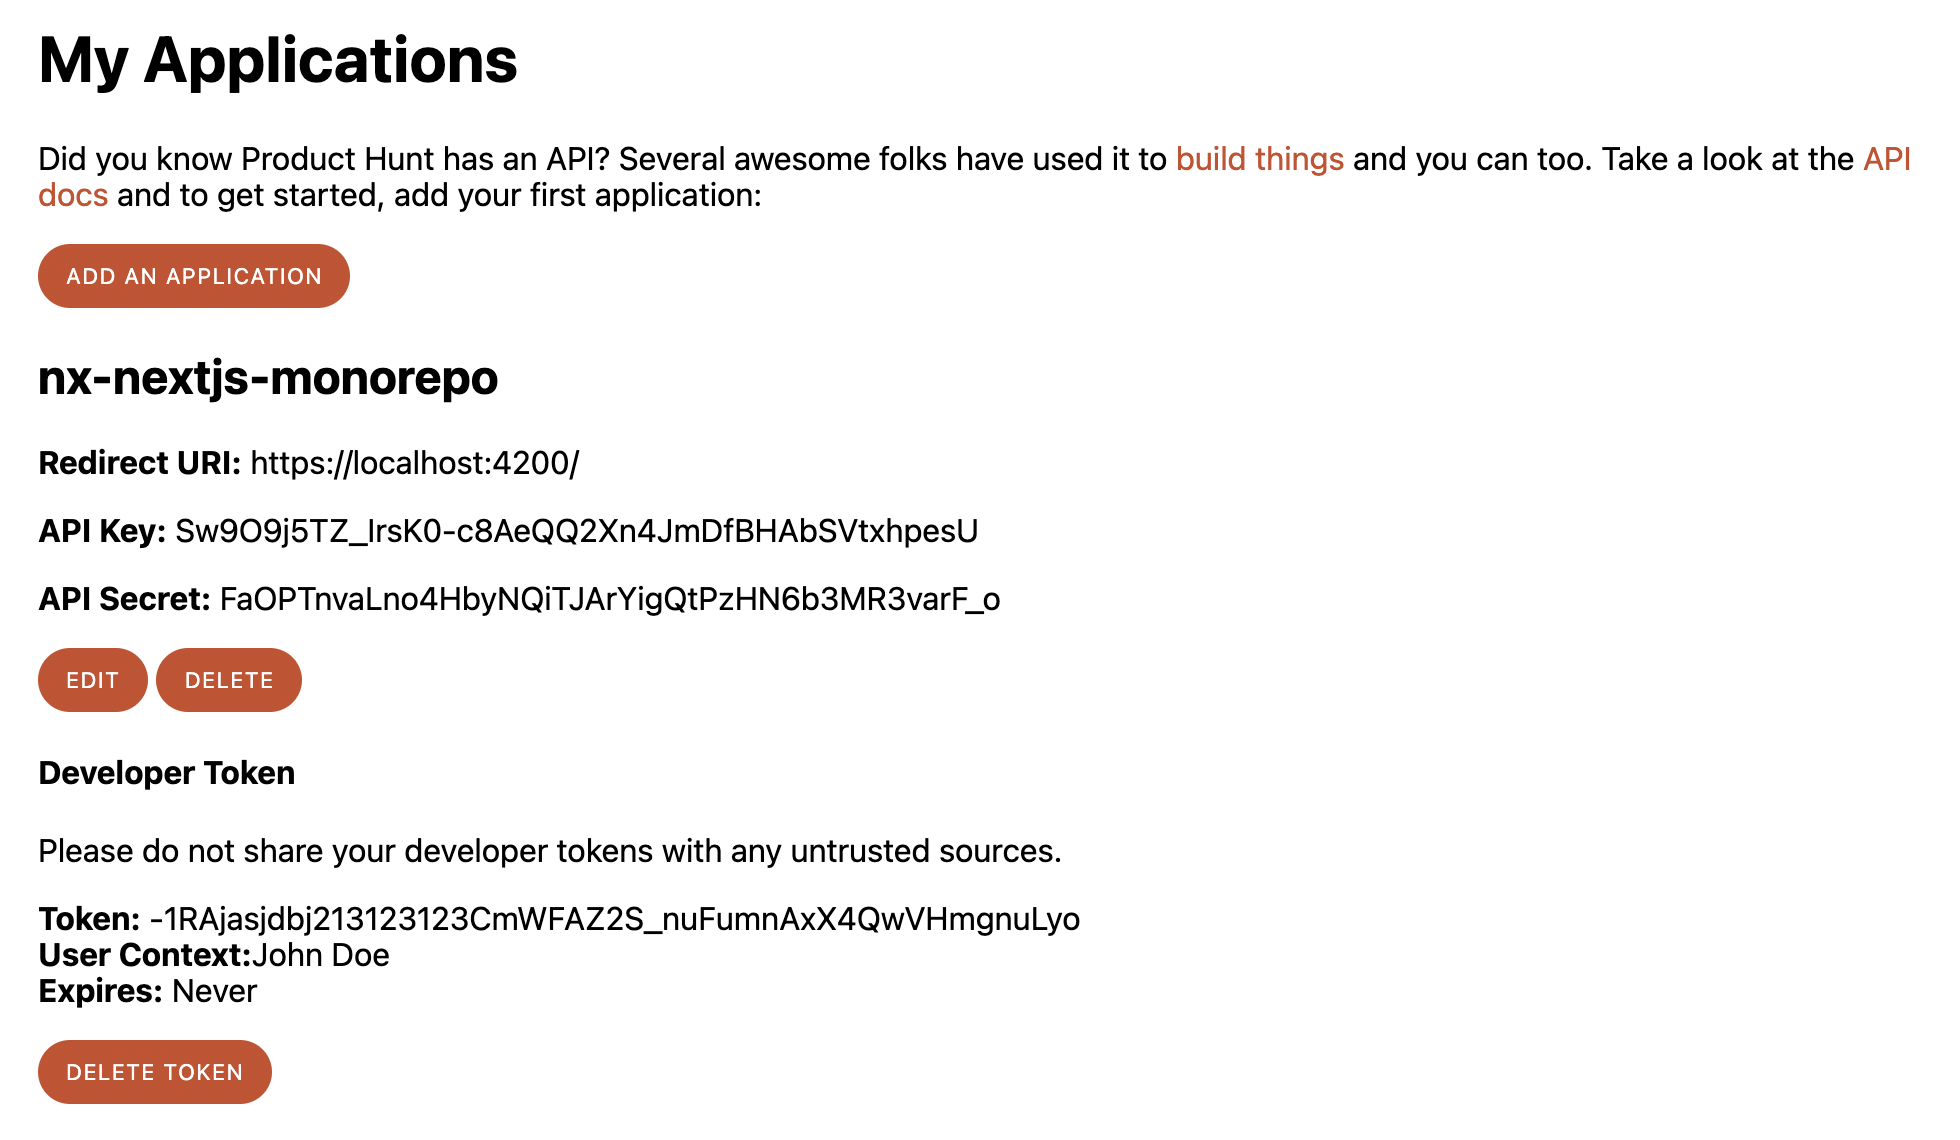
Next, we need to store these credentials inside our application. We can create a new .env.local file inside the apps/product-hunt directory with the following content:
// apps/product-hunt/.env.local

NEXT_PUBLIC_PH_API_ENDPOINT=https://api.producthunt.com/v2/api/graphql
NEXT_PUBLIC_PH_TOKEN=<your-developer-token>
Since the Product Hunt API is in GraphQL, we’ll have to install a few packages to make our application work with GraphQL. From the root directory, we need to run the following command to install the necessary packages:
yarn add graphql-hooks graphql-hooks-memcache
graphql-hooks is a minimal hooks-first GraphQL client. It helps us in requesting data from a GraphQL server.
graphql-hooks-memcache is an in-memory caching implementation for graphql-hooks.
Next, we need to initialize the GraphQL client from the graphql-hooks package. We can do that by creating a new graphql-client.ts file inside the apps/product-hunt/lib directory with the following content:
// apps/product-hunt/lib/graphql-client.ts

import { GraphQLClient } from "graphql-hooks";
import memCache from "graphql-hooks-memcache";
import { useMemo } from "react";

let graphQLClient;

const createClient = (initialState) => {
  return new GraphQLClient({
    ssrMode: typeof window === "undefined",
    url: process.env.NEXT_PUBLIC_PH_API_ENDPOINT, // Server URL (must be absolute)
    cache: memCache({ initialState }),
    headers: {
      Authorization: `Bearer ${process.env.NEXT_PUBLIC_PH_TOKEN}`,
    },
  });
};

export const initializeGraphQL = (initialState = null) => {
  const _graphQLClient = graphQLClient ?? createClient(initialState);

  // After navigating to a page with an initial GraphQL state, create a new
  // cache with the current state merged with the incoming state and set it to
  // the GraphQL client. This is necessary because the initial state of
  // `memCache` can only be set once
  if (initialState && graphQLClient) {
    graphQLClient.cache = memCache({
      initialState: Object.assign(
        graphQLClient.cache.getInitialState(),
        initialState
      ),
    });
  }

  // For SSG and SSR always create a new GraphQL Client
  if (typeof window === "undefined") {
    return _graphQLClient;
  }

  // Create the GraphQL Client once in the client
  if (!graphQLClient) {
    graphQLClient = _graphQLClient;
  }

  return _graphQLClient;
};

export const useGraphQLClient = (initialState) => {
  const store = useMemo(() => initializeGraphQL(initialState), [initialState]);

  return store;
};
The above code is similar to the official Next.js GraphQL example. The main idea of the above file is to create a GraphQL client that will help us in requesting data from a GraphQL server.
The createClient function is responsible for creating the GraphQL client using the graphql-hooks package.
The initializeGraphQL function is responsible for initializing our GraphQL client using createClient as well as hydrating our GraphQL client on the client side. This is necessary because we’re using Next.js, which allows us to fetch data on both client and server side. So, if the data is fetched on the server side, the client side also needs to be hydrated with the same data without doing any additional request to the GraphQL server.
The useGraphQLClient is a hook that can be used to generate the GraphQL client.
Next, we’ll also need to create one more file, graphql-request.ts, inside the apps/product-hunt/lib directory with the following content:
// apps/product-hunt/lib/graphql-request.ts

const defaultOpts = {
  useCache: true,
};

// Returns the result of a GraphQL query. It also adds the result to the
// cache of the GraphQL client for better initial data population in pages.

// Note: This helper tries to imitate what the query hooks of `graphql-hooks`
// do internally to make sure we generate the same cache key
const graphQLRequest = async (client, query, options = defaultOpts) => {
  const operation = {
    query,
  };
  const cacheKey = client.getCacheKey(operation, options);
  const cacheValue = await client.request(operation, options);

  client.saveCache(cacheKey, cacheValue);

  return cacheValue;
};

export default graphQLRequest;
The graphQLRequest function is responsible for returning the result of the GraphQL query as well as adding the result to the GraphQL client’s cache.
The above code is similar to the official Next.js GraphQL example.
Next, we need to update the apps/product-hunt/pages/_app.tsx file with the following content:
// apps/product-hunt/pages/_app.tsx

import { ClientContext } from "graphql-hooks";
import { AppProps } from "next/app";
import Head from "next/head";
import React from "react";
import { useGraphQLClient } from "../lib/graphql-client";

const NextApp = ({ Component, pageProps }: AppProps) => {
  const graphQLClient = useGraphQLClient(pageProps.initialGraphQLState);

  return (
    <ClientContext.Provider value={graphQLClient}>
      <Head>
        <title>Welcome to product-hunt!</title>
      </Head>
      <Component {...pageProps} />
    </ClientContext.Provider>
  );
};

export default NextApp;
The above code will ensure that our whole application has access to the GraphQL context provider by wrapping our app with the ClientContext.Provider.
Next, we need to create one more file, all-posts.ts, inside the apps/product-hunt/queries directory with the following content:
// apps/product-hunt/queries/all-posts.ts

const ALL_POSTS_QUERY = `
  query allPosts {
    posts {
      edges {
        node {
          id
          name
          description
          votesCount
          website
          thumbnail {
            url
          }
        }
      }
    }
  }
`;

export default ALL_POSTS_QUERY;
The above GraphQL query will allow us to fetch all the posts from the ProductHunt GraphQL API endpoint.
Let’s also create a new product.ts file inside the apps/product-hunt/types directory with the following content to define the Product type:
// apps/product-hunt/types/product.ts

export default interface Product {
  id: number;
  name: string;
  tagline: string;
  slug: string;
  thumbnail: {
    image_url: string;
  };
  user: {
    avatar_url: string;
    name: string;
  };
}
The above code adds the TypeScript types for Product. A product can have an ID, name, tagline, slug, thumbnail and user. This is how the Product Hunt GraphQL returns the data.
Next, we need to update the apps/product-hunt/pages/index.tsx file with the following content:
// apps/product-hunt/pages/index.tsx

import { useQuery } from "graphql-hooks";
import { GetStaticProps, NextPage } from "next";
import Image from "next/image";
import React from "react";
import { initializeGraphQL } from "../lib/graphql-client";
import graphQLRequest from "../lib/graphql-request";
import {
  StyledCard,
  StyledCardColumn,
  StyledCardLink,
  StyledCardRow,
  StyledCardTagline,
  StyledCardThumbnailContainer,
  StyledCardTitle,
  StyledContainer,
  StyledGrid,
} from "../public/styles";
import ALL_POSTS_QUERY from "../queries/all-posts";
import Product from "../types/product";

interface IProps {
  hits: Product[];
}

const ProductsIndexPage: NextPage<IProps> = () => {
  const { data } = useQuery(ALL_POSTS_QUERY);

  return (
    <StyledContainer>
      <StyledGrid>
        {data.posts.edges.map(({ node }) => {
          return (
            <StyledCardLink key={node.id} href={node.website} target="_blank">
              <StyledCard>
                <StyledCardColumn>
                  <StyledCardThumbnailContainer>
                    <Image src={node.thumbnail.url} layout="fill" />
                  </StyledCardThumbnailContainer>
                </StyledCardColumn>
                <StyledCardColumn>
                  <StyledCardRow>
                    <StyledCardTitle>{node.name}</StyledCardTitle>
                    <StyledCardTagline>{node.description}</StyledCardTagline>
                  </StyledCardRow>
                </StyledCardColumn>
              </StyledCard>
            </StyledCardLink>
          );
        })}
      </StyledGrid>
    </StyledContainer>
  );
};

export const getStaticProps: GetStaticProps = async () => {
  const client = initializeGraphQL();

  await graphQLRequest(client, ALL_POSTS_QUERY);

  return {
    props: {
      initialGraphQLState: client.cache.getInitialState(),
    },
    revalidate: 60,
  };
};

export default ProductsIndexPage;
In the above code snippet, we’re doing two things:
-
We’re fetching the data via the
ALL_POSTS_QUERYGraphQL query and then we’re mapping over thedataarray returns by the ProductHunt API. -
We’re fetching the data during build time via getStaticProps, which is a Next.js function. However, if we fetch the data during our build time, the data might become obsolete. So, we use the
revalidateoption. The revalidate an optional amount (in seconds) after which a page re-generation can occur. This is also known as Incremental Static Regeneration.
Let’s also add the styles by adding the following content inside the apps/product-hunt/public/styles.ts file:
// apps/product-hunt/public/styles.ts

import styled from "styled-components";

export const StyledContainer = styled.div`
  padding: 24px;
  max-width: 600px;
  margin: 0 auto;
  font-family: sans-serif;
`;

export const StyledGrid = styled.div`
  display: grid;
  grid-template-columns: repeat(1, minmax(0, 1fr));
  grid-gap: 24px;
`;

export const StyledCardLink = styled.a`
  text-decoration: none;
  color: #000;
`;

export const StyledCard = styled.div`
  display: flex;
  gap: 12px;
  padding: 12px;
  background-color: #f7f7f7;
`;

export const StyledCardColumn = styled.div`
  display: flex;
  flex-direction: column;
  gap: 4px;
  justify-content: space-between;
`;

export const StyledCardRow = styled.div`
  display: flex;
  flex-direction: column;
  gap: 4px;
`;

export const StyledCardThumbnailContainer = styled.div`
  object-fit: cover;

  width: 150px;
  height: 150px;
  position: relative;
`;

export const StyledCardTitle = styled.div`
  font-size: 18px;
  font-weight: bold;
`;

export const StyledCardTagline = styled.div`
  font-size: 14px;
  line-height: 1.5;
`;
Now, if we run yarn start command inside a new terminal window, we’ll see the following screen on http://localhost:4200/.
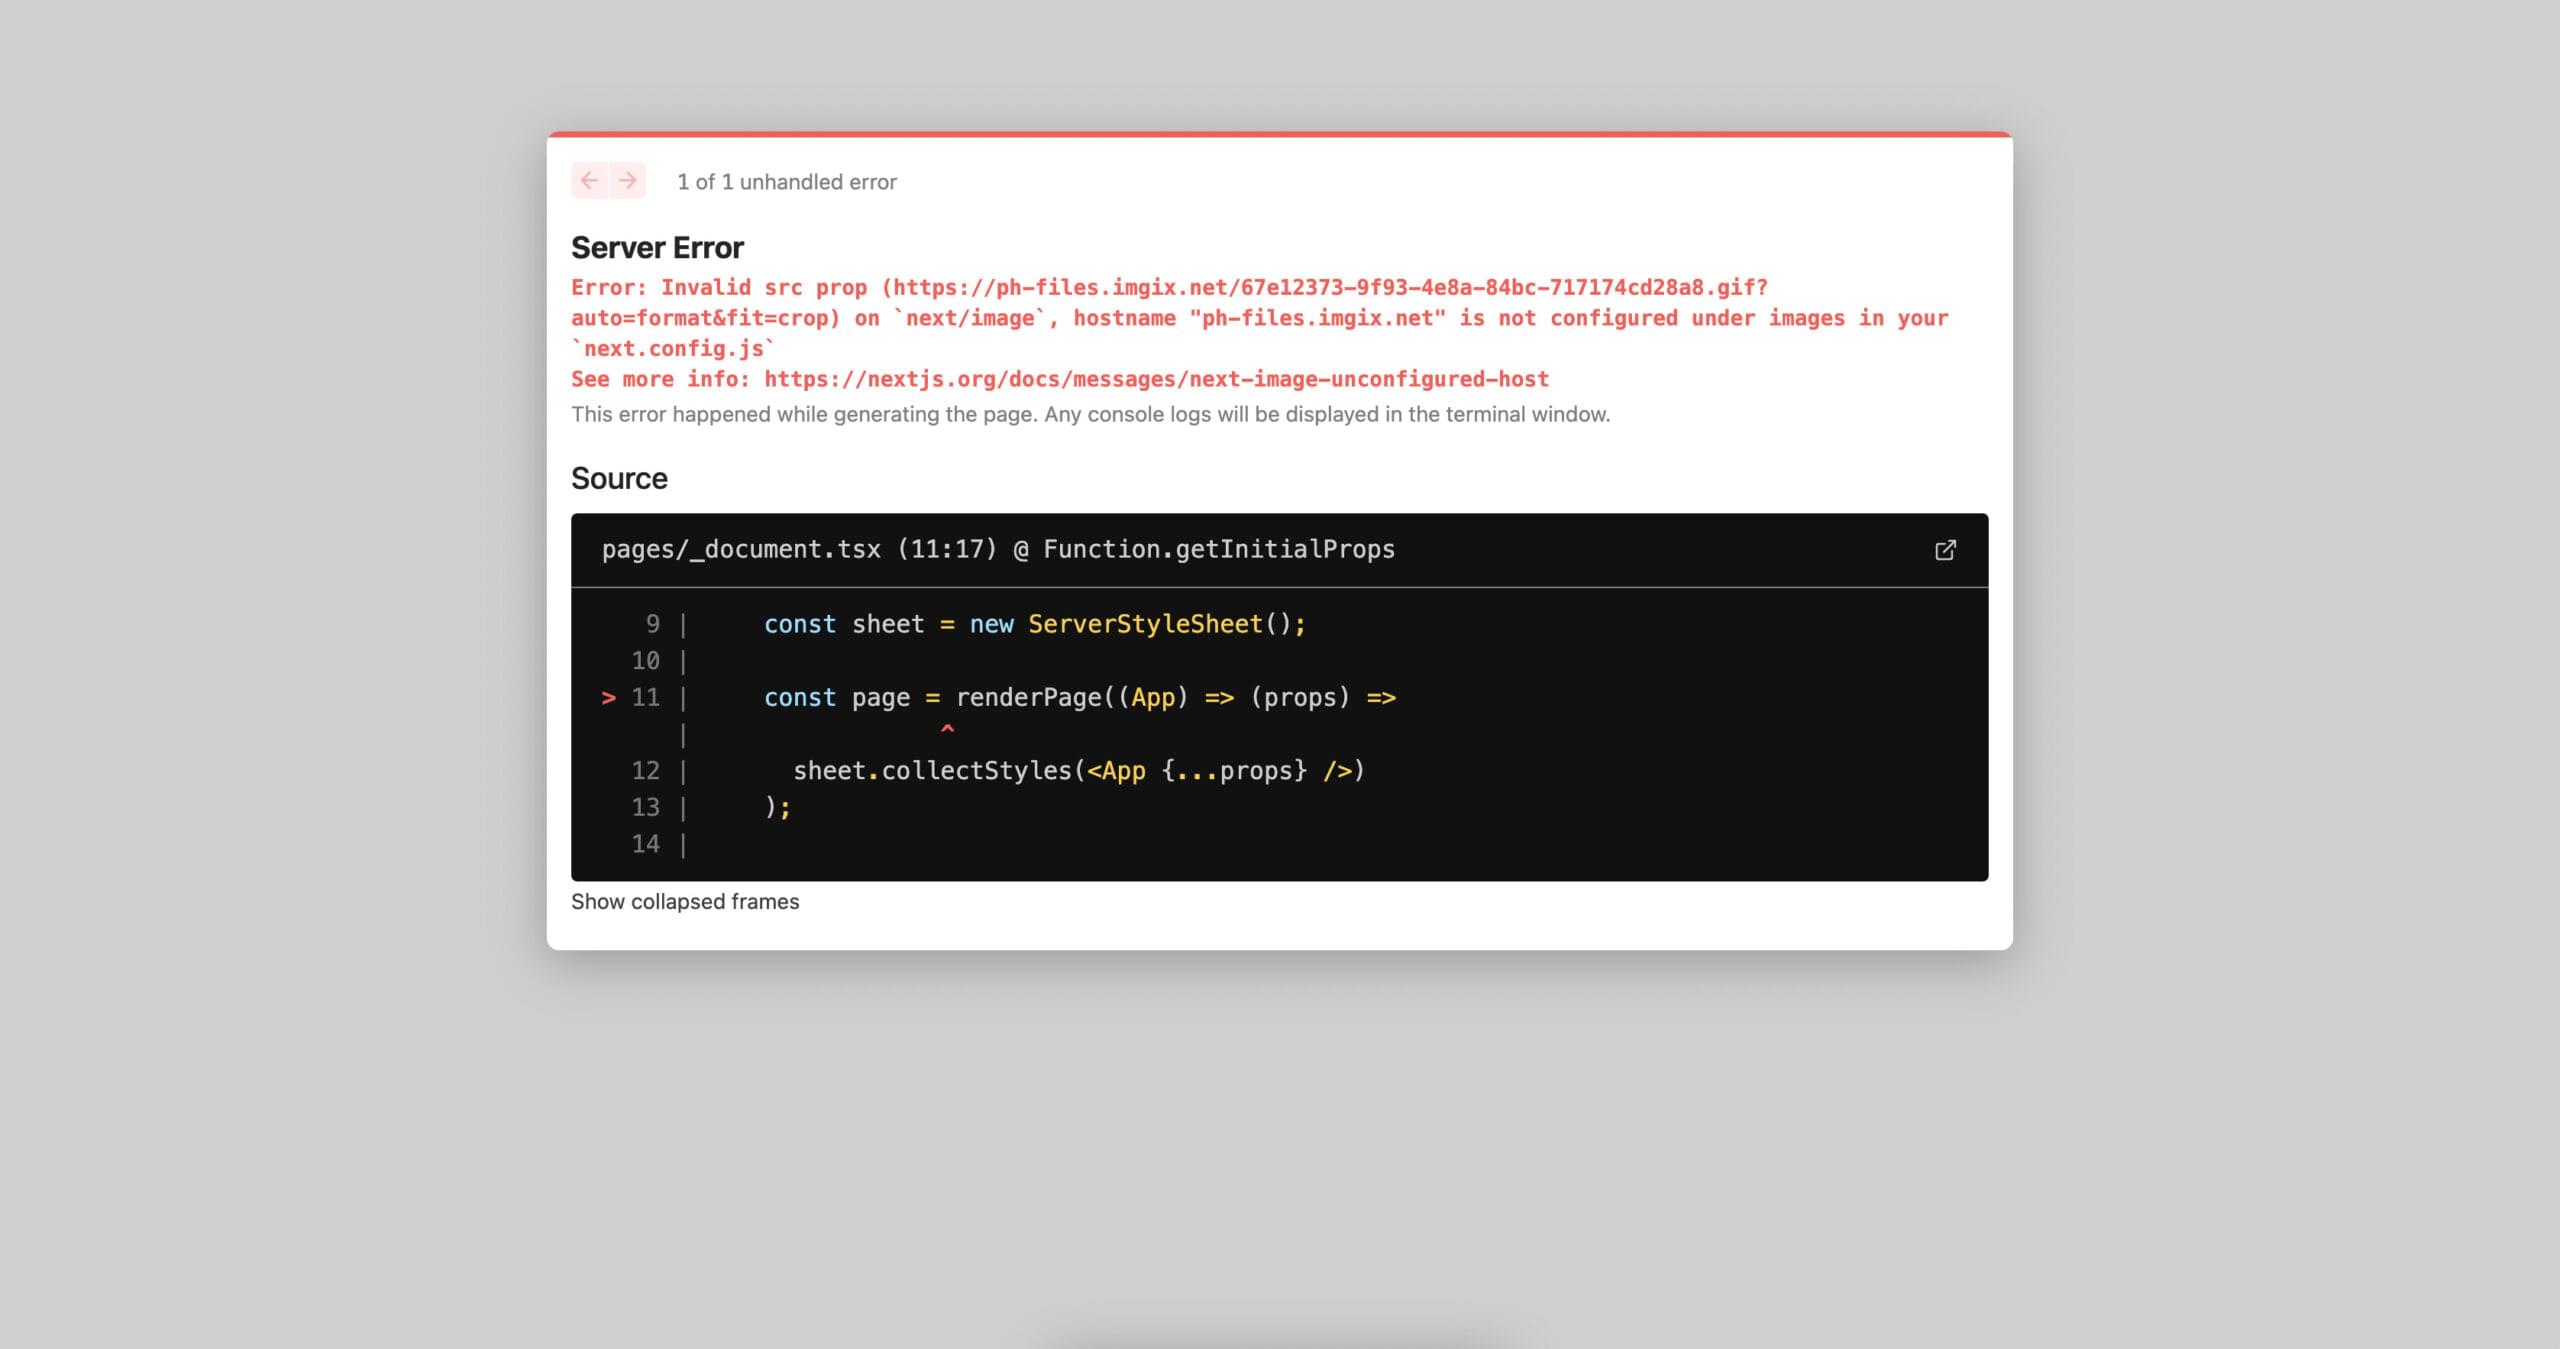
To fix the above issue, we need to update our apps/product-hunt/next.config.js file with the following content:
// apps/product-hunt/next.config.js

// eslint-disable-next-line @typescript-eslint/no-var-requires
const withNx = require("@nrwl/next/plugins/with-nx");

module.exports = withNx({
  nx: {
    // Set this to false if you do not want to use SVGR
    // See: https://github.com/gregberge/svgr
    svgr: true,
  },
  images: {
    domains: ["ph-files.imgix.net", "ph-avatars.imgix.net"],
  },
});
We added the domains from which the Product Hunt API fetches the images. This is necessary because we’re using Next’s Image component.
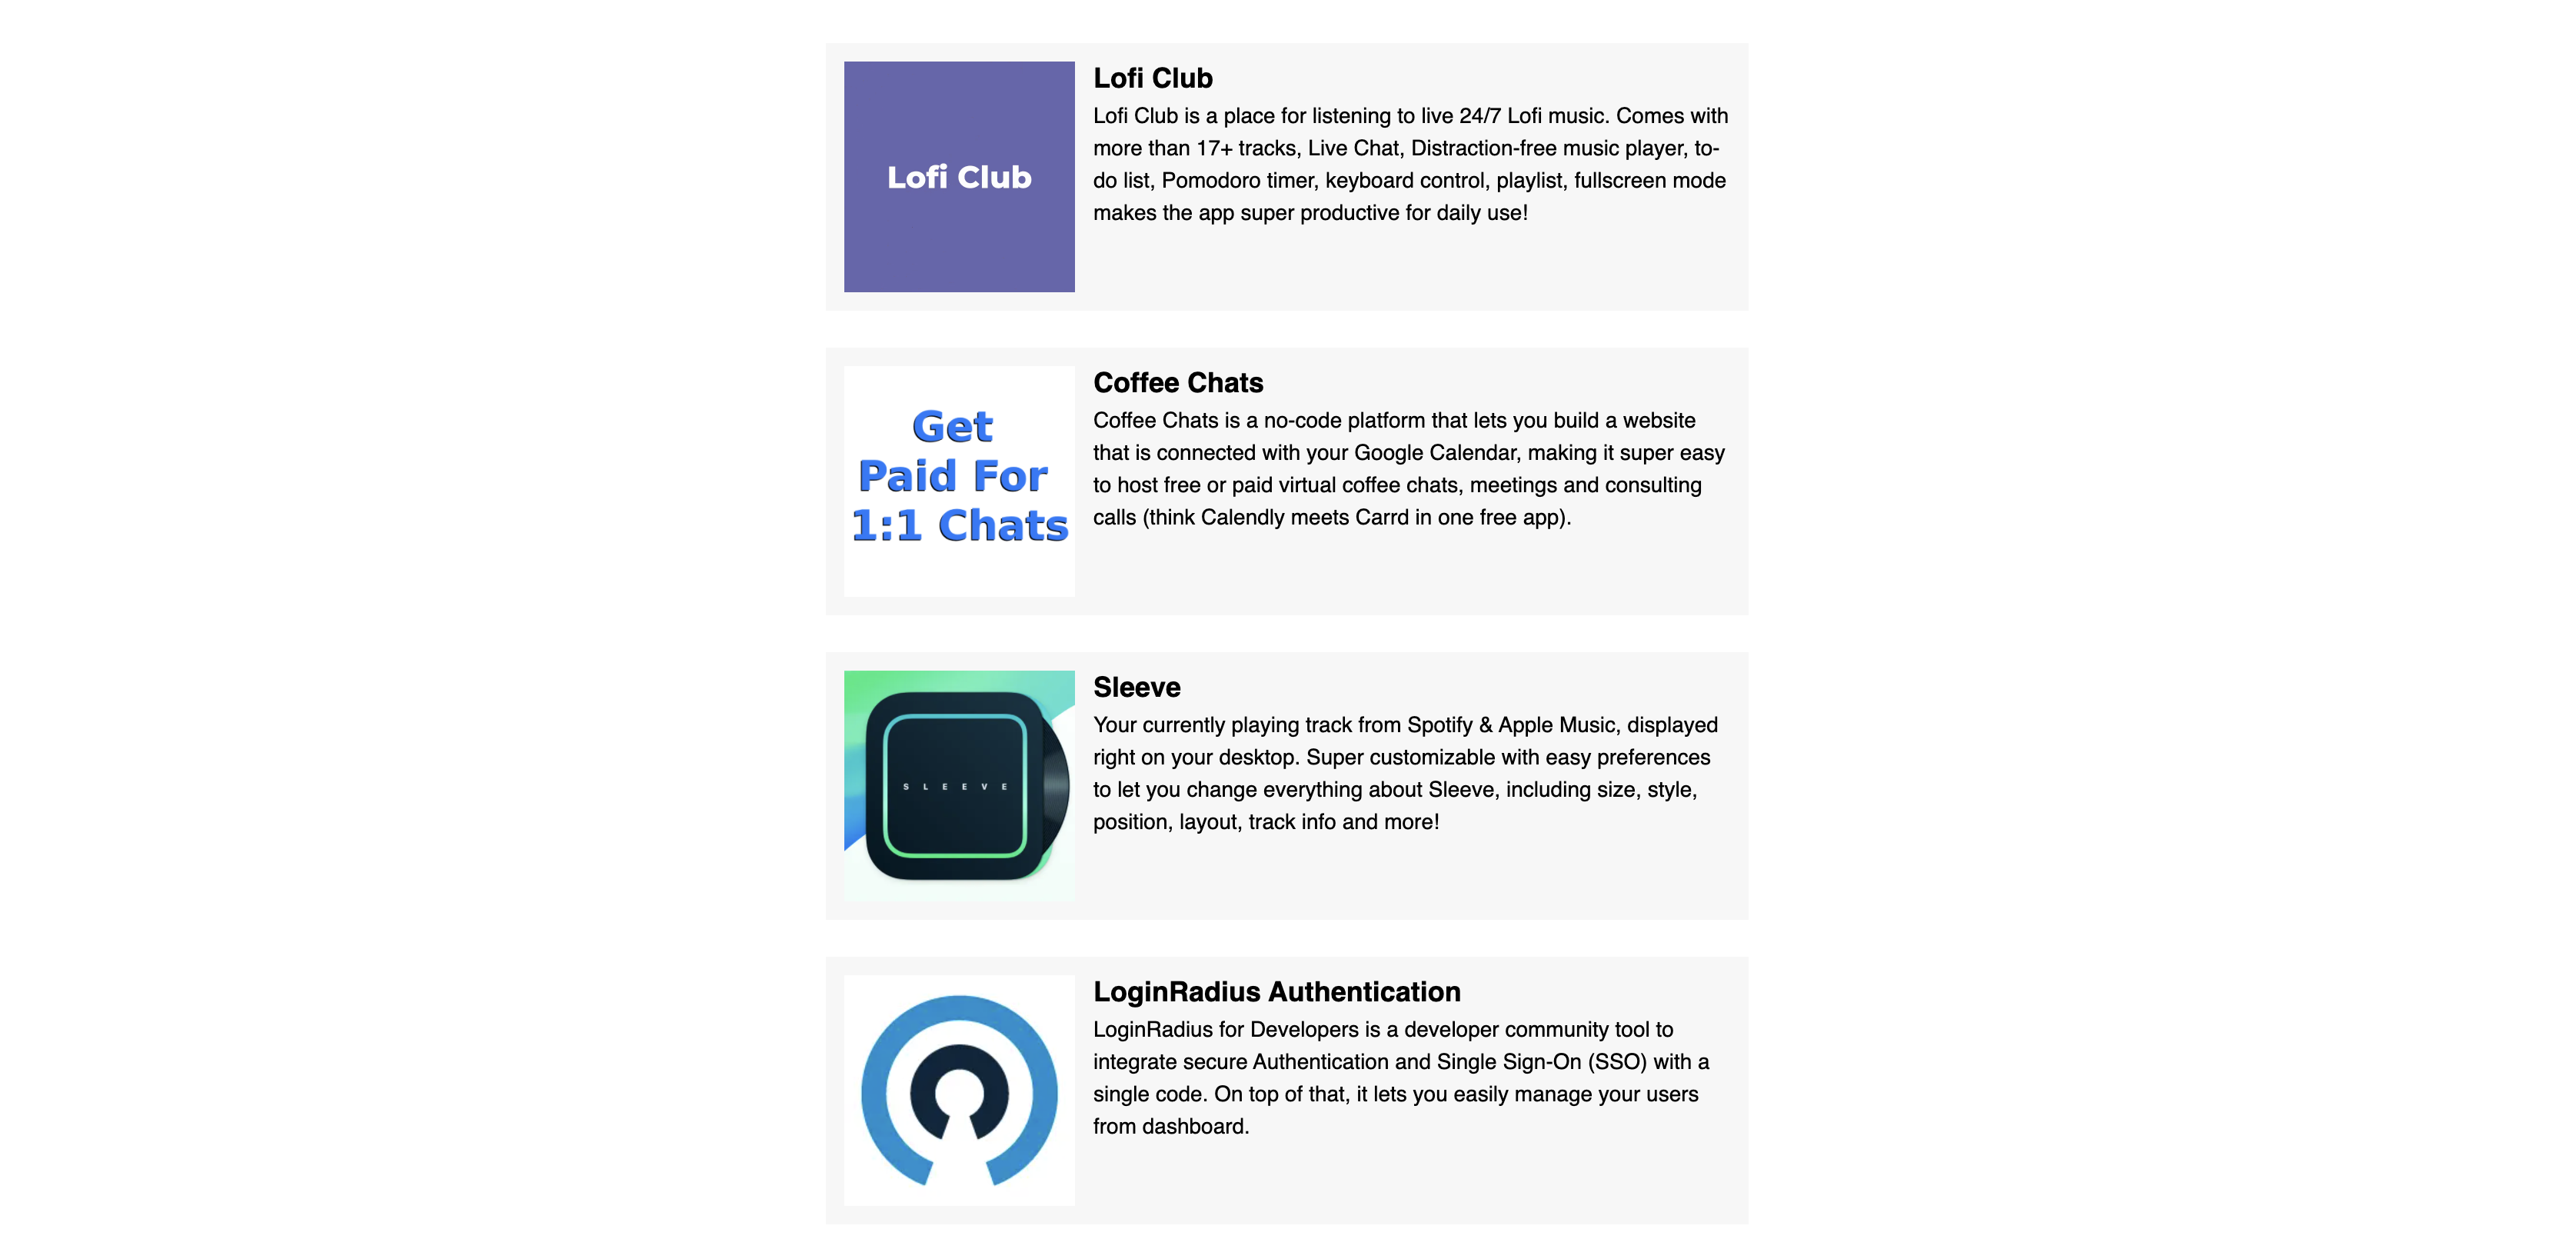
Now, if we restart our server, we should be able to view the following screen on http://localhost:4200/.
Creating a Reusable Component Library
We’ve successfully built the front page of Product Hunt. However, we can see that all our styles are under a single application. So, if we want to reuse the same styles while building another application, we’ll have to copy these styles into the new application.
One way of resolving this issue is by creating a separate component library and storing these styles there. That component library can be reused bye multiple applications.
To create a new React library in Nx, we can run the following command from the root of our project:
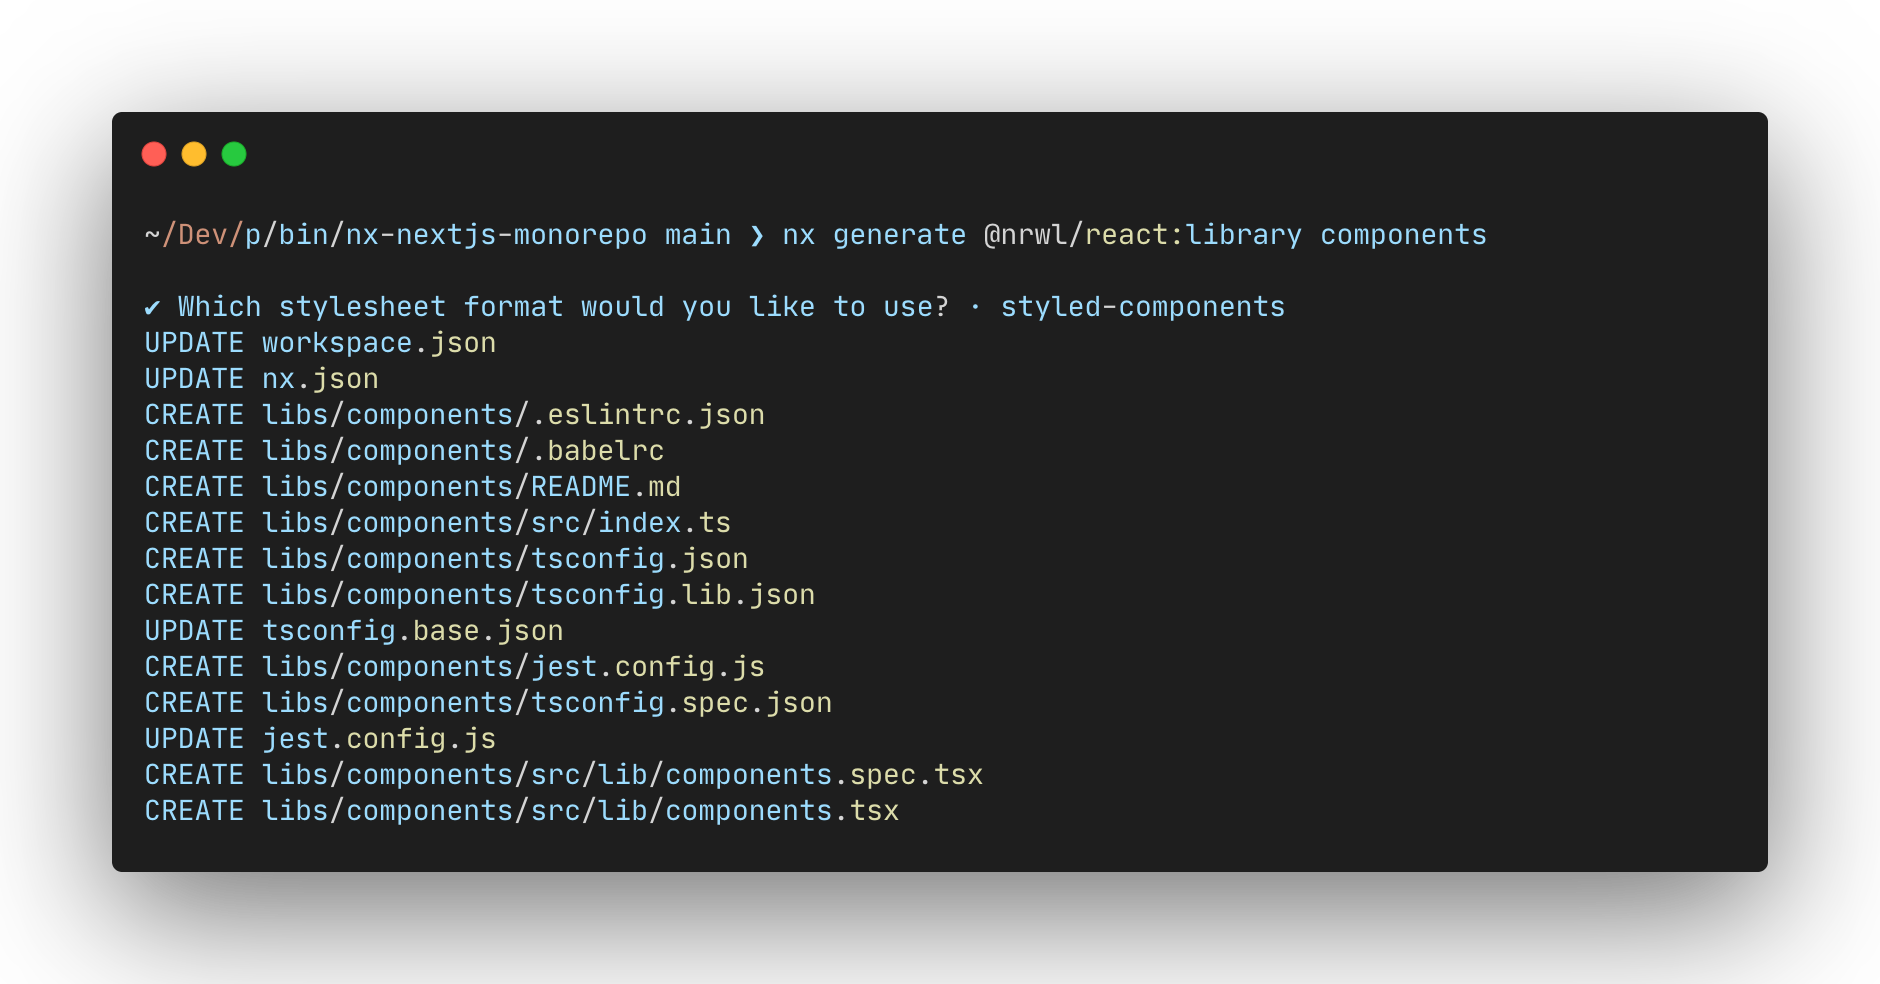
nx generate @nrwl/react:library components
The above command will give us the prompt pictured below.
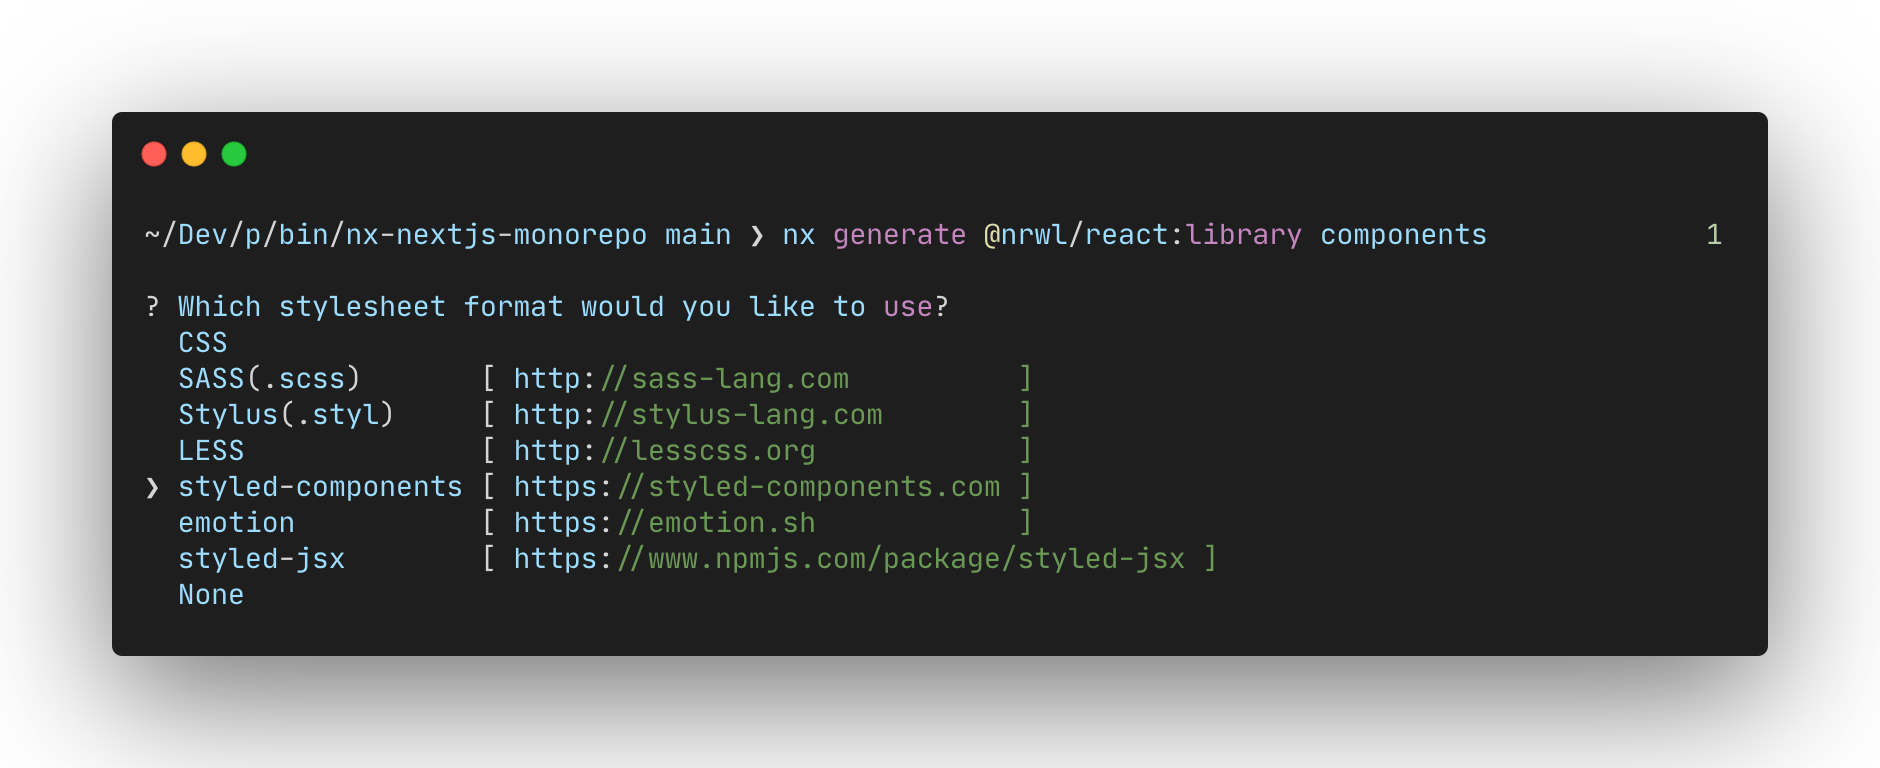
Since we’re using Styled Components, we’ll choose that option in the above prompt. Once we select that option, we’ll view the following changes on our terminal.
Next, we’ll copy all the styles from apps/product-hunt/public/styles.ts into the libs/components/src/lib/components.tsx file.
We also need to import all the styles from this library. To do that, we need to modify our apps/product-hunt/pages/index.tsx file:
// apps/product-hunt/pages/index.tsx

import {
  StyledCard,
  StyledCardColumn,
  StyledCardLink,
  StyledCardRow,
  StyledCardTagline,
  StyledCardThumbnailContainer,
  StyledCardTitle,
  StyledContainer,
  StyledGrid,
} from "@nx-nextjs-monorepo/components";
If we look at our tsconfig.base.json file, we’ll view the following line:
// tsconfig.base.json

"paths": {
  "@nx-nextjs-monorepo/components": ["libs/components/src/index.ts"]
}
@nx-nextjs-monorepo/components is the name of our component library. Hence, we’ve imported all the styles from that library in the apps/product-hunt/pages/index.tsx file.
We can remove the apps/product-hunt/public/styles.ts file, since we don’t need it anymore.
Now, if we restart our Nx server, we’ll view the following screen on http://localhost:4200/.
Conclusion
In this article, we’ve learned how we can leverage Nx to build a monorepo with Next.js and Styled Components. We’ve also learned how using monorepos can improve the development experience and speed of building applications. We’ve built a Next.js application and a Styled Components library, but using Nx, it’s possible to generate Angular, Cypress, Nest, Gatsby, Express and Storybook applications using their generators.
And don’t forget: the code for this article is available on GitHub, and you can find a working demo of the app here.
FAQs About Monorepos
A monorepo, short for monolithic repository, is a version control system that contains multiple projects, applications, or components, typically managed together in a single repository.
Monorepos offer several advantages, including simplified dependency management, easier code sharing, consistent versioning, centralized configuration, and improved collaboration among teams working on related projects.
A monorepo contains multiple projects in a single repository, while a polyrepo uses separate repositories for each project. Monorepos are beneficial for code sharing and cross-project changes, while polyrepos provide isolation between projects.
Monorepos are suitable for projects where there is a high degree of interdependence or code sharing among components. This often includes large-scale web applications, microservices architectures, and projects with shared libraries.
Some popular tools for managing monorepos include Lerna, Yarn Workspaces, and Bazel. These tools help with dependency management, code organization, and versioning in a monorepo environment.
Monorepos can streamline development workflows by facilitating shared code ownership, simplifying dependency management, and enabling atomic commits across multiple projects. However, they may require adjustments in build and testing processes.