

It is a common requirement for apps to require a backend for data to be saved, shared with other users and synced between a user’s devices.
Building this backend can require time, a different skill set and other resources (e.g., servers, push notification services, etc). Fortunately, there are several platforms that provide ready-made customizable backends you can integrate with your apps. These are known as ‘Backend as a Service’, or BaaS in short.
Key Takeaways
- Seamless Integration and Time Efficiency: Utilizing Parse for your iOS app’s backend can significantly reduce development time and resources by providing a ready-made platform that includes data storage, user authentication, and more.
- Comprehensive Services Offered: Parse offers an all-in-one package with features like Parse Core for data handling, Parse Push for notifications, and Parse Analytics for tracking app usage, streamlining various aspects of app management and monitoring.
- Scalability and Ease of Modifications: BaaS platforms like Parse are designed to scale automatically with user growth, and changes to the app’s backend, such as database modifications, can be made easily through the dashboard.
- Potential Cost and Vendor Lock-In: While starting with a free package, costs can escalate as user numbers increase. Also, switching from Parse to another service can be challenging due to potential feature discrepancies between BaaS providers.
- Dependency Risks: Relying on third-party BaaS providers like Parse introduces risks such as sudden changes in service terms or discontinuation, which could necessitate urgent migration or redevelopment of the backend.
- Practical Implementation: The article walks through the practical steps of setting up Parse with an iOS application, from account creation and SDK integration to real-time data handling and user authentication, providing a clear blueprint for developers.
Pros and Cons of Using BaaS
Pros
- Saves you time and resources.
- Provides different services in one package. Most of the available BaaS vendors not only provide backend cloud storage for you data, they also offer such services as push notifications, analytics, social network integration, etc.
- Caters to scaling. The BaaS platforms are built for scaling and as a developer, you will not need to do any extra work if you gain a large amount of users, just pay more.
- Easy to make changes. You can easily make changes to your application’s functionality without requiring a lot of rewrites to its backend. It is easy to change your database models using the platform’s dashboard. This comes in handy to anyone following the iterative ‘lean startup methodology’ of shipping and improving the app based on usage data.
Cons
- Using a BaaS can be expensive. While most of these services offer a free package for a certain number of requests a month. Things can suddenly become costly if your app was to become successful and rapidly gain many users.
- You might experience vendor lock-in where a switch to another platform is difficult. This is becoming less of a problem as most services now allow for easier migrations. You may have to give up some features as not all BaaS platforms offer the same.
- A huge disadvantage to consider before using a BaaS is the dependence of your app on a third-party service. A provider might make changes to its service (e.g. change pricing plans) which you will either have to accept or look for another solution. There is also the possibility of a service being shut down. This is a huge inconvenience as you will be forced to migrate your data to another provider or to build your own backend. An example of this is the recent shutdown of StackMob which forced developers to migrate their data.
Enter Parse
For this tutorial, we are going to look at Parse to provide a backend for an iOS application. We’ll briefly look at what it offers, followed by building an application that will use it for user registration, authentication and storing of user data.
Parse is one of the more popular Backend as a Service platforms. The service offers three products in one package: Parse Core, Parse Push and Parse Analytics.
Parse Core generally handles the saving of data and social media integration. It also enables you to write your own code that will be run in the cloud thus providing custom server-side logic.
Parse Push is used to send push notifications. It enables the developer to customize, schedule and send push notifications to all registered users or a select group of users.
Parse Analytics enables you to track your app’s data. You can track usage data such as installations, active users, user retention, push notification open rates etc.
To start off, download the project file which includes a starter project and the completed final project. The application is a simple note taking application that enables a user to save and retrieve notes to the cloud, thus maintaining the same data across devices.
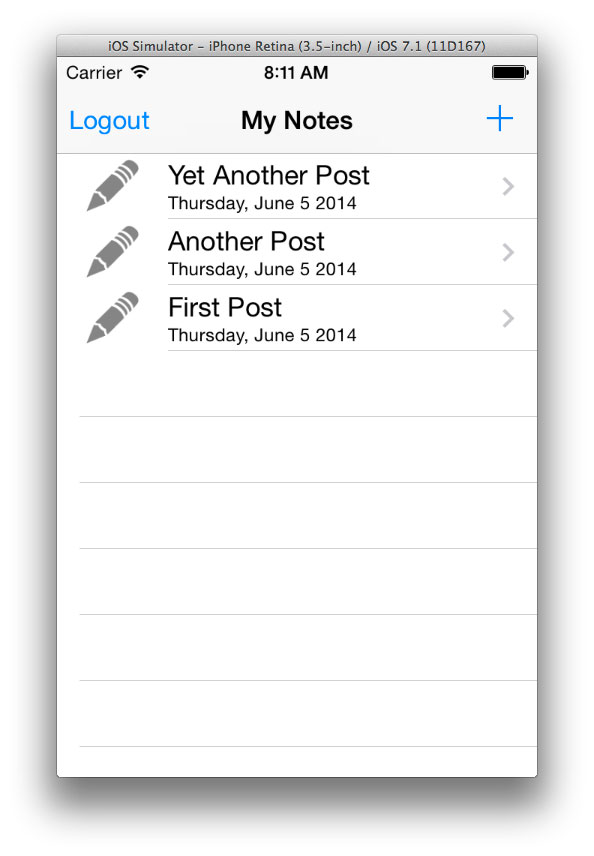
The project consists of a login, signup, notes table view and an add/edit note view as shown below.

On running the app, you will see an empty table view with Logout and Add buttons on the navigation bar. The app should require the user to login before using it. If the user is logged in, it will take them directly to the table view showing a list of saved notes. Otherwise it will bring up the Login view. If the user isn’t registered, then they will have an option of signing up.
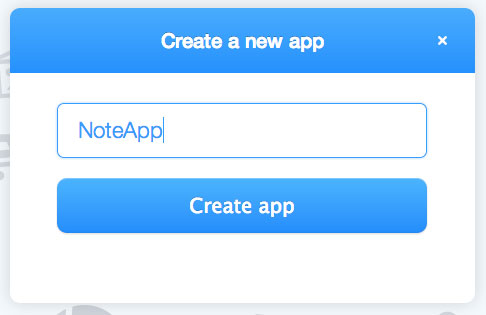
To start, you should first create an account on parse.com if you don’t already have one. Once logged in, access the Dashboard where you should be able to create a new app and also see a list of all your apps. Create an app called NoteApp.
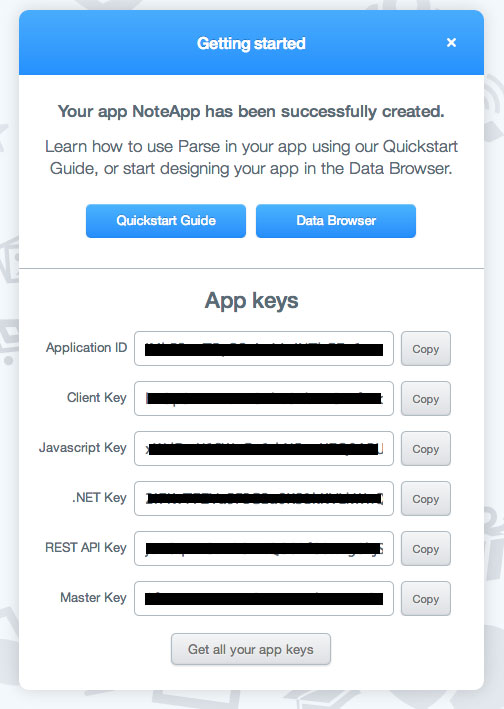
On creating the app, you will see a window containing your app IDs and keys. These will be used later in the iOS app.
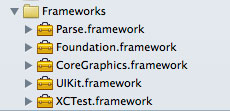
Download the Parse SDK here. Unzip the file and drag the framework into your project’s Frameworks group folder.
Next we need to add some libraries to the project. Select your project on the project navigator, make sure the project target is selected and then click on the ‘Build Phases’ tab. Expand ‘Link Binary With Libraries’.

Click the Add icon at the bottom of the listed frameworks and add the following libraries.
- AudioToolbox.framework
- CFNetwork.framework
- CoreGraphics.framework
- CoreLocation.framework
- libz.dylib
- MobileCoreServices.framework
- QuartzCore.framework
- Security.framework
- StoreKit.framework
- SystemConfiguration.framework
Open the AppDelegate.m file and add the following import to the top of the file and make the following modification to the application:didFinishLaunchingWithOptions:, method placing in your app id and client key.
#import <Parse/Parse.h>
- (BOOL)application:(UIApplication *)application didFinishLaunchingWithOptions:(NSDictionary *)launchOptions

{

    [Parse setApplicationId:@"YOUR APP ID"

                  clientKey:@"YOUR CLIENT KEY"];

    return YES;

}
To test the SDK, paste the following lines below the method call that sets the application id and client key in application:didFinishLaunchingWithOptions:.
PFObject *testObject = [PFObject objectWithClassName:@"TestObject"];

testObject[@"foo"] = @"bar";

[testObject saveInBackground];
Run the app and navigate to the Parse dashboard on your browser. Select your app and click on the Data Browser tab. You should see a table data of the object that was created above.
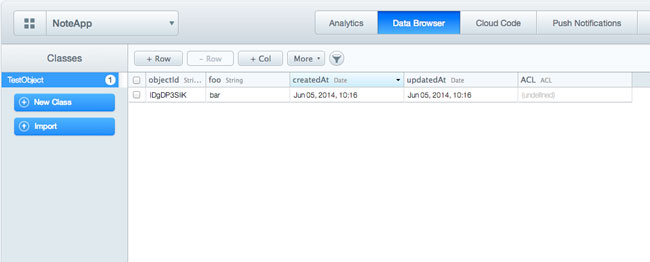
In the Dashboard, you will find controls to add/remove rows and columns, set permissions, export the class and even drop the whole class. Drop the TestObject class as we won’t need it for our app. Drop it by clicking on the More button and selecting Drop Class. Also delete the code that creates the TestObject when the application launches.
Not only can you create objects programmatically as we did above, but you can also do so using the Dashboard. We are going to create a Post class and some test posts that will be loaded in our app.
Click on the New Class button and name the class Post. Leave the type as Custom. Add two string columns: title and content. Add a few rows of data, just fill the title and content fields.
Apart from the title and content columns, other columns are also generated — objectId, createdAt, updatedAt and ACL. The ACL stands for Access Control Lists. These are used to specify the access control users and/or roles have on particular objects.
Back in our app, we’ll create a view controller for the notes table view. Parse has a convenient class which is a subclass of UITableViewController called PFQueryTableViewController. We’ll be using some of the functionality it offers like pull to refresh and pagination (which enables you to set the number of results each query gets you).
Create a new class. I named mine JKENotesListViewController. It should be a subclass of PFQueryTableViewController.
James Yu, the co-creator of Parse wrote a gist for a PFQueryTableViewController template which I use instead of writing all the code from scratch. I’ve replaced the template’s initializer initWithStyle: with initWithCoder: since we are using Storyboards.
The following is the code in JKENotesListViewController.m
//  JKENotesListViewController.m

//  NoteApp

//

//  Created by Joyce Echessa on 6/5/14.

//  Copyright (c) 2014 Joyce Echessa. All rights reserved.

//
#import "JKENotesListViewController.h"
@interface JKENotesListViewController ()
@end
@implementation JKENotesListViewController
    - (id)initWithCoder:(NSCoder *)aDecoder

    {

        self = [super initWithClassName:@"Post"];

        self = [super initWithCoder:aDecoder];

        if (self) {

            // The className to query on

            self.parseClassName = @"Post";
            // Whether the built-in pull-to-refresh is enabled

            self.pullToRefreshEnabled = YES;
            // Whether the built-in pagination is enabled

            self.paginationEnabled = YES;
            // The number of objects to show per page

            self.objectsPerPage = 15;

        }

        return self;

    }
    #pragma mark - UIViewController
    - (void)viewDidLoad {

        [super viewDidLoad];
        // Uncomment the following line to preserve selection between presentations.

        // self.clearsSelectionOnViewWillAppear = NO;
        // Uncomment

        // self.navigationItem.rightBarButtonItem = self.editButtonItem;

    }
    #pragma mark - PFQueryTableViewController
    // Override to customize the look of a cell representing an object. The default is to display

    // a UITableViewCellStyleDefault style cell with the label being the textKey in the object,

    // and the imageView being the imageKey in the object.

    - (UITableViewCell *)tableView:(UITableView *)tableView cellForRowAtIndexPath:(NSIndexPath *)indexPath object:(PFObject *)object {

        static NSString *CellIdentifier = @"Cell";
        PFTableViewCell *cell = (PFTableViewCell *)[tableView dequeueReusableCellWithIdentifier:CellIdentifier];

        if (cell == nil) {

            cell = [[PFTableViewCell alloc] initWithStyle:UITableViewCellStyleDefault reuseIdentifier:CellIdentifier];

        }
        NSDateFormatter *dateFormatter = [[NSDateFormatter alloc] init];

        [dateFormatter setDateFormat:@"EEEE, MMMM d yyyy"];

        NSDate *date = [object createdAt];
        // Configure the cell

        cell.textLabel.text = [object objectForKey:@"title"];

        cell.detailTextLabel.text = [dateFormatter stringFromDate:date];

        cell.imageView.image = [UIImage imageNamed:@"note"];
        return cell;

    }
    #pragma mark - UITableViewDelegate
    - (void)tableView:(UITableView *)tableView didSelectRowAtIndexPath:(NSIndexPath *)indexPath {

        [super tableView:tableView didSelectRowAtIndexPath:indexPath];

    }

@end
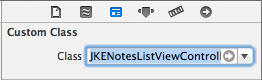
To identify the class as the view controller for the scene, select the table view controller from the storyboard. On the Identity Inspector tab, select JKENotesListViewController from the Class menu.
Run the app and you should see a list showing the titles of the notes you created on the Parse dashboard.
Just like in any database query language, you can specify the results you get. In the above example, the default query returns Posts in the order they were saved, without any filter. Later, we’ll only get the posts that were made by the logged in user.
In the above code, initWithCoder: initializes with a class name of the PFObjects that will be associated with the table, in our case it will be the Post class that we created. We also set some parameters that will enable the table data to be refreshed by pulling down the list and activate pagination which sets the maximum number of results returned by each query which we set to 15.
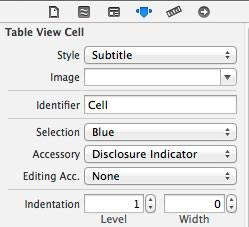
The tableView:cellForRowAtIndexPath:object: method is overridden if you wish to style the table cells differently from the default. In the above example, we configure each cell to display an image, the note title and the date it was created(as a subtitle). If you downloaded the starter project, the image used is in the Supporting Files group folder. In the storyboard file, the table prototype cell has an identifier of Cell, its accessory is set to Disclosure Indicator and the Style to Subtitle. The settings are found on the Attributes Inspector.
We will now enable notes to be saved. On the navigation bar, there is an Add button which when clicked brings up the Add/Edit view. To keep the app simple, I will use the same view to add, edit and view notes.
Create a controller for the view. I named mine JKENotesViewController. It is a subclass of UIViewController. Set the class as the view controller of the Add/Edit Notes scene by selecting the Add/Edit view controller in the storyboard and setting the custom class as JKENotesViewController on the Identity Inspector tab.
Before editing the new class, add the following to the JKENotesListViewController.m file. If you look at your storyboard, there are two push segues leading to the Add/Edit view controller. I named them addNote and showNote. addNote is connected to the Add navigation bar button while showNote to a cell in the table view.
The code below checks to see what segue was activated, and if it is the showNote one, it passes the PFObject instance associated with the selected cell to the JKENotesViewController. In this way, you can pass data between view controllers.
- (void)prepareForSegue:(UIStoryboardSegue *)segue sender:(id)sender

{

    if ([segue.identifier isEqualToString:@"showNote"]) {

        NSIndexPath *indexPath = [self.tableView indexPathForSelectedRow];

        PFObject *object = [self.objects objectAtIndex:indexPath.row];
        JKENotesViewController *note = (JKENotesViewController *)segue.destinationViewController;

        note.note = object;

    }

}
Add the following property to the `JKENotesViewController.h` file
@property (nonatomic, strong) PFObject *note;Add the following outlets to the implementation file of JKENotesViewController. titleTextField is for the text field on the Add/Edit view controller while contentTextView is for the text view. Create an action connection from the Save button. I named mine saveWasPressed. (I am assuming that the reader knows how to do this. If not look at this guide for actions and this for outlets).
@interface JKENotesViewController ()
    @property (weak, nonatomic) IBOutlet UITextField *titleTextField;

    @property (weak, nonatomic) IBOutlet UITextView *contentTextView;
@end

.

.

@implementation JKENotesViewController

    - (IBAction)saveWasPressed:(id)sender {

    }

@end
I made the following changes to the JKENotesViewController.m file.
//

//  JKENotesViewController.m

//  NoteApp

//

//  Created by Joyce Echessa on 6/6/14.

//  Copyright (c) 2014 Joyce Echessa. All rights reserved.

//
#import "JKENotesViewController.h"
@interface JKENotesViewController ()
    @property (weak, nonatomic) IBOutlet UITextField *titleTextField;

    @property (weak, nonatomic) IBOutlet UITextView *contentTextView;
@end
@implementation JKENotesViewController
    - (void)viewDidLoad

    {

        [super viewDidLoad];
        // Check to see if note is not nil, which let's us know that the note

        // had already been saved.

        if (self.note != nil) {

            self.titleTextField.text = [self.note objectForKey:@"title"];

            self.contentTextView.text = [self.note objectForKey:@"content"];

        }

    }
    - (IBAction)saveWasPressed:(id)sender {
        NSString *title = [self.titleTextField.text stringByTrimmingCharactersInSet:[NSCharacterSet whitespaceAndNewlineCharacterSet]];
        if ([title length] == 0) {

            UIAlertView *alertView = [[UIAlertView alloc] initWithTitle:@"Error!"

                                                        message:@"You must at least enter a title"

                                                       delegate:nil cancelButtonTitle:@"OK" otherButtonTitles:nil];

            [alertView show];

        }

        else {
            if (self.note != nil) {

                [self updateNote];

            }

            else {

                [self saveNote];

            }

        }
    }
    - (void)saveNote

    {
        PFObject *newNote = [PFObject objectWithClassName:@"Post"];

        newNote[@"title"] = self.titleTextField.text;

        newNote[@"content"] = self.contentTextView.text;
        [newNote saveInBackgroundWithBlock:^(BOOL succeeded, NSError *error) {

            if (succeeded) {

                [self.navigationController popViewControllerAnimated:YES];

            } else {

                UIAlertView *alertView = [[UIAlertView alloc] initWithTitle:@"Error!"

                                                            message:[error.userInfo objectForKey:@"error"]

                                                           delegate:nil cancelButtonTitle:@"OK" otherButtonTitles:nil];

                [alertView show];

            }

        }];
    }
    - (void)updateNote

    {
        PFQuery *query = [PFQuery queryWithClassName:@"Post"];
        // Retrieve the object by id

        [query getObjectInBackgroundWithId:[self.note objectId] block:^(PFObject *oldNote, NSError *error) {
            if (error) {

                UIAlertView *alertView = [[UIAlertView alloc] initWithTitle:@"Error!"

                                                            message:[error.userInfo objectForKey:@"error"]

                                                           delegate:nil cancelButtonTitle:@"OK" otherButtonTitles:nil];

                [alertView show];

            }

            else {

                oldNote[@"title"] = self.titleTextField.text;

                oldNote[@"content"] = self.contentTextView.text;
                [oldNote saveInBackgroundWithBlock:^(BOOL succeeded, NSError *error) {

                    if (succeeded) {

                        [self.navigationController popViewControllerAnimated:YES];

                    } else {

                        UIAlertView *alertView = [[UIAlertView alloc] initWithTitle:@"Error!"

                                                                    message:[error.userInfo objectForKey:@"error"]

                                                                   delegate:nil cancelButtonTitle:@"OK" otherButtonTitles:nil];

                        [alertView show];

                    }

                }];

            }
        }];
    }
@end
In viewDidLoad there is a check to see whether self.note is null. If the user clicked on a note, then the post object was passed to this view controller by the prepareForSegue:sender: method discussed earlier. If a post was passed in, then we set the title TextField and the content TextView with the object’s title and content data respectively.
When the Save button is pressed, a similar check is made to determine whether a new note will be created by calling saveNote or if an existing note will be updated by calling updateNote.
In saveNote a PFObject is created and saved to Parse with the saveInBackgroundWithBlock: method. This method saves data asynchronously so your app won’t be blocked until the save is complete. If the network is slow you can navigate back to the notes table view and the data will still get saved. Parse also has a saveEventually method which can be used if you don’t need to know when the save has finished. If there is no network connection, saveEventually will store the update on the device until a network connection is re-established and if the app is closed before the connection is back, Parse will try again the next time the app is opened.
In the updateNote method, we retrieve the Post object to be updated using its objectId and call saveInBackgroundWithBlock: with the updated data.
When a note is saved, the app returns to the notes table view, but you will notice that the table isn’t updated to show the newly created note. You can pull down the list to refresh the view, but we want the user to see the created note without manually refreshing the view.
In JKENotesListViewController.m add the following which will reload the objects once the table view comes back into view.
- (void)viewWillAppear:(BOOL)animated {

    [super viewWillAppear:animated];

    [self loadObjects];

}
Run the app and now when a note is added or edited, the changes will be seen on the table view.
The app is saving and retrieving posts, but anyone can use it and see all the notes saved in the backend. We will restrict the app use to logged in users, and also make it so that a user can only access their notes.
Make the following changes to viewDidLoad in JKENotesListViewController.m
- (void)viewDidLoad {

    [super viewDidLoad];
    PFUser *currentUser = [PFUser currentUser];

    if (currentUser) {

        NSLog(@"Current user: %@", currentUser.username);

    }

    else {

        [self performSegueWithIdentifier:@"showLogin" sender:self];

    }

}
Since the creation of user accounts is a common requirement in applications, Parse provides the PFUser class which automatically handles much of the functionality required for user account management.
In the above example, we check to see if a user is logged in. The currentUser method gets the currently logged in user from disk and returns an instance of it. If the user is logged in, we log their username and the view loads as usual. If the user isn’t logged in, then the Login view will be shown. In the starter project, I had already created a segue to the Login view controller and given it an identifier of showLogin.
Create a new class and make it a subclass of UIViewController. I named mine JKELoginViewController. Select the Login view controller on the storyboard and on the Identity Inspector tab, set its Custom Class to JKELoginViewController.
Create outlet connections from the username and password text field and an action connection from the Login button. The following shows the changes to the JKELoginViewController.h file.
@interface JKELoginViewController : UIViewController
    @property (weak, nonatomic) IBOutlet UITextField *usernameTextField;

    @property (weak, nonatomic) IBOutlet UITextField *passwordTextField;
    - (IBAction)login:(id)sender;
@end
I then made the following changes to the JKELoginViewController.m file.
//

//  JKELoginViewController.m

//  NoteApp

//

//  Created by Joyce Echessa on 6/6/14.

//  Copyright (c) 2014 Joyce Echessa. All rights reserved.

//
#import "JKELoginViewController.h"

#import <Parse/Parse.h>
@interface JKELoginViewController ()
@end
@implementation JKELoginViewController
    - (void)viewDidLoad

    {

        [super viewDidLoad];
        self.navigationItem.hidesBackButton = YES;

    }
    - (IBAction)login:(id)sender {

        NSString *username = [self.usernameTextField.text stringByTrimmingCharactersInSet:[NSCharacterSet whitespaceAndNewlineCharacterSet]];

        NSString *password = [self.passwordTextField.text stringByTrimmingCharactersInSet:[NSCharacterSet whitespaceAndNewlineCharacterSet]];
        if ([username length] == 0 || [password length] == 0) {

            UIAlertView *alertView = [[UIAlertView alloc] initWithTitle:@"Error!"

                                                        message:@"You have to enter a username and password"

                                                       delegate:nil cancelButtonTitle:@"OK" otherButtonTitles:nil];

            [alertView show];

        }

        else {
            [PFUser logInWithUsernameInBackground:username password:password block:^(PFUser *user, NSError *error) {

                if (error) {

                    UIAlertView *alertView = [[UIAlertView alloc] initWithTitle:@"Error!"

                                                                message:[error.userInfo objectForKey:@"error"]

                                                               delegate:nil cancelButtonTitle:@"OK" otherButtonTitles:nil];

                    [alertView show];

                }

                else {

                    [self.navigationController popToRootViewControllerAnimated:YES];

                }

            }];

        }

    }
@end
In viewDidLoad we hide the back button from the navigation bar. We don’t want the user to be able to navigate back to the notes table view.
The login: method checks whether the username and password fields have been filled, then attempts to authenticate the user. If authentication is successful, the root view controller will be called. In our case, this is the table view controller displaying the list of notes.
We’ll now create a controller to handle user sign up. Create a UIViewController subclass. I named mine JKESignupViewController and set it as the Custom Class of the Signup view controller on the Identity Inspector tab.
Create the following outlet and action connections. In JKESignupViewController.h
@interface JKESignupViewController : UIViewController
    @property (weak, nonatomic) IBOutlet UITextField *usernameTextField;

    @property (weak, nonatomic) IBOutlet UITextField *emailTextField;

    @property (weak, nonatomic) IBOutlet UITextField *passwordTextField;
    - (IBAction)signup:(id)sender;
@end
In JKESignupViewController.m make the following changes.
//

//  JKESignupViewController.m

//  NoteApp

//

//  Created by Joyce Echessa on 6/6/14.

//  Copyright (c) 2014 Joyce Echessa. All rights reserved.

//
#import "JKESignupViewController.h"

#import <Parse/Parse.h>
@interface JKESignupViewController ()
@end
@implementation JKESignupViewController
    - (void)viewDidLoad

    {

        [super viewDidLoad];

        // Do any additional setup after loading the view.

    }
    - (IBAction)signup:(id)sender {

        NSString *username = [self.usernameTextField.text stringByTrimmingCharactersInSet:[NSCharacterSet whitespaceAndNewlineCharacterSet]];

        NSString *password = [self.passwordTextField.text stringByTrimmingCharactersInSet:[NSCharacterSet whitespaceAndNewlineCharacterSet]];

        NSString *email = [self.emailTextField.text stringByTrimmingCharactersInSet:[NSCharacterSet whitespaceAndNewlineCharacterSet]];
        if ([username length] == 0 || [password length] == 0 || [email length] == 0) {

            UIAlertView *alertView = [[UIAlertView alloc] initWithTitle:@"Error!"

                                                        message:@"You have to enter a username, password, and email"

                                                       delegate:nil cancelButtonTitle:@"OK" otherButtonTitles:nil];

            [alertView show];

        }

        else {

            PFUser *newUser = [PFUser user];

            newUser.username = username;

            newUser.password = password;

            newUser.email = email;
            [newUser signUpInBackgroundWithBlock:^(BOOL succeeded, NSError *error) {

                if (error) {

                    UIAlertView *alertView = [[UIAlertView alloc] initWithTitle:@"Error!"

                                                                message:[error.userInfo objectForKey:@"error"]

                                                               delegate:nil cancelButtonTitle:@"OK" otherButtonTitles:nil];

                    [alertView show];

                }

                else {

                    [self.navigationController popToRootViewControllerAnimated:YES];

                }

            }];

        }

    }
@end
The signup: method checks if all fields have been filled, then creates a PFUser object and saves it to Parse with the signUpInBackgroundWithBlock: method. If signup is successful, the user will be taken to the table view with the list of notes. Run and test the application with some data.
Now we will allow the user to be able to log out. Add an action connection from the Logout button.
In JKENotesListViewController.h
@interface JKENotesListViewController : PFQueryTableViewController
    - (IBAction)logout:(id)sender;
@end
In JKENotesListViewController.m add the following.
- (IBAction)logout:(id)sender {

    [PFUser logOut];

    [self performSegueWithIdentifier:@"showLogin" sender:self];

}
Now the user can log out.
We are going to create a relationship between posts and the user. In JKENotesViewController.m add the following statement after newNote[@"content"] is set in the saveNote method.
newNote[@"author"] = [PFUser currentUser];
When a new note is added, the currently logged in user will be saved as its author. On the first run, the author column will be created in Parse automatically before the data is saved, so you don’t need to create it using the dashboard before you can use it.
Add the following method in the JKENotesListViewController.m file to customize the query sent to Parse so that only the logged in user’s posts are retrieved.
// Override to customize what kind of query to perform on the class. The default is to query for

	// all objects ordered by createdAt descending.

	- (PFQuery *)queryForTable {
    	// Create a query

    	PFQuery *query = [PFQuery queryWithClassName:self.parseClassName];
    	// Follow relationship

    	if ([PFUser currentUser]) {

        	[query whereKey:@"author" equalTo:[PFUser currentUser]];

    	}

    	else {

        	// I added this so that when there is no currentUser, the query will not return any data

        	// Without this, when a user signs up and is logged in automatically, they briefly see a table with data

        	// before loadObjects is called and the table is refreshed.

        	// There are other ways to get an empty query, of course. With the below, I know that there

        	// is no such column with the value in the database.

        	[query whereKey:@"nonexistent" equalTo:@"doesn't exist"];

    	}
    	return query;

	}
Run and test the app. Any new note that you save will now be linked to you and only you will be able to see your notes.
Our app can save and edit notes, but it can’t delete them. I won’t add delete functionality, but if you want to delete any object, you can use the deleteInBackground method.
[myObject deleteInBackground];Conclusion
We have looked at using Parse as a BaaS system for your apps. Using such ready-made backend services has numerous advantages, but it also comes with some pitfalls which should be measured against the advantages when deciding whether to build from scratch or to use a BaaS solution.
Even if you plan to build your own backend, it might be worth starting with a BaaS to reduce the time it takes for your app to get to the market and to test out the app with the market and validate functionality quickly based on usage data.
Apart from Parse, there are several such solutions/services, such as Apigee, Backendless, Kii, built.io, Firebase. These provide different services at different prices and it’s worth looking at and comparing the different products to decide what best suits your needs.
Frequently Asked Questions (FAQs) about Creating a Cloud Backend for iOS App Using Parse
What are the benefits of using Parse for backend development?
Parse is a powerful, open-source platform that allows developers to create a backend for their mobile applications without having to manage servers or write server-side code. It provides a range of features such as data storage, user authentication, push notifications, and social networking integration. This allows developers to focus on creating the best user experience, while Parse handles the backend.
How secure is Parse for storing sensitive data?
Parse provides robust security features to protect your data. It uses secure HTTPS connections for all data transfers, and you can also implement additional security measures such as user authentication and role-based access control. However, as with any platform, it’s important to follow best practices for data security.
Can I migrate my existing backend to Parse?
Yes, Parse provides a migration tool that allows you to move your existing data to the Parse platform. This can be a complex process depending on the size and structure of your data, so it’s recommended to plan your migration carefully and test thoroughly before switching over.
How does Parse handle scalability?
Parse is designed to scale automatically as your app grows, without requiring manual intervention. It uses cloud-based infrastructure to handle increased demand, and you can also adjust your plan to accommodate higher usage if necessary.
Can I use Parse for real-time applications?
Yes, Parse supports real-time applications through its LiveQuery feature. This allows you to subscribe to changes in your data, so your app can react instantly when something changes.
How does Parse integrate with other services?
Parse provides a range of integrations with other services, including social networks, email providers, and payment processors. You can also use the Parse API to connect with other services that aren’t directly supported.
Can I use Parse for web applications as well as mobile apps?
Yes, Parse supports both web and mobile applications. It provides SDKs for a range of platforms, including iOS, Android, JavaScript, and more.
What kind of support is available for Parse?
As an open-source platform, Parse has a strong community of developers who can provide support and advice. There are also a range of resources available online, including documentation, tutorials, and forums.
How much does it cost to use Parse?
Parse is free to use for small applications, with paid plans available for larger apps or those that require more resources. The cost depends on the amount of data storage, API requests, and other features you need.
How do I get started with Parse?
To get started with Parse, you’ll need to download the Parse Server and SDK for your platform. You can then follow the documentation to set up your backend and start building your app.

