
Illustration is an integral part of graphic designing. Stylized illustrations can have larger-than-life appeal that goes well beyond what a realistic photograph can provide, especially when it comes to food. An illustration of an indulgent edible treat can garner an incredible amount of attention and elicit visceral responses in viewers.
In this tutorial, I’ll walk you through the process of making a tasty donut in Photoshop. We’ll use the pen tool, the brush tool, the burn tool, the dodge tool, the smudge tool, and various filters and layer styling techniques to achieve the final outcome. Hopefully you will learn some useful tips work up an appetite at the same time. So, let’s get started!
Resources:
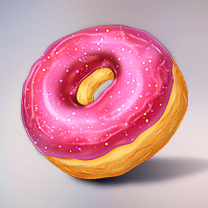
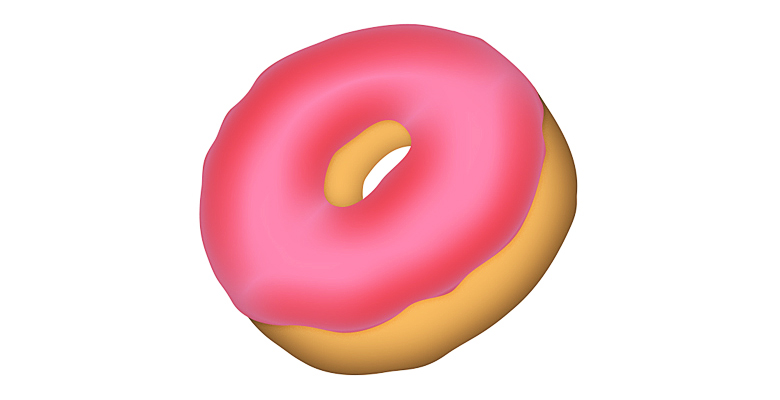
Final result:

(Download the finished, layered PSD file.)
Step 1
Create a new document in Photoshop with a 700px width and a 500px height.

Step 2
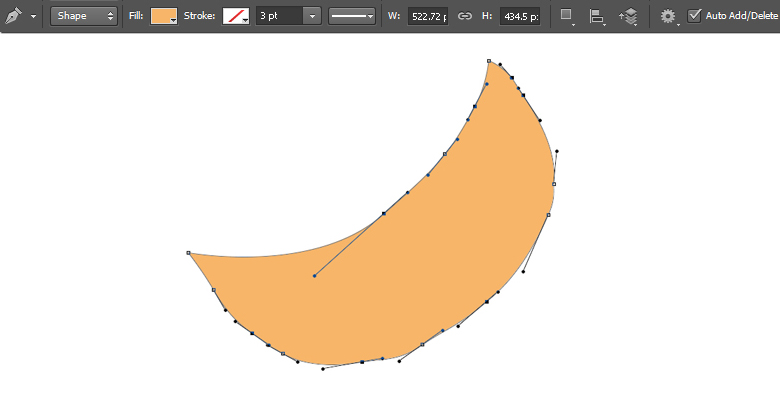
First of all, we’ll draw the basic shapes of the donut. Pick #f7b569 as your foreground color and select the pen tool (Tool mode: “Shape”) to draw the shape shown below. Label it as “Base1”.
Step 3
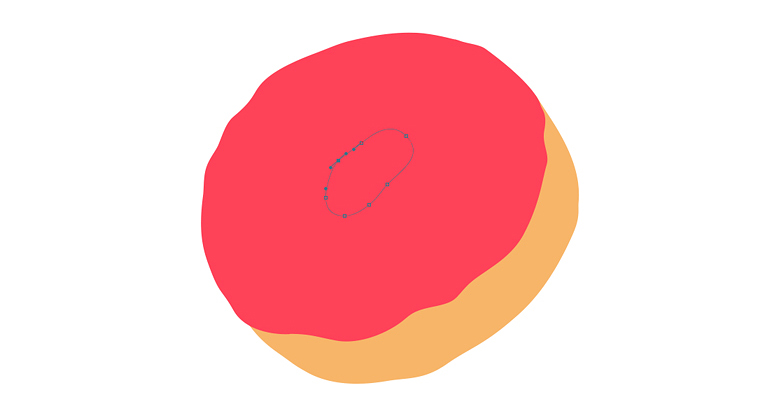
Now, pick color #fe4258 and draw the shape to make the icing. The icing on the donut is never perfect, so try to make it a bit irregular. Label it as “Icing”.

Draw another shape covering the center of icing as shown below. Label it as “Hole”.
Step 4
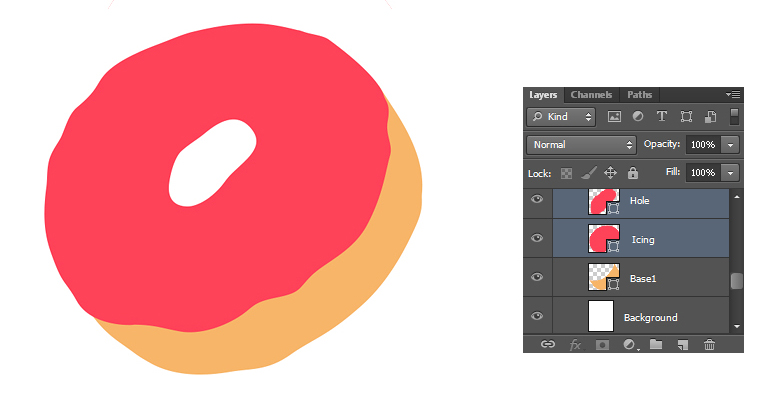
Select both the hole and icing layers by pressing “Shift” key. Then, go to “Layer” > “Combine Shapes” > “Subtract Front Shape”. Label the resulting shape as “Icing”.
Step 5
Once again, pick #f7b569 as your color and draw a shape below the icing layer using the pen tool (Tool mode: Shape). Label it as “Base2”.

Step 6
Next, we’ll give these shapes some volume through layer styling. Double-click the “Base1” layer to open the layer style window and apply the following settings for inner shadow.


Step 7
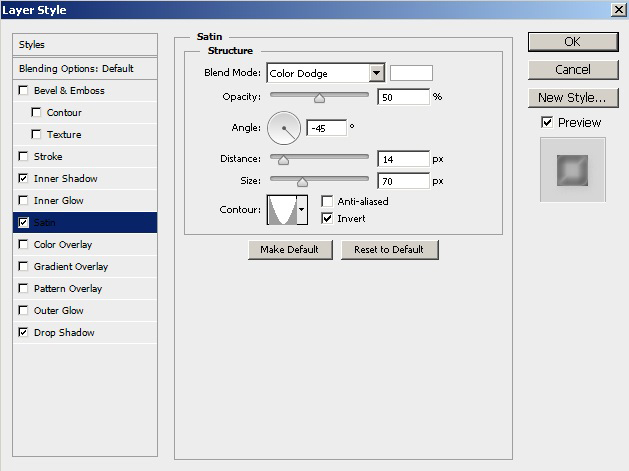
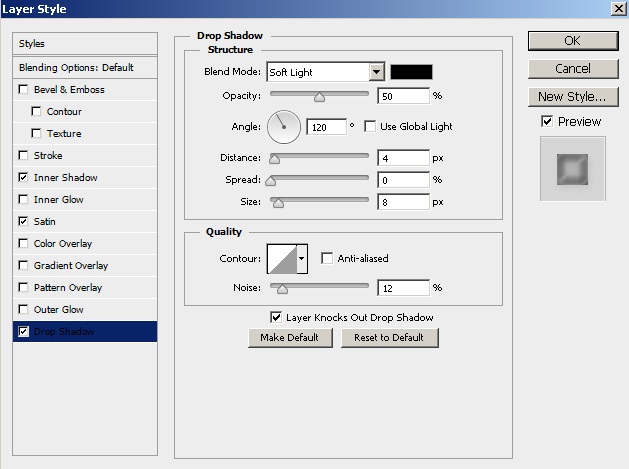
Double-click the icing layer and apply the following settings for inner shadow, satin, and drop shadow to get the same effect as mine.

Step 8
Now, we’ll add details to the base1 layer. Pick #ae7533 as your color and select a soft round brush. Press Ctrl +

While the selection is still active, pick #cf8d42 as your color and draw an irregular line using a 15-20px soft round brush (60% opacity) on a new layer as shown below.

Create a new layer and pick #fed8ac as your color. Apply a soft round brush (30-40px size) as shown below. Reduce the opacity of this layer to 50%.

Step 9
Now, pick a 1-2px soft round brush and make light and dark strokes randomly on a new layer.

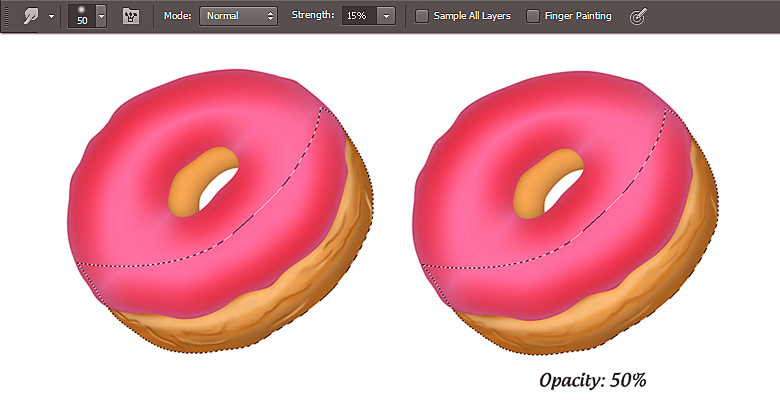
Pick the smudge tool (Strength: 15%) and apply it over these strokes to blend them together. Once you are done, reduce the opacity of strokes layer to 50%.
Step 10
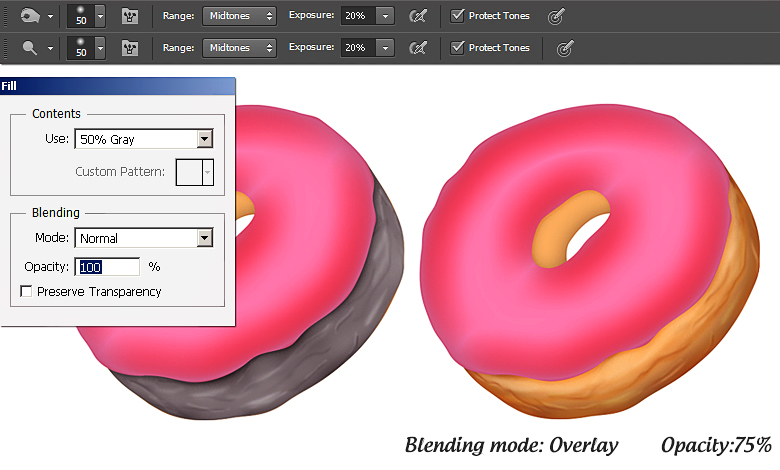
While selection is still active, create a new layer and go to “Edit” > “Fill” > “Use 50% Gray”. Change its blending mode to “Overlay”. Select the burn tool and choose a soft round brush tool with a 40-50px size with Range: “Midtones” and Exposure: “20%”. Apply it over the edges. Now, pick a 2-3px size brush and apply the burn tool over the details created in step 9. After that, select the dodge tool with Range: “Midtones” and Exposure: “20%”. Apply the dodge over the details to highlight them.
Step 11
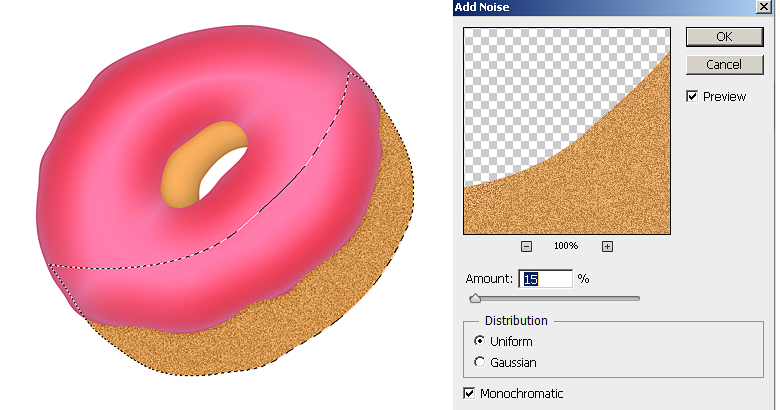
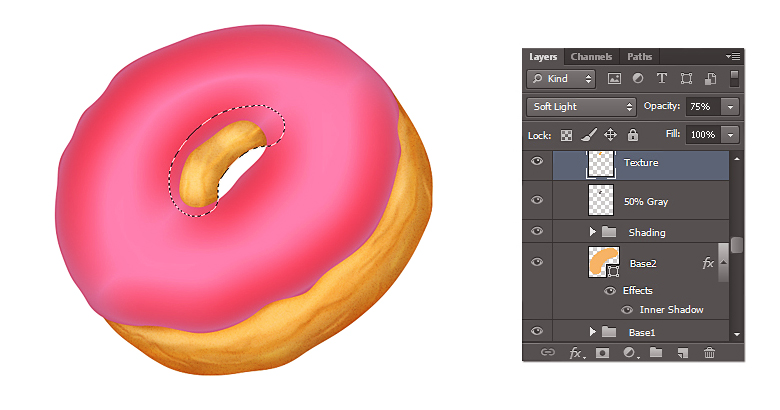
Next, we’ll apply texture over the base1. To make the texture, create a new layer and fill it with color #d19956. After that, go to “Filter” > “Noise”> “Add Noise” and use the following values here.
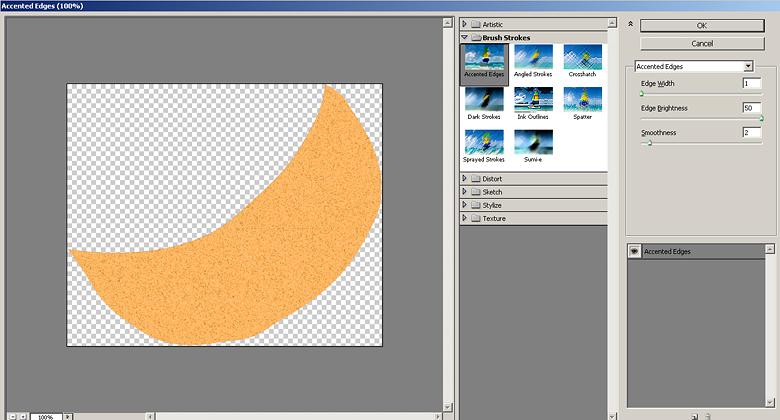
Now, go to “Filter” > “Filter Gallery” > “Brush Strokes” > “Accented Edges” and apply the following settings here.
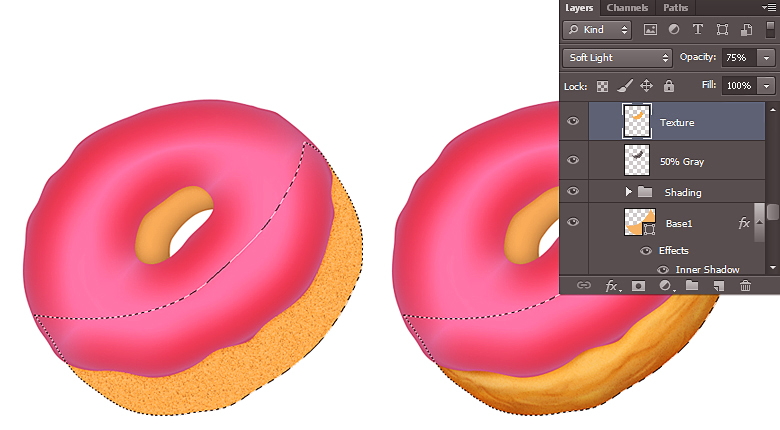
Change its blending mode to “Soft Light” and set a 75% opacity.
Step 12
Press Ctrl +
Step 13
Next, we’ll apply shading to the icing. Press Ctrl +
Step 14
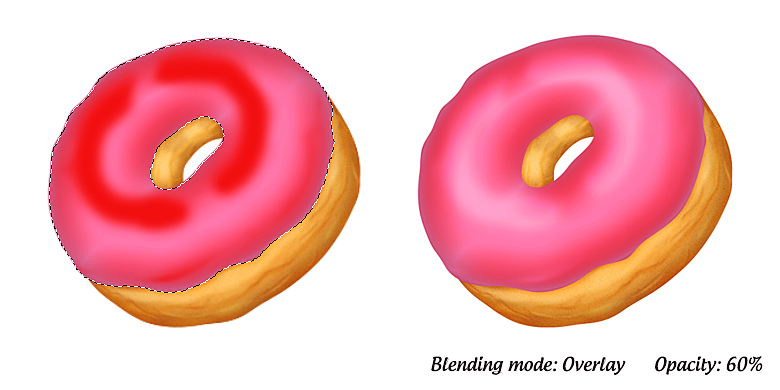
Pick #a33d41 as your color and apply some shading on a new layer using the soft round brush tool (Opacity: 50-60%). Once you are done, change the blending mode of this layer to “Hard Light” and set opacity to 75%.

Step 15
Now, create a new layer and fill it with “50% Gray” within the selection. Apply the burn and dodge tools to it using the same settings used in step 10.

Step 16
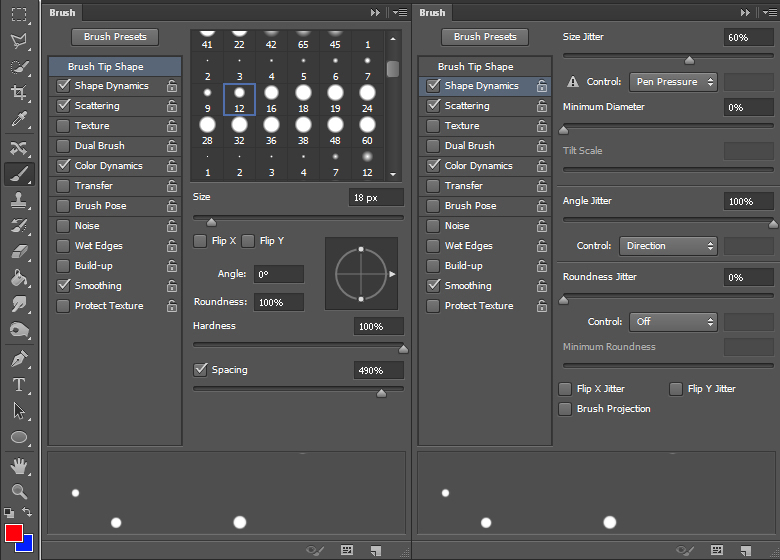
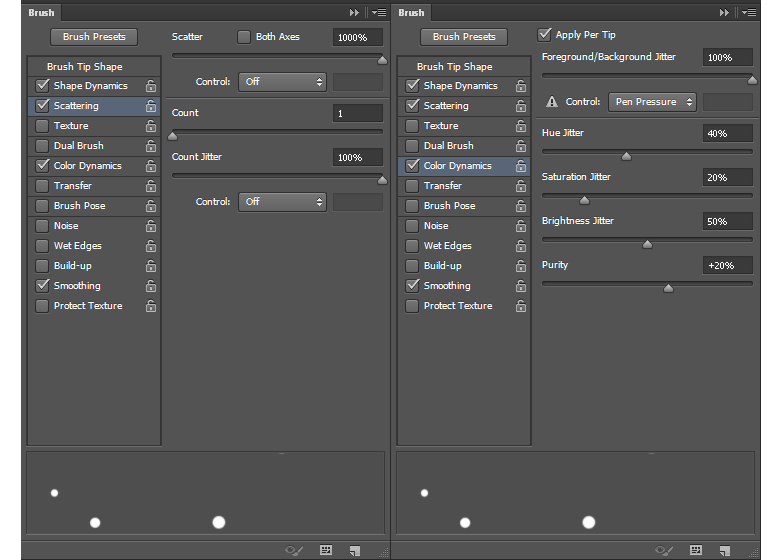
Pick red as your foreground and blue as your background color. Select the brush tool and press “F5” to open the brush panel. Apply the following settings here.
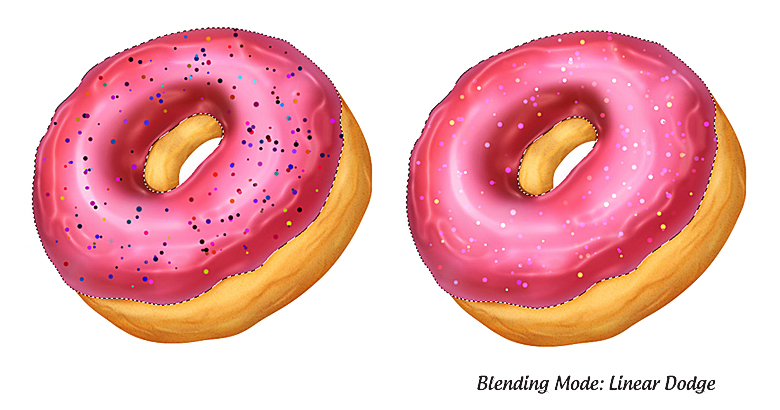
Now, apply this brush over a new layer and change its blending mode to “Linear Dodge”.
Step 17
Next, we’ll add some noise over the icing. Create a new layer, fill the selection with black, and go to “Filter” > “Noise” > “Add Noise”. Apply the following settings here. Change its blending mode to “Screen” and set opacity to 30%.

Step 18
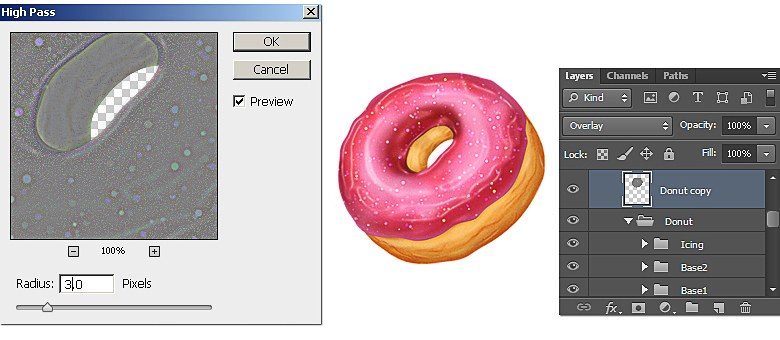
To sharpen the details, collect all of the layers forming donut in a single group, duplicate it, and merge it. Now, go to “Filter” > “Other” > “High Pass”. Use a 3px value here. Change the blending mode of the high pass layer to “Overlay”.
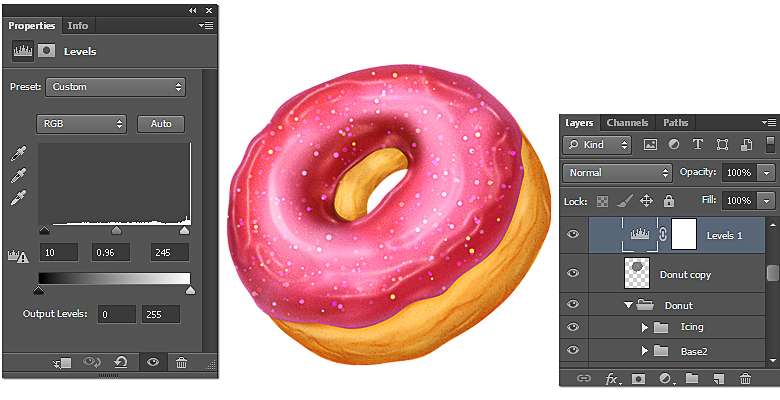
Step 19
Click on the icon to “Create new fill or adjustment layer” found at the bottom of layers panel and choose “Levels”. Apply the following settings here.
Step 20
To make shadow, apply a large soft round brush on a new layer below the rest of the layers. Now, smudge it using the smudge tool to get the result shown below.
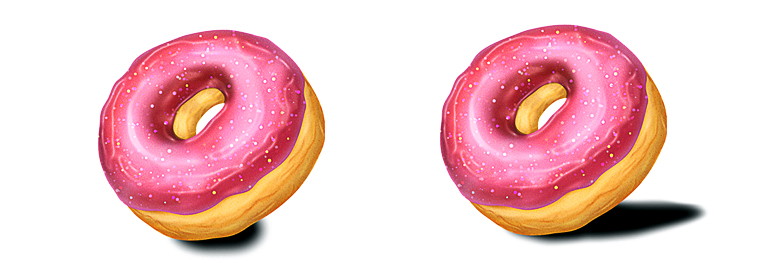
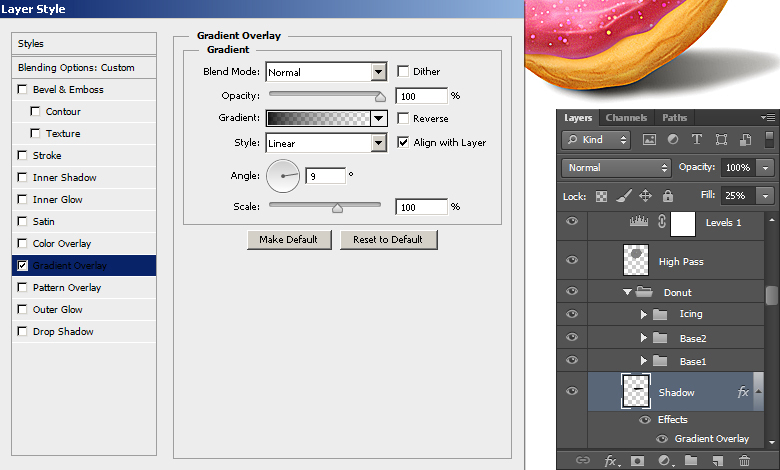
Reduce its opacity to 25% and apply a “Black to Transparent” gradient to it using the following settings.
Final result:
That’s it guys. I hope you had fun and learned some useful tips. Enjoy your delicious donut.
Frequently Asked Questions about Creating a Donut Icon in Photoshop
What are the basic tools I need to create a donut icon in Photoshop?
To create a donut icon in Photoshop, you will need to familiarize yourself with a few basic tools. These include the Ellipse Tool, which is used to create the basic shape of the donut, the Gradient Tool, which is used to add color and depth to the donut, and the Brush Tool, which is used to add details like sprinkles. You will also need to understand how to use layers, as each part of the donut will be created on a separate layer.
How can I add texture to my donut icon in Photoshop?
Adding texture to your donut icon can make it look more realistic. One way to do this is by using the Noise Filter. After you’ve created your basic donut shape and added color with the Gradient Tool, go to Filter > Noise > Add Noise. Adjust the amount of noise to your liking. This will give your donut a grainy texture, similar to a real donut.
How can I create a 3D effect for my donut icon in Photoshop?
Creating a 3D effect for your donut icon can make it stand out. To do this, you can use the Bevel and Emboss layer style. After creating your basic donut shape, go to Layer > Layer Style > Bevel and Emboss. Adjust the settings to your liking to create a 3D effect.
How can I add sprinkles to my donut icon in Photoshop?
Adding sprinkles to your donut icon can make it look more appealing. To do this, select the Brush Tool and choose a small, round brush. Change the brush color to the color you want your sprinkles to be. Then, simply click on your donut to add sprinkles. Remember to add the sprinkles on a new layer so you can easily adjust them if needed.
How can I save my donut icon for web use in Photoshop?
Once you’re happy with your donut icon, you’ll want to save it for web use. To do this, go to File > Export > Save for Web. Choose the format you want (usually PNG or JPEG), and adjust the quality settings. Then, click Save and choose where you want to save your file.
Can I create different types of donuts using the same method in Photoshop?
Yes, you can create different types of donuts using the same basic method. You can change the color of the donut and the sprinkles, add different types of toppings, or even change the shape of the donut. The possibilities are endless!
How can I make my donut icon look glossy in Photoshop?
To make your donut icon look glossy, you can use the Gradient Tool. After creating your basic donut shape, select the Gradient Tool and choose a gradient that goes from light to dark. Apply the gradient to your donut to create a glossy effect.
Can I use this method to create other types of food icons in Photoshop?
Absolutely! The basic method of creating a donut icon – creating a basic shape, adding color and texture, and adding details – can be applied to create other types of food icons. You just need to adjust the shape and details to match the food you’re trying to create.
What resolution should I use when creating a donut icon in Photoshop?
The resolution you should use depends on how you plan to use the icon. If you’re creating an icon for a website, a resolution of 72 pixels per inch is usually sufficient. If you’re creating an icon for print, you’ll need a higher resolution, usually 300 pixels per inch.
How can I make my donut icon look more realistic in Photoshop?
To make your donut icon look more realistic, pay attention to the details. Add texture to the donut, create a 3D effect, and add details like sprinkles. You can also study photos of real donuts to get a better idea of what a realistic donut looks like.