Design collaboration tools are all the rage in 2016.
In the past, most project teams mostly hacked together calendaring and to-do apps to fit their needs, mostly with good results. But as the design and development process becomes more complex, the argument for a specialized collaboration tool becomes more compelling.
But how close has anyone come to perfecting the design collaboration process? I think that’s a little more tricky. Recently I looked at an interesting contender in the field – Sympli. Let me walk you through it.

Preferences are the defining factor in choosing a design collaboration tool, but whose? Design collaboration tools tend to be aimed towards designers and managers, where developers are often left out and that results in a shaky design handoff.
Let’s take a look at how collaborating with Sympli can improve the design handoff (and ultimately developer relations) without making life difficult for designers. Plus, it’s free for a single project with unlimited collaborators!
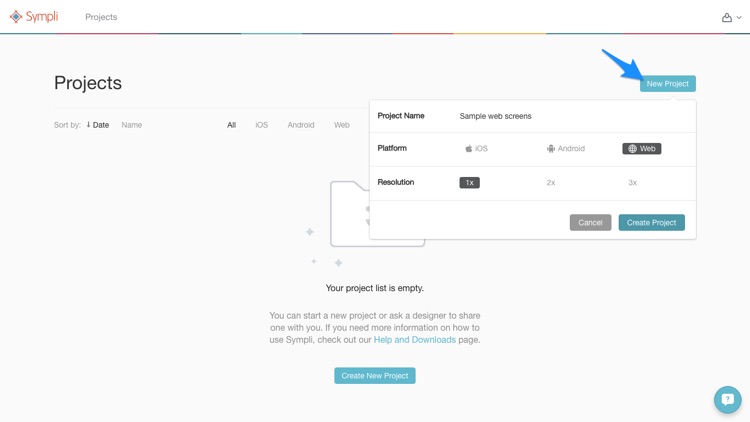
Starting a Sympli Project
What really impressed me at first was how I could start collaborating right away – only the bare minimum amount of information was taken from me in the signup form and I was told I could start a “New Project” immediately. Sympli needs three tidbits of information from you to begin; Project Name, Platform and Resolution, so go ahead and offer that.
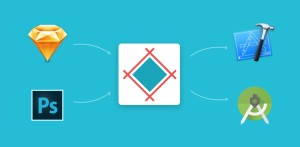
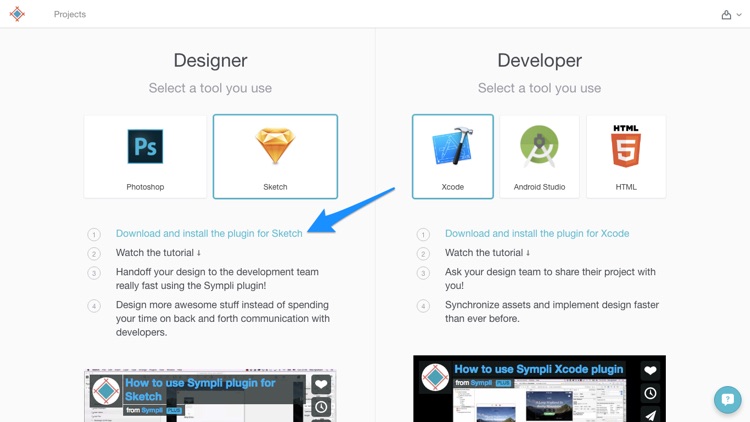
Installing the Plugins for Photoshop or Sketch
After setting up a “New Project” you’ll be asked to upload designs from either the Photoshop Plugin or Sketch Plugin for Sympli. If you’re not the designer you can invite them to do that, which suggested to me that it’s totally okay for developers to take the wheel here (more on that shortly).
Leave this webpage for now.

I’ll be walking you through the process of importing design assets and styles from Sketch, however, you can do also do this using Photoshop where the steps are pretty much the same. Start by downloading either the Photoshop Plugin or the Sketch Plugin here; the installation itself should be relatively easy but there are detailed instructions for those that have never installed extensions before.
As you can see on the right-hand side, there’s also some extensions for developers (Xcode, Android Studio) that help facilitate the extraction of design assets from Sympli.
Again, more on that shortly.
Importing the Designs into Sympli
I’m going to use one of my own user interface kits for the sake of this tutorial, but feel free to grab something from Sketch App Sources if you need a sample file to use.
Select a layer (or multiple layers) that you want to export, and click the “Make Exportable” button from The Inspector. So far this is rather normal and you can see all of the exportable regions via the usual keyboard command, command+shift+E.
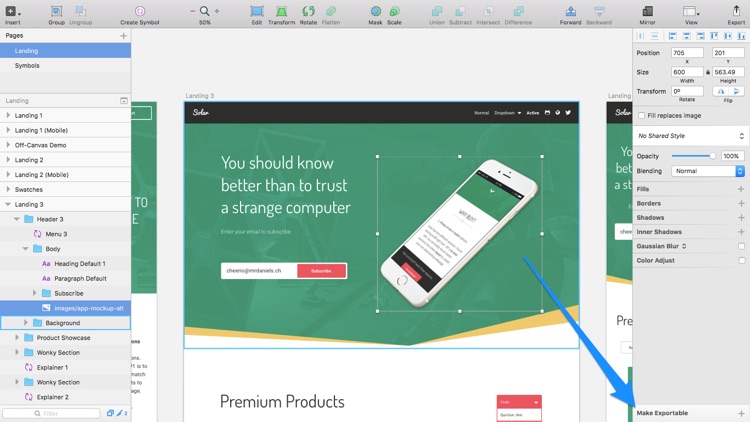
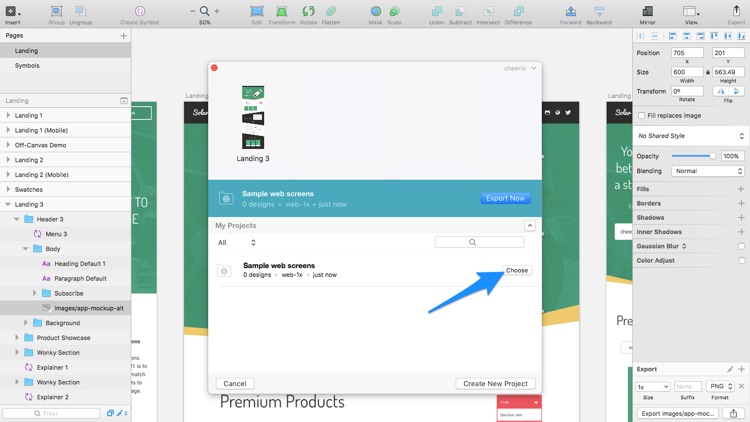
But rather than actually exporting these layers to our local computer we’ll instead use the keyboard shortcut (command+Y) to export the assets to Sympli. Sympli will export the entire selected artboard with all of its layers intact, or if none are selected, it will export all of the artboards. Log in first…
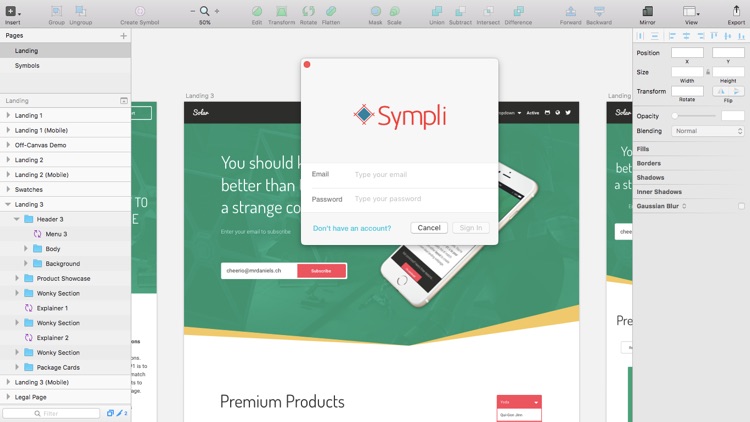
…and then choose from the “My Projects” list where you’d like to export the assets to. If you skipped that step earlier on you can “Create [a] New Project” here instead (in fact, designers barely have to use the Sympli web interface at all). Sympli will then begin to export the design, and after a few minutes (depending on the complexity of the design) you’ll see it appear in the Sympli web app, so let’s move back to the browser.
How the Design Handoff Works
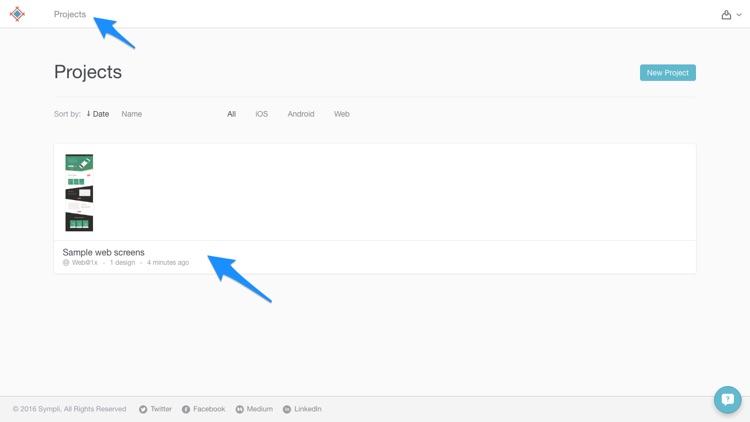
Start by clicking “Projects” in the header and navigating to our exported design – this is where designers, developers, and managers can browse and inspect designs, right down to a specific layer, independent of any actual design application.
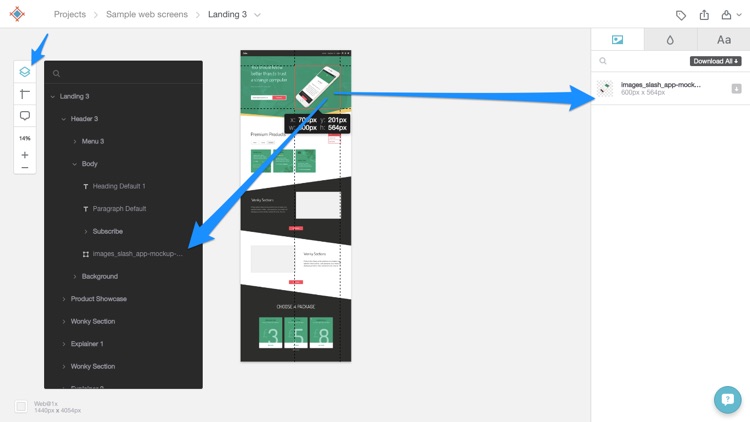
As you can see on the left-hand side (if you click the layer icon) you can browse those layers in a layer list, and on the right-hand side, any image assets that we declared as exportable back in Sketch. You can download all image assets from here, or click on the actual image to observe its dimensions.
Of course, if we select a different layer, a text layer, for example, they’ll be much more information available: colors, fonts used, font size, text value, alignment and so on. You can copy this style information (as code) to the clipboard, where the code language depends on which platform you’re designing for (it’ll be CSS if you chose “Web” for instance).

Perfect for developers.
You can also specify beforehand what units of measurement you’d like to use (px, em, et cetera) along with some other settings, but of course this is for the developers to handle. Like I said earlier, developers have access to an Xcode and Android Studio Plugin where they can access all of this information directly, without having to use the Sympli interface either. Essentially, your entire team can use Sympli without having to access the web interface!
Note: developers will still need to use the Sympli web interface to browse HTML designs and extract CSS data.
What Else?
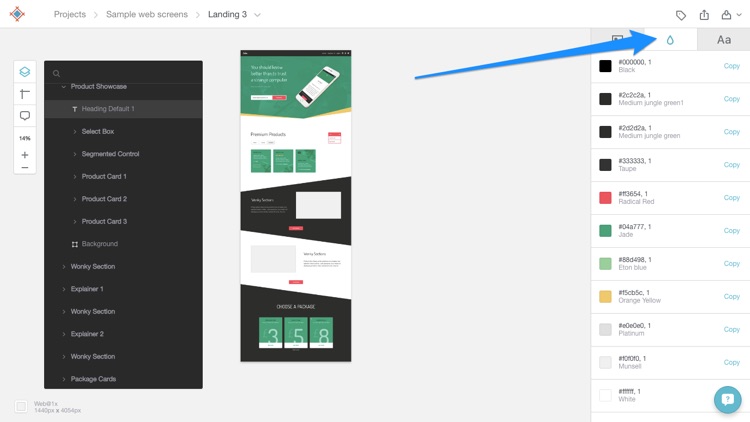
Aside from the less important tools like the ruler and zoom, the other two tabs on the right-hand side display a concise overview of the colors and fonts used throughout the entire design, where you can also copy that information to the clipboard.

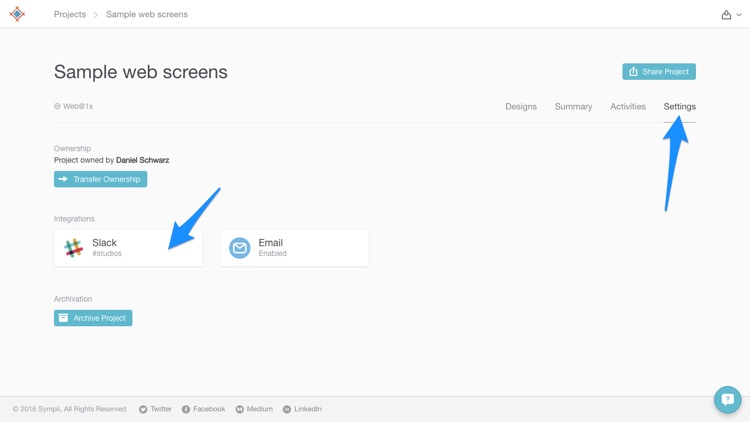
Onboarding the Other Collaborators
You can invite your teammates to collaborate with you from anywhere in the app; usually from the header. Pretty standard really, but what stood out for me was the Slack integration, which lets Sympli share updates about your designs in your Slack team, enabling communication and feedback. If you navigate back to “Projects” you can link a specific design to a specific Slack channel. Perfect for large teams working on different things!
Conclusion
So, why Sympli? Because it allows designers and developers not only to collaborate simultaneously but to do it in their own way using Sympli as a central, neutral location; where it’s delightfully easy to both export highly-granular layouts and extract the assets/styles from it into a real-life website/app.
Bottom line: Sympli actually manages to make collaboration fun for everyone.
 Daniel Schwarz
Previously, design blog editor at Toptal and SitePoint. Now Daniel advocates for better UX design alongside industry leaders such as Adobe, InVision, Marvel, Wix, Net Magazine, LogRocket, CSS-Tricks, and more.