Create an Explosive 3D Text Effect in Photoshop

As graphic designers, we’re always on the hunt for resources to help us perfect our next design, but sometimes we just can’t find what we’re looking for. This is a particularly common challenge when trying to find the perfect font for that prominent headline that must be compelling. Many of us have spent hours scrolling through our font libraries just hoping that the perfect typeface will miraculously fall into place. But, you can’t always count on a heroic font to come to the rescue; often you’ll have to design text effects on your own to achieve the perfect aesthetic. Don’t wait until your next design dilemma to break out your custom text effect skills — be your own hero and stop your font frustrations from ever happening.
In today’s tutorial, I’m going to show you a simple and efficient way to create an explosive, eye-grabbing 3D text effect without using 3D software like Cinema 4D. Everything in today’s tutorial can be easily done in Photoshop and even in freeware software like GIMP. The main goal of this tutorial is for you to learn how to create your own 3D typography and practice your own methods for achieving powerful text effects.
Here is what our final image will look like:

Resources:
Glass Stock
Texture Stock
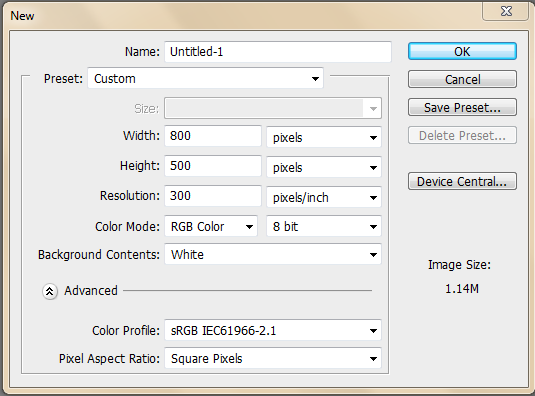
Step 1: Create Your Canvas
Create a new file, make your canvas 800 x 500 pixels, and press “OK.”
Step 2: Build a Black Background
Making sure your foreground color is set to the default black (#000000), create a new layer and fill in your entire canvas.

Step 3: Add Simple Text
Click the “Text” icon within your toolbar or press “T” on your keyboard to access the text function. Change your font to bold, set the size to 18pt, and type in your desired text using pure white (#ffffff).

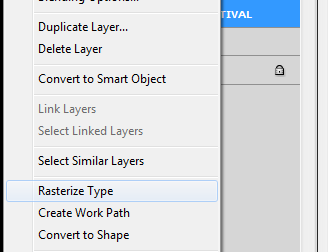
Step 4: Rasterize and Move
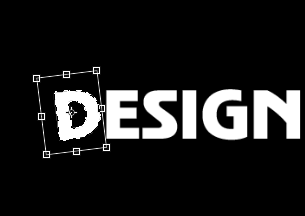
Duplicate your text; this is an optional precaution. Whether you have duplicated your text layer or not, right-click on the layer and select “Rasterize Type.”
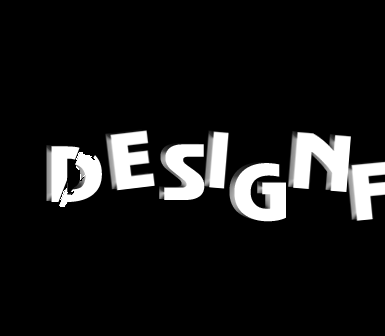
Once that is done, select each letter of your words and begin rotating them until you final image resembles something like the image below.

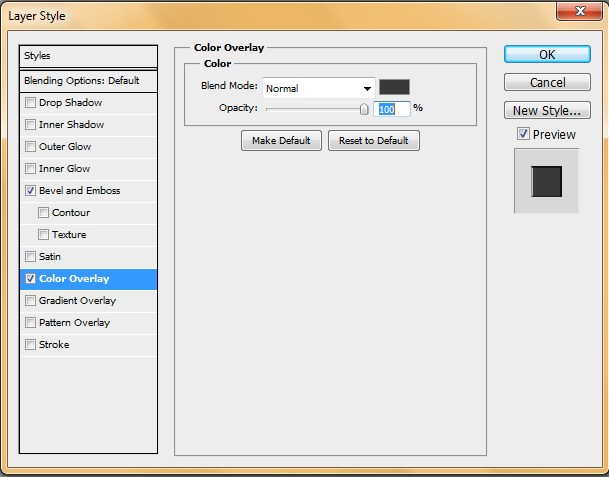
Step 5: Add Blending Options
To give our text some depth, we will be adding a few blending options to it. First, duplicate your newly-jumbled text. Double-click or right-click the layer to access the “Blending Options” menu. Check the boxes for “Bevel and Emboss” and “Color Overlay.” Note the color for the Color Overlay is #393939. Change the settings as shown below:

Step 6: Rearrange Your Layers
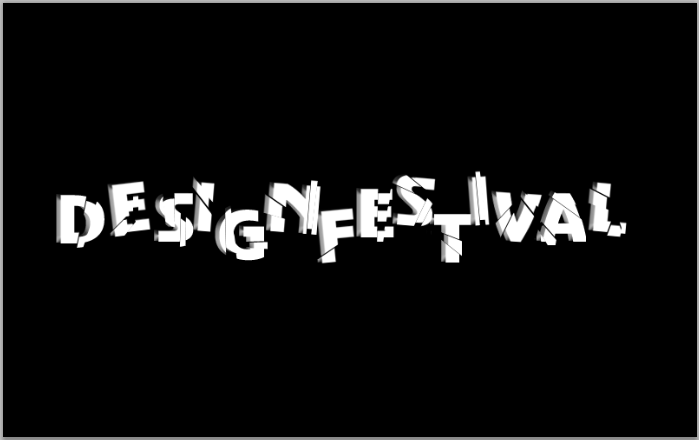
After you have finished with step 5, your image should now look like this.

Move this layer beneath the original text layer and nudge it to the left so that it gives your text a 3D look. Then, merge the two layers.

Step 7: Shatter Your Text
Use Photoshop’s lasso tool, select a piece of the first letter of your word and move the selection either up or down to give the letter the appearance that it is breaking apart.
Continue doing this for each letter until you are finished.
Step 8: Duplicate Your Text Layer
Duplicate your newly-shattered text and move it underneath the original copy. Move the text slightly to the left to give the words even more depth, and then merge the two layers together.

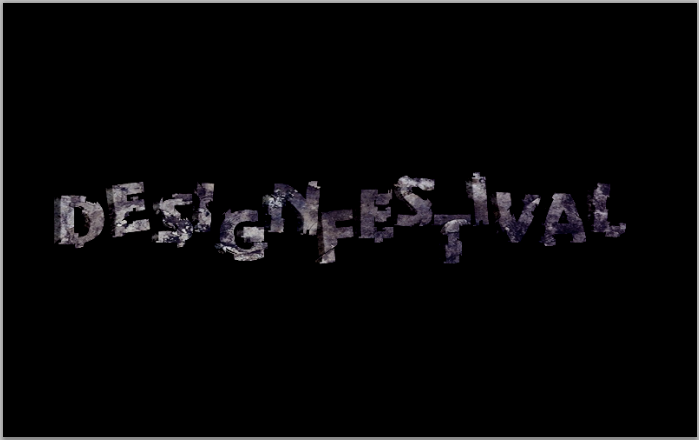
Step 9: Add Texture
Copy the aforementioned texture stock and paste it onto your canvas. You will need to resize it by pressing Ctrl + “T”.

Select around the words and press delete on the texture layer to remove any excess or unwanted texture that makes your type hard to read.

Change the layer mode to “Linear Burn.”
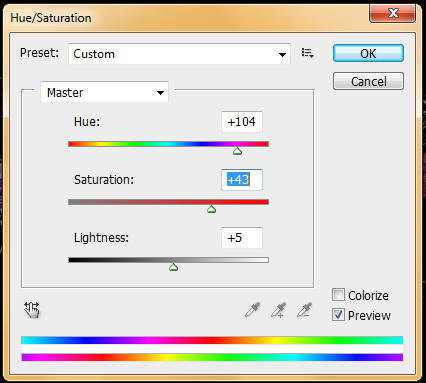
Step 10: Change Colors
Staying on your texture layer, go to “Image” > “Adjustments” > “Hue/Saturation” and change the settings as shown below.


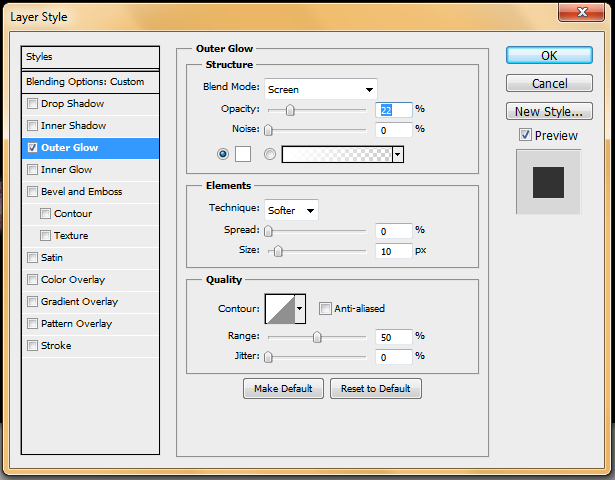
Step 11: Add Outer Glow
Once again staying on your texture layer, access the blending options menu and check the “Outer Glow” box. Change your color to white (#ffffff) and change your settings to match the ones below. Once done, press “OK.”

Step 12: Get Glassy
Grab the glass stock and paste it into your canvas. Resize the image and place it under all of your text layers.

Duplicate and rotate the image two more times until you have something that looks like the image below. Make sure to merge the glass layers together.

Step 13: Change Your Glass Color
To finish up your image, access the Hue/Saturation menu on the glass layer and change settings as shown below.
Finished Image
Conclusion
As you can see, creating your own 3D typography in Photoshop is really easy and yields some great results. So, now that you know how to create your own 3D typography, try to create your own variation of this technique by using different types of brushes and stock images. Try using different fonts of varying thickness and sizes as well as different colors to get some creative and interesting results. When creating your own typography, you can get as fancy as you want, just remember to experiment and that there is never one way to do things. Most importantly, don’t count on fonts when you can build something far better with your own design skills!
Frequently Asked Questions (FAQs) about Creating an Explosive 3D Text Effect in Photoshop
What are the basic requirements for creating a 3D text effect in Photoshop?
To create a 3D text effect in Photoshop, you need to have Adobe Photoshop installed on your computer. It’s recommended to use the latest version for the best results. You also need a basic understanding of Photoshop’s interface and tools. Familiarity with layers, text tools, and blending options will be particularly useful. Lastly, you need a creative mindset and patience to experiment with different settings to achieve the desired effect.
Can I use any font for creating a 3D text effect?
Yes, you can use any font to create a 3D text effect in Photoshop. However, thicker and bolder fonts often give better results as they have more surface area to show the 3D effect. You can experiment with different fonts and choose the one that best suits your design.
How can I add more depth to my 3D text effect?
You can add more depth to your 3D text effect by adjusting the depth value in the 3D panel. You can also use the Bevel and Emboss layer style to add more depth and dimension to your text. Experimenting with different light sources and angles can also enhance the depth of your 3D text.
Can I change the color of my 3D text after creating it?
Yes, you can change the color of your 3D text even after creating it. You can do this by adding a color overlay in the layer styles panel. You can choose any color you want and adjust the opacity to get the desired effect.
How can I create a realistic shadow for my 3D text?
Creating a realistic shadow for your 3D text involves using the Drop Shadow layer style. You can adjust the distance, spread, and size of the shadow to make it look more realistic. You can also change the angle of the shadow to match the light source in your design.
Can I save my 3D text effect as a preset for future use?
Yes, you can save your 3D text effect as a preset in Photoshop. This allows you to apply the same effect to other texts without having to repeat the entire process. You can do this by saving your layer style as a new style in the Styles panel.
How can I make my 3D text effect look more explosive?
To make your 3D text effect look more explosive, you can add elements like sparks, smoke, and fire using different brushes and blending modes. You can also use the Warp tool to distort your text and give it a more dynamic look.
Can I animate my 3D text effect in Photoshop?
While Photoshop is primarily a photo editing software, it does have some basic animation capabilities. You can create a simple animation of your 3D text effect using the Timeline panel. However, for more complex animations, you might need to use a dedicated animation software.
How can I add a background to my 3D text effect?
You can add a background to your 3D text effect by creating a new layer and placing it below your text layer. You can then fill this layer with any color, gradient, or image you want. You can also use different blending modes to blend your background with your text.
Can I use my 3D text effect in other Adobe applications?
Yes, you can use your 3D text effect in other Adobe applications like Illustrator and After Effects. You can do this by saving your text as a Smart Object and importing it into the other application. However, keep in mind that not all Photoshop features may be supported in other applications.
Gabrielle is a creative type who specializes in graphic design, animation and photography.