
Whether you’re a beginner or an expert, you’ve most likely come across StudioPress’ masterpiece, the Genesis Framework. This popular WordPress framework is well known for providing a secure foundation for high quality WordPress websites that are easy to setup (and maintain), and also SEO friendly.
Given it’s such a popular framework, there are a variety of plugins that have been built to extend upon Genesis. In this article, I’ll share some of the most popular Genesis plugins available.
As always, try to be selective in what plugins you install to keep your site lean, just focus on features that you actually need.
Key Takeaways
- Genesis Framework Plugins are designed to enhance WordPress websites with a focus on SEO optimization, ease of setup and maintenance, and high security.
- Plugins such as Genesis Responsive Slider, Genesis eNews Extended, and WordPress Responsive Menu extend the functionality of Genesis Framework, providing features like responsive slideshows, integration with mailing list service providers, and interactive navigation menus for mobile devices.
- Other plugins like Genesis Simple Hooks, Genesis Simple Share, and Genesis Simple Edits allow developers to modify WordPress and Genesis hooks, add social sharing buttons, and edit post info, footer area, and post-meta respectively.
- Genesis Connect for WooCommerce allows the creation of an online store using WooCommerce and Genesis, while Genesis Layout Extras adds extra layouts to the Genesis Framework.
- Genesis Visual Hook Guide is a tool for locating the Genesis filter, markup, and action hooks in the current child theme, working well with Genesis Simple Hooks.
Genesis Responsive Slider
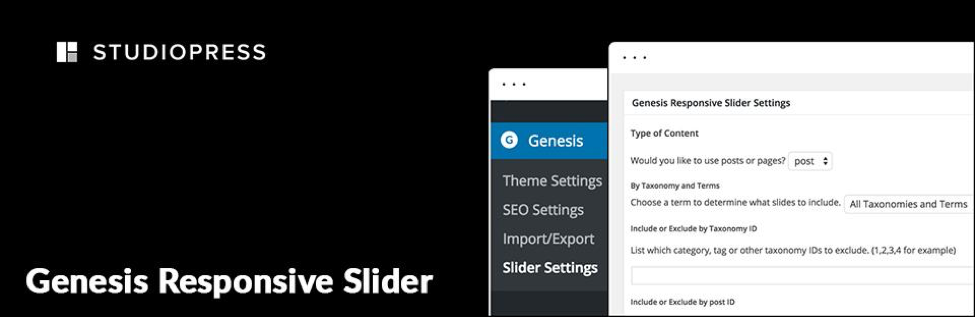
Genesis Responsive Slider is an excellent slider that solves the problem of no default dedicated slider. The plugin allows you to display a slideshow of the featured posts. The slideshow includes the posts’ title, excerpt, and the featured image. The slider is responsive and adjusts automatically to the target screen sizes.
WordPress version required: 3.2 or higher
Compatible up to version: 4.3.6
Active Installs: 80,000+
Key Features:
- Responsive slider and automatic adjustment according to screen size.
- Drag-and-drop option to place the slideshow in the widget area.
- Choose desired dimensions for the slideshow of the posts.
- Set how the slideshow will look and function.
- Using the post IDs, you can feature custom posts on the slider.
Quick Tutorial & Installation Guide:
Manual Procedure:
- Open /wp-content/plugins/ directory and upload the folder genesis-responsive-slider there.
- Make sure that you don’t change the folder’s name.
- Go to the Plugins menu in WordPress Admin Dashboard and activate the plugin.
Install via WordPress:
- Dashboard > Plugin > Add New.
- Search for Genesis Responsive Slider Plugin.
- Install and activate it.
- Go to the Slider Setting from Genesis > Slider Settings.
- Configure the responsive slider and tweak its settings.
- To add the slider, go to the widget area, find the Responsive slider from the left widget screen. Once located, drag-and-drop the Genesis Responsive Slider to the desired location.
More details and download: (https://wordpress.org/plugins/genesis-responsive-slider/)
Genesis eNews Extended
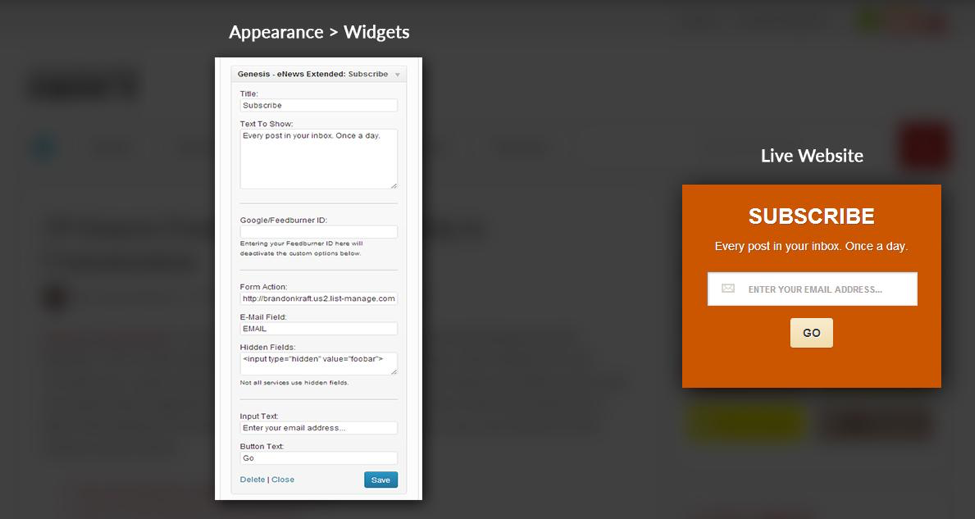
Genesis eNews Extended is a simple, third-party plugin, which greatly extends the capabilities of the Genesis framework. Although it was removed in version 2.0, it’s still compatible with all the later versions. The plugin creates a widget, which integrates with mailing list service providers such as FeedBlitz, FeedBurner, Aweber, MailChimp, and several others. It’s quite easy to use. All you have to do is to select the service provider, enter the user credentials, and you’re all set.
WordPress version required: 3.0 or higher
Compatible up to version: 4.7
Active Installs: 90,000+
Key Features:
- Easy integration with popular mailing list providers.
- Customise the subscription box through additional configuration options.
- Improved features and functionality as compared to the previous ‘Genesis eNews’ version.
Quick Tutorial & Installation Guide:
Manual Procedure:
- Open /wp-content/plugins/ directory and upload the folder Genesis eNews Extended there.
- Make sure that you don’t change the folder’s name.
- Go to the Plugins menu in WordPress and activate the plugin.
Install via WordPress:
- Dashboard > Plugin > Add New.
- Search for Genesis eNews Extended Plugin.
- Install and activate it.
- To add the Subscription form, go to the widget area, find Genesis eNews Extended from the left widget screen. Once located, drag-and-drop it to the desired location.
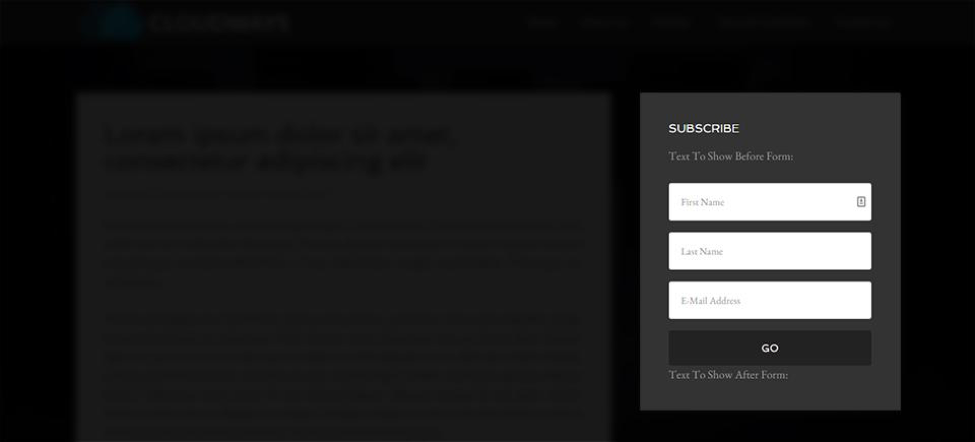
Using the Genesis eNews Extended plugin is a little tricky. When connecting the form with the mailing list provider, you need to use the form code given by the service provider to add the form field ID, form action URL etc. You can view a video example where I’m using MailChimp here.
Once you have it setup, I strongly recommend that you do a test run to verify that it works correctly.
More details and download: (https://wordpress.org/plugins/genesis-enews-extended/)
WordPress Responsive Menu
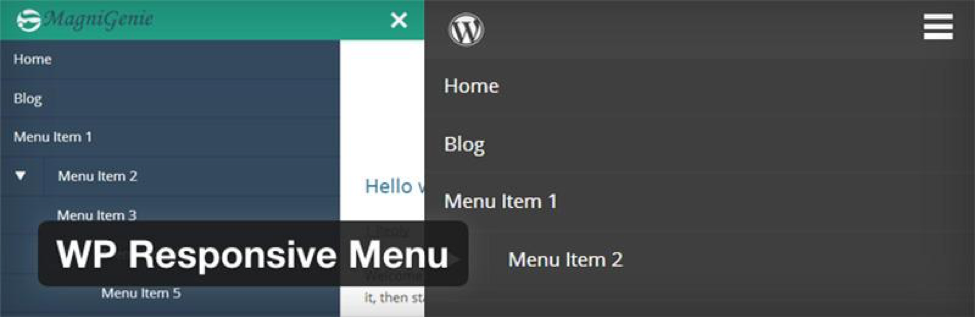
Integrating interactive and highly responsive navigation menus for mobile devices in Genesis-powered websites is best done through WP Responsive Menu. The plugin is based on Sidr jQuery menu plugin and packs numerous features, including customising menu colours and animations, adding logo to the menu, pinch zooming, swipe gestures, hiding specific menu items. The plugin also has a pro version that offers several additional features.
WordPress version required: 3.5.0 or higher
Compatible up to version: 4.5.4
Active Installs: 60,000+
Key Features:
- The option to enable/disable pinch zooming feature.
- The Admin interface is extremely user-friendly and makes customising the menus a breeze.
- Add logo, colours, animations, and other appealing features to the menu to match the website’s theme.
- Open menu however you like, i.e. from right, left, and top.
- Easy integration with the WordPress menu system.
- Discard/hide unwanted features or elements on handheld devices.
- Add a custom search bar and alter its text to match the font and colour scheme of the overall menu.
Quick Tutorial & Installation Guide:
Manual Procedure:
- Open /wp-content/plugins/ directory and upload the folder there.
- Make sure that you don’t change the folder’s name.
- Go to the Plugins menu in WordPress and activate the plugin.
Install via WordPress:
- Dashboard > Plugin > Add New.
- Search for WordPress Responsive Menu in the search bar.
- Install and activate it.
- Once it’s installed, you’ll see the plugin in the left navigation bar of WordPress Dashboard.
More details and download: (https://wordpress.org/plugins/wp-responsive-menu/)
Genesis Simple Hooks
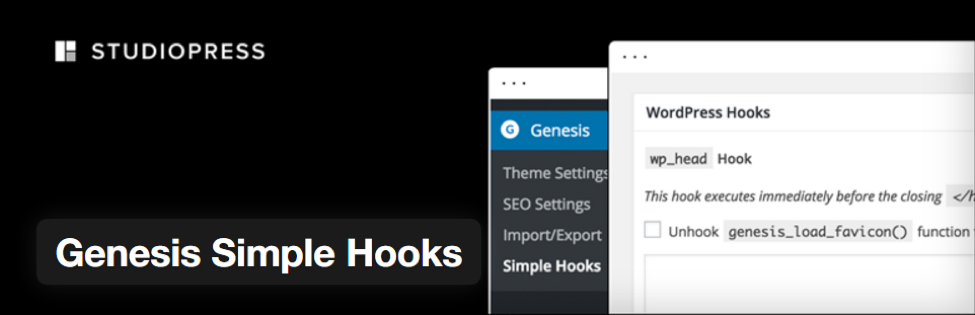
Genesis Simple Hooks is a cutting-edge plugin that allows developers to access both WordPress and Genesis hooks. When you install the plugin, a new setting page is created in the website’s dashboard, right below the framework’s menu. You can determine the content and the appropriate hook by accessing this page. You could insert content into the hooks without having to make any custom functions.
WordPress version required: 3.9.2 or higher
Compatible up to version: 4.3.6
Active Installs: 90,000+
Key Features:
- 50+ Genesis action hooks.
- Easy and simple interface to modify your current Genesis theme by making changes to the hook system.
- Get access to WordPress built-in and Genesis theme hooks.
Quick Tutorial & Installation Guide:
Manual Procedure
- Open /wp-content/plugins/ directory and upload the contents of the Genesis-simple-hooks folder.
- Make sure that you don’t change the folder’s name.
- Go to the Plugins menu in WordPress to activate the plugin.
- Find and select the hook that you want to use.
- Now enter the code that needs to be executed for that hook.
- Select whether PHP and Shortcodes need to be executed on that hook.
- Save the changes and check if the changes are applied on the Genesis theme.
Install via WordPress:
- Dashboard > Plugin > Add New.
- Search for Genesis Simple Hooks in the search bar.
- Install and activate it.
- Once it’s installed, you’ll see the plugin in the left navigation bar of WordPress Dashboard and follow step 4 onwards above.
More details and downloads: (https://wordpress.org/plugins/genesis-simple-hooks/)
Genesis Simple Share
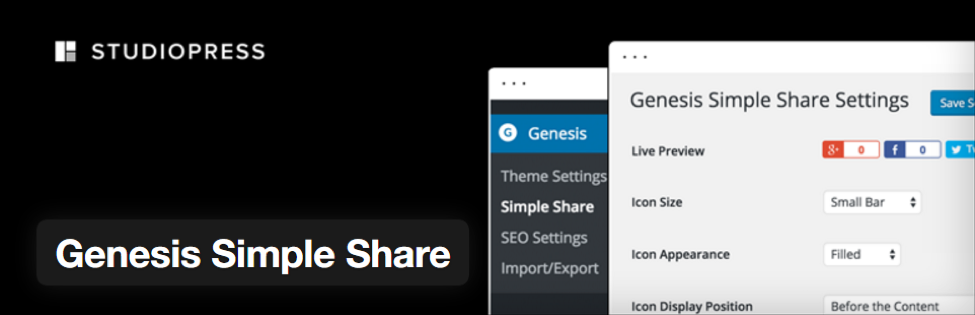
Social sharing icons are a common feature on many websites. If you have a Genesis-powered website, you can easily include social sharing buttons by installing this plugin. Genesis Simple Share is an official release from StudioPress, and offers several configuration options, enabling you to customise the look of social sharing icons for individual posts.
WordPress version required: 3.7 or higher
Compatible up to version: 4.6.1
Active Installs: 20,000+
Key Features:
- Change the order of social sharing icons through simple drag-and-drop.
- Light and fast in performance.
- Choose the types of posts on which this plugin will be active.
- Special settings for Twitter that enable the user to put their username on the Twitter icon.
Quick Tutorial & Installation Guide:
Manual Procedure
- Download the Genesis Simple Share plugin.
- Go to your WordPress Dashboard and upload it as a new plugin. You can also upload this plugin through FTP to the wp-content/plugins folder.
- Activate the plugin.
Install via WordPress:
- Dashboard > Plugin > Add New.
- Search for Genesis Simple Share in the search bar.
- Install and activate it.
- Once it’s installed, you’ll see the plugin in the left navigation bar of WordPress Dashboard.
More details and download: (https://wordpress.org/plugins/genesis-simple-share/)
Genesis Simple Edits
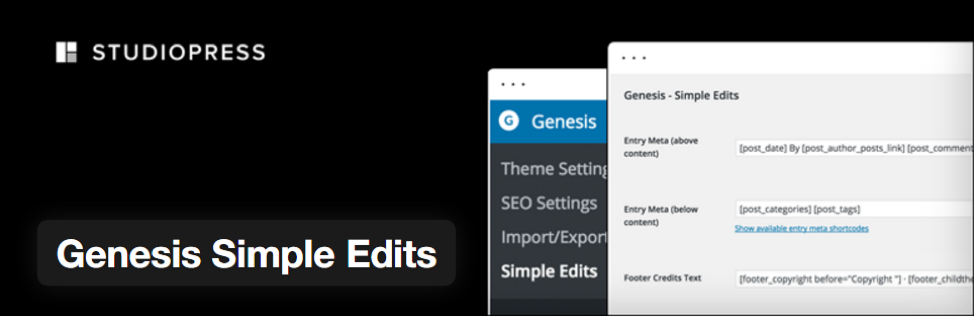
Whenever you set up a child theme on the parent install, you’ll notice that configurations about the post info, the footer area, and the post-meta are pre-set. The problem is that Genesis does not provide a way to modify these three areas as per the requirements of the individual posts.
This is where Genesis Simple Edits comes in handy, as it allows you to edit and modify these areas very easily. You can edit the three fields by going to the admin screen and making changes to the HTML, Shortcodes, and the text in the text boxes.
WordPress version required: 3.2 or higher
Compatible up to version: 4.3.6
Active Installs: 200,000+
Key Features:
- Free, lightweight and extremely simple to use.
- Enables the user to quickly modify the footer, byline, and post meta information with custom details.
- Saves the hassle of writing PHP functions, tweaking the hooks, or using filters.
Quick Tutorial & Installation Guide:
Manual Procedure
- Open /wp-content/plugins/ directory and upload the contents of the Genesis-simple-edits folder.
- Make sure that you don’t change the folder’s name.
- Go to the Plugins menu in WordPress to activate the plugin.
- Go to Genesis-> Simple Edits.
- Edit the three fields with custom information.
- Save the changes.
Install via WordPress:
- Dashboard > Plugin > Add New.
- Search for Genesis Simple Edits in the search bar.
- Install and activate it.
- Once it’s installed, you’ll see the plugin in the left navigation bar of WordPress Dashboard and follow step 4 onwards above.
More details and download: (https://wordpress.org/plugins/genesis-simple-edits/)
Genesis Connect for WooCommerce
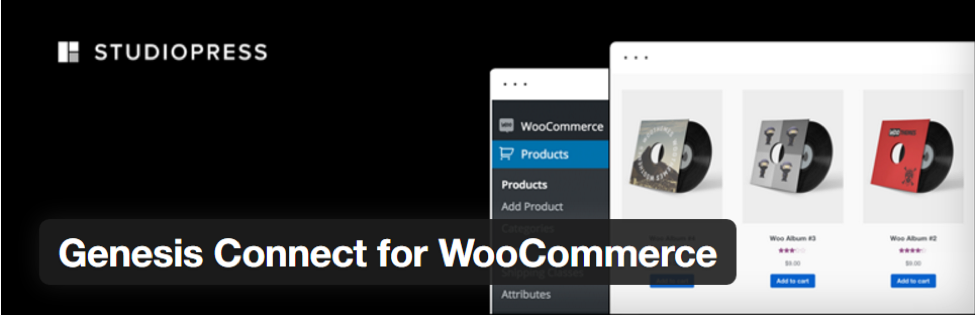
Are you looking for a solution to create an online store using both WooCommerce and Genesis? Well, your search ends with this plugin. Genesis Connect for WooCommerce enables you to incorporate WooCommerce functionality and features in the Genesis child themes and framework. You can easily use customised designs for tag archives, products and their categories, and the main shop pages.
WordPress version required: 3.3 or higher
Compatible up to version: 4.6.1
Active Installs: 20,000+
Key Features:
- Makes Genesis Simple Menus and Genesis Simple Sidebars compatible with WooCommerce.
- Supports customisations that the user can incorporate at the template level, ensuring that none of the changes are lost in the future.
- Compatible with Genesis, WordPress, and WooCommerce 2.1+ versions.
- The plugin is available for free and is created by StudioPress developers.
- Allows you to display product lists and works perfectly with the e-commerce platform.
Quick Tutorial & Installation Guide:
Manual Procedure
Note that before you install this plugin, a Genesis child theme must be activated on the framework and WooCommerce must be installed on your system.
- Open /wp-content/plugins/ directory and upload the contents of the Genesis-connect-WooCommerce folder.
- 2.Make sure that you don’t change the folder’s name.
- 3.Go to the Plugins menu in WordPress to activate the plugin.
- 4.Add the code add_theme_support( ‘genesis-connect-woocommerce’ ); to the functions.php file of the Genesis child theme.
- 5.Check whether the new templates are working properly on your shop pages.
Install via WordPress:
- Dashboard > Plugin > Add New.
- Search for Genesis Connect for WooCommerce in the search bar.
- Install and activate it.
- Once it’s installed, you’ll see the plugin in the left navigation bar of WordPress Dashboard.
More details and download: (https://wordpress.org/plugins/genesis-connect-woocommerce/)
Genesis Layout Extras
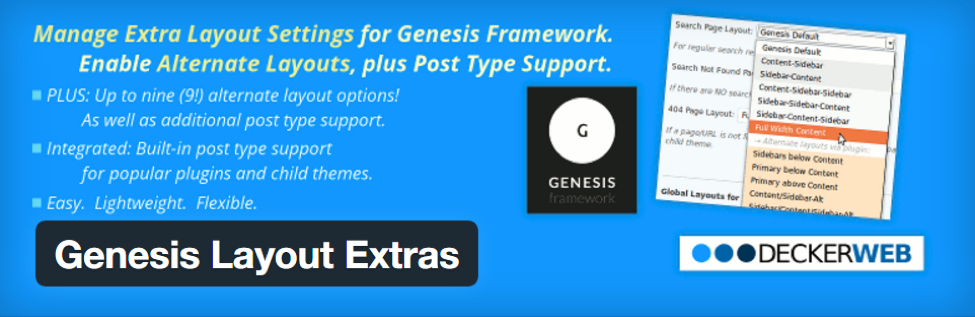
Genesis Framework somewhat lacks in the variety of page layouts, which is why installing the Genesis Layout Extra plugin is the best option for adding extra layouts. It’s a very lightweight plugin, that enables you to easily change and modify default layouts for archive sections, singular pages, search results pages, homepage, attachment pages, author pages, and the 404 pages. You can give the website a completely new look by selecting creative layouts from a wide range of options for the aforementioned pages.
WordPress version required: 3.4 plus Genesis 1.8+ or higher
Compatible up to version: 4.6.1
Active Installs: 10,000+
Key Features:
- Up to 9 new layouts.
- Modify default layouts for homepage, search, attachment, various archive, and 404 pages.
- Layouts available for posts that are created by other plugins in the framework or other third-party authors.
- Layout settings for the Genesis compatible bbPress 2.x forum plugin as a bonus feature.
Quick Tutorial & Installation Guide:
Manual Procedure
Note that the Genesis Layout Extra plugin is only compatible with the parent theme of Genesis Framework (GPL-2.0+)
- Open /wp-content/plugins/ directory and upload the contents of the Genesis-featured-page-extras folder.
- Make sure that you don’t change the folder’s name.
- Go to the Plugins menu in WordPress to activate the plugin.
- Make changes to the default layout by going to the Genesis Theme Settings menu on the left-hand and selecting Layout Extras.
Install via WordPress:
- Dashboard > Plugin > Add New.
- Search for Genesis Layout Extra in the search bar.
- Install and activate it.
- Make changes to the default layout by going to the Genesis Theme Settings menu on the left-hand and selecting Layout Extras.
More details and download: (https://wordpress.org/plugins/genesis-layout-extras/)
Genesis Visual Hook Guide
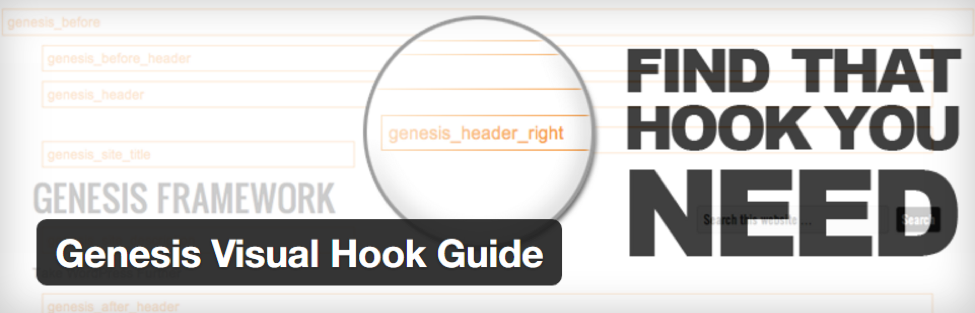
Do you want to customise the Genesis child theme exactly the way you want it to be?
Genesis Visual Hook Guide allows you to locate the Genesis filter, markup and action hooks in the current child theme easily and quickly.
WordPress version required: 3.4 or higher
Compatible up to version: 4.1.13
Active Installs: 10,000+
Key Features:
- Works great with Genesis Simple Hooks.
- A drop-down menu is added in the admin bar once the plugin is installed to allow the user to select from the three hook options, and find their location.
Quick Tutorial & Installation Guide:
Manual Procedure
- Open
/wp-content/plugins/directory and upload the contents of the Genesis-visual-hook-guide folder. - Make sure that you don’t change the folder’s name.
- Go to the Plugins menu in WordPress to activate the plugin.
Install via WordPress:
- Dashboard > Plugin > Add New.
- Search for Genesis Simple Hooks in the search bar.
- Install and activate it.
- Once it’s installed, you’ll see the plugin in the left navigation bar of WordPress Dashboard under Genesis.
More details and download: (https://wordpress.org/plugins/genesis-visual-hook-guide/)
Wrapping Up
So there you have it, these are some of the best plugins for Genesis powered websites. You can easily use a combination (or all of them) for customising Genesis based projects and greatly enhance the user experience.
If you have any other Genesis plugins that you use in your builds, please share them with us in the comments below.
Frequently Asked Questions about Genesis Framework Plugins
What are the benefits of using Genesis Framework plugins for my WordPress website?
Genesis Framework plugins offer a variety of benefits for your WordPress website. They provide a solid and secure foundation for your website, ensuring it runs smoothly and efficiently. These plugins are also SEO-friendly, helping your site rank higher in search engine results. Additionally, they offer a range of customization options, allowing you to tailor your site to your specific needs and preferences. Genesis Framework plugins are also regularly updated, ensuring they remain compatible with the latest versions of WordPress.
How do I install Genesis Framework plugins on my WordPress website?
Installing Genesis Framework plugins on your WordPress website is a straightforward process. First, you need to log into your WordPress dashboard. Then, navigate to the ‘Plugins’ section and click on ‘Add New’. In the search bar, type the name of the Genesis Framework plugin you wish to install. Once you find the plugin, click on ‘Install Now’ and then ‘Activate’. The plugin should now be installed and ready to use on your website.
Are Genesis Framework plugins compatible with all WordPress themes?
Genesis Framework plugins are designed to work seamlessly with Genesis child themes. However, their compatibility with other WordPress themes may vary. It’s always a good idea to check the plugin’s documentation or consult with the plugin’s developer to ensure it will work properly with your chosen theme.
Can I use multiple Genesis Framework plugins on my website?
Yes, you can use multiple Genesis Framework plugins on your website. However, it’s important to ensure that the plugins you choose do not conflict with each other. Always test new plugins on a staging site before implementing them on your live site to avoid any potential issues.
What should I do if a Genesis Framework plugin is causing issues on my website?
If a Genesis Framework plugin is causing issues on your website, the first step is to deactivate the plugin and see if the problem persists. If the issue is resolved, then the plugin was likely the cause. In this case, you can reach out to the plugin’s developer for assistance or look for an alternative plugin that offers similar functionality.
How can I customize Genesis Framework plugins?
Many Genesis Framework plugins offer a range of customization options. These can typically be accessed through the plugin’s settings in your WordPress dashboard. Here, you can adjust various aspects of the plugin’s functionality and appearance to suit your needs.
Are Genesis Framework plugins mobile-friendly?
Yes, most Genesis Framework plugins are designed to be mobile-friendly. This means they will function properly and look good on all types of devices, including smartphones and tablets.
Do I need to update Genesis Framework plugins regularly?
Yes, it’s important to keep your Genesis Framework plugins updated to ensure they continue to function properly and remain secure. Updates often include bug fixes, new features, and improvements to the plugin’s performance.
Can Genesis Framework plugins slow down my website?
While any plugin has the potential to slow down your website, Genesis Framework plugins are designed to be lightweight and efficient. However, it’s always a good idea to monitor your site’s performance and deactivate any plugins that are causing significant slowdowns.
Are Genesis Framework plugins free, or do I need to pay for them?
Some Genesis Framework plugins are free, while others require a one-time purchase or a subscription. The cost can vary depending on the plugin’s features and functionality. Always check the plugin’s details before installing to understand if there are any costs involved.