Sadly, sound within Flash projects is often included as an afterthought – if it’s included at all. Hurried, last-minute sound additions typically amount to no more than a clichéd loop that serves little purpose. If you ever find yourself in the position of importing a sound clip into a project without a clear idea of why you’re doing it, stop and repeat the Flash designers’ mantra: bad use of sound can destroy the entire user experience.
In this age of digital media, sound can and should be a part of the online environment. A little sound can go a long way toward enhancing and solidifying the user experience. Even a simple “click” sound can provide valuable auditory feedback, provided it’s used in the right manner. But beware overloading your projects with sound “just for the sake of it.” The use of sound, then, is a question of balance.
Note that you can download this chapter in pdf format if you’d prefer to read this content offline.
When Should You Use Sound in Your Projects?
This is one of those golden questions, and the answer depends on the type of project you’re developing . Some productions don’t require any sound when viewed in isolation; yet, when incorporated into a larger project, they call for some degree of aural enhancement. If a project is heavily related to sound, then it should definitely involve an appropriate variety of audio clips.
Always consider your work from the perspective of users: will the addition of sound increase their enjoyment of the project? Including short or long musical loops, sound bytes, or a narrative can greatly increase the appeal of an interface, but may also detract from other content and become extremely annoying after just a short while. Consider the following examples of possible Flash projects and think about sound might benefit them. Your choice could include sound effects, musical loops, narratives, or, of course, nothing at all.
- Looping animation
- Single level menu system
- Multilevel menu system
- Multi-paged Flash site
- Flash form
- Streaming video content
Quickly run through these examples in your head. It’s not difficult to see what will and won’t work for different projects. Over time, you’ll become increasingly adept at making decisions about when and how to add sound to your projects.
Selecting Sound Clips
One of the major benefits of digital sound is its flexibility. Audio processing software such as Steinberg Wavelab makes it easy to edit, modify, loop, and add effects to sounds. You can take a ten-second section from one audio loop, paste it into another, or paste it across multiple tracks, with no more difficulty than editing a Word document. The advanced sound processing tools that are now available, combined with a microphone and your own imagination, allow you to create a huge array of audio clips. If you’re pushed for time or need extra inspiration, there are many online resources from which you can download free clips or purchase collections of clips for use in your projects.
The application of sound to your projects should not be taken lightly. You need to pay attention to a number of factors if the effects are to be successful – most notably, timing, volume, and composition. Remember, you’re seeking to enhance your visual messages rather than work against them, so your choice of sound is important. A manic techno loop attached to the submit button of a Flash form may well provoke visitors to close the browser. On the other hand, if you give users subtle feedback that the form has been submitted, they’ll likely gain confidence in the interface and continue to interact.
As you can see, it’s all about context. The appropriate integration of sound into a project can support the efficient communication of the message.
Importing and Exporting Sound Clips
Flash MX 2004 offers a built-in sound editor, which is fine for simple editing tasks. However, this tool is too basic for most needs: it doesn’t allow you to add effects to your sound selections, for example. I definitely advocate the use of a more powerful sound processor, especially when it comes to trimming, duplicating, and looping clips.
You can import a sound clip from the File menu just as you would any other media type. Imported sounds can be applied directly to buttons and button states (Up, Down, Over, etc.), incorporated via streaming external files, included through ActionScripted control in the Action Panel, or added via other means.
The addition of a “click” sound to a button’s Down state to simulate a real world mouse click is an example of a basic sound effect. It doesn’t require ActionScript knowledge, but it certainly can be created via script. In the following example, the necessary code is applied to a button called myButton, which references a sound clip that has a linkage identifier of mySound in the Library Panel:
myButton.onPress = function ()

{

  newSound = new Sound ();

  newSound.attachSound ("mySound");

  newSound.start ();

}
For more advanced effects, including streaming and abstract playback mechanisms, we need to look under the hood of the ActionScript Sound class to see how we can control sound from within the interface and code conditions. It’s an exciting arena in which you can create interesting and dramatic effects quickly, with just a little imagination.
As this book is concentrated on the creation of effects via ActionScript, we won’t cover the integration of sound effects into buttons and frames on the timeline. For examples of this, refer to the Flash MX 2004 documentation.
Let’s start with an interesting volume control that’s linked to an animation.
Dynamic Volume Control
In the following demonstration, we scale the vertical height of a movie clip dynamically, tying the volume of a sound associated with the clip to its height. It’s an important example, as it forms the basis for many of the effects you’ll create in future.
To edit a completed version of the effect, locate volcontrol.fla in the code archive.
Setting the Scene
- Create a new Flash document that’s 500 pixels wide and 400 pixels high. Set the frame rate to 24 fps (Modify > Document…).
clipper.reverb.mp3 from the code archive, or import another sound file of your choice. Place it in the Sound folder.The file used here is a short, three-second clip of medium quality chosen primarily because it’s a small file.
Having added the element we’re going to animate and linked the sound clip for ActionScript export, we can now add the control code.
Adding the ActionScript
Example 5.1. volcontrol.fla Actions : 1 (excerpt)
MovieClip.prototype.WaveFade = function (minValue, maxValue,

    period)

{

  this.period = period;

  this.minValue = minValue;

  this.maxValue = maxValue;

  this.count = 0;

  this.onEnterFrame = function ()

  {

    var value = (1 + Math.cos (this.count++ * 2 * Math.PI /

        this.period)) / 2;

    this._yscale = this.minValue + value *

        Math.abs (this.maxValue - this.minValue);

  };

};

clipper.WaveFade (20, 100, 48);
Here, we extend the movie clip class with a new method called WaveFade, which scales the clip up and down vertically in a smooth, regular pattern. The method is relatively straightforward, with the exception that careful use of the cosine function is required to produce the values that control the scaling.
The method takes three parameters: minValue, the minimum scale for the clip (as a percentage); maxValue, the maximum scale for the clip; and period, the number of frames in one oscillation (from the maximum scale to the minimum and back again).
The value variable is assigned a value using the cosine function. We add one and then divide the result by two to get values oscillating between zero and one. (Cosine oscillates between one and minus one.) We then multiply that by the difference between the maximum and minimum scaling values to determine the vertical scaling of the clip for each frame.
Notice that the _yscale of the movie clip oscillates smoothly from its full height down to 20% and then back up again. Now that we have the animation in place, we can add the sound clip:
Example 5.2. volcontrol.fla Actions : 1
MovieClip.prototype.WaveFade = function (minValue, maxValue,

    period)

{

  this.period = period;

  this.minValue = minValue;

  this.maxValue = maxValue;

  this.count = 0;

  this.reverb = new Sound ();

  this.reverb.attachSound ("reverb");

  this.reverb.start (0, 999);

  this.onEnterFrame = function ()

  {

    var value = (1 + Math.cos (this.count++ * 2 * Math.PI /

        this.period)) / 2;

    this._yscale = this.minValue + value *

        Math.abs (this.maxValue - this.minValue);

    this.reverb.setVolume (this.minValue + value *

        Math.abs (this.maxValue - this.minValue));

  };

};

clipper.WaveFade (20, 100, 48);
We start by creating a new Sound object and attaching the sound from the Library Panel. We start the clip at the beginning (0), and set it to loop 999 times.
Meanwhile, within the onEnterFrame event handler, we set the percentage volume of the sound clip using the same calculation we employed for its _yscale:
this.reverb.setVolume (this.minValue + value *

        Math.abs (this.maxValue - this.minValue));
This is the same code we used to control the clip’s _yscale; in theory, we could replace it with the following:
this.reverb.setVolume(this._yscale);
However, we avoid using this code as it’s less readable. When you revisit your code at a later date, you might easily become confused if you saw sound properties linked to movie clip properties.
Notice that, as the scale of the clip decreases, so does the volume of the sound. As the scale increases, so does the volume. The addition of scripted sound has enhanced this simple effect, which strengthens the message and creates a more powerful experience.
Dynamic Panning Control
In this example, we animate an object across the screen and alter the panning of sound in accordance with the object’s location. Panning involves the movement of a sound in stereo, which can add dynamism to even a single continuous tone. This builds on the previous example to increase your skills with the Sound class using a new method: setPan.
By default, the panning of a sound is set to 0, but we can use setPan to alter that between the limits of -100 (all sound to the left channel) and +100 (all sound to the right channel).
Let’s mirror the movement of a simple animation from left to right with an effect that moves the sound from the left channel to the right.
To skip ahead and modify this effect, locate pancontrol.fla in the code archive.
Setting the Scene
- Create a new Flash document that’s 500 pixels wide and 400 pixels high. Set the frame rate to 24 fps (Modify > Document…).
clipper.reverb.mp3 from the code archive, or import a sound file of your choice.reverb as the identifier.Adding the ActionScript
We’re done setting the scene. It’s time to add the code to bring it all together.
Example 5.3. pancontrol.fla Actions : 1
MovieClip.prototype.WavePan = function (minValue, maxValue,

    period)

{

  this.period = period;

  this.minValue = minValue;

  this.maxValue = maxValue;

  this.count = 0;

  this.reverb = new Sound ();

  this.reverb.attachSound ("reverb");

  this.reverb.start (0, 999);

  this.onEnterFrame = function ()

  {

    var value = (1 + Math.cos (this.count++ * 2 * Math.PI /

        this.period)) / 2;

    this._x = this.minValue + value *

        Math.abs (this.maxValue - this.minValue);

    this.reverb.setPan (-100 + value * 200);

  };

};

clipper.WavePan (50, Stage.width - 100, 48);
We give the method a new name (WavePan), we’ve, set the horizontal position (instead of the vertical scale) of the movie clip to oscillate between the maximum and minimum values, and have the sound pan between the left and right speakers.
In our call to WavePan, we pass minimum and maximum values to ensure that the movie clip covers most of the stage:
clipper.WavePan (50, Stage.width - 100, 48);All that remains is to test-drive the effect!
Move your speakers apart or put your headphones on, so you can enjoy this effect to the full.
This simple effect can serve multiple purposes within your projects. It can really bring your creations to life, adding pizzazz to animations, navigation systems, and more!
Mini Sound Player
It’s time to stretch our legs! We’ve covered the fundamentals of sound control. Now, let’s move into the development of a fully functional sound playback device. In this example, we’ll create a random sound player that provides visual feedback about various properties of the random sound clips it plays, as shown in Figure 5.1.
Figure 5.1. Create a mini sound player.
To jump forward and edit this effect, locate miniplayer.fla in the code archive.
Setting the Scene
- Create a new Flash document that’s 450 pixels wide and 100 pixels high. Set the frame rate to 24 fps (Modify > Document…).
miniplayer.fla in the code archive or Figure 5.1 for examples.PlayClip, StopClip, VolumeUp, and VolumeDown. Arrange the buttons so they sit within the bounds of the background you created in step 3.play, stop, volume + and volume -, respectively.choir1.mp3, choir2.mp3, choir3.mp3, choir4.mp3, and choir5.mp3.choir1, choir2, etc.).As I’ve explained before, this allows us to access the sound clips dynamically without having to drag them onto the stage.
We’ve successfully created the objects and imported the sounds we need to achieve basic functionality. All that remains is to add the ActionScript that controls the application.
Adding the ActionScript
First, we’ll add the code that controls the playback of the sounds we imported.
Example 5.4. miniplayer.fla Actions : 1 (excerpt)
function randomBetween (a, b)

{

  return Math.min (a, b) + random (Math.abs (a - b) + 1);

}

PlayClip.onPress = function ()

{

  stopAllSounds ();

  _root.orchestra = new Sound ();

  _root.orchestra.attachSound ("choir" + randomBetween (1, 5));

  _root.orchestra.start ();

};
As the music player plays clips at random, our familiar randomBetween function comes in handy.
As the heart of this example, the onPress event handler of the PlayClip button definitely merits further study. The first thing it does is stop any sound that may already be playing, so that multiple sound clips aren’t played at the same time if the PlayClip button is clicked repeatedly. The built-in stopAllSounds function handles this:
stopAllSounds ();
Next, we create a new Sound object and store it in a variable in the main movie (_root) called orchestra. We then use attachSound to load one of the five sounds from the library start it playing:
_root.orchestra = new Sound ();

  _root.orchestra.attachSound ("choir" + randomBetween (1, 5));

  _root.orchestra.start ();
Press the Play button and a randomly selected clip will begin to play; press it again and another random clip will play. It’s all functioning as expected.
Now, we’ll add the Stop button’s control code. This is much the same as the code we used with the Play button to remove the movie clips and stop all sound on the stage:
Example 5.5. miniplayer.fla Actions : 1 (excerpt)
StopClip.onPress = function ()

{

  stopAllSounds ();

  _root.orchestra = null;

};
We use stopAllSounds to stop any playing sounds, and throw away the Sound object we’d stored in the orchestra variable. This frees up the memory the object was using.
When you press the Play button, the sound plays; when you hit the Stop button, it stops. Let’s add the volume control buttons and finish this example.
Example 5.6. miniplayer.fla Actions : 1 (excerpt)
VolumeUp.onPress = function ()

{

  if (_root.orchestra.getVolume () < 100)

  {

    _root.orchestra.setVolume (_root.orchestra.getVolume () +

        10);

  }

};

VolumeDown.onPress = function ()

{

  if (_root.orchestra.getVolume () > 0)

  {

    _root.orchestra.setVolume (_root.orchestra.getVolume () -

        10);

  }

};
When the volume of a sound clip is less than 100, we increase it in increments of ten each time the VolumeUp button is pressed. Conversely, when its volume is greater than zero, it’s decreased in steps of ten each time the VolumeDown button is pressed.
You can select a random clip by pressing the Play button, stop the dynamically loaded clip with the Stop button, and increase or decrease the volume of the clip using the volume controls. You may want to experiment with sound clips of your own, as those distributed in the code archive are quite short.
Modifications
We’ve successfully created an interface for the playback of random sound clips! We can extend it easily to provide visual feedback about the duration of the loaded track, the play time remaining, the name of the playing clip, and the volume level.
To edit these additions, locate miniplayer-feedback.fla in the code archive.
volume.clip length and time remaining using static text areas.clipname, cliplength and timeleft. Repeat step 3 for each of the text boxes. Make sure each box is large enough to hold the required information.Example 5.7. miniplayer-feedback.fla Actions : 1
function roundNumber (toRound, numDecimals)

{

  return Math.round (toRound * Math.pow (10, numDecimals)) /

      Math.pow (10, numDecimals);

}

function randomBetween (a, b)

{

  return Math.min (a, b) + random (Math.abs (a - b) + 1);

}

_root.createEmptyMovieClip ("tracker", 1);

PlayClip.onPress = function ()

{

  stopAllSounds ();

  _root.orchestra = new Sound ();

  var clipnumber = randomBetween (1, 5);

  _root.orchestra.attachSound ("choir" + clipnumber);

  _root.orchestra.start ();


  _root.tracker.onEnterFrame = function ()

  {

    _root.timeleft.text = roundNumber (

        (_root.orchestra.duration - _root.orchestra.position)

        / 1000, 2) + " seconds";

  };

  _root.cliplength.text = roundNumber (

      _root.orchestra.duration / 1000, 2) + " seconds";

  _root.clipname.text = "Choir" + clipnumber;

  _root.volume.text = _root.orchestra.getVolume ();

};

StopClip.onPress = function ()

{

  stopAllSounds ();

  _root.orchestra = null;

  _root.cliplength.text = "";

  _root.clipname.text = "";

  _root.timeleft.text = "";

};

VolumeUp.onPress = function ()

{

  if (_root.orchestra.getVolume () < 100)

  {

    _root.orchestra.setVolume (_root.orchestra.getVolume () +

        10);

    _root.volume.text = _root.orchestra.getVolume ();

  }

};

VolumeDown.onPress = function ()

{

  if (_root.orchestra.getVolume () > 0)

  {

    _root.orchestra.setVolume (_root.orchestra.getVolume () -

        10);

    _root.volume.text = _root.orchestra.getVolume ();

  }

};
Let’s dissect the changes we’ve made, so we understand how it all works!
First, we introduce a new math function, roundNumber, which rounds figures to a specified number of decimal places. This will be used to show both the play time remaining for each clip and the clip’s total duration.
function roundNumber (toRound, numDecimals)

{

  return Math.round (toRound * Math.pow (10, numDecimals)) /

      Math.pow (10, numDecimals);

}
We’ll be updating the track time remaining with each frame of the movie, so we’ll need an onEnterFrame event handler. Unfortunately, we don’t have any obvious movie clip to hook that handler to. We could attach it to one of the buttons in our interface, but it’s tidier to create an empty movie clip called tracker to host it:
_root.createEmptyMovieClip ("tracker", 1);We then add the following code to the PlayClip button’s onPress handler that sets up the event handler itself:
_root.tracker.onEnterFrame = function ()

  {

    _root.timeleft.text = roundNumber ((_root.orchestra.duration -

        _root.orchestra.position) / 1000, 2) + " seconds";

  };
This continuously updates the timeleft dynamic text field we created earlier. We constantly monitor the position of the sound clip using the duration and position properties of the Sound object, calculating the remaining time in milliseconds. We then convert this to a value in seconds, rounding to two decimal places with the help of our roundNumber function.
We also update the other dynamic text fields that hold the length of the clip being played, its name, and its volume.
_root.cliplength.text = roundNumber (_root.orchestra.duration /

      1000, 2) + " seconds";

  _root.clipname.text = "Choir" + clipnumber;

  _root.volume.text = _root.orchestra.getVolume ();
Within the StopClip button’s onPress event handler, we include the following code, which clears the dynamic text fields of the information associated with the clip played previously:
_root.cliplength.text = "";

_root.clipname.text = "";

_root.timeleft.text = "";
Finally, the VolumeUp and VolumeDown onPress event handlers are updated. This ensures that any changes to the clip’s volume are reflected in the volume dynamic text field.
_root.volume.text = _root.orchestra.getVolume ();That’s it for the code changes.
There! We have a fully-fledged random clip player that provides information on the duration of the current clip, its name, and the play time remaining.
This example can easily be extended through the addition of more clips to the library. Export them for ActionScript reference, and alter the code that selects the clip to play within the PlayClip button’s onPress event handler.
Use an array!
A useful variation would be to store the linkage names of available clips in an array, so that the number of clips available would not have to be hard-coded.
Random Track Sequencer Effect
This effect is different from others in the book in that it has no interface! There’s nothing to see, but plenty to hear. We’re aiming to overlay random tracks to create a unique sound – something that’s a little different from what a user might normally hear. The composition contains four ten-second loops comprising a random selection from the following categories:
- Background: a selection of five background bed tracks
- Drums: a selection of five drum tracks
- Guitar: a selection of five guitar loops
- Overlay: a selection of different overlays
As the movie loads, a random selection is made from each category. The tracks are then combined to create one of 625 possible soundtracks.
That’s enough of the introduction – let’s get cracking! To edit this effect, locate random.fla in the code archive.
Setting the Scene
- Create a new Flash document that’s 200 pixels wide and 200 pixels high. Modify the frame rate to 24 fps (Modify > Document…).
Background1.mp3, Background2.mp3, Background3.mp3, Background4.mp3, Background5.mp3, Drum1.mp3, Drum2.mp3, Drum3.mp3, Drum4.mp3, Drum5.mp3, Guitar1.mp3, Guitar2.mp3, Guitar3.mp3, Guitar4.mp3, Guitar5.mp3, Overlay1.mp3, Overlay2.mp3, Overlay3.mp3, Overlay4.mp3, and Overlay5.mp3..mp3 extension if you’re using Flash MX 2004), and click OK.That’s all the setting up we need to do for this example. As we’re not adding an interface or allowing any user interaction, no other elements need to be included, apart from the ActionScript to produce the sound composition.
Adding the ActionScript
Example 5.8. random.fla Actions : 1
function randomBetween (a, b)

{

  return Math.min (a, b) + random (Math.abs (a - b) + 1);

}

MovieClip.prototype.PlayQueue = function (clip)

{

  var orchestra = new Sound (this);

  orchestra.attachSound (clip);

  orchestra.start ();

};

function PlayClips ()

{

  var background = "background" + randomBetween (1, 5);

  var drums = "drum" + randomBetween (1, 5);

  var guitar = "guitar" + randomBetween (1, 5);

  var overlay = "overlay" + randomBetween (1, 5);

  var clips = new Array (background, drums, guitar, overlay);

  for (var i = 0; i < clips.length; i++)

  {

    var mc = createEmptyMovieClip ("SoundHolder" + i, i);

    mc.PlayQueue (clips[i]);

  }

}

PlayClips ();
That’s a fairly concise piece of code. Preview the movie and skip the code walkthrough, or read on for the nitty-gritty details – the choice is yours!
Let’s look at the PlayClips function to see how it all fits together. For each of the tracks, we create a variable (e.g. drums) that we fill with one of the linkage identifiers for the sound clips in the library, using the randomBetween function to generate a random number between one and five. We then combine these variables into an array of sound clips:
var clips = new Array (background, drums, guitar, overlay);
From here, we use a for loop to create an empty movie clip for each element of the array. These clips play the selected sound clips at random. This is accomplished by calling the PlayQueue movie clip method (which we’ll examine in a moment) and passing the sound clip linkage identifier as a parameter.
for (var i = 0; i < clips.length; i++)

  {

    var mc = createEmptyMovieClip ("SoundHolder" + i, i);

    mc.PlayQueue (clips[i]);

  }
We call the PlayQueue method for each of the new movie clips created by the PlayClips function. This embeds a sound clip into each of these movie clips, then plays it.
MovieClip.prototype.PlayQueue = function (clip)

{

  var orchestra = new Sound (this);

  orchestra.attachSound (clip);

  orchestra.start ();

};
Because the sound clips are created in quick succession at runtime, the effect is one of a single composite track with a background, plus drum, guitar, and overlay sections.
You may notice that every time you play the movie, you get a different composition. Some work very well, while others sound fairly clunky! It’s all about experimentation and seeing what’s possible.
Random Track Overlay Effect
This effect is based on the previous “headless” example, but builds on it quite extensively, utilizing the CheckBox component, custom event handlers, and providing users with the ability to switch tracks on or off. The user interface is shown in Figure 5.2.
Figure 5.2. This random track overlay effect builds on the previous example.
CheckBox Incompatibilities
While developing this effect, which uses the CheckBox component, I was perplexed to find that the code I had in place for Flash MX didn’t work with Flash MX 2004. I investigated this through the Reference Panel and found that there is no getValue method for the Flash MX 2004 version of the CheckBox component. Additionally, the CheckBox no longer allows for a change event handler.
An engineer friend at Macromedia told me that these features hadn’t just been deprecated – they had been removed completely!
The code and steps that follow are for Flash MX, while the changes for the 2004 version are provided as asides. The example provided in the code archive was developed using the Flash MX version of the component.
To modify this effect, locate random-gui.fla in the code archive.
Setting the Scene
- Create a new Flash document that’s 550 pixels wide and 100 pixels high. Modify the frame rate to 24 fps (Modify > Document…).
Actions and create beneath it three layers named CheckBoxes, Elements, and Background.Background1.mp3, Background2.mp3, Background3.mp3, Background4.mp3, Background5.mp3, Drum1.mp3, Drum2.mp3, Drum3.mp3, Drum4.mp3, Drum5.mp3, Guitar1.mp3, Guitar2.mp3, Guitar3.mp3, Guitar4.mp3, Guitar5.mp3, Overlay1.mp3, Overlay2.mp3, Overlay3.mp3, Overlay4.mp3, and Overlay5.mp3..mp3 extension if you’re using Flash MX 20004), and click OK.CheckBox component onto the CheckBoxes layer of the stage. Arrange them from left to right using the Align Panel to set their spacing if necessary (Window > Design Panels > Align).CheckBox component on the stage in turn, from left to right, and apply the instance name and parameters shown in Figure 5.3.

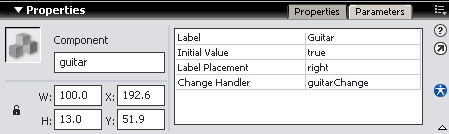
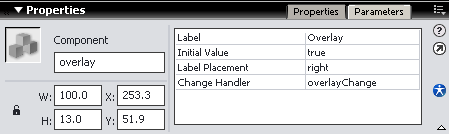
Figure 5.3. The properties for the four CheckBox components are displayed in Flash.
No Change Handler in Flash MX 2004
The Change Handler parameter for each CheckBox is especially important here, as it will be used to mute a track when the corresponding checkbox is unchecked. This parameter doesn’t exist in Flash MX 2004, so we’ll add some ActionScript later to handle these events in that version.
Progress, and name the instance progress. This will act as a quick progress bar, indicating the progress of the composition as it plays.Now, let’s add the code to make the effect work.
Adding the ActionScript
Example 5.9. random-gui.fla Actions : 1 (excerpt)
function randomBetween (a, b)

{

  return Math.min (a, b) + random (Math.abs (a - b) + 1);

}

function roundNumber (toRound, numDecimals)

{

  return Math.round (toRound * Math.pow (10, numDecimals)) /

      Math.pow (10, numDecimals);

}

MovieClip.prototype.PlayQueue = function (clip)

{

  this.orchestra = new Sound (this);

  this.orchestra.attachSound (clip);

  this.orchestra.start ();

};

function PlayClips ()

{

  var background = "background" + randomBetween (1, 5);

  var drums = "drum" + randomBetween (1, 5);

  var guitar = "guitar" + randomBetween (1, 5);

  var overlay = "overlay" + randomBetween (1, 5);

  var clips = new Array (background, drums, guitar, overlay);

  var mc;

  for (var i = 0; i < clips.length; i++)

  {

    mc = createEmptyMovieClip ("SoundHolder" + i, i);

    mc.PlayQueue (clips[i]);

  }

  mc.onEnterFrame = function ()

  {

    _root.progress._xscale = this.orchestra.position /

        this.orchestra.duration * 100;

  };

  mc.orchestra.onSoundComplete = function ()

  {

    stopAllSounds ();

    LoopClips ();

  };

}

function LoopClips ()

{

  _root.SoundHolder0.orchestra.start ();

  _root.SoundHolder1.orchestra.start ();

  _root.SoundHolder2.orchestra.start ();

  _root.SoundHolder3.orchestra.start ();

}

PlayClips ();
We’ve used the randomBetween and roundNumber functions previously in this chapter, so there’s no need to cover them again.
The PlayQueue method is identical to that used in the previous example, as is the PlayClips function, except for a couple of event handlers we added to the last dynamically generated movie clip.
mc.onEnterFrame = function ()

  {

    _root.progress._xscale = this.orchestra.position /

        this.orchestra.duration * 100;

  };

  mc.orchestra.onSoundComplete = function ()

  {

    stopAllSounds ();

    LoopClips ();

  };
After the sound object is initialized, the sound clip is attached, and the sound clip has started to play, we dynamically track the position of the last sound object that’s created using an onEnterFrame event handler attached to the containing movie clip. This event handler controls the width of the progress bar by altering its _xscale property. When the sound finishes, the onSoundComplete event handler will call the stopAllSounds function. Immediately after that, we call LoopClips to restart the four tracks we’ve produced, creating the effect of an infinite loop.
function LoopClips ()

{

  _root.SoundHolder0.orchestra.start ();

  _root.SoundHolder1.orchestra.start ();

  _root.SoundHolder2.orchestra.start ();

  _root.SoundHolder3.orchestra.start ();

}
So far, so good, right? When the movie is running, we want to dynamically switch the different tracks on or off by clicking the checkboxes on the stage. To this end, each CheckBox has its own event handler that controls the volume of the track. Let’s add these now.
Example 5.10. random-gui.fla Actions : 1 (excerpt)
function backgroundChange (background)

{

  if (background.getValue ())

  {

    _root.SoundHolder0.Orchestra.setVolume (100);

  }

  else

  {

    _root.SoundHolder0.Orchestra.setVolume (0);

  }

}

function drumsChange (drums)

{

  if (drums.getValue ())

  {

    _root.SoundHolder1.Orchestra.setVolume (100);

  }

  else

  {

    _root.SoundHolder1.Orchestra.setVolume (0);

  }

}

function guitarChange (guitar)

{

  if (guitar.getValue ())

  {

    _root.SoundHolder2.Orchestra.setVolume (100);

  }

  else

  {

    _root.SoundHolder2.Orchestra.setVolume (0);

  }

}

function overlayChange (overlay)

{

  if (overlay.getValue ())

  {

    _root.SoundHolder3.Orchestra.setVolume (100);

  }

  else

  {

    _root.SoundHolder3.Orchestra.setVolume (0);

  }

}
The names of these functions correspond to the Change Handler parameter values we assigned to each of the heckBox components when we created them. All these event handlers work the same way. They check whether the CheckBox is checked using the getValue method, then set the volume of the corresponding sound clip to match. The initial state of each CheckBox is true (checked). So, when the checkbox is clicked, its status switches to false, and the volume is set to 0 for that particular Sound object. Clicking it again changes the status to true and the volume to 100. Using the change handlers in this way, we can drop individual tracks out and bring them back in at will.
You’re probably listening to a funky composition right now. Click the checkboxes to drop different tracks out and bring them back in. If you don’t like the composition, or it’s a little too wild for your tastes, preview the movie again to see what the random sequencer comes up with!
Changes for Flash MX 2004
If you’re using Flash MX 2004, you’ll find that the checkboxes don’t work as advertised. That’s because the CheckBox component, besides looking better, lacks a Change Handler parameter. As a result, our event handler methods have not been hooked up to the checkboxes. This is a good thing, because these methods use another feature that’s missing from the Flash MX 2004 CheckBox component: the getValue method. Let’s now make the changes necessary to get the example working in Flash MX 2004.
First, change each of the event handler functions so they check the selected property of the appropriate CheckBox, rather than the getValue method, which no longer exists. For example, adjust this line of the backgroundChange function:
if (background.getValue ())
Replace it with this line:
if (background.selected)
Next, set up the event handler functions so they’re called when one of the checkboxes is clicked.
Add the following code below all the other code in the Actions Panel:
var cboxListener = new Object ();

cboxListener.click = function()

{

  backgroundChange (background);

  drumsChange (drums);

  guitarChange (guitar);

  overlayChange (overlay);

};


background.addEventListener ("click", cboxListener);

drums.addEventListener ("click", cboxListener);

guitar.addEventListener ("click", cboxListener);

overlay.addEventListener ("click", cboxListener);
This creates a new Object with a single method called click, which is set up as an event listener for each of the four CheckBox objects on the stage. When any one of the checkboxes is clicked, the click method is called. In turn, it calls each of our four event handlers to update the volume accordingly.
Watch the file size!
This example contains 20 ten-second clips, weighing in at nearly 3MB in total! This project would be better suited to CD or kiosk deployment than to distribution over the Internet. If the clips were shorter, or if there were fewer of them, it might be possible to distribute the application over the Internet – just be careful with the file size. Don’t say I didn’t warn you!
Modifications
We can make this effect even more interactive by, for example, directly controlling the properties of the Sound objects. In the following modification, we’ll control the volume of the various sound clips with the NumericStepper component, which ships with Flash MX 2004. The interface is shown in Figure 5.4.
Figure 5.4. Add volume control to the dynamic sound clips.
As we’ll be adding the Flash MX 2004 NumericStepper component, we’ll take advantage of the new CheckBox component that comes with Flash MX 2004, rather than the Flash MX version we used in the previous example.
If you’re working with Flash MX, you might as well skip ahead to the next example.
To edit this effect, locate random-volume.fla in the code archive.
Setting the Scene
Building on the previous example, we’ll add several pieces of code to accommodate the volume control mechanism, and we’ll replace the existing Flash MX CheckBox components with their Flash MX 2004 counterparts. We’ll also add the new NumericStepper component to the interface to provide users with volume control.
- If you’re working from the previous example, locate the Flash MX CheckBox components within the CheckBoxes layer, and delete them.
CheckBox component from the UI Components section of the Components Panel, spacing them evenly across the stage. Name these instances, from left to right: backgroundCBox, drumsCBox, guitarCBox, and overlayCBox.CheckBox instances you just created, change the selected parameter within the Property Inspector to true, so that the checkboxes will be selected by default.CheckBox instances. From left to right, they should read: Background, Drums, Guitar, and Overlay.NumericStepper component from the UI Components section of the Components Panel into the first frame of the CheckBoxes layer. Align each NumericStepper beneath each of the checkboxes. Name the instances vol1Control, vol2Control, vol3Control, and vol4Control, and set their widths to 50 pixels.NumericStepper component instances, set the parameters within the Property Inspector as follows:maximum
100
minimum
0
stepSize
5
value
100
NumericStepper components, add a static text box containing the text “Volume” to indicate the purpose of the NumericStepper component. The outcome should resemble Figure 5.4.Now we can add the extra ActionScript needed to accomplish this effect.
Adding the ActionScript
randomBetween, roundNumber, PlayQueue, PlayClips, LoopClips) alone, but replace the remaining code (the checkbox event handlers) with the following:var backgroundOff = false;
var drumsOff = false;
var guitarOff = false;
var overlayOff = false;
function backgroundChange ()

{

  if (backgroundCBox.selected)

  {

    backgroundOff = false;

    vol1Control.enabled = true;

  }

  else

  {

    backgroundOff = true;

    vol1Control.enabled = false;

    _root.SoundHolder0.orchestra.setVolume (0);

  }

}
function drumsChange ()
{
if (drumsCBox.selected)
{
drumsOff = false;
vol2Control.enabled = true;
}
else
{
drumsOff = true;
vol2Control.enabled = false;
_root.SoundHolder1.orchestra.setVolume (0);
}
}
function guitarChange ()
{
if (guitarCBox.selected)
{
guitarOff = false;
vol3Control.enabled = true;
}
else
{
guitarOff = true;
vol3Control.enabled = false;
_root.SoundHolder2.orchestra.setVolume (0);
}
}
function overlayChange ()
{
if (overlayCBox.selected)
{
overlayOff = false;
vol4Control.enabled = true;
}
else
{
overlayOff = true;
vol4Control.enabled = false;
_root.SoundHolder3.orchestra.setVolume (0);
}
}
function setCustomVolume ()

{

  if (!backgroundOff)

  {

    SoundHolder0.orchestra.setVolume (vol1Control.value);

  }

  if (!drumsOff)

  {

    SoundHolder1.orchestra.setVolume (vol2Control.value);

  }

  if (!guitarOff)

  {

    SoundHolder2.orchestra.setVolume (vol3Control.value);

  }

  if (!overlayOff)

  {

    SoundHolder3.orchestra.setVolume (vol4Control.value);

  }

}
var volumeListener = new Object ();

volumeListener.change = function ()

{

  setCustomVolume ();

};
var cboxListener = new Object ();
cboxListener.click = function ()
{
backgroundChange ();
drumsChange ();
guitarChange ();
overlayChange ();
setCustomVolume ();
};
vol1Control.addEventListener ("change", volumeListener);

vol2Control.addEventListener ("change", volumeListener);

vol3Control.addEventListener ("change", volumeListener);

vol4Control.addEventListener ("change", volumeListener);
backgroundCBox.addEventListener ("click", cboxListener);
drumsCBox.addEventListener ("click", cboxListener);
guitarCBox.addEventListener ("click", cboxListener);
overlayCBox.addEventListener ("click", cboxListener);Once again, we have functions to handle the CheckBox changes (backgroundChange, drumsChange, guitarChange, and overlayChange). They all look fairly similar.
function backgroundChange ()
{
if (backgroundCBox.selected)
{
backgroundOff = false;
vol1Control.enabled = true;
}
else
{
backgroundOff = true;
vol1Control.enabled = false;
_root.SoundHolder0.orchestra.setVolume (0);
}
}These functions detect the current status of the relevant CheckBox by analyzing its selected property. If the CheckBox is selected, we set a variable to false (in this case, the variable is backgroundOff) to indicate that the corresponding clip is not switched off. These four variables are set to false to begin with, since all four sound clips are switched on at the start of the movie. We also enable the associated volume control NumericStepper (vol1Control).
If the CheckBox is not selected, we set the variable to true and disable the corresponding NumericStepper component, indicating that the sound clip is switched off. We also set the volume of the related sound clip to zero. This switches the clip off, but allows it to keep playing silently, maintaining its position in case we decide to switch it back on later.
The setCustomVolume function sets the volume of each clip to the value specified by its associated NumericStepper control, unless the flag variable indicates that it’s currently switched off.
function setCustomVolume ()
{
if (!backgroundOff)
{
SoundHolder0.orchestra.setVolume (vol1Control.value);
}
if (!drumsOff)
{
SoundHolder1.orchestra.setVolume (vol2Control.value);
}
if (!guitarOff)
{
SoundHolder2.orchestra.setVolume (vol3Control.value);
}
if (!overlayOff)
{
SoundHolder3.orchestra.setVolume (vol4Control.value);
}
}All that’s left is to ensure these functions are called at the appropriate times. A new listener Object called volumeListener offers a method called change that calls the setCustomVolume function.
var volumeListener = new Object ();
volumeListener.change = function ()
{
setCustomVolume ();
};By calling the addEventListener method from each of the NumericStepper components, we have this object handle changes to the volume of our clips:
vol1Control.addEventListener ("change", volumeListener);
vol2Control.addEventListener ("change", volumeListener);
vol3Control.addEventListener ("change", volumeListener);
vol4Control.addEventListener ("change", volumeListener);If any of the NumericStepper component values change, the setCustomVolume function is called to handle it.
We’ve also set up an event listener in a similar manner for the CheckBox components:
cboxListener = new Object ();

cboxListener.click = function ()

{

  backgroundChange ();

  drumsChange ();

  guitarChange ();

  overlayChange ();

  setCustomVolume ();

};

...

backgroundCBox.addEventListener ("click", cboxListener);

drumsCBox.addEventListener ("click", cboxListener);

guitarCBox.addEventListener ("click", cboxListener);

overlayCBox.addEventListener ("click", cboxListener);
When any one of the checkboxes is clicked, the event handler calls the four functions we defined earlier (switching on or off the correct sound clip) before calling setCustomVolume to correctly set the volume of any clip that has just been switched on.
Don’t forget ActionScript 2.0
Components distributed with Flash MX 2004 work internally using features of ActionScript 2.0. If you try to publish a movie that contains such components with Publish settings configured for ActionScript 1.0, the components will not work (they’ll look like white rectangles with black borders).
New movies created in Flash MX 2004 default to ActionScript 2.0, so you’re okay there. But, if you start from the finished version of the previous example provided in the code archive, you’ll need to change the ActionScript version setting for the file. Simply click the background of the movie, then click the Settings… button in the Property Inspector. You can adjust the ActionScript version setting on the Flash tab.
Use the checkboxes to switch on and off some of the tracks; notice how they disable and enable the volume controls we’ve added. Experiment with the volume controls to set a nice balance between the tracks, and see what masterpieces you can come up with!
You can build on this example to modify any number of sound object properties. Spend a little time with it and see what you can achieve.
XML, MP3, and ID3 Tag Reader
This effect uses the same choir sound clips we used previously in this chapter, but with a slightly different approach. We’ll import a playlist from an XML file and load the MP3 files dynamically into Flash. We’ll also present song information (including Album, Artist, and Song Title) that’s stored within the MP3 in what are called ID3 tags, as shown in Figure 5.5.
Figure 5.5. Create a random MP3 player using XML and ID3 data.
ID3 tag information is referenced differently in Flash MX than in Flash MX 2004, owing to the differences between versions of Flash Player. Macromedia Flash Player 7 supports the latest ID3 v2.2 and v2.4 tags. As the data is stored at the beginning of the MP3 file, this information is referenced immediately upon opening the MP3 stream. On the other hand, Macromedia Flash Player 6 supports only ID3 v1.0 and v1.1 tags, which are stored at the end of the file. On that platform, we must wait until the stream is fully loaded before we can retrieve the ID3 tag information.
We’ll initially create an MP3 player for version 6 of the Flash Player, supporting ID3 v1.x tags. Then, we’ll modify the effect to take advantage of ID3 v2.x tag support within version 7 of the Flash Player.
To edit this effect, locate mp3–mx.fla in the code archive.
It uses several MP3 files: choir1.mp3, choir2.mp3, choir3.mp3, choir4.mp3, and choir5.mp3. We’ll also be needing the XML file that acts as the playlist; it’s called playlist.xml and can also be found in the code archive.
Setting the Scene
For this project, we need a clickable movie clip that loads a random MP3 file and a dynamic text field that displays the ID3 data from the MP3 file.
- Create a new Flash document that’s 500 pixels wide and 450 pixels high. Accept the default frame rate and click OK.
PlayRandomButton containing a button that’s approximately 70 pixels high and 70 pixels wide. Name the instance randomplayer and move the clip to the left of the stage centre, as shown in Figure 5.5.We’ll use this clip to randomly load an MP3 file and pass the ID3 tag information from the MP3 file into a dynamic text field.
trackID3Info.This dynamic text field will act as a container that receives the ID3 tag information from the dynamically loaded MP3 files.
Now, for a little window-dressing:
You can add as many extras as you wish to increase the aesthetics of the interface. Refer to Figure 5.5 for inspiration!
choir1.mp3, choir2.mp3, choir3.mp3, choir4.mp3 and choir5.mp3 from the code archive and move them into the same folder in which you saved the document.Creating the XML Playlist
We now need to create the XML playlist that references the MP3 files we’re planning to load.
Tip
For more information on working with XML, see Introduction to XML, by Harry Fuecks.
playlist.xml in the same folder.Example 5.11. playlist.xml Actions : 1
<?xml version="1.0" encoding="iso-8859-1"?>

<playlist>

  <mp3file track="choir1.mp3"/>

  <mp3file track="choir2.mp3"/>

  <mp3file track="choir3.mp3"/>

  <mp3file track="choir4.mp3"/>

  <mp3file track="choir5.mp3"/>

</playlist>
Unlike HTML, which uses a predefined set of tags, XML allows you to create custom data structures. As long as all opening tags have a matching closing tag (or, as in the case of the mp3File tag in this example, they close themselves), Flash will import the data structure as an ActionScript XML object, allowing you to manipulate and access the information contained within the file.
This XML file is structurally simple. The playlist tag is the top-level node, and the mp3file tags are its child nodes. These child nodes also contain an attribute called track, which holds the name of the MP3 file we wish to pull into Flash.
Our ActionScript will import this XML file and move through the data structure, populating an array with the names of the MP3 files it contains.
Adding the ActionScript
Example 5.12. mp3–mx.fla Actions : 1 (excerpt)
var tracklist = new Array ();

var mp3List = new XML ();

mp3List.ignoreWhite = true;

mp3List.onLoad = createPlayList;

mp3List.load ("playlist.xml");

function createPlayList (success)

{

  if (!success)

  {

    return;

  }

  var topLevel = null;

  for (i = 0; i <= this.childNodes.length; i++)

  {

    if (this.childNodes[i].nodeValue == null &&

        this.childNodes[i].nodeName == "playlist")

    {

      topLevel = this.childNodes[i];

      break;

    }

  }

  if (topLevel != null)

  {

    for (i = 0; i <= topLevel.childNodes.length; i++)

    {

      if (topLevel.childNodes[i].nodeName == "mp3file")

      {

        var track =

            topLevel.childNodes[i].attributes["track"];

        _root.tracklist.push (track);

      }

    }

  }

}

function randomBetween (a, b)

{

  return Math.min (a, b) + random (Math.abs (a - b) + 1);

}

function playTrack ()

{

  var track = _root.track;

  if (track.getBytesLoaded () == track.getBytesTotal () &&

      track.duration > 0)

  {

    clearInterval (_root.checkLoaded);

    trackID3Info.text = "";

    trackID3Info.text += "Title: " + track.id3.songname +

        newline;

    trackID3Info.text += "Artist: " + track.id3.artist +

        newline;

    trackID3Info.text += "Album: " + track.id3.album +

        newline;

    trackID3Info.text += "Year: " + track.id3.year + newline;

    trackID3Info.text += "Comments: " + track.id3.comment +

        newline;

  }

}

randomplayer.onPress = function ()

{

  stopAllSounds ();

  var trackNo = randomBetween (0, _root.tracklist.length - 1);

  _root.track = new Sound ();

  _root.track.loadSound (_root.tracklist[trackNo], true);

  _root.checkLoaded = setInterval (playTrack, 500);

};
Let’s break this code into manageable chunks and see what’s going on.
First, we create an empty array to contain our list of MP3 tracks.
var tracklist = new Array ();Next, we create an XML object called mp3List, and set its ignoreWhite property to true so that line feeds and whitespace aren’t parsed as separate nodes.
var mp3List = new XML ();

mp3List.ignoreWhite = true;
We then set the event handler that will execute when the XML file has loaded (createPlayList) and load the data from playlist.xml.
mp3List.onLoad = createPlayList;

mp3List.load ("playlist.xml");
Now we define the createPlayList function, which gets called to handle the XML data once it has loaded.
function createPlayList (success)

{

  if (!success)

  {

    return;

  }

  var topLevel = null;

  for (i = 0; i <= this.childNodes.length; i++)

  {

    if (this.childNodes[i].nodeValue == null &&

        this.childNodes[i].nodeName == "playlist")

    {

      topLevel = this.childNodes[i];

      break;

    }

  }
The first thing we do is check whether the XML file loaded successfully, as indicated by the success parameter. If it didn’t, we bail out before attempting to process it.
We then enter a for loop based on the number of top-level nodes within the XML object (this). We check these nodes until we find the one that has a null nodeValue, meaning it’s a tag (as opposed to a piece of text) and that its name is playlist. This node is stored in a variable named topLevel. We then break out of the for loop.
Next, we enter another for loop, in order to examine its children:
if (topLevel != null)

  {

    for (i = 0; i <= topLevel.childNodes.length; i++)

    {

      if (topLevel.childNodes[i].nodeName == "mp3file")

      {

        var track = topLevel.childNodes[i].attributes["track"];
For each of the child nodes, we check to see if it’s an mp3file tag, and then populate a variable with the track attribute of the tag, which is the name of an MP3 file.
Finally, we populate the tracklist array using its push method to add the filename to the start of the array.
_root.tracklist.push (track);
That takes care of building the playlist. Now, when the randomplayer movie clip is clicked, the following code is brought into play:
randomplayer.onPress = function ()

{

  stopAllSounds ();

  var trackNo = randomBetween (0, _root.tracklist.length - 1);

  _root.track = new Sound ();

  _root.track.loadSound (_root.tracklist[trackNo], true);

  _root.checkLoaded = setInterval (playTrack, 500);

};
First, we stop all currently running sounds using the stopAllSounds function. We then populate a variable called trackNo with a random number in order to choose one of the tracks in our tracklist array.
We then create a new Sound object and load it up with a random MP3 file using the trackNo variable we have just populated.
Finally, we use the setInterval function to call the playTrack function every half-second. We store the interval identifier in a variable called checkLoaded in the root of the movie so we can cancel it when appropriate.
Now, all that’s left to discuss is the playTrack function:
function playTrack ()

{

  var track = _root.track;

  if (track.getBytesLoaded () == track.getBytesTotal () &&

      track.duration > 0)

  {

    clearInterval (_root.checkLoaded);

    trackID3Info.text = "";

    trackID3Info.text += "Title: " + track.id3.songname + newline;

    trackID3Info.text += "Artist: " + track.id3.artist + newline;

    trackID3Info.text += "Album: " + track.id3.album + newline;

    trackID3Info.text += "Year: " + track.id3.year + newline;

    trackID3Info.text += "Comments: " + track.id3.comment +

        newline;

  }

}
Each time this function is called, we check whether the MP3 file has loaded successfully. Once it has, we cancel the interval that is set to call the function every half-second with the clearInterval function. We can then populate the trackID3Info dynamic text field with the ID3 tag information from the MP3 file.
ID3 v1.x Caveat
As Flash Player 6 and Flash MX support only ID3 v1.0 and v1.1 tags, we have to make sure that the MP3 file is completely loaded before we attempt to pull the ID3 tag information from it. This is essential, as the ID3 tag data is found at the end of the MP3 file.
In Flash MX 2004, which can produce content for Flash Player 7 and supports the ID3 v2.2 and v2.4 tag information located at the beginning of the MP3 file, this information is much more easily accessed. We’ll see what this means to Flash developers when we modify this example.
When the movie loads, the XML file is imported and the tracklist array is populated with all the track information from the playlist.xml file. Clicking on the randomplayer movie clip loads an MP3 file and displays its ID3 tag data in the dynamic text field.
Modifications
As we discussed before, it’s much easier to reference ID3 tag data in Flash Player 7. This Player supports v2.2 and v2.4 ID3 tags, which are stored at the beginning of the MP3 file rather than at the end.
Flash MX 2004 only!
As you can only produce Flash Player 7 SWF files using Flash MX 2004, this modification is suitable for Flash MX 2004 only.
To edit this effect, locate mp3–mx2004.fla in the code archive.
We need only make a couple of simple modifications to the movie to allow Flash MX 2004 to read ID3 v2.2 and 2.4 tag information.
playTrack function from the Actions Panel. It’s no longer needed!randomPlayer movie clip with the following code:Example 5.13. mp3–mx2004.fla Actions : 1 (excerpt)
randomPlayer.onPress = function ()

{

  stopAllSounds ();

  var trackNo = randomBetween (0, trackInfo.length - 1);

  var track = new Sound ();

  track.onID3 = function ()

  {

    trackID3Info.text = "";

    trackID3Info.text += "Title: " + track.id3.TIT2 + newline;

    trackID3Info.text += "Artist: " + track.id3.TPE1 + newline;

    trackID3Info.text += "Album: " + track.id3.TALB + newline;

    trackID3Info.text += "Year: " + track.id3.TYER + newline;

    trackID3Info.text += "Comments: " + track.id3.COMM +

        newline;

  };

  track.loadSound (tracklist[trackNo], true);

};
This code is essentially the same as before, but it uses an event handler to process the ID3 tag information rather than calling a function every half-second to check for it.
After we’ve created the new Sound object (track), we reference a new event handler, called onID3, which is available in Flash Player 7. This is invoked when new ID3 data is detected for a loaded MP3 file, which means that we don’t need to confirm that the MP3 file has completely loaded before we check for the ID3 tag data. Once the onID3 event handler is invoked, we can proceed to populate the trackID3Info dynamic text field with the ID3 2.0 tags. It’s as simple as that!
ID3 Reference
For a complete listing of supported ID3 tags within Flash MX 2004, search for Sound.ID3 in the Help Panel.
Now, when you click the randomPlayer movie clip, the MP3 file starts to play and the ID3 tag data is displayed in the dynamic text field almost instantly. You no longer need to wait for the MP3 file to load completely as you did in the previous example.
Conclusion
Who said that all you can do with sound clips is play them? Certainly not me! I hope that we’ve covered enough material within this chapter to fuel your desire to create some really interesting sound-based interfaces, experimental effects, and other items.
It’s now time to see what we can accomplish using video effects in Flash!
This marks the end of our series containing three chapters from SitePoint’s The Flash Anthology: Cool Effects & Practical ActionScript, which contains over 60 practical ActionScript solutions for Flash developers and designers.
The book contains a total of 10 chapters that provide over 60 ActionScipted solutions to common problems in Flash. Every solution you’ll ever need for your Flash projects, from text and video effects, to debugging and using external data in your applications, is covered in this 455-page reference. All the code included in the book is available in a free downloadable archive.
For more information, see the book page.
 Steve Grosvenor
Steven is cofounder of phireworx.com, a Fireworks resource site, and contributing author of Fireworks MX Magic (New Riders), Special Edition Using Fireworks MX (Que), and Fireworks MX Fundamentals (New Riders). Steve wrote SitePoint's The Flash Anthology: Cool Effects & Practical ActionScript