

It’s well known that most photographers enhance their photos, whether for basic lighting changes, color correction or a full overhaul that virtually deconstructs the image to recreate a new one. Put simply, photographers rely heavily on programs like Photoshop and Lightroom. While the arguments in regards to the overuse of Photoshop come up now and again there is no denying that Photoshop is a beneficial asset.
Photoshop has a plethora of effects, filters and tools that when combined can yield beautiful results that you wouldn’t be able to create in camera. It allows you to retouch what needs to be corrected and allows you to create your image in the way that you yourself envisioned the final result to look like. Another great thing about Photoshop is it can bring out heavy, rich tones to add drama to your photos. A lot of action oriented photography and advertisements often dramatize their work to make it pop and today you are going to be able to do the same.
You will be using basic applications in Photoshop including creating paths with the pen tool, using the image adjustments such as curves and levels as well as adding filters like high pass and Gaussian blur. Now that we have that out of the way let’s pull up Photoshop and get to dramatizing.
Resources Needed:
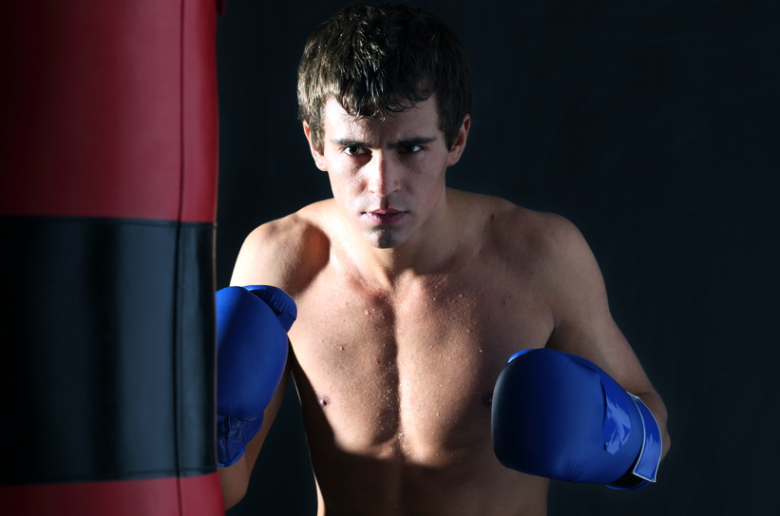
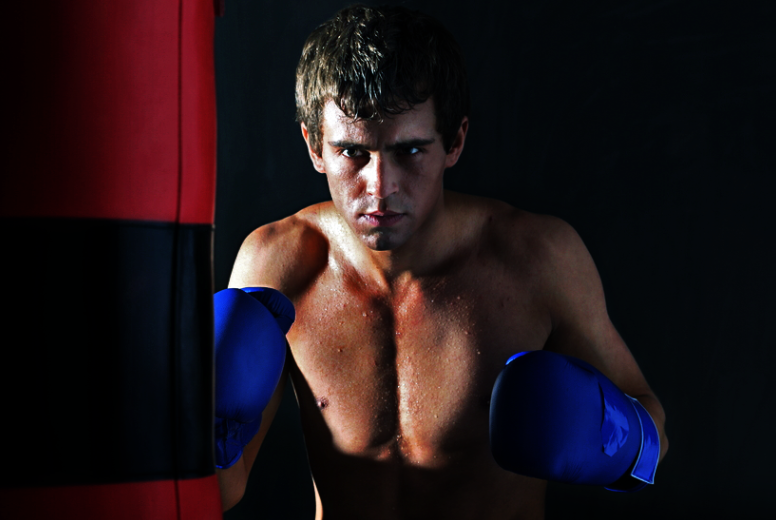
Boxer Stock Image
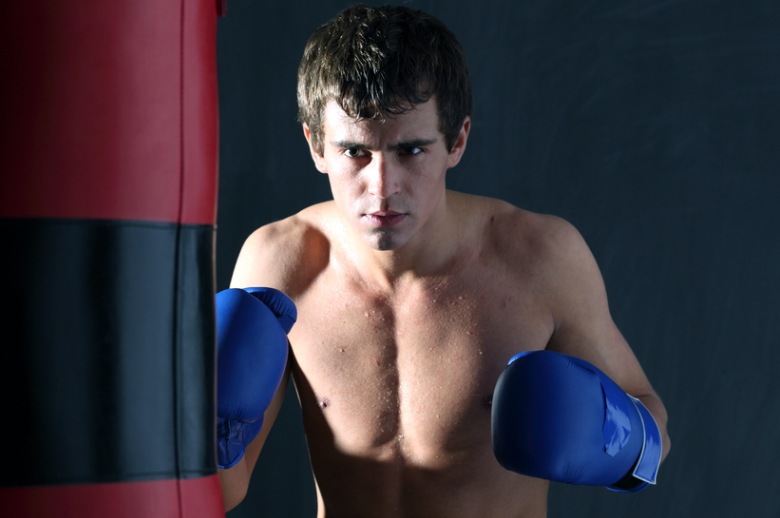
Step 1 Open Image
The first thing you want to do is open your image. If you want to use your own image for this tutorial you will still be able to follow along with the steps with slight variations depending on your photos lighting and background setting.

Step 2 Auto-Correct
To prevent making changes directly to your original image and so that you will be able to have a comparison reference, you need to duplicate your image. Next go to Image>Auto Color and then go to Image>Auto Tone. Your photo should now have different colors and tones.
Step 3 Curves
Duplicate your autocorrected image and access the curves dialogue box by either going to Image>Curves or clicking Ctrl+M. Copy the curve settings as shown below.
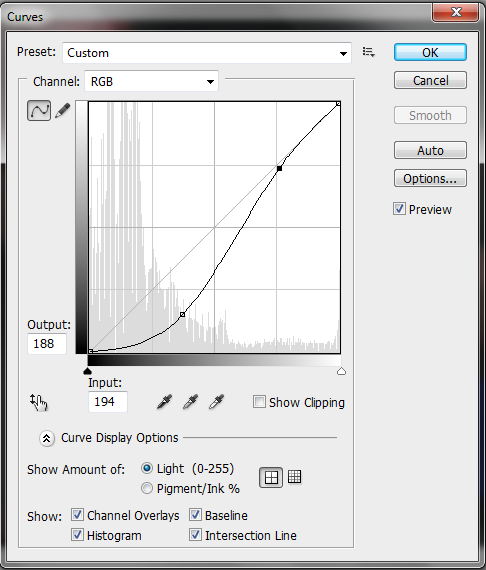
When the curve modifications have been applied drop the layer’s opacity to 20%.
Step 4 Fill Background
Create a new layer and have your foreground color selected as black #000000. Use the pen tool to select around your boxer so that you are only selecting the background. Don’t worry about making your selection perfect.
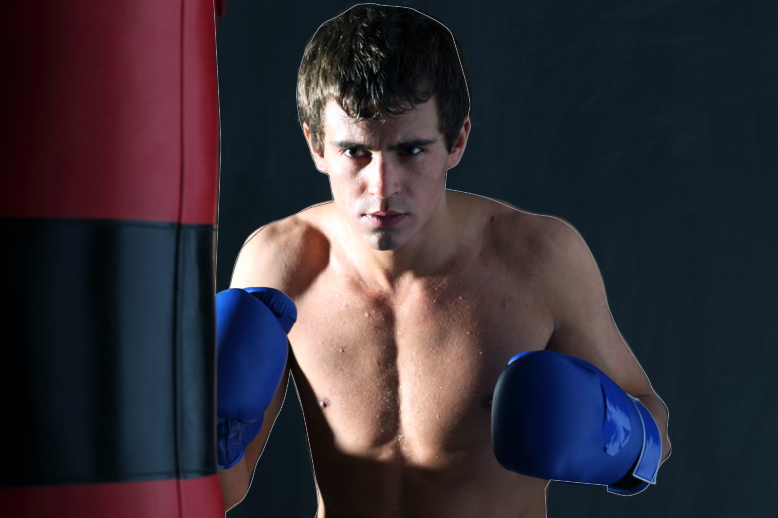
Fill the background in with black and then apply Gaussian Blur to somewhere between 5px and
10px. Change the layer mode to Soft Light and drop the opacity to 50%.
Step 5 Punching Bag
Change your foreground color to #711924 and your background color to #000000. Now on a new layer paint over the punching bag with the two colors, making sure to paint over the red with #711924 and the black with #000000. Change your layer mode to Soft Light.

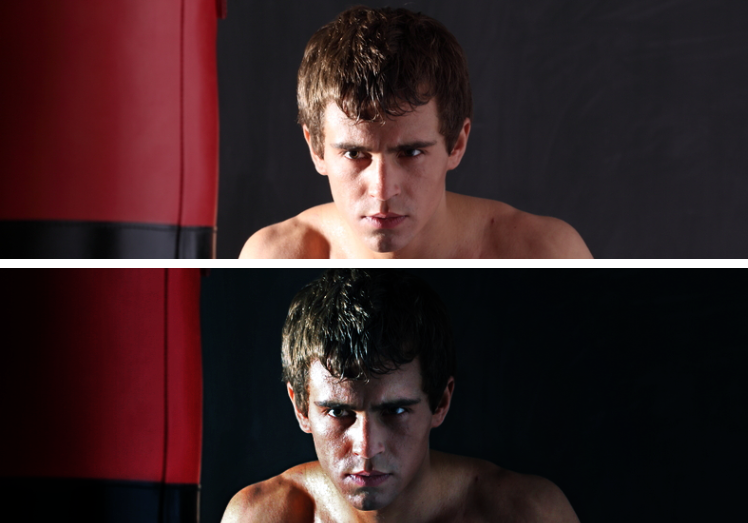
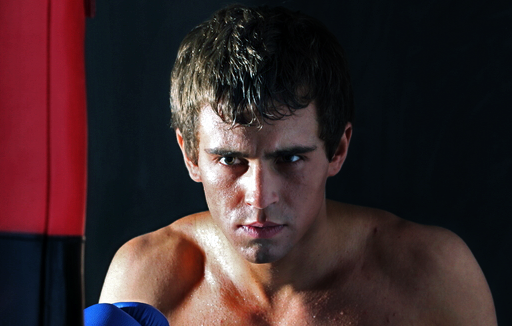
Step 6 Shadows and Highlights
Now it is time to merge your layers. Merge all your layers down so that you are left with one image. Next go to Image>Adjustments>Shadows/Highlights. Change the shadow amount to 10% and up the highlight all the way to 100%. Press OK when you’re finished.

You will notice a significant change in the face as well as the overall image.

Step 7 High Pass
Duplicate your image and go to Filter>Other>High Pass. Make the radius somewhere around 55px and press OK for the changes to happen.
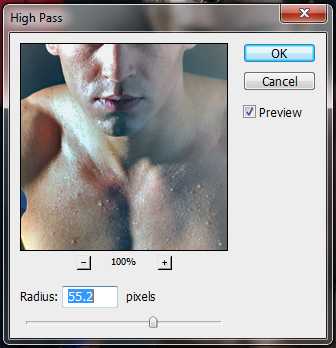
Make your layer mode Soft Light and move the opacity down to 30%.

Step 8 Shadow
We want to work with the light in the image and use it to create a dramatic contrast. As you have probably noticed the right side of the boxer is heavy with light due to the placement of the lighting equipment. Instead of creating a faux fill light for the left side we will further darken that side of the boxer. To do so you need to create a new layer. With the pen tool draw a path around the left half of the body as well as the background like so.

Next fill the path with black and change the layer mode to Soft Light and drop the opacity to 66%.

Step 9 Face Shadows and Highlights
Make a new layer and change the layer mode to Soft Light and the opacity to 50%. With a soft round brush begin painting over the dark areas of the face with black (#000000) and the light areas of the face with white (#ffffff).
Step 10 Merge and High Pass
Merge your layers again until you have one image. Duplicate your layer and go to Filter>Other>High Pass. This time set the Radius somewhere between 7px and 8px. Press OK.

Set the layer mode to Soft Light and the opacity to 50%.

Step 11 Gloves
Use #193c8c to color over the boxing gloves. Change the layer mode to Overlay and the opacity to 50%.

Step 12 Right Shadow
We want to darken our foreground some but we only want to do a particular section so we will use the pen tool. Make a new layer and create a curved path to encompass part of the punching bag and the lower half of the image. Your path should look like this.

Gaussian Blur the path by 20px. Set the layer mode to Soft Light and change the opacity to 70%.

Step 13 Merge and Shadow
Merge your layers once more and create a new layer. Make the layer mode Overlay and the opacity 50%. With a soft round brush and with the foreground color set as #000000 begin coloring the dark areas and shadows of the boxer’s body and face. Gaussian blur at 10px.

Step 14 Highlights
Make another layer for your highlights. Change the layer mode to Overlay and set the opacity to 20%. Make your foreground color #ffffff and go over the brighter parts of the body and face. Gaussian blur at 10px.

Step 15 Merge and Levels
Merge your layers for the last time and then duplicate it. Go to Image>Adjustments>Levels or simply press Ctrl + L. Set the three output levels so they read 14, 0.84 and 226.
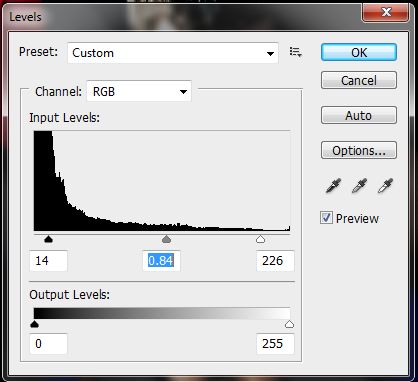
Change the layer mode to Multiply and drop the opacity to 30%.
Step 16 Gradient
Finish your image by creating a new layer. Set your foreground and background colors to default by pressing (D) on your keyboard and the press (X) to switch them (white on top, black on bottom). Select the gradient tool and make sure the setting is radial gradient. Pull the gradient from the center to the bottom of the image. Change the layer mode to Soft Light and the opacity to 30%.

Download the PSD file (zipped, 8.3 Mb)
Conclusion
There are many ways to go about creating more atmosphere and drama to your images so that they stand out. Today you have been shown just one of many techniques. I recommend experimenting with various images and various settings until you get a look that is perfect for you and to your liking. Hopefully you have picked up some techniques that you can then tweak to your aesthetic preferences and create amazing work.
Frequently Asked Questions about Dramatizing Portrait Photography
What does it mean to dramatize portrait photography?
Dramatizing portrait photography refers to the process of adding a dramatic effect or mood to a portrait photograph. This can be achieved through various techniques such as lighting, composition, post-processing, and the use of props or costumes. The aim is to evoke a strong emotional response from the viewer, making the photograph more impactful and memorable.
How can I use lighting to dramatize my portrait photographs?
Lighting plays a crucial role in dramatizing portrait photographs. You can use hard lighting to create strong shadows and highlights, which can add a dramatic effect to your images. Alternatively, you can use soft lighting to create a more subtle, moody effect. Experimenting with different lighting setups and angles can help you achieve the desired dramatic effect.
How does composition contribute to the dramatization of portrait photography?
Composition is another important aspect of dramatizing portrait photography. By carefully arranging the elements in your frame, you can guide the viewer’s eye and create a sense of drama. This can be achieved through techniques such as the rule of thirds, leading lines, and framing. The placement of your subject within the frame can also greatly influence the mood and drama of your photograph.
What role does post-processing play in dramatizing portrait photography?
Post-processing is a powerful tool for dramatizing portrait photography. With the help of editing software, you can enhance the colors, adjust the contrast, and apply various effects to your images to create a dramatic mood. Techniques such as dodging and burning, color grading, and adding texture overlays can significantly enhance the drama in your photographs.
How can props and costumes be used to dramatize portrait photography?
Props and costumes can add a layer of storytelling to your portrait photographs, making them more dramatic. They can help to convey a certain mood, theme, or narrative, engaging the viewer’s imagination. Whether it’s a vintage dress, a dramatic piece of jewelry, or a symbolic object, props and costumes can greatly enhance the drama in your portrait photography.
How can I evoke emotion in my dramatized portrait photography?
Evoking emotion in dramatized portrait photography can be achieved through a combination of techniques. The expression and body language of your subject, the lighting, the composition, and the post-processing can all contribute to the emotional impact of your images. It’s about creating a connection between the viewer and the subject, making the photograph feel alive and emotive.
Can I dramatize portrait photography in black and white?
Absolutely, black and white photography can be incredibly dramatic. By removing color, you focus the viewer’s attention on the textures, shapes, and contrasts in the image. This can create a powerful, timeless effect that is perfect for dramatizing portrait photography.
What are some common mistakes to avoid when dramatizing portrait photography?
Some common mistakes to avoid include over-editing your images, using inappropriate lighting, and neglecting the composition. It’s important to strike a balance between drama and realism, ensuring that your images are impactful but still believable. Also, remember to always focus on the emotion and storytelling aspect of your photographs, as this is what truly creates drama.
How can I learn more about dramatizing portrait photography?
There are many resources available for learning more about dramatizing portrait photography. Online tutorials, photography workshops, and books on the subject can provide valuable insights and techniques. Additionally, studying the work of professional portrait photographers can also be a great source of inspiration and learning.
Can anyone learn to dramatize portrait photography?
Yes, anyone with an interest in photography can learn to dramatize their portrait photographs. It requires practice and experimentation, but with time and patience, you can learn to create stunning, dramatic portraits. Remember, the key is to convey emotion and tell a story through your images.

