

When working with images, you don’t always have to go for the traditional look. There are situations where the average 8 x 10 or 5 x 7 just isn’t enough. Sometimes an image just needs a little extra effect to a stronger appeal and a bigger impact. In Photoshop, you can use creative masking techniques to give your images a little extra pizzazz. In just a few minutes, you can turn a good image into a great one simply by adding a creative border.
Option 1: Classic Vignette
In Photoshop, you can create a classic vignette effect, which is a great option for wedding photos, such as the one shown below. This method is fairly simple, but you can use the layer mask to make adjustments to create different results.
First, hold Command/Ctrl and click the “New Layer” icon ay the bottom of the layers panel. This will create a new layer below the currently selected layer. Select the new layer and fill it with black.
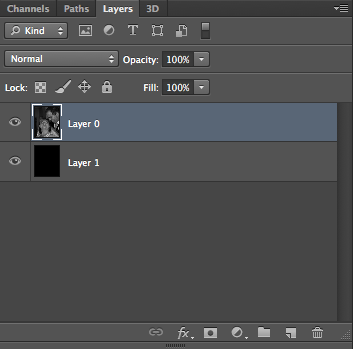
Then, select the image layer and click the layer mask icon to create a new layer mask. Click the layer mask to make sure that it’s selected, and select the elliptical marquee tool. While holding Alt/Option, place your cursor in the center point of your image and draw an elliptical selection that overlaps the edges of the image, so that the corners aren’t selected.
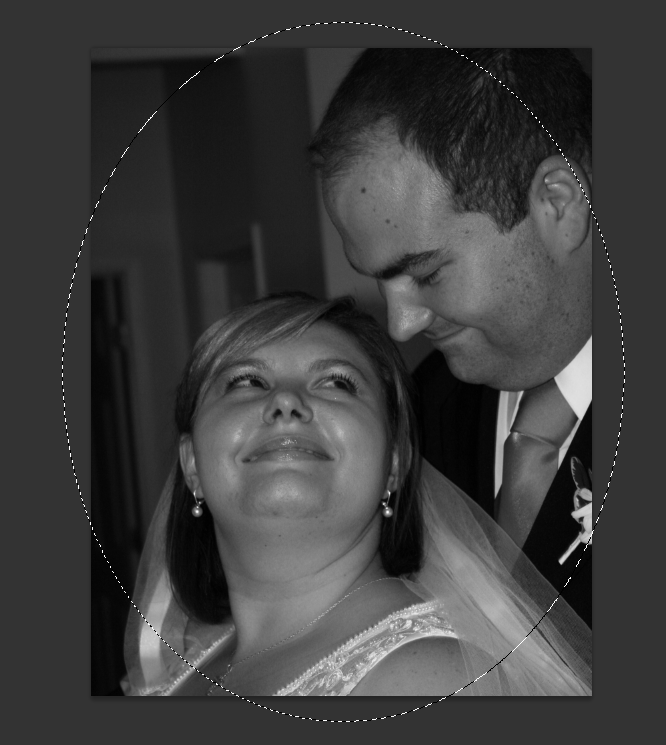
Next, hold Command/Ctrl + Shift + “I” to invert the selection and fill it with black. This will mask the corners of the image, revealing the black layer below.

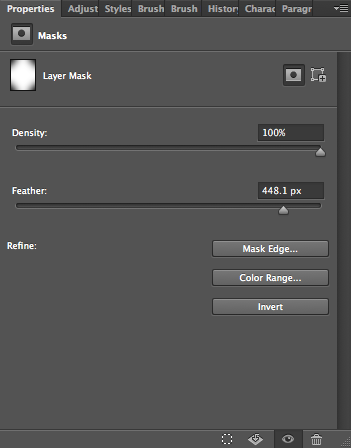
This is definitely too sharp to look like a natural vignette, but to adjust the mask, go to the “Properties” panel and drag the feather slider to the right to soften the edges of the vignette until it is soft and subtle.

Brushes
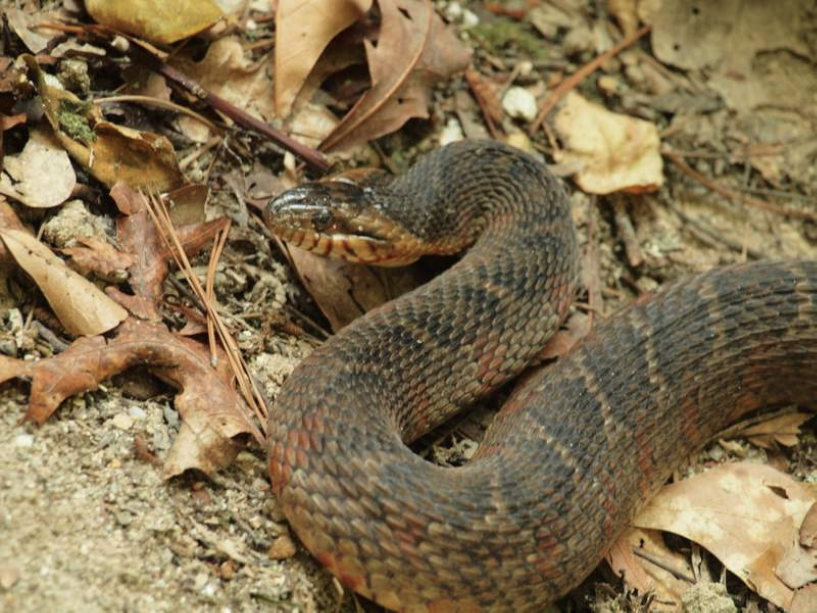
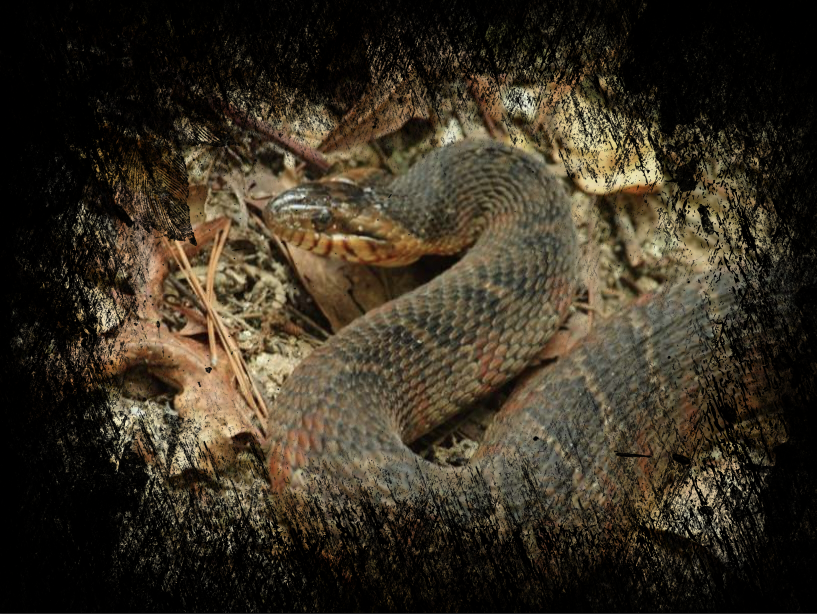
You can use brush effects to create a masked border that is a little more interesting than just simple vignettes. The image below can be found here. A rugged, destroyed border effect would go well with this image.
Brush sets are available all over the web. One of the biggest free brush sites is Brusheezy. Here, you can search for any type of brush that you would like and bring them into Photoshop to use on your projects. For the following effect, search for “grunge,” “destroyed,” or something similar. Once you have downloaded the brush set that you want, drop it in your “Brushes” folder, under “Presets” within the main Photoshop applications folder.
Select a destroyed grunge brush and click the layer mask icon to add a layer mask to your image. Also, create a new layer below the image layer and fill it with black so that you can easily see the effects from your brush. Click on the layer mask and brush around the edges. The great thing about this type of effect is that if you aren’t happy with the effect, you can simply fill the mask with white and start over. I increased the size of the brush to make it very large and fill the canvas. With black, I single-clicked over the image to take away from the snake.

Select white and lower the size of the brush to paint the snake itself back in. We just wanted to add a little roughness to the center of the image, but we don’t want to take away from the snake itself. Switch back to black and while using varying sizes, click around the edges of the snake image. You can click and drag, or you can single-click in different areas to make the effect irregular and gritty. Also, mix in different brushes to really add variation to your mask.
Filter Effects
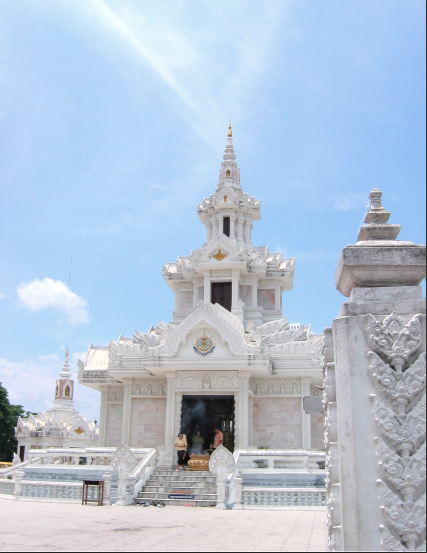
Combining filter effects with masks can give you some highly creative border effects for your images. They are really easy to do; you simply create the effects on your mask instead of your image. This keeps you from destroying your actual image, and if you don’t like the effect, you can simply fill the mask with white and start over. The sample image below can be found here.
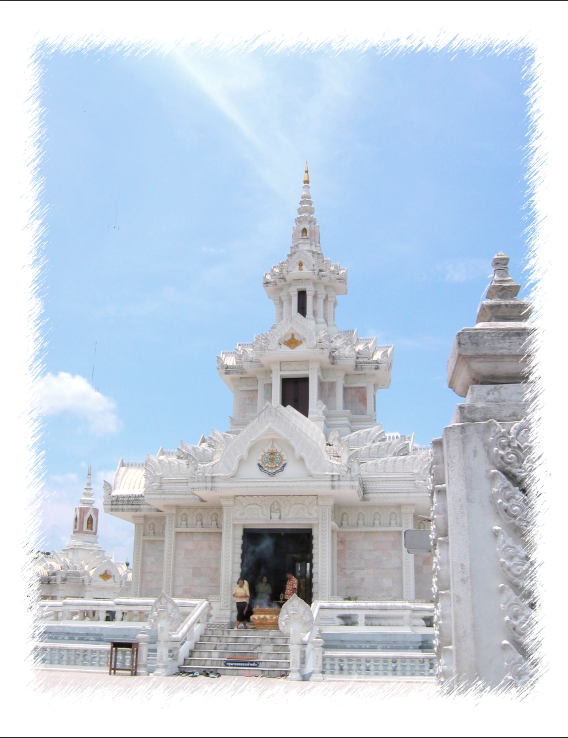
Click the layer mask icon to create a layer mask, and select the marquee tool. Create a rectangular selection and to give yourself a sizable solid border. Fill it with black, and then hit Command/Ctrl+ “I” to invert the mask. Your mask should look like the sample below.

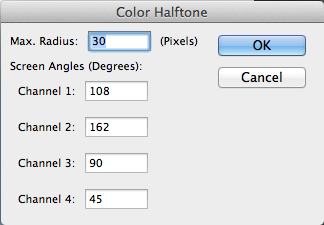
Now, with the layer mask still selected, we can run a myriad of different filters on our mask itself. For example, Go to “Filter” > “Pixelate” > “Color Halftone.” A dialog box will come up; increase the Max Radius value to something much larger than 8, such as 30. This really just depends on the size of your image.

Another nice, subtle effect is to go to “Filter” > “Filter Gallery” and choose glass, but bump up the value to around 650-700. This gives a smooth transition that looks similar to real glass.

The example below is the result of choosing “Sprayed Strokes” with both sliders bumped all the way up. It created an artistic “scribble” effect.
If you run the same exact filter on the actual image, but lower the settings both to 10, it really adds to the effect and looks realistic. Combining border effects with images effects can definitely yield some interesting results.

Conclusion
You aren’t stuck with the same old boring borders for your images. With a little know-how and very little work, you can create interesting and custom border effects for all of your images. They can really enhance an image and take it to the next level.
Frequently Asked Questions on Creative Borders with Masking Techniques in Photoshop
How can I create a border with a specific color in Photoshop?
To create a border with a specific color in Photoshop, first, open the image you want to add a border to. Then, go to the “Image” menu, select “Canvas Size,” and adjust the width and height to create a border around your image. To change the color of the border, create a new layer below your image layer, select the “Paint Bucket” tool, choose your desired color, and click on the canvas. The color will fill the border area you created.
Can I add a border to a text layer in Photoshop?
Yes, you can add a border to a text layer in Photoshop. To do this, select the text layer you want to add a border to, go to the “Layer” menu, select “Layer Style,” and then “Stroke.” Here, you can adjust the size, position, blend mode, opacity, and color of the border.
How can I create a gradient border in Photoshop?
To create a gradient border in Photoshop, first, create a border around your image by adjusting the canvas size. Then, create a new layer below your image layer, select the “Gradient” tool, choose your desired colors, and draw a line across the canvas. The gradient will fill the border area you created.
Can I add a border to a shape in Photoshop?
Yes, you can add a border to a shape in Photoshop. To do this, select the shape layer you want to add a border to, go to the “Layer” menu, select “Layer Style,” and then “Stroke.” Here, you can adjust the size, position, blend mode, opacity, and color of the border.
How can I create a patterned border in Photoshop?
To create a patterned border in Photoshop, first, create a border around your image by adjusting the canvas size. Then, create a new layer below your image layer, select the “Paint Bucket” tool, choose “Pattern” from the options at the top, select your desired pattern, and click on the canvas. The pattern will fill the border area you created.
Can I add a border to a selection in Photoshop?
Yes, you can add a border to a selection in Photoshop. To do this, make a selection using any of the selection tools, go to the “Select” menu, choose “Modify,” and then “Border.” Here, you can specify the width of the border.
How can I create a textured border in Photoshop?
To create a textured border in Photoshop, first, create a border around your image by adjusting the canvas size. Then, create a new layer below your image layer, select the “Paint Bucket” tool, choose “Pattern” from the options at the top, select a texture pattern, and click on the canvas. The texture will fill the border area you created.
Can I add a border to a layer in Photoshop?
Yes, you can add a border to a layer in Photoshop. To do this, select the layer you want to add a border to, go to the “Layer” menu, select “Layer Style,” and then “Stroke.” Here, you can adjust the size, position, blend mode, opacity, and color of the border.
How can I create a border with a custom shape in Photoshop?
To create a border with a custom shape in Photoshop, first, create a new layer and select the “Custom Shape” tool. Choose your desired shape, draw it on the canvas, and position it to create a border around your image. To fill the shape with color, select the “Paint Bucket” tool, choose your desired color, and click on the shape.
Can I add a border to multiple layers in Photoshop?
Yes, you can add a border to multiple layers in Photoshop. To do this, select the layers you want to add a border to by holding down the “Ctrl” key and clicking on each layer. Then, go to the “Layer” menu, select “Layer Style,” and then “Stroke.” Here, you can adjust the size, position, blend mode, opacity, and color of the border.