
Interesting tools are emerging each day of the year, helping developers work faster, keeping them focused on the actual business values of the project.
One such tool is Vagrant, which is becoming one of the strongest helping hands for a developer, standardizing how development environments are created and managed.
In this article you’ll learn how to create your own Vagrant base box based on Ubuntu 14.04 LTS, provision it with your favorite apps and share it with the rest of us using Vagrant Cloud.
Key Takeaways
- To create a Vagrant base box, you need to install VirtualBox and Vagrant on your machine, then create a new virtual machine using VirtualBox. Install the necessary software and configurations, and package it into a box file using the ‘vagrant package’ command.
- A Vagrant base box is a pre-packaged environment that can be used as a starting point for projects. It ensures consistency across different development environments and saves time by eliminating the need to manually set up everything from scratch.
- Sharing a Vagrant base box can be done by uploading it to a box hosting service like Vagrant Cloud. Once uploaded, the box URL can be shared with others, who can add it to their Vagrant environment using the ‘vagrant box add’ command.
- A Vagrant base box typically includes an operating system, necessary software like a web server or a database server, and any configurations required for the development environment. However, the contents can be tailored to suit the needs of a specific project.
Creating the virtual machine
Note: for the examples below, you will need to have at least Vagrant version 1.5 installed on your local computer.
To create a virtual machine, you need a virtualization provider. Although Vagrant doesn’t discriminate over which provider to use, we’ll be using VirtualBox in the examples below.
You need to install VirtualBox first before creating the virtual machine.
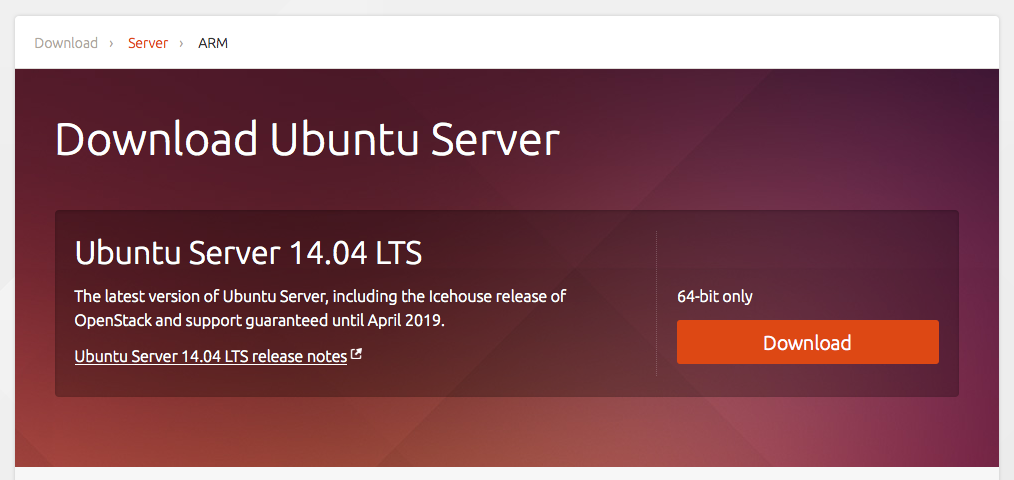
Next, head over to the Ubuntu download page and grab the Ubuntu 14.04 LTS ISO.
About the LTS version
A new version of Ubuntu is released in every six months and support for each version is limited.
LTS stands for long term support and it’s given to a specific subset of Ubuntu versions. The LTS timespan stretches to five years. If you install an LTS version today, you’ll get updates up to five years from now.
For web development, it’s always best to use an LTS tagged Ubuntu and the good news is that the Ubuntu 14.04 LTS was released on April 17th, 2014, therefore support lasts until 2019.
Installing Ubuntu
After the ISO file finishes downloading, fire up VirtualBox and click on New to create a new virtual machine then select Linux as the type, Ubuntu (64 bit) as the version and give your virtual machine a name.
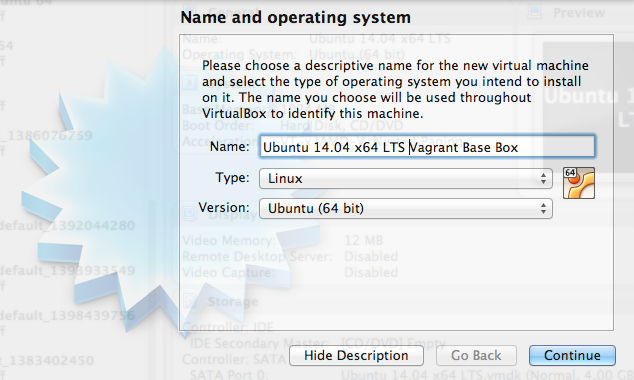
Click continue, set the memory size to 1024 MB or higher if you think you will have memory intensive tasks running in the virtual machine.
On the next pane, select Create a virtual hard drive now then select VMDK (Virtual Machine Disk).
On the Storage on physical hard drive pane select Dynamically allocated and set a minimum of 8 GB. Click continue and your virtual machine is almost finished.
You need to insert the downloaded Ubuntu 14.04 LTS ISO file as a virtual CD, so upon starting the virtual machine the operating system gets installed. It’s just like how you insert a bootable CD into a CD-ROM.
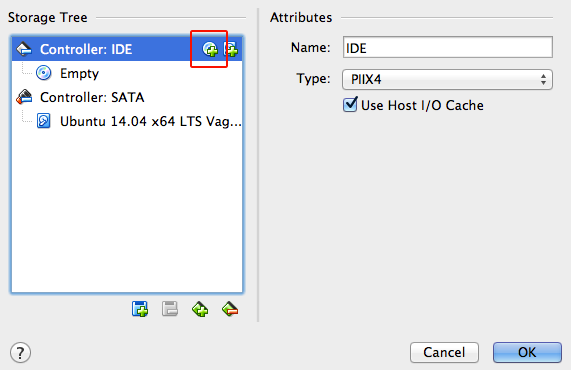
Select the virtual machine from the list, click Settings and click on the Storage tab. On the Controller: IDE click on the little CD icon (highlighted in red in the image below) then click Choose disk and select the Ubuntu ISO file.
Now we are ready to fire up the virtual machine and install Ubuntu as the guest OS. There are a couple more steps in the installation process such as selecting the language, country, etc. I will be touching on the more important ones below.
- When prompted to enter the hostname, type vagrant
- For both the username and password also type vagrant
- Encrypt your home directory? Select No
- On the timezone panel, select UTC or your own preferred timezone
- Partitioning method: Guided – use entire disk and set up LVM
- When prompted which software to install, select OpenSSH server, the rest such as LAMP or MySQL will be installed later
- Select to install GRUB boot loader on the master boot record
This should sum up the installation, next you’ll be prompted to log in. Use the vagrant user and password to do so.
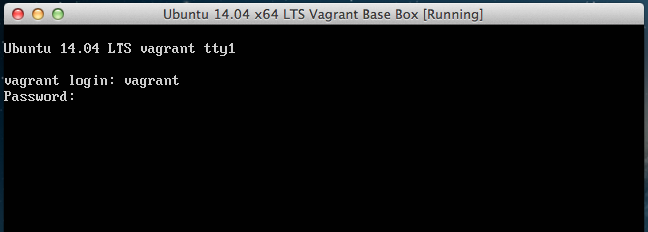
Next, switch to the root user by typing:
sudo su -
Note that this is not a very secure setup, and securing Ubuntu is out of the scope of this article. For a development machine, security isn’t paramount anyhow.
Using the root user, update to the latest packages by typing the following commands
apt-get update

apt-get upgrade
Configuring the virtual machine for Vagrant
Vagrant requires a couple of specific options to be set in order to play nice with the virtual machine.
Password-less command execution
All of the operations carried out by Vagrant will use the vagrant user and all of the sudo commands need to execute without asking for a password each time they are ran.
To set this up we need to run the visudo command to configure password-less sudo for the user. Just type:
visudo
Add the following line to the end of the file and save it:
vagrant ALL=(ALL) NOPASSWD:ALL
Root password
A general guideline when creating Vagrant boxes is to set the root password to a well known one. Vagrant uses vagrant as the password. To set this up type in the following command as the root user and type in the password when prompted:
passwd
SSH configuration
In order for Vagrant to be able to SSH into the virtual machine, it uses public key authentication. We need to set this up for our vagrant user.
Still logged in with the root user go to the vagrant user’s home directory:
cd /home/vagrant
Create the following folder:
mkdir .ssh
Vagrant uses an insecure keypair to connect to the virtual machine, which you can download here: github.com/mitchellh/vagrant/blob/master/keys/vagrant.pub
Just run the following command to get it directly:
wget https://raw.githubusercontent.com/mitchellh/vagrant/master/keys/vagrant.pub -O .ssh/authorized_keys
OpenSSH is very strict about this folder and file permission, so let’s change it to the correct one:
chmod 700 .ssh

chmod 600 .ssh/authorized_keys

chown -R vagrant:vagrant .ssh
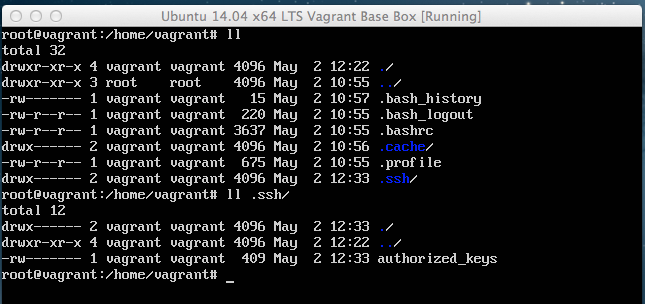
If everything was done correctly this is how the folder structure of /home/vagrant and /home/vagrant/.ssh should look like including the permissions.
Optional step: To speed up SSH connections to the virtual machine we need to modify the SSH server configuration also:
cd /etc/ssh

pico sshd_config
Add this line to the end of the file and save it:
UseDNS no
Then restart the SSH server:
service ssh restart
Finally, we can log out as the root user, by typing:
exit
Installing VirtualBox guest additions
In order for Vagrant to correctly share folders between the guest and host operating systems, the VirtualBox Guest Additions needs to be installed.
A prerequisite to installing guest additions on Linux systems are a couple of packages such as the Linux headers and developer tools. Let’s install those first, by typing the following:
sudo apt-get install linux-headers-generic build-essential dkms -y
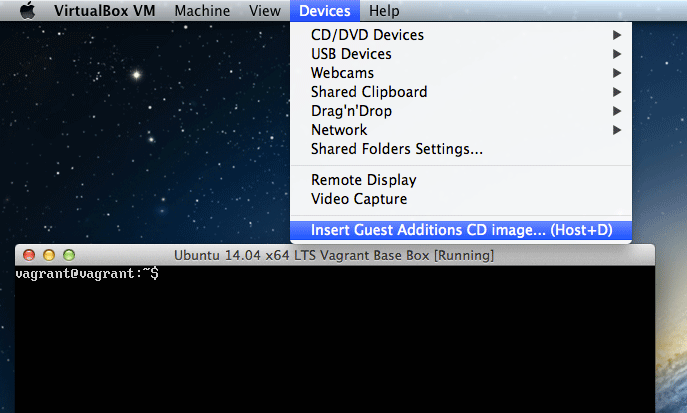
Next, we need to make sure the guest additions image is inserted into the virtual machine’s virtual CD-ROM. To do this focus on the virtual machine’s window, select Devices -> Insert Guest Additions CD Image.
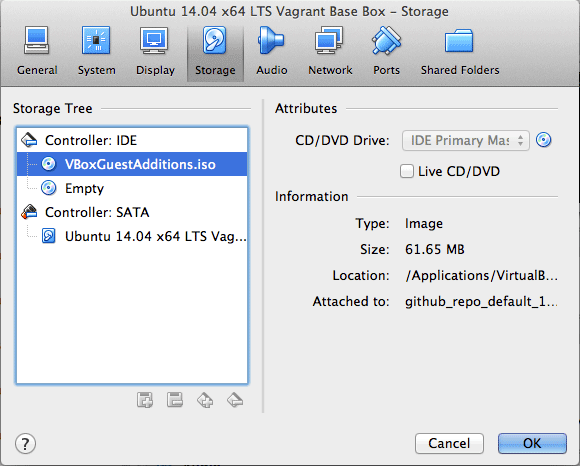
You can verify if the image is inserted in VirtualBox, by selecting the running virtual machine from the list and clicking Settings -> Storage. You should see VBoxGuestAdditions.iso under Controller: IDE.
Next, we need to mount the CD and run the actual installation shell script, by running the following commands:
sudo mount /dev/cdrom /media/cdrom

cd /media/cdrom

sudo ./VBoxLinuxAdditions.run
After this operation, it’s good to restart the virtual machine to make sure the new settings take effect:
sudo reboot
Creating the base box package
Now, that we created the basic virtual machine, we need to create the actual Vagrant base box. Just type the following command in your actual host machine’s terminal (not in your virtual machine’s command line):
vagrant package --base <virtualmachine name>
<virtual machine name> is the virtual machine’s name you specified in the VirtualBox settings. If you don’t know what the name is you can type the following command to find out:
VBoxManage list vms
In our case it’s called Ubuntu 14.04 x64 LTS Vagrant Base Box, it also contains spaces, so make sure you write it between quotes like this:
vagrant package --base "Ubuntu 14.04 x64 LTS Vagrant Base Box"
This process will result in a package.box file which is an archive of the virtual machine and Vagrant’s metadata files.
Sharing the base box
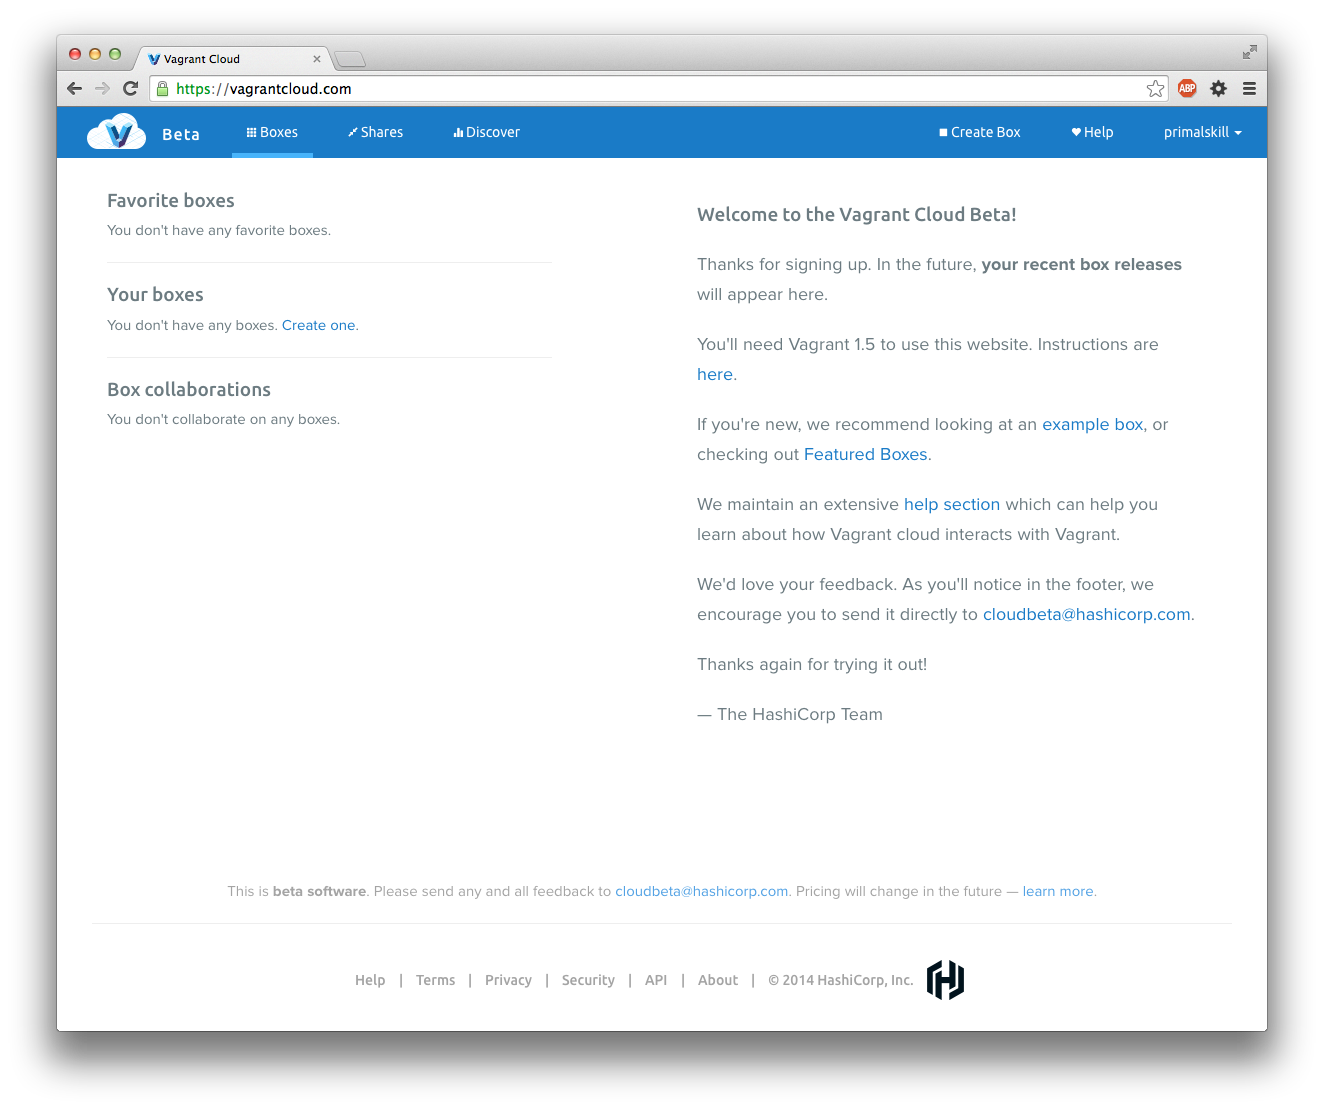
Vagrant recently created a service called Vagrant Cloud, where anybody can create and share Vagrant boxes for others to use.
To share our base box on Vagrant Cloud, we first need to sign up. When you log in, you will see the dashboard below. Click on the Create Box link on the upper right corner.
We need to specify a name and a short description for our box. You can enter anything here, I added ubuntu-trusty64 for our box. Trusty is the development code name for Ubuntu 14.04 LTS.
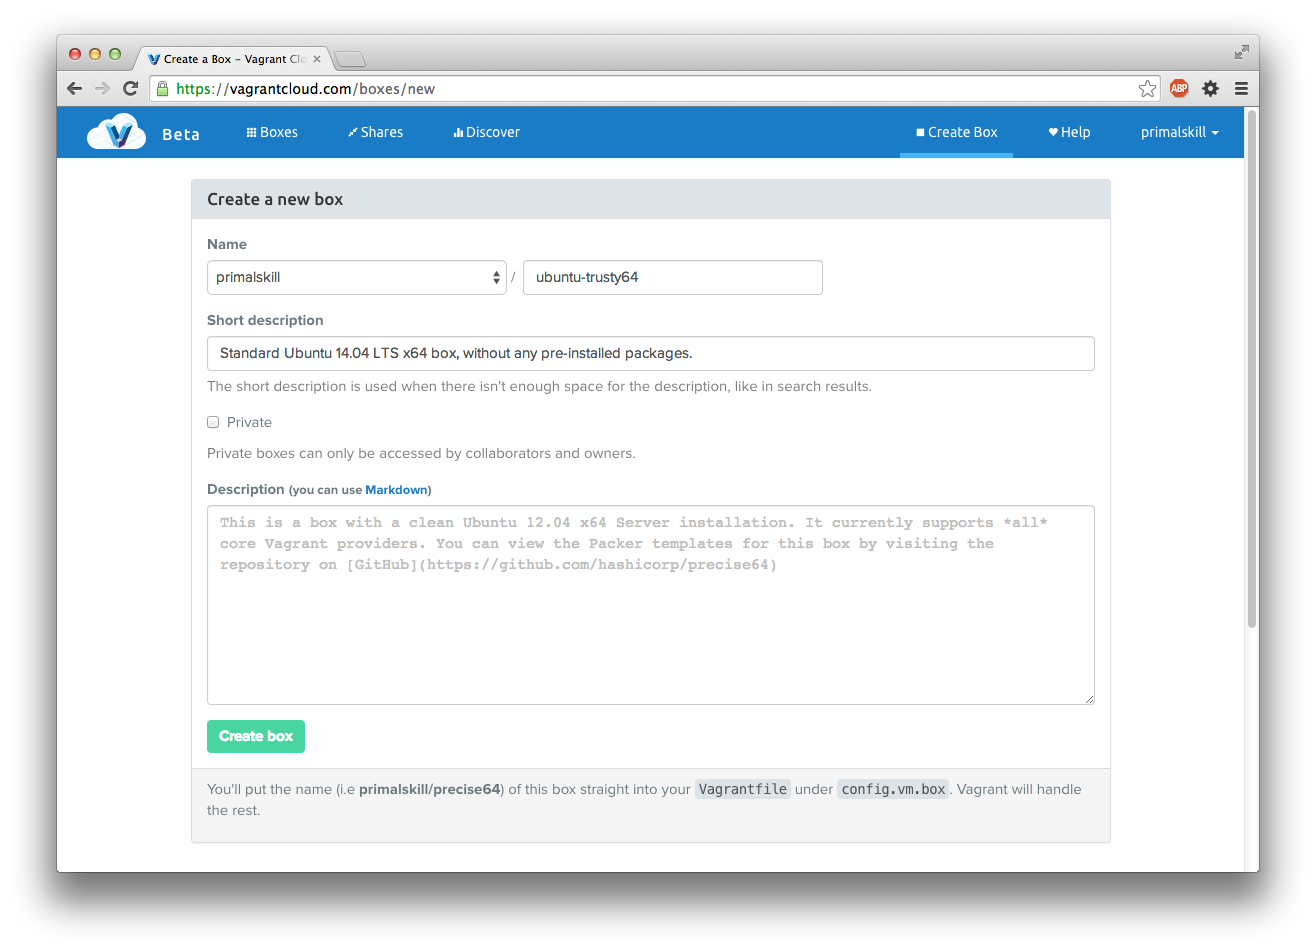
Next you need to create a version for the box, let’s add 1.0.0 for the initial version number and click Create Version.

After you’re finished with creating the box and the version, we need to add a provider. Click Create new provider and type virtualbox then click on the URL button and type in the URL where your package.box file is located.
Note: Only paid premium users can upload the base box directly to Vagrant Cloud. For more info have a look at the pricing page.
Once you added a provider, click on the Release now button to make the box available on Vagrant Cloud.
The Vagrant box used as an example in this article is available at https://vagrantcloud.com/primalskill/ubuntu-trusty64. It’s a perfectly fine base box you can use in your development environment, but bear in mind it’s not secure in any way, use it only locally.
Conclusion
You learned how to create a VirtualBox virtual machine, install Ubuntu as a guest OS and how to package this VM to use it with Vagrant.
Finally, we showed you how to distribute your Vagrant base box on Vagrant Cloud and share it publicly on the Internet.
In the followup to this article you will learn how to use this Vagrant base box to install your preferred software and set up a development environment using a combination of shell scripts and other provisioning tools.
Frequently Asked Questions (FAQs) about Creating and Sharing a Vagrant Base Box
What is a Vagrant Base Box and why do I need it?
A Vagrant Base Box is essentially a pre-packaged environment that you can use as a starting point for your projects. It contains an operating system, pre-installed software, and configurations that are necessary for your development environment. The main advantage of using a Vagrant Base Box is that it ensures consistency across different development environments, reducing the chances of encountering the “it works on my machine” problem. It also saves time as you don’t have to manually set up everything from scratch.
How can I create a Vagrant Base Box?
Creating a Vagrant Base Box involves several steps. First, you need to install VirtualBox and Vagrant on your machine. Then, you create a new virtual machine using VirtualBox, install the necessary software and configurations, and package it into a box file using the vagrant package command. This box file can then be used to initialize new Vagrant environments.
How can I share my Vagrant Base Box with others?
You can share your Vagrant Base Box by uploading it to a box hosting service like Vagrant Cloud. Once uploaded, you can share the box URL with others, who can then add it to their Vagrant environment using the vagrant box add command.
What should I include in my Vagrant Base Box?
What you include in your Vagrant Base Box depends on the needs of your project. However, it typically includes an operating system, necessary software like a web server or a database server, and any configurations that are required for your development environment.
How can I update my Vagrant Base Box?
To update your Vagrant Base Box, you need to make the necessary changes to the virtual machine, re-package it into a box file, and then upload it to the box hosting service. You can then update the box in your Vagrant environment using the vagrant box update command.
Can I use a Vagrant Base Box for production environments?
While you can technically use a Vagrant Base Box for production environments, it’s generally not recommended. Vagrant is primarily designed for creating reproducible development environments, and using it for production can lead to performance and security issues.
How can I troubleshoot issues with my Vagrant Base Box?
Troubleshooting issues with your Vagrant Base Box can involve checking the Vagrant and VirtualBox logs, verifying the box file integrity, and ensuring that your Vagrant and VirtualBox versions are compatible.
Can I use a Vagrant Base Box with other virtualization software?
Yes, Vagrant supports several virtualization providers besides VirtualBox, including VMware, Hyper-V, and Docker. However, you need to ensure that the box file is compatible with the provider you’re using.
How can I optimize my Vagrant Base Box?
Optimizing your Vagrant Base Box can involve reducing the box file size, minimizing the number of pre-installed software, and using scripts to automate the box creation process.
Can I use a Vagrant Base Box for cross-platform development?
Yes, one of the main advantages of using a Vagrant Base Box is that it allows for cross-platform development. Since the box file contains a complete development environment, it can be used on any platform that supports Vagrant and the chosen virtualization provider.