
In this tutorial, I will show you how to create a gorgeous shop app icon in Adobe Illustrator. We’ll use various shape tools, pen tool, gradient tool, shape builder tool and few options in the effect and object menu to achieve the final result. Hope you will learn few useful tips along the way. So, let’s get started!
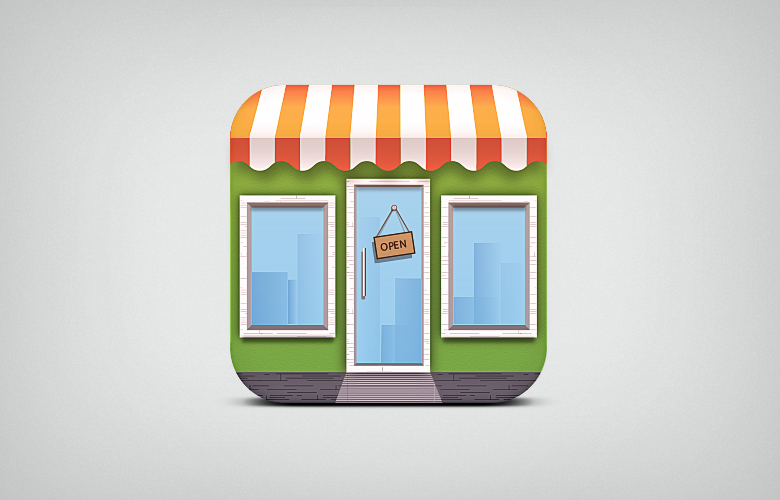
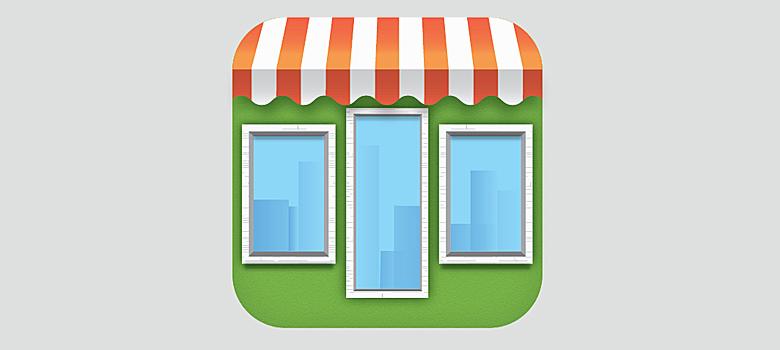
Final result:
Step 1
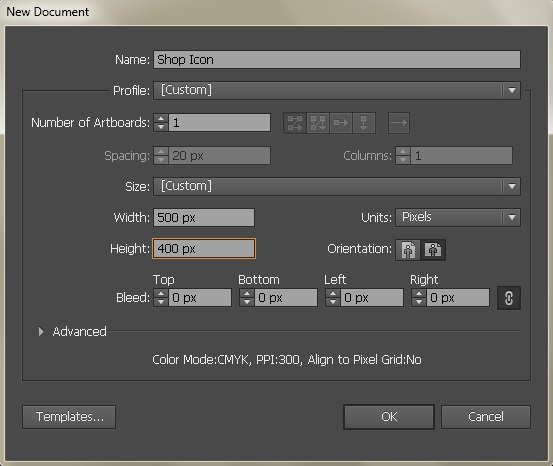
Create a new document in Illustrator with 500px width and 400px height.
Step 2
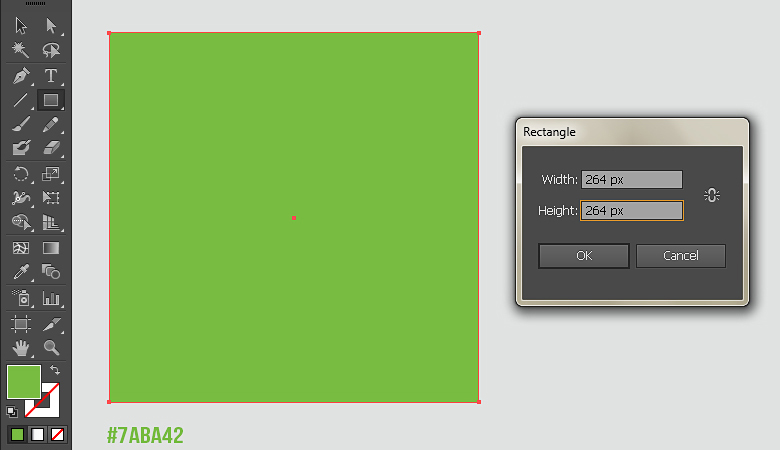
Pick #7ABA42 fill color, select the Rectangle Tool (“M”) and click the canvas to view the rectangle window. Enter 264px for width and height and hit “OK” to draw a rectangle. Label it as “Base”.
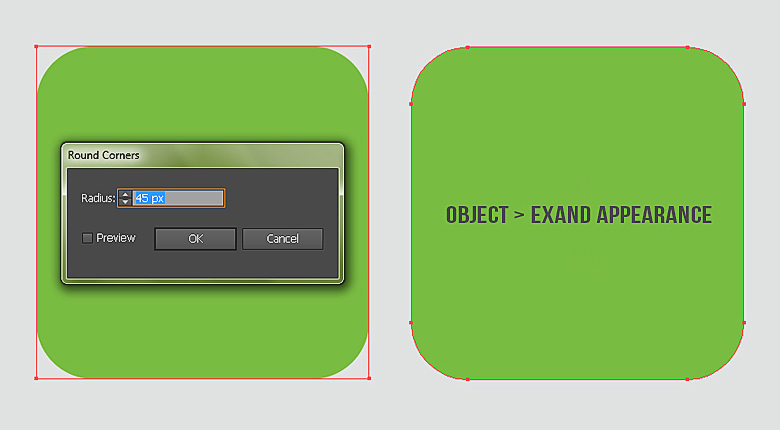
Select it and go to “Effect”> “Stylize”> “Round corners”. Enter 45px radius to convert it into a rounded rectangle. Now go to “Object”> “Expand Appearance” to modify the shape.
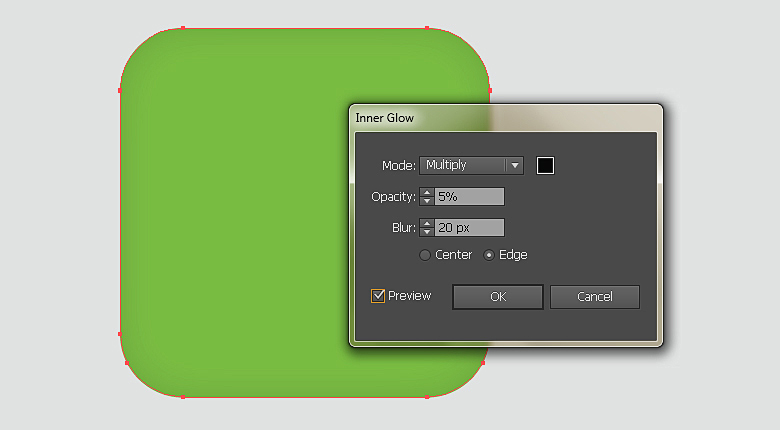
Step 3
Select the “Base” shape and go to “Effect”> “Stylize”> “Inner Glow”. Apply given settings here.
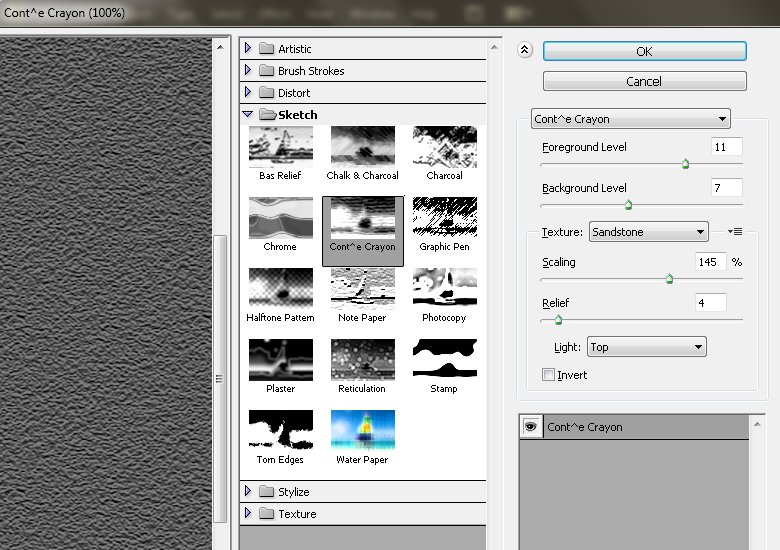
Step 4
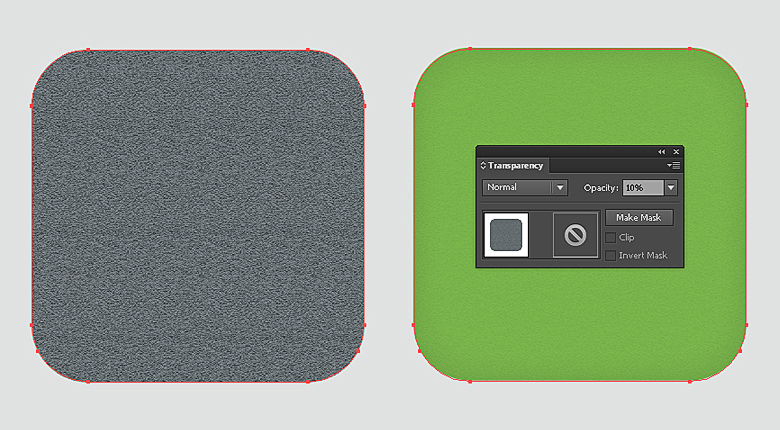
Next, we’ll add texture to the base. Press Ctrl+ “C” to copy the base and press Ctrl + “F” to paste in front. Now go to “Effect”> “Sketch”> “Conte Crayon” and apply given settings here.
Decrease the opacity of textured layer to 10% in the Transparency panel (“Shift + Ctrl + F10”).
Step 5
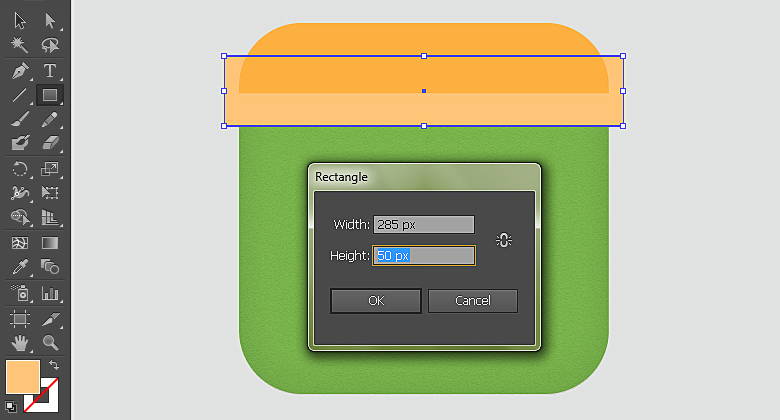
We’ll create the awning now. Select the Rectangle Tool (“M”) and draw a rectangle using any fill color with 350px width and 50px height along the top border of base.
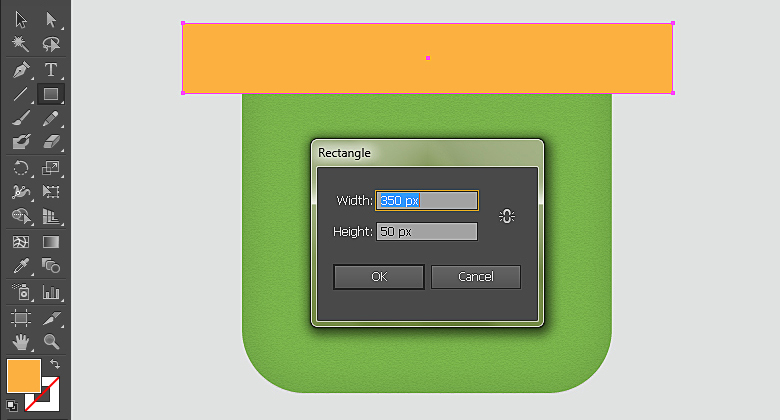
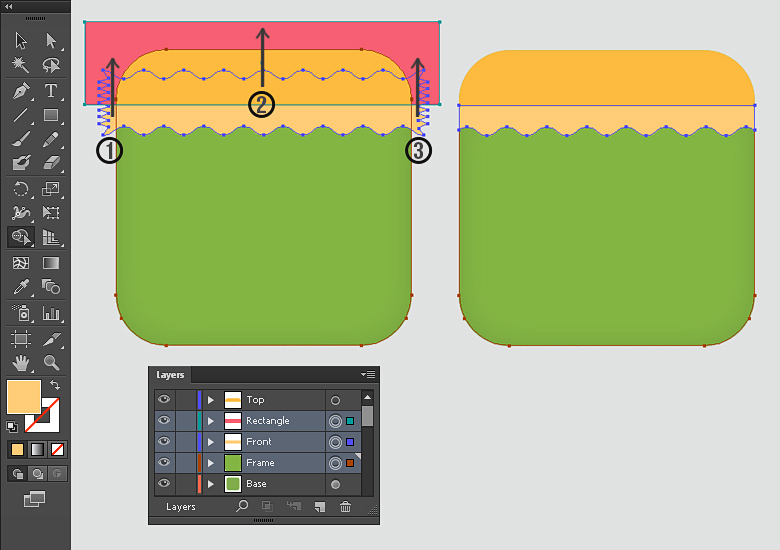
Make another copy of base layer; label it as “Frame”. We will use it as the guide to trim other shapes. Select both the rectangle and frame layers and pick the Shape Builder Tool (Shift + “M”). Now take the tool over the parts of rectangle outside the frame, you will notice a change in the appearance of that shape, now click the part while pressing “Alt” key to delete it. Delete both sides of rectangles that are outside the frame using this tool. Label this new shape as “Top”.

Step 6
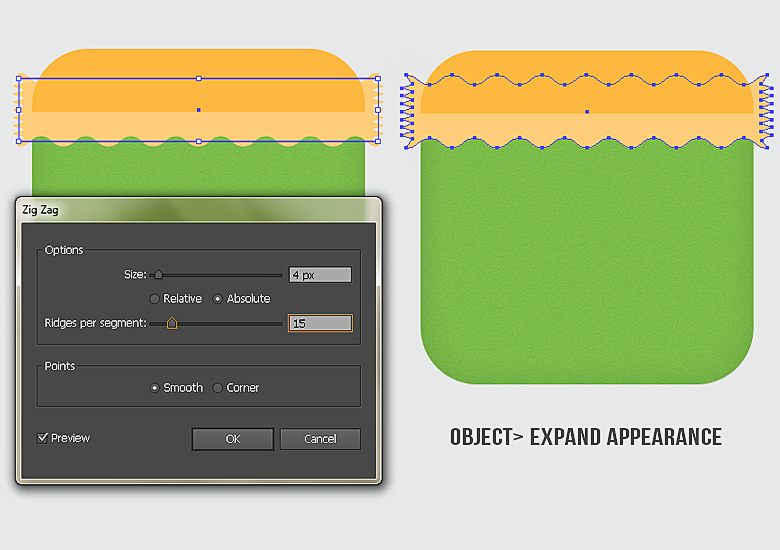
Once again select the Rectangle Tool (“M”) and draw a rectangle of 285px width and 50px height. Label it as “Front”.
Now select the Front shape and go to “Effect”> “Distort & Transform”> “Zig Zag”. Apply given settings here. And go to “Object”> “Expand Appearance” to modify the shape.
Next, roughly draw a rectangle covering the top shape layer. After that, select the frame, front and this new rectangle layers. Pick the Shape Builder Tool (Shift + “M”) and drag it along three paths shown in the image below while pressing “Alt” key to delete them.
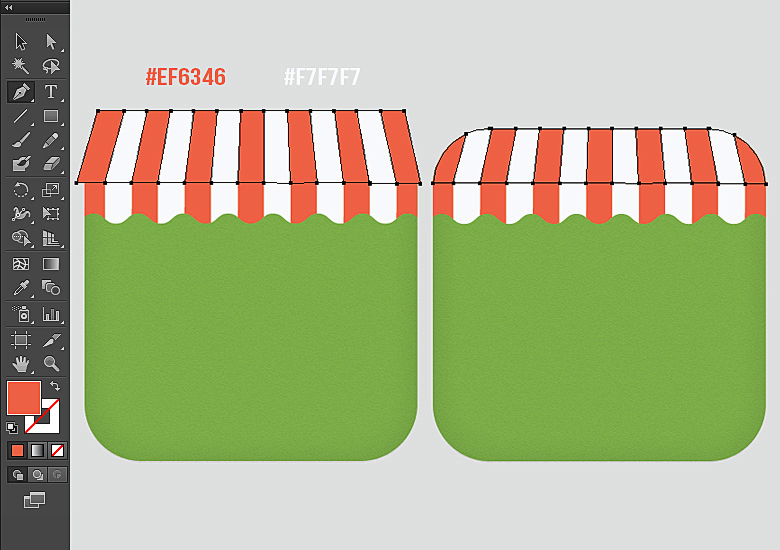
Step 7
Next, make the striped pattern by drawing #EF6346 and #F7F7F7 color rectangles repeatedly. And to confine the pattern to the Front shape, select the pattern and Front shape layers and delete the parts of pattern outside the Front shape.
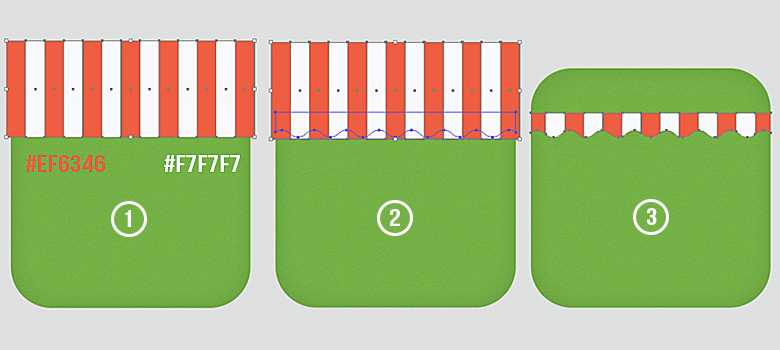
Now select the Pen Tool (“P”) and draw the stripes for the top part of awning. Once you are done, select these stripes and Top shape layer and delete the parts of stripes outside the Top shape layer using Shape Builder Tool (Shift + “M”).
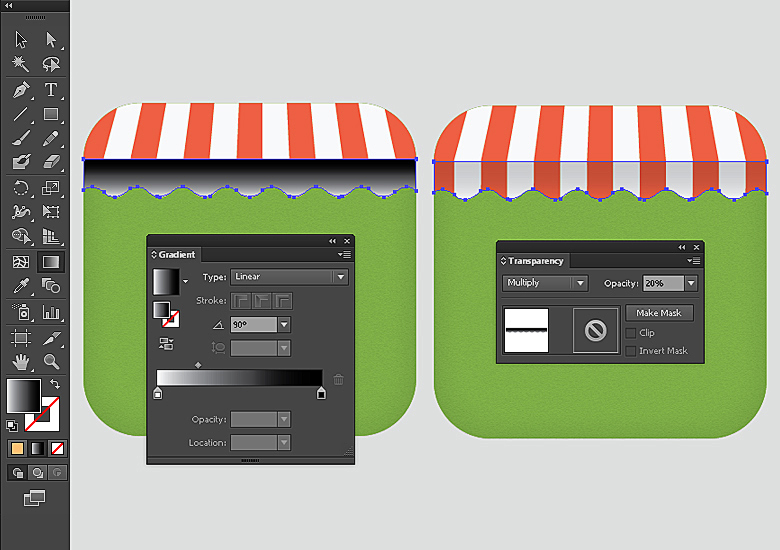
Step 8
Now place the Front shape layer above the pattern layer and apply black to white gradient on it at 90⁰ using Gradient Tool (“G”). Change its blending mode to “Multiply” with 20% opacity.
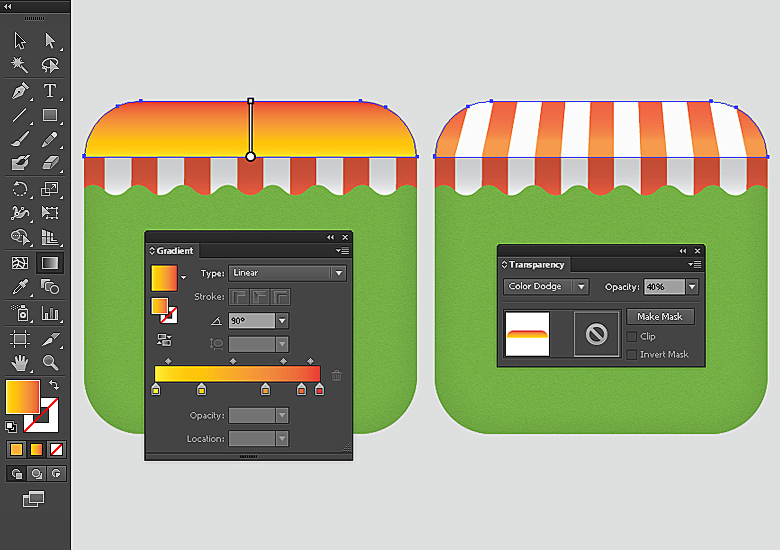
Next, place the Top shape layer above its pattern layer and apply following “Orange Yellow” gradient on it. You can find this gradient by going to “Window”> “Swatch Libraries”> “Gradients”> “Color Combinations”. Change gradient layer blending mode to “Color Dodge” with 40% opacity.
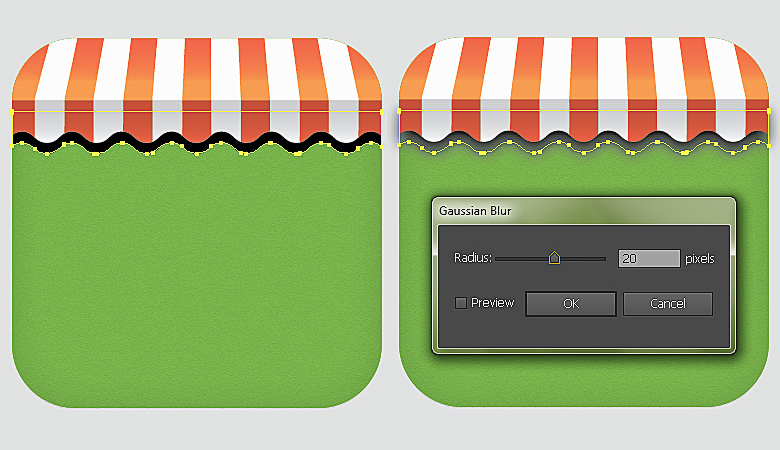
Step 9
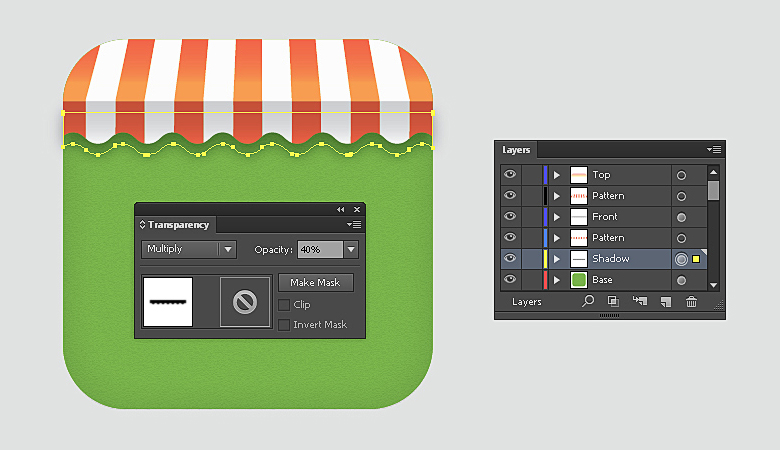
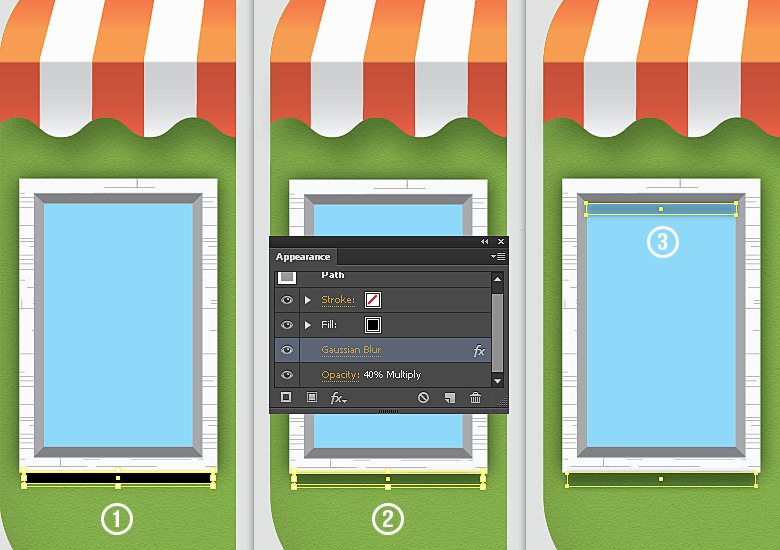
To make the shadow of the awning, copy the “Front” shape and place it just above the base layer. Change its fill color to black and drag it 3-5 steps downwards using Selection Tool (“V”). After that, select it and go to “Effect”> “Blur”> “Gaussian Blur”. Apply 20px Gaussian blur effect on it and then change its blending mode to “Multiply” with 40% opacity.
Step 10
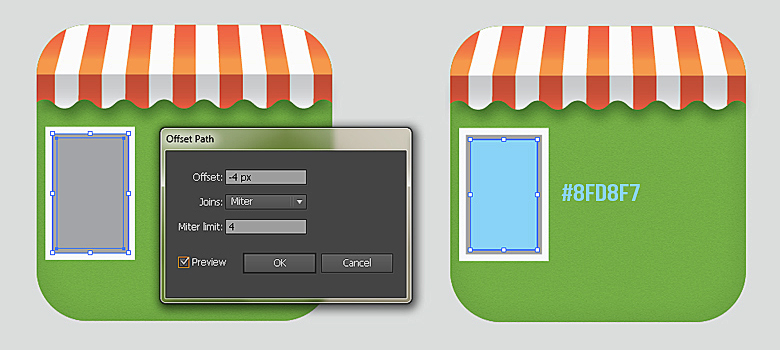
Next, we’ll draw a window; make a rectangle with 80px width and 118px height of white fill color. Select it and go to “Object”> “Path”> “Offset Path”. And offset the path by “-6px”. Change the new path fill color to gray.

Now select the gray path and offset it by “-4px”. Turn its fill to blue as shown below.
Step 11
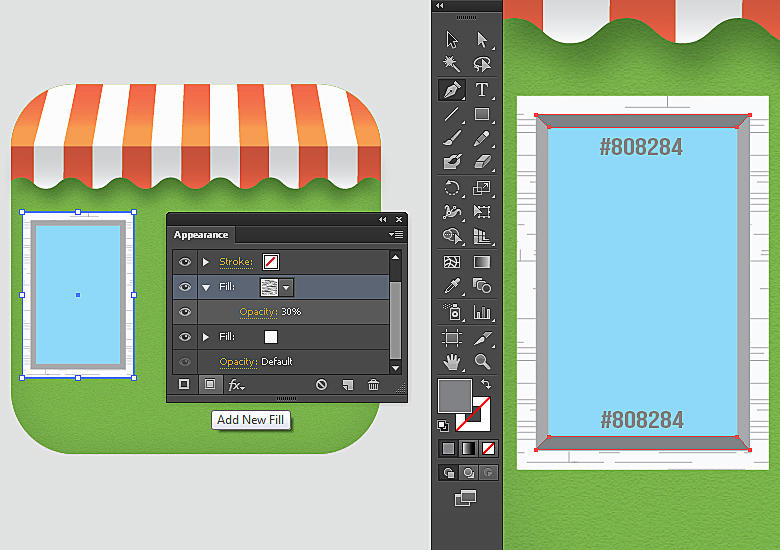
Select the white frame of window and press Shift + “F6” to view the Appearance Panel. Click the “Add new fill” icon at the bottom of appearance panel and choose the “Lines” pattern from the swatches. Decrease pattern opacity to 30%. You can find this pattern by going to “Window”> “Swatch Libraries”> “Patterns”> “Basic Graphics”> “Basic Graphics-Textures”> “Lines”. Next, select the Pen Tool (“P”) to draw following shapes over the gray frame with darker gray fill color.
Step 12
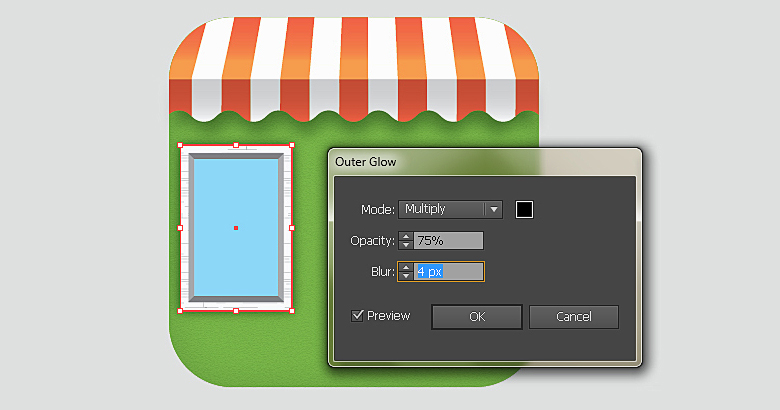
To make window’s shadow, select the white frame and go to “Effect”> “Stylize”> “Outer Glow”. Apply given settings here.
Now make a small black rectangle just below the window, apply 5px Gaussian blur effect on it and decrease its opacity to 40%. Make its copy and position it over the glass after resizing as shown below.
Step 13
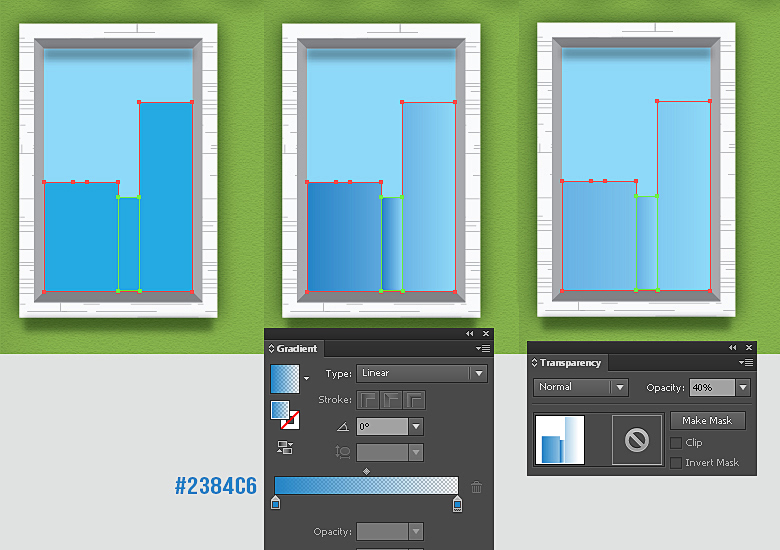
Next, we’ll make buildings reflection over the window’s glass. Draw few random rectangles inside the glass and apply “blue to transparent” gradient on them. Decrease their opacity to 40%.
Select all the layers forming the left window and choose “Collect in New Layer” from the fly-out menu at the top right corner of layers panel. Label it as “Left window”. Make its copy, position it over the right side and label as “Right window”. Just change the reflection over glass by drawing new rectangles. Similarly make another copy of the window and adjust its size using Selection Tool (“V”) to make the door as shown below.
Step 14
Now we’ll make door’s handle. Draw a rectangle using Rounded Rectangle Tool and apply “Chrome” gradient on it. You can find this gradient by going to “Window”> “Swatch Libraries”> “Gradients”> “Metal”. To make its shadow, select the handle, press Ctrl+ “C” to copy and Press Ctrl+ “B” to paste in back, change its fill color to #808284 and drag it few steps downwards and towards left.

Step 15
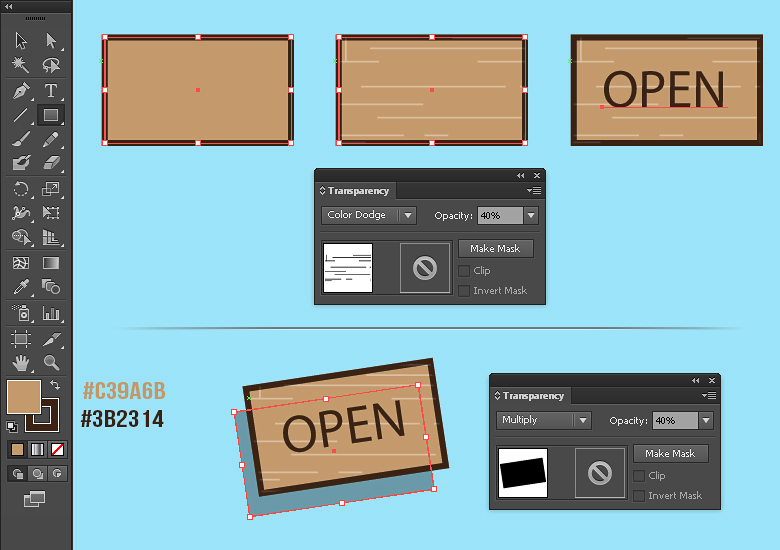
Now draw a small rectangle over the door using #C39A6B fill color and #3B2314 color stroke (Stroke weight: 1pt). Make its copy and paste in front, apply lines pattern on it and change its blending mode to “Color Dodge” with 40% opacity. Type in some text over it, I’ve used “Myriad Pro” font here. Select all these layers and rotate it a bit using Selection Tool (“V”) and make its shadow.
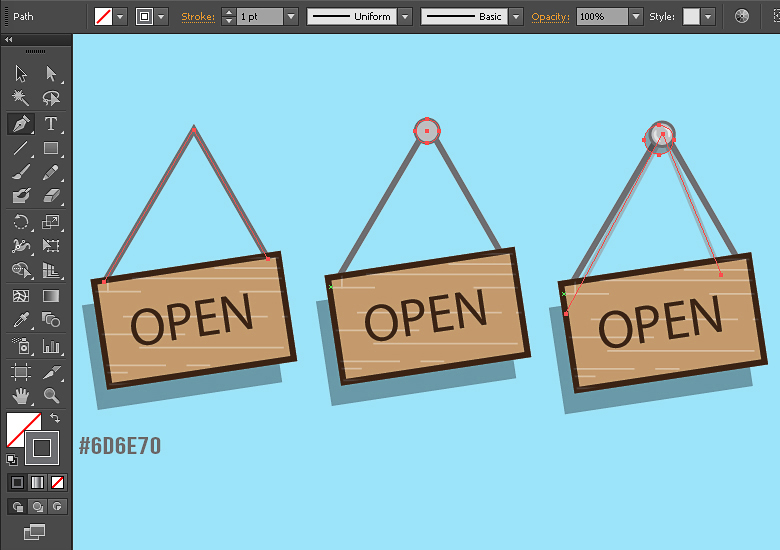
Step 16
Make the string using Pen Tool (“P”) with #6D6E70 Stroke color (1pt). After that, draw a small ellipse and make few highlights over it as shown below. And then make their shadow.
Step 17
Next, to make the road draw a rectangle with #6D6E70 fill color. And delete its parts outside the base of icon.

Step 18
Select the Road shape and add new fill in the appearance panel. Choose “Lines” pattern as the fill. After that, select it and apply given settings for Inner Glow.

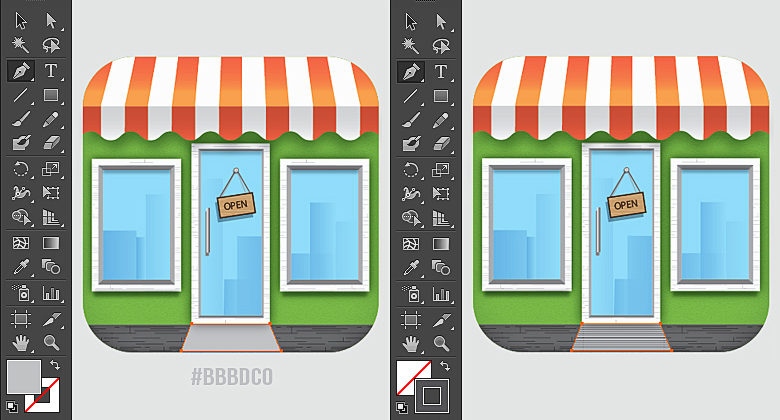
Step 19
Draw the following shape using Pen Tool (“P”) with #BBBDC0 fill color. You can add few lines over it using #58585B stroke color.
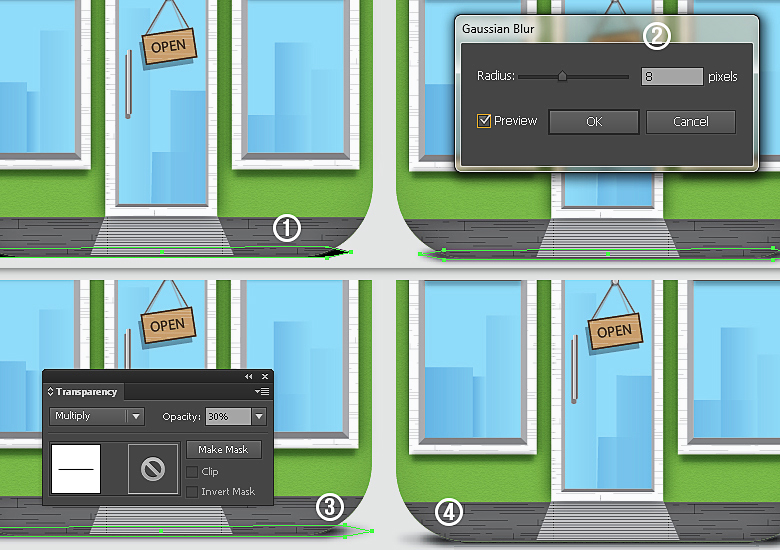
Step 20
To make shop shadow, draw the shape shown below using Pen Tool (“P”) and apply 8px Gaussian blur effect on it. After that, make its copy, increase its width using Selection Tool (“V”) and decrease its opacity to 30%.
Final result:
That’s it guys our app icon is ready. Hope you enjoyed the tutorial and learned something useful.
 Anum Khan
Anum is Web and Graphic designer. Addicted to Photoshop and crazy for pixel perfection. She is also an active blogger, sharing her passions, skills and creative details on her blog Websoulz. She loves to connect with the community, sharing the latest design gossips and rolling her eyes on boring trends.


