How to Transition from Photoshop to InDesign

I recently had to break out of my box and start working in a design tool with which I have very little experience. Short of opening up InDesign and thinking, “Okay. This looks cool. See ya!”, I hadn’t really messed with it much. 99% of my work is web-based, and InDesign is all about the physical printing.
In case you decided to switch from Adobe Photoshop to Adobe InDesign, you may feel a bit intimidated like I did. It’s a new piece of software, and that usually implies some (usually steep) learning curve. Guess what? You got it all wrong. It was easy, painless, and for the most part I was able to transition seamlessly. Here’s why.

Why Switch at All?
First thing’s first, why do you feel the need to switch over to InDesign in the first place? In most cases, you’ve been handed a project by a client that is in the .indd file format. Or, maybe you’re latest project is a multi-page publication.
InDesign allows you to define a layout and then gives writers the ability to change up the content on the fly without destroying your well-designed layout. Sure, you can try to design a 12-page publication in Photoshop, but you can be sure of one thing — the editors are going to come in at the last minute and want a bunch of new content added or cut out. This can completely change your layout and which text flows from one page to the next.
InDesign is going to be your best bet if you want to have quick control of the global document without having to mess with multiple documents in Photoshop.
Easy to Switch
Photoshop and InDesign are produced by Adobe, and over the last few years they’ve done a good job of making the two systems talk to each other. Adobe has gone out of their way to make the interface between Photoshop and InDesign as similar as possible. In short, you can generally open up InDesign and know what you’re dealing with pretty quickly. There are some software-specific tools, but nothing you can’t figure out by clicking around or doing a quick search for.
So, what I’m trying to say is that if you’re a Photoshop guru (or something along the lines), it won’t be cumbersome for you to transition to InDesign. That’s because you’ll have a very similar workflow and tools (with a few peculiar ones). Other than that, you can arrange your work environment as you see fit because you can easily set up your keyboard shortcuts so that they work exactly the way you are used to.
Well-Known Features and Tools
You’ll be able to work with such familiar features as copying layer styles, nesting items in folders, hiding and unhiding objects, smart objects, and so on and so forth. So, you’ll feel almost like you’re at your Photoshop home. And, my favorite feature is that you can just import layers with your .PSD file. This allows you to use pre-designed layers instead of creating brand new ones from scratch within your InDesign document.
This feature alone is a life-saver for me, not to mention a huge time-saver. If I have a particular visual concept, I can do it in Photoshop and then quickly drop the PSD file into InDesign. Just use the “File” > “Place” feature to drop the Photoshop file wherever you want it.

InDesign Specific Features
Although Adobe InDesign and Photoshop are extremely similar, there are a bunch of specific features that make InDesign inevitable for magazine and publication creation. To provide a general idea, I’ll point out a few of the neat tools that make you feel like you can make a magazine in a matter of minutes.
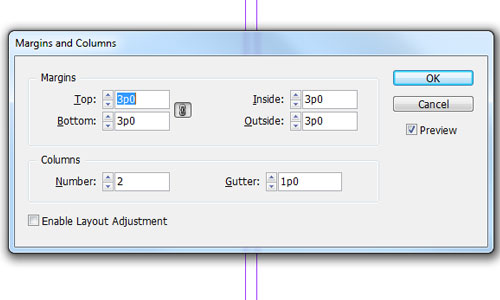
As you know, InDesign is primarily used for easy magazine creation. And most of the features streamline that exact process. For starters, you can automatically distribute your text layer across several columns (as they usually do it in magazines). Secondly, if there’s enough text for two columns but your textual content is in one, you can easily split your text with just a few clicks of the mouse. These features are found in the Layout menu.
The Mini Bridge tool allows you to load linked content (images) from a separate InDesign document (.indd). That’s very useful, because you can just drag the images that you need instead of hunting for them. Plus, you can just auto fit them so that they look like they truly belong there. Other than that, you can use the new gap tool that enables you to re-size images in a certain frame with the gaps between the images in mind. That proves to be of great use if you just want to bring more attention to one image by enlarging it.
There are lots of other features unique to InDesign, but the main point I’m trying to make is that they’re generally going to be text-layout-based. InDesign is awesome for multi-page projects where you have a lot of text content. It gives you near infinite control of the layout and typography. Photoshop will cover all your graphic elements, but InDesign is what you’ll want to use for text and general layout.
iPad-Friendly
And last but not least, with the invention of the iPad, people tend to use digital magazines. And that’s exactly why InDesign allows you to create interactive magazines as well. You can animate images and text, add music, and even videos.
Since you can create animation, you also have the option to export your animated content as .swf or even .fla files so that you can work on them with the help of Flash. Again, that proves that Adobe does its best to integrate all of their products.
Conclusion
You can switch quite easily from Photoshop mastery to Adobe Indesign expertise. There’s a small learning curve, but if you’ve lived most of your design life in Photoshop, you’ll be amazed to see how familiar the overall interface is. If your job involves creating magazines, booklets, or even brochures, you need to immediately invest a day or two in learning InDesign, because it’ll save you a whole lot of time that would otherwise be spent meddling in the wrong Adobe software for the job.
Did you start with Photoshop and master InDesign later? How did you make the transition? Do you use both applications together for certain projects and purposes?
Frequently Asked Questions about Transitioning from Photoshop to InDesign
How can I import a PSD file into InDesign with layers so it can be edited and saved as an InDesign file?
To import a PSD file into InDesign with layers, you need to follow these steps. First, open your InDesign document and select the place where you want to insert the PSD file. Go to File > Place, then select the PSD file you want to import. In the import options, check the ‘Show Import Options’ box. This will open a new window where you can select the layers you want to import. After selecting the layers, click OK. The PSD file will be placed in your InDesign document with the selected layers. You can then edit the layers as needed and save the document as an InDesign file.
How can I convert a PSD file to an InDesign file?
Converting a PSD file to an InDesign file is a straightforward process. First, open your PSD file in Photoshop. Then, go to File > Save As and choose the format you want to save the file in. Choose ‘Photoshop PDF’ and click Save. Now, open InDesign and go to File > Open. Select the PDF file you just saved and click Open. The PSD file will be converted to an InDesign file.
How can I use Photoshop assets in InDesign?
Photoshop assets can be used in InDesign by importing them. To do this, open your InDesign document and go to File > Place. Select the Photoshop file you want to import and click Open. The Photoshop asset will be placed in your InDesign document. You can then move, resize, and edit the asset as needed.
How can I start using Photoshop and InDesign together?
Using Photoshop and InDesign together can greatly enhance your design workflow. You can start by creating your design elements in Photoshop, then importing them into InDesign for layout and text formatting. To do this, save your Photoshop files as PSDs, then import them into InDesign using the File > Place command. You can then arrange and format your design elements in InDesign.
How can I convert a PSD file to an INDD file?
Converting a PSD file to an INDD file involves saving the PSD file as a PDF in Photoshop, then opening that PDF in InDesign. To do this, open your PSD file in Photoshop and go to File > Save As. Choose ‘Photoshop PDF’ as the format and click Save. Then, open InDesign and go to File > Open. Select the PDF file you just saved and click Open. The PSD file will be converted to an INDD file.
Tara Hornor has a degree in English and has found her niche writing about marketing, advertising, branding, graphic design, and desktop publishing. She is a Senior Editor for Creative Content Experts, a company that specializes in guest blogging and building backlinks. In addition to her writing career, Tara also enjoys spending time with her husband and two children.