There are few products and services that you can’t buy on the Internet. Everything from personal shoppers, seafood markets, and large established brands have a presence online. Whether your business is large or small, effective marketing practices are the key to making sales online, and as designers we have a large part to play in the process. Showcasing your products or services, attracting customers, and persuading them to purchase is the basis for much of our web design work. One of the most effective ways to convey your offer to comparative shoppers is with a pricing table. So, today I’m going to show you how to design a beautiful unique price table in our very own Photoshop. Along the way, you will learn the use of pen tool, shape tools, and various other layer styling options and tricks to achieve the final result.
So, let’s get started!
Resources
PW Pattern
Fabric Pattern
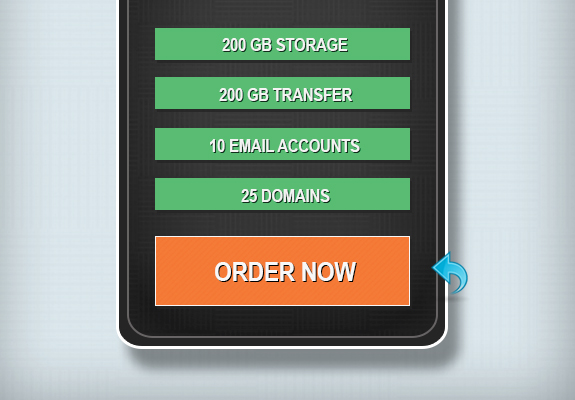
Now before we start let’s have a look at our final outcome. (Download the finished, layered, PSD file.)

Step 1
Open your Photoshop and create a new file with a width of 600px and a height of 700px.

Step 2
Now we will start with the background, so create a new layer. Then, select the paint bucket tool and fill the background with color #9fc7d9.
Step 3
Select the background layer and click on “Layer” > “Layer styles” > “Pattern overlay” (or double-click on the selected layer) and add one of the PW patterns from the aforementioned set. Change the blending mode to “Lighten” and set the pattern opacity to 67%.

Step 4
Again, click on “Layer” > “Layer styles” > “Inner shadow” (or double-click on the selected layer) and add some inner shadow with the “Multiply” blending mode. Now, reduce the opacity to 41%.

Step 5
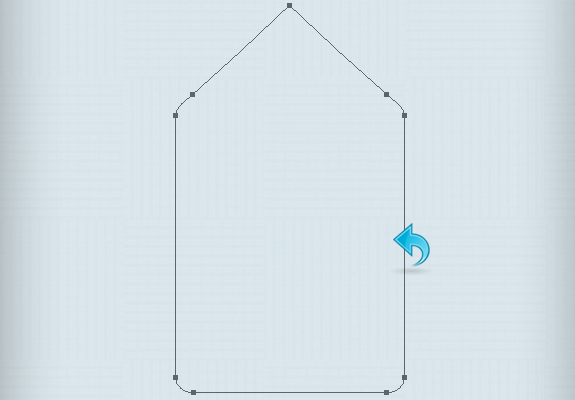
Our background is done, so let’s start with our pricing table. First, create a new layer, and then click on the pen tool to create a pricetag shape shown below.
Step 6
Now, fill the shape with color #252525. You can also right-click on the path, select “Make selection” and then fill it using the paint bucket tool.

Step 7
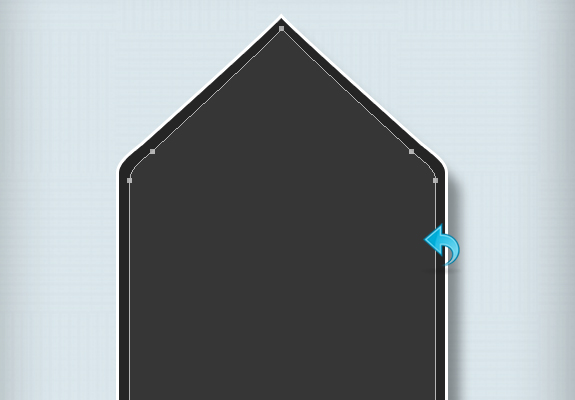
Now, click on “Layer” > “Layer styles” > “Stroke” (or double-click on the selected layer) to add some stroke to our shape. Add a 3px stroke with 100% opacity and select “inside” for position.

Step 8
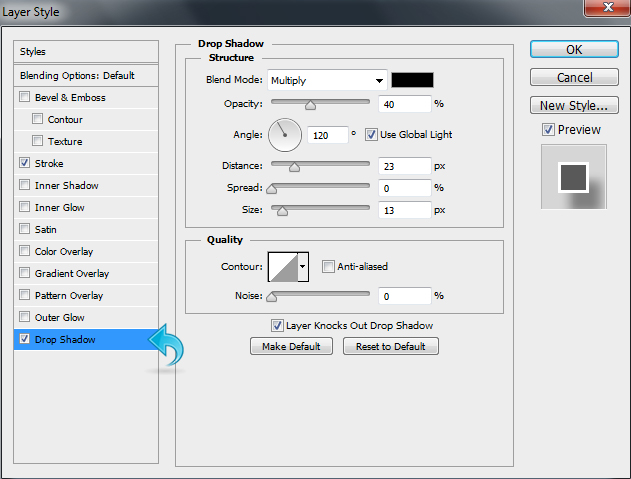
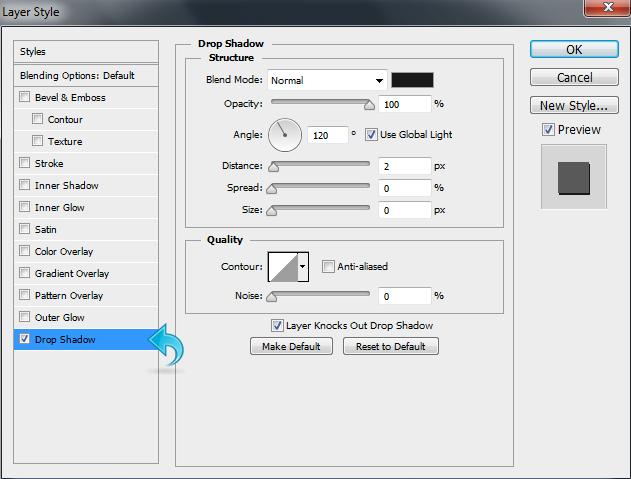
Again, click on “Layer” > “Layer styles” > “Drop shadow” (or double-click on the selected layer), change the blending mode to “Multiply,” and reduce the opacity to 40%. Adjust the shadow distance to 23px and adjust the size to 13px.
Step 9
Create a new layer (click on “Layer” > “New” > “Layer”) and then click on the pen tool to create another shape. Right-click on the path and select “Make selection.” Now, select the paint bucket tool and fill the shape with color #363636.
Step 10
Now, click on “Layer” >”Layer styles” > “Stroke” (or double-click on the selected layer) to add some stroke to our shape. Add a 2px stroke with 100% opacity using color #676363.

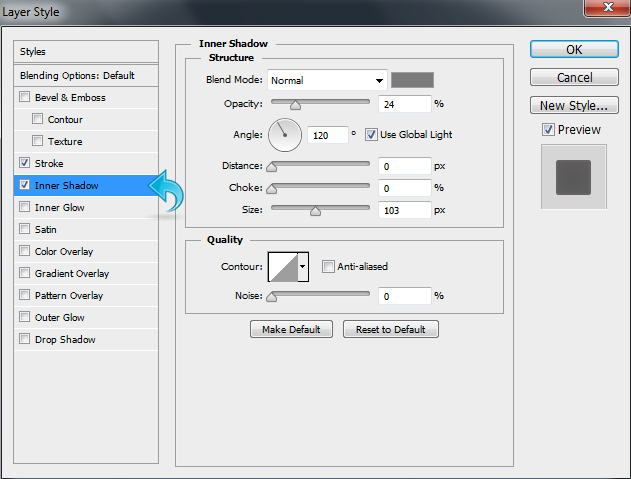
Step 11
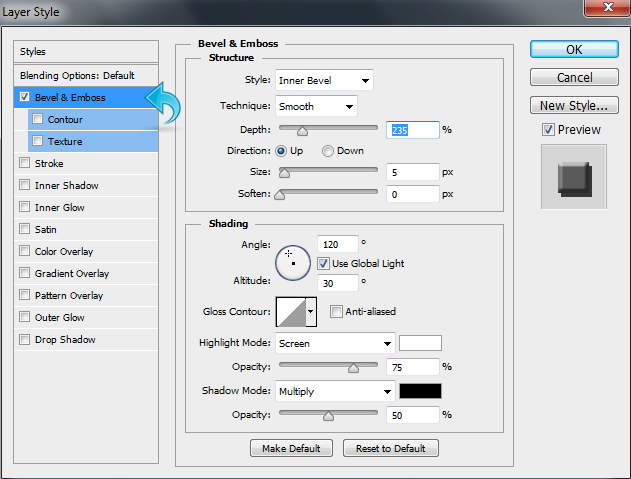
Again, click on “Layer styles” to add “Inner shadow.” Use the settings shown in the image below.
Step 12
Again, click on layer styles to add some “Inner glow.” Change the blending mode to “Linear burn” and keep the rest of the settings the same as the image below.

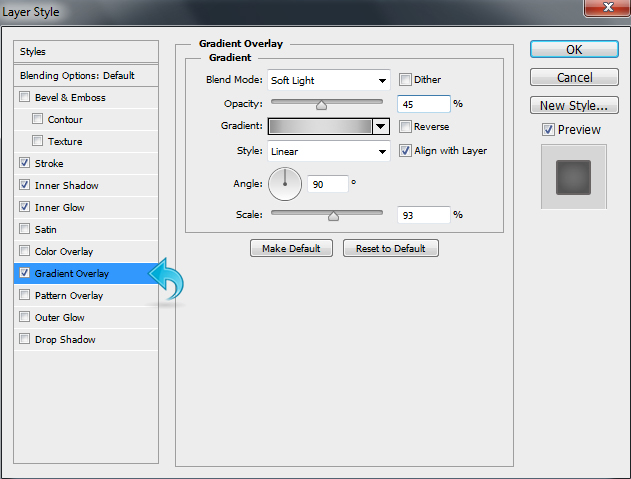
Step 13
Again, click on “Layer styles” to add a “Gradient overlay.” Change the blending mode to “Soft light” and reduce the opacity to 45%. Keep the rest of the settings the same as shown in the image below.
Step 14
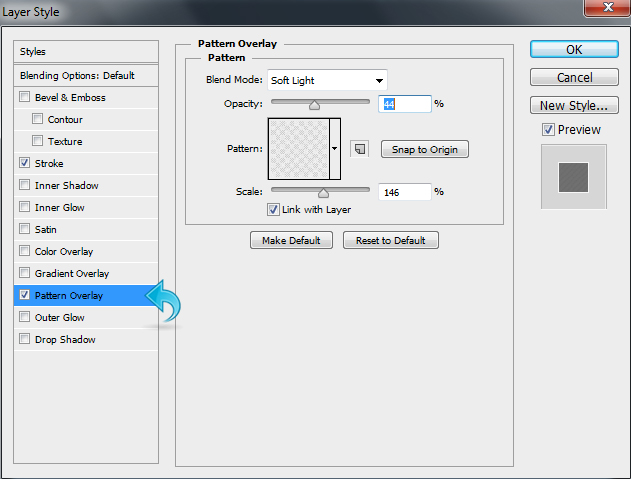
Select the shape layer and click on “Layer” > “Layer styles” > “Pattern overlay” (or double-click on the selected layer) and add another PW pattern from the aforementioned set. Adjust the opacity to 65% and the scale to 41%.

Step 15
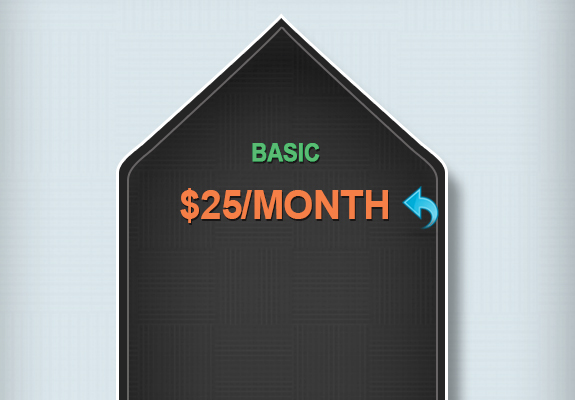
Now, let’s start with the details, select the type tool and add a title using color #3fcf74. Then, click on “Layer styles” and add some drop shadow to our text. Keep the shadow settings the same as shown in the image below.
Step 16
Repeat the same process and add some more text using color #fd8044. Then, add some drop shadow with the same settings as above.
Step 17
Now, select the rectangle tool and create a small rectangle using color #3fcf74. Then, click on “Layer styles” and add drop shadow to the rectangle. Keep the settings the same as shown in the image below.

Step 18
Select the type tool and add text using color #f4f3f3, then click on “Layer styles” to add some drop shadow. Use the settings below.

Step 19
Repeat the same process and create some more rectangles and add text using the same settings shown above.

Step 20
Now, let’s create the order button. Select the rectangle tool and create a small rectangle using color #f26522. Then, click on “Layer styles” to add some stroke, pattern, and drop shadow. Use the settings shown below.


Step 21
Select the type tool to add text to our order button. Add text using color #f8f8f8, then click on “Layer styles” and add some drop shadow using the same techniques employed in the above text.
Step 22
Now, let’s start with the rope, first we will create a hole. So select the ellipse tool and create a small circle using color #959595. Then, create another circle, fill it with color #e2eef4, and place it in the middle of the first circle.

Step 23
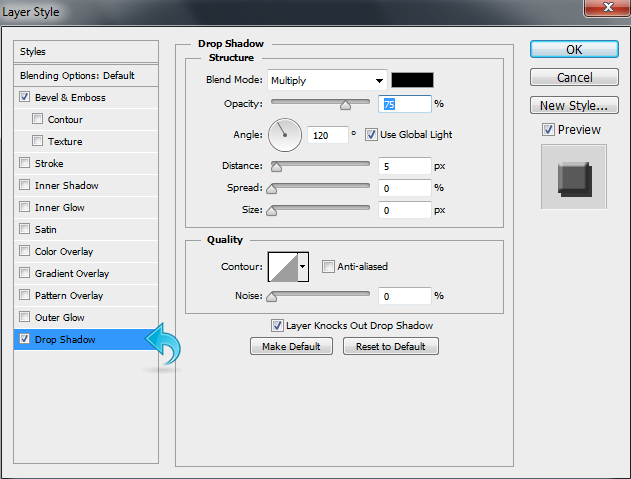
Select the first circle and click on “Layer styles” to add “Bevel & Emboss” and “Drop Shadow.” Use the settings shown below.
Step 24
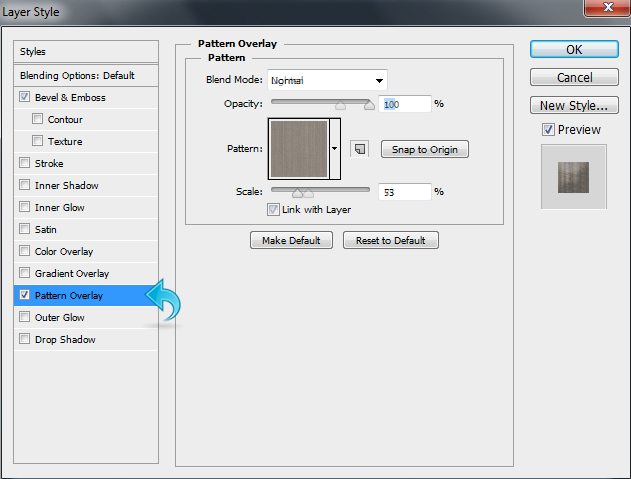
For the rope, select a hard round brush and create a straight line using pure white. Then, click on the “Layer styles” to add “Bevel & Emboss” and “Pattern.”

Step 25
Now, add the shadow to the rope, use a soft round brush with color #2d2d2d, then click on “Filter” > “Blur” > “Gaussian Blur.” Adjust the radius to 8.8px.
We are done! Our sleek and stylish pricing table is ready. I hope you enjoyed the tutorial. Take care!
 Anum Khan
Anum is Web and Graphic designer. Addicted to Photoshop and crazy for pixel perfection. She is also an active blogger, sharing her passions, skills and creative details on her blog Websoulz. She loves to connect with the community, sharing the latest design gossips and rolling her eyes on boring trends.