

In this article, you’ll learn how to build a GitHub tracker that notifies users when there’s a new Issue/PR on a tracked repository by sending push notifications.
GitHub already sends notifications through emails if you’ve opted in, but many studies have shown that push notifications reach users better than emails do. After you’ve built the GitHub tracker by following this tutorial, you’ll have learned how to:
- add a service worker and convert the tracker to a PWA
- subscribe to push notifications
- use the GitHub API
- send push events through Vercel cloud functions
- periodically fetch new issues using EasyCron
Prerequisites
There are a few skills and services you’ll need to follow this article:
- Node.js and npm installed
- prior Svelte knowledge
- a free GitHub account, since we’re using the GitHub API
- a free MongoDB Atlas account to use MongoDB in the cloud
- a free Vercel account to deploy the application and for cloud functions
What are Push Notifications?
Let’s take a look at what these so called “push notifications” are.
You must be familiar with regular notifications. These are little bubbles of text that appear on your screen to notify you of something. Push notifications are similar, except that they aren’t generated on-demand, but they are generated upon receiving push events. Push notifications work when an app is closed, while regular notifications require you to have the app open.
Push notifications are supported in modern web browsers like Chrome by using something called service workers. Service workers are little pieces of JavaScript that run separately from the browser’s main thread, and as a result, can run offline if your app is installed as a PWA (progressive web application).
Push notifications are used in chat applications to notify users when they have unread messages, in games, to notify users of game events, in news sites, to notify users of breaking articles, and for many other purposes.
There are four steps to show push notifications in your app:
- request permission with
window.Notification.requestPermission() - convert your app to a PWA and install it
- subscribe to push events
- upon receiving a push event, send the notification
Step 1: Creating the Tracker
Let’s use Svelte with Vite.js instead of Rollup in this article. Vite is, as its name suggests, faster than Rollup, and also provides built-in support for environment variables. To create a new project with Svelte and Vite, run this command:
npm init vite
Select the framework to be svelte. You can use TypeScript if you want. I’ll be using regular JavaScript.
Next, cd into the project folder and you can add TailwindCSS to your application and install all dependencies with these commands:
npx svelte-add tailwindcss

# Install packages
yarn install # or npm install
Finally, open the project in your favorite code editor and run npm run dev or yarn dev to start the application on http://localhost:3000.
How the tracker will work
We’ll use the GitHub API to get a list of issues and pull requests for a repository that the user has tracked. A user’s tracked repositories and their username will be stored in the MongoDB database.
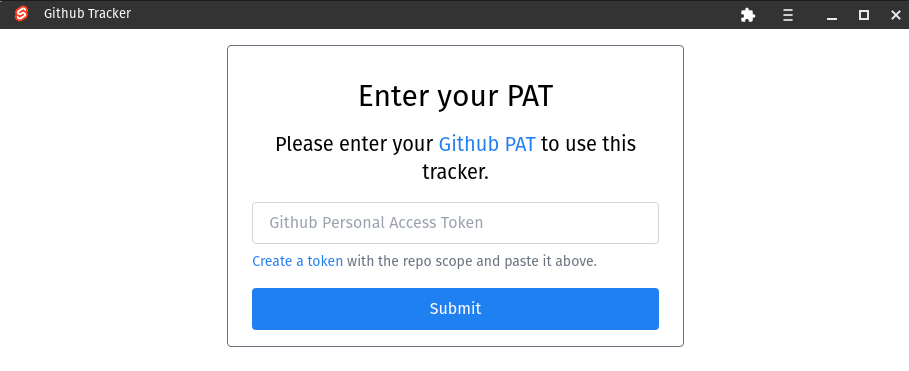
The first step would be to prompt the user for their username. Create src/lib/UsernamePrompt.svelte, which will be the component that will do so. Here’s my UI for the form, but you can design it however you want:
<script>
  let username = "";
  async function submit() {
    // TODO
  }
</script>

<form
  on:submit|preventDefault="{submit}"
  class="mx-auto min-w-[350px] max-w-[1100px] w-[50%] border border-gray-500 rounded my-4 px-6 py-4"
>
  <h1 class="text-center text-3xl m-4">Enter a username</h1>
  <p class="text-center text-xl m-4">Enter a username to use this tracker</p>

  <input
    type="text"
    class="rounded px-4 py-2 border border-gray-300 w-full outline-none"
    placeholder="Username"
    aria-label="Username"
    bind:value="{username}"
  />

  <button
    class="mt-4 border border-transparent bg-blue-500 text-white rounded px-4 py-2 w-full"
  >
    Submit
  </button>
</form>
Add this component in App.svelte like so:
<script>
  import UsernamePrompt from "./lib/UsernamePrompt.svelte";
</script>

<UsernamePrompt />
Next, let’s add the main tracker UI. Create file src/lib/Tracker.svelte and add the below code in it:
<script>
  let repo = "";
  function track() {
    // TODO
  }

  function untrack(repo) {
    // TODO
  }
</script>

<form
  on:submit|preventDefault={track}
  class="mx-auto min-w-[350px] max-w-[1100px] w-[50%] border border-gray-500 rounded my-4 px-6 py-4"
>
  <h1 class="text-center text-3xl m-4">GitHub tracker</h1>

  <input
    type="text"
    class="rounded px-4 py-2 border border-gray-300 w-full outline-none"
    placeholder="Enter the repository's URL"
    aria-label="Repository URL"
    bind:value={repo}
  />
  <button
    class="mt-2 border border-transparent bg-blue-500 text-white rounded px-4 py-2 w-full"
    >Track repository</button
  >

  <h2 class="mt-4 text-2xl">Tracked repositories</h2>
  <ul class="m-2 list-decimal">
    <!-- We'll use a loop to automatically add repositories here later on. -->
    <li class="py-1 flex items-center justify-between">
      <a class="text-gray-500 hover:underline" href="https://github.com/test/test"
        >https://github.com/test/test</a
      >
      <button class="text-red-500 cursor-pointer" on:click={() => untrack("")}
        >Untrack</button
      >
    </li>
  </ul>
</form>
To test out your component, temporarily swap out the UsernamePrompt component for the new Tracker component in App.svelte:
<script>
  // import UsernamePrompt from "./lib/UsernamePrompt.svelte";
  import Tracker from "./lib/Tracker.svelte";
</script>

<!-- <UsernamePrompt /> -->
<Tracker />
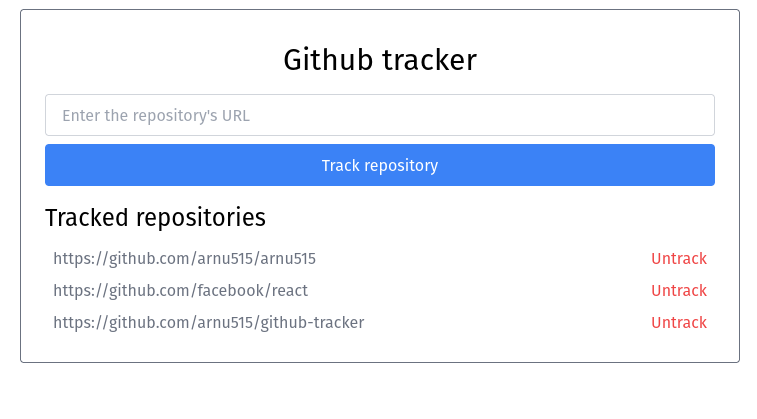
Your screen should now look like this:
Note: remember to restore App.svelte to its previous code!
Step 2: Setting up Cloud Functions
We need to have a back-end server to send push events to our application. This means that you need to create a new (maybe) ExpressJS project, and then deploy that separately. This will all be a headache for someone just experimenting with push notifications.
Vercel Cloud Functions to the rescue! Cloud functions are like Express routes. They can run code and give you a response when you fetch its URL. Vercel has support for cloud functions; you just have to create files in the api folder. You’ll be using cloud functions to interact with MongoDB, since exposing secrets client-side is never a good thing.
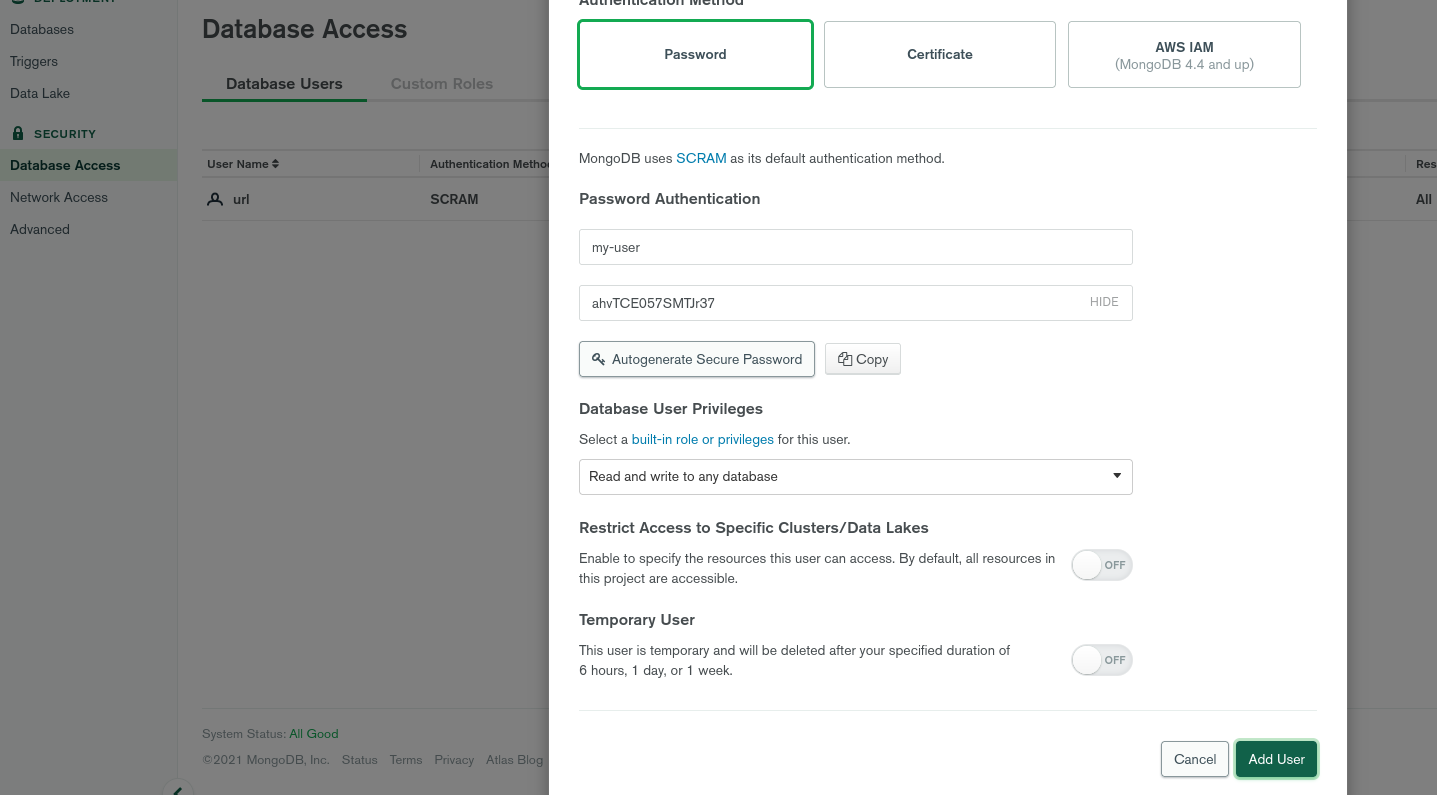
First, make sure you have a Cluster in MongoDB Atlas. MongoDB has a free plan (M0), so be sure to create one if you haven’t already. Now, go to the Database Access tab in the sidebar of your Atlas dashboard. Add a new Database User by clicking the green button on the right side. Enter in the user’s details (don’t forget the password), and create the user.
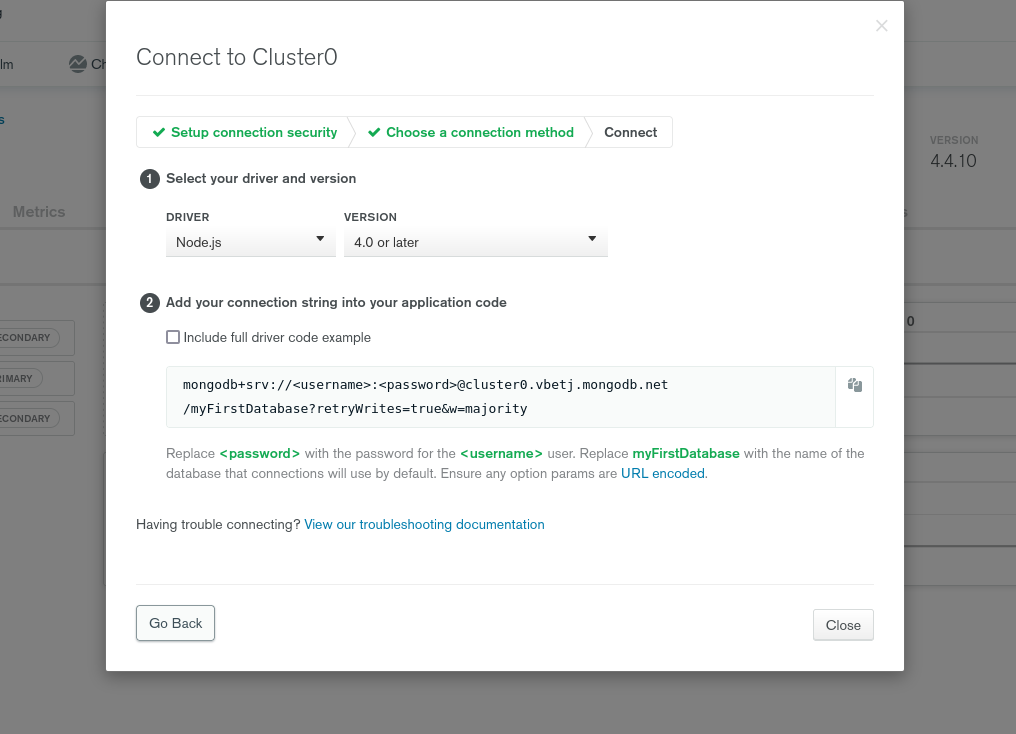
To connect to the database, you’ll need the connection string. Save the new user and password somewhere and head to your Cluster’s Overview. Click the Connect button on the right side and select Connect your Application as the method of connection. You should see a connection string similar to the one below.
Now that you have the connection string, you can connect to your database, but first, you need to deploy the current application to Vercel. The easiest way to do this is using GitHub.
Create a new GitHub repository and push your code to it. Next, head to your Vercel Dashboard and click the New Project button. Import your GitHub Repository, make sure the framework is Vite, and add an environment variable called MONGODB_URL. Set its value to the connection string of the MongoDB database.
Once your website has been deployed, you need to change your local development command from yarn dev to vercel dev. Upon running the command, if you’re asked to link to an existing project, click yes.
Note: make sure to install the Vercel CLI with npm i -g vercel if you haven’t already.
Like me, if you run into a problem with using vite with vercel dev, be sure to change the Development Command of your project to vite --port $PORT from vite in the Vercel Dashboard.
This will allow us to use cloud functions with the correct environment variables locally.
Let’s add a helper file that will allow us to access MongoDB without opening up too many connections. Create file api/_mongo.js and put the following code in it. A file in the api directory that is prefixed with a _ will not be treated as a cloud function. This allows us to add helpers and other logic in separate files:
const { MongoClient } = require("mongodb");

const mongo = new MongoClient(process.env.MONGODB_URL);

// Export the connection promise
export default mongo.connect();
Exporting the connection promise instead of the main client itself will prevent us from having redundant connections, since we’re working in a serverless platform.
Using CommonJS instead of ESModules
Notice how I am using require instead of import? This is because, as of the time of writing, Vercel Cloud Functions doesn’t support ESModule import statements in JavaScript files. Instead, you need to use CommonJS require statements.
There’s one problem here. If you see the package.json of our app, you’ll notice that it has a line "type": "module". This means that each JavaScript file in the project is an EsModule. This is not what we want, so to mark all files in the api directory as CommonJS files, so we can use the require statement, create api/package.json and add this line in it:
{
  "type": "commonjs"
}
This will now allow us to use require statements in the api directory. Install the MongoDB connection driver with this command:
# Don't forget to CD!
cd api
npm i mongodb # or use yarn
Step 3: Adding functionality
The tracker, as of now, doesn’t really work, so let’s fix that.
Authentication
For authentication, we need to store the username that the user has input in the MongoDB database.
Create a file /api/storeusername.js. This will be a cloud function and will be mapped to http://localhost:3000/api/storeusername. Put the below code in it:
const mongoPromise = require("../src/lib/mongo");
// All cloud functions must export a function that takes a req and res object.
// These objects are similar to their express counterparts.
module.exports = async (req, res) => {
  // TODO
};
Next, get the MongoDB client like so:
module.exports = async (req, res) =>
  // Wait for the client to connect
  const mongo = await mongoPromise;
}
Extract the username from the request’s body:
// ...
const { username } = req.body;

// Check if the username is valid
if (typeof username !== "string" || !username.trim()) {
  res.status(400).json({ message: "Please send the username" });
  return;
}
Next, you need to store this username in the database:
// Get the collection
const usersCol = mongo.db().collection("users");
// Check if the username already exists in the database
if (await usersCol.findOne({ _id: username })) {
  res.status(400).json({ message: "User already exists!" });
  return;
}
// We want the username to be the identifier of the user
await usersCol.insertOne({ _id: username });

// Everything went well :)
res.status(200).json({ message: "Username recorded" });
Finally, this is how the api/storeusername.js file should look:
const mongoPromise = require("./_mongo");

module.exports = async (req, res) => {
  const mongo = await mongoPromise;

  const { username } = req.body;
  if (typeof username !== "string" || !username.trim()) {
    res.status(400).json({ message: "Please send the username" });
    return;
  }

  // Get the collection
  const usersCol = mongo.db().collection("users");

  // Check if the username already exists in the database
  if (await usersCol.findOne({ _id: username })) {
    res.status(400).json({ message: "User already exists!" });
    return;
  }

  // We want the username to be the identifier of the user
  await usersCol.insertOne({ _id: username });

  // Everything went well :)
  res.status(200).json({ message: "Username recorded" });
};
Deploy your application to Vercel with vercel ., or by pushing to GitHub, and your serverless function should be live! You can test it using cURL with this command:
curl -X POST -H "Content-Type: application/json" -d '{"username": "test"}' https://your-app.vercel.app/api/storeusername
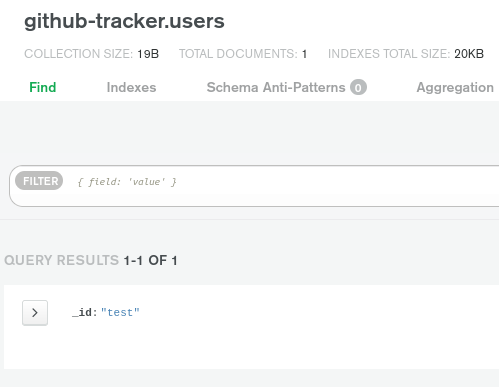
This should create a new document in the users collection with the _id field being the username we just gave.
Now all that’s left is to fetch this function on the front end. In src/lib/UsernamePrompt.svelte, in the submit function, first you need to send a request to the cloud function, and then put the username in localStorage, so we know that the user is authenticated. You can send requests with the fetch function:
async function submit() {
  const res = await fetch("/api/storeusername", {
    body: JSON.stringify({ username }),
    headers: {
      "Content-Type": "application/json",
    },
    method: "POST",
  });
  const data = await res.json();
  if (!res.ok) alert(data.message);
  else {
    // Store the username in localStorage
    localStorage.setItem("username", username);
    // Reload the page
    window.location.reload();
  }
}
We’re reloading the page, because in App.svelte, when the page is loaded, we need to check if there is a username in localStorage. If there is, we can skip the UsernamePrompt screen. To do so, add this code in the script tag of App.svelte:
<script>
  import { onMount } from "svelte";
  import UsernamePrompt from "./lib/UsernamePrompt.svelte";
  import Tracker from "./lib/Tracker.svelte";

  let isLoggedIn = false;
  onMount(() => {
    // If there is a username in the localStorage, set isLoggedIn to true
    isLoggedIn = !!localStorage.getItem("username");
  });
</script>
The above code will check the localStorage for a username and set isLoggedIn to true if it exists. Next, all we have to do is update the DOM. Right under the script tag of App.svelte, add this:
{#if !isLoggedIn}
<UsernamePrompt />
{:else}
<Tracker />
{/if}
Tracking and untracking repositories
Now let’s add the functionality for the actual tracking features of the tracker. If you open Tracker.svelte, you’ll notice there are two functions — track() and untrack(). These functions should track and untrack repositories respectively, by adding them to the database.
But before that, you need to add a few more cloud functions. One to track a repository, another to untrack, and one last to get a user’s tracked repositories.
Let’s work on them one by one.
Tracking Repositories
Create file api/trackrepo.js. This will be mapped to /api/trackrepo:
const mongoPromise = require("./_mongo");

module.exports = async (req, res) => {
  const mongo = await mongoPromise;
  // TODO
};
When a user wants to track a repository, they’ll send a POST request to this function with the name of the repository and their username in the body. The function will add the name of the repository in the trackedRepos field of the users collection. Add some code to get these fields from the body:
const { username, repo } = req.body;
if (typeof username !== "string" || typeof repo !== "string") {
  res.status(400).json({ message: "Invalid body" });
  return;
}
And finally, add the code to track the repository by adding it to the database:
// Get the users collection
const usersCol = mongo.db().collection("users");
let user = await usersCol.findOne({ _id: username });
if (!user) {
  res.status(400).json({ message: "User not found" });
}
// Add repository to user's tracked repositories
user.trackedRepos = !user.trackedRepos ? [repo] : [...user.trackedRepos, repo];
// Helps avoid duplicates
user.trackedRepos = [...new Set(user.trackedRepos)];
// Save changes to DB
user = await usersCol.updateOne({ _id: username }, { $set: user });
res.status(200).json({ user });
And this is how api/trackrepo.js should look:
const mongoPromise = require("./_mongo");

module.exports = async (req, res) => {
  const mongo = await mongoPromise;

  const { username, repo } = req.body;
  if (typeof username !== "string" || typeof repo !== "string") {
    res.status(400).json({ message: "Invalid body" });
    return;
  }

  const usersCol = mongo.db().collection("users");
  const user = await usersCol.findOne({ _id: username });
  if (!user) {
    res.status(400).json({ message: "User not found" });
  }
  user.trackedRepos = !user.trackedRepos
    ? [repo]
    : [...user.trackedRepos, repo];
  user.trackedRepos = [...new Set(user.trackedRepos)];
  await usersCol.updateOne({ _id: username }, { $set: user });
  res.status(200).json({ user });
};
Now it’s time to use this function in the tracker. Open src/lib/Tracker.svelte and change the track() function to this:
function track() {
  // If there is no username, reload the page and end the function
  if (!localStorage.getItem("username")) return window.location.reload();

  fetch("/api/trackrepo", {
    body: JSON.stringify({ username: localStorage.getItem("username"), repo }),
    headers: { "Content-Type": "application/json" },
    method: "POST",
  })
    .then(async (r) => {
      // Return the data and the response itself
      return { r, data: await r.json() };
    })
    .then(({ r, data }) => {
      if (!r.ok) alert(data.message);
      else console.log("Repository tracked");
    });
  trackedRepos = [...trackedRepos, repo];
  repo = "";
}
Now, when you enter a repository in the input and click Track, it should get saved in the database.
Untracking repositories
Let’s add a cloud function to untrack a repository. Create file api/untrackrepo.js. This will be mapped to /api/untrackrepo:
const mongoPromise = require("./_mongo");

module.exports = async (req, res) => {
  const mongo = await mongoPromise;
  // TODO
};
The request body of this cloud function will be the same as that of the trackrepo function — the user’s username and the repo:
const { username, repo } = req.body;
if (typeof username !== "string" || typeof repo !== "string") {
  res.status(400).json({ message: "Invalid body" });
  return;
}
Next, here comes the code to delete the repository from the user’s trackedRepos:
const usersCol = mongo.db().collection("users");
const user = await usersCol.findOne({ _id: username });
if (!user) {
  res.status(400).json({ message: "User not found" });
}
if (!Array.isArray(user.trackedRepos)) {
  user.trackedRepos = [];
} else {
  // Remove the repo from the user's list of tracked repos.
  user.trackedRepos = user.trackedRepos.filter((r) => r !== repo);
}
// Save changes
await usersCol.updateOne({ _id: username }, { $set: user });
res.status(200).json({ user });
And this is how api/untrackrepo.js should look:
const mongoPromise = require("./_mongo");

module.exports = async (req, res) => {
  const mongo = await mongoPromise;

  const { username, repo } = req.body;
  if (typeof username !== "string" || typeof repo !== "string") {
    res.status(400).json({ message: "Invalid body" });
    return;
  }

  const usersCol = mongo.db().collection("users");
  const user = await usersCol.findOne({ _id: username });
  if (!user) {
    res.status(400).json({ message: "User not found" });
  }
  if (!Array.isArray(user.trackedRepos)) {
    user.trackedRepos = [];
  } else {
    user.trackedRepos = user.trackedRepos.filter((r) => r !== repo);
  }
  await usersCol.updateOne({ _id: username }, { $set: user });
  res.status(200).json({ user });
};
It’s now time to utilize this cloud function on the front end. In the untrack() function of src/lib/Tracker.svelte, add this code:
function untrack(repo) {
  // If there is no username, reload the page and end the function
  if (!localStorage.getItem("username")) return window.location.reload();

  fetch("/api/untrackrepo", {
    body: JSON.stringify({ username: localStorage.getItem("username"), repo }),
    headers: { "Content-Type": "application/json" },
    method: "POST",
  })
    .then(async (r) => {
      // Return the data and the response itself
      return { r, data: await r.json() };
    })
    .then(({ r, data }) => {
      if (!r.ok) alert(data.message);
      else console.log("Repository untracked");
    });
  trackedRepos = trackedRepos.filter((r) => r !== repo);
}
You’ll notice that it’s very similar to the track() function, because it’s literally the same; just the URL has been updated. You can’t really test this out just yet, because we aren’t displaying a list of the tracked repositories, so let’s fix that.
Listing tracked repositories
This part is pretty simple. You just need to fetch the user’s tracked repositories from the database and display it on the front end. Create a cloud function api/listrepos.js and add the following code to it:
const mongoPromise = require("./_mongo");

module.exports = async (req, res) => {
  const mongo = await mongoPromise;
  const username = req.query.username;
  if (typeof username !== "string" || !username.trim()) {
    res
      .status(401)
      .json({ message: "Please send `username` in the querystring." });
    return;
  }

  const usersCol = mongo.db().collection("users");
  const user = await usersCol.findOne({ _id: username });
  if (!user) {
    res.status(400).json({ message: "User not found" });
  }
  let repositories = [];
  if (Array.isArray(user.trackedRepos)) {
    repositories = user.trackedRepos;
  }
  res.status(200).json({ repositories });
};
Since the cloud function will be called using an HTTP GET request, you can’t put a body in it, so we’re using the query string to pass the username; and since user.trackedRepos can be null, we’re making sure to return an array. Next, it’s time to use this cloud function on the front end! Create an async function called fetchRepos in the src/lib/Tracker.svelte file. This function will be responsible for fetching the user’s tracked repositories from the database using the cloud function we just created:
async function fetchRepos() {
  // If there is no username, reload the page and end the function
  if (!localStorage.getItem("username")) return window.location.reload();

  const res = await fetch(
    "/api/listrepos?username=" + localStorage.getItem("username")
  );
  const data = await res.json();
  if (!res.ok) alert(data.message);
  else return data.repositories;
}
We need to fetch this function when the component is mounted. This can be done using the onMount hook in Svelte. When the component is mounted, I want to set the returned value of the above function to a variable called trackedRepos, so we can use it in the DOM:
import { onMount } from "svelte";

let trackedRepos = [];
onMount(async () => {
  trackedRepos = await fetchRepos();
});
Now that we have access to the user’s tracked repositories, let’s update the HTML template in Tracker.svelte to show an accurate list of tracked repositories:
<!-- ... -->
  <ul class="m-2 list-decimal">
    {#each trackedRepos as repo}
      <li class="py-1 flex items-center justify-between">
        <a class="text-gray-500 hover:underline" href="https://github.com/{repo}"
          >https://github.com/{repo}</a
        >
        <button class="text-red-500 cursor-pointer" on:click={() => untrack(repo)}
          >Untrack</button
        >
      </li>
    {/each}
  </ul>
<!-- ... -->
We still have to reload the page to see any changes. Let’s fix that by updating the DOM every time the track or untrack buttons are clicked:
function track() {
  // ...
  trackedRepos = [...trackedRepos, repo];
  repo = "";
}

function untrack(repo) {
  // ...
  trackedRepos = trackedRepos.filter((r) => r !== repo);
}
And here’s how Tracker.svelte should look:
<script>
  import { onMount } from "svelte";

  let trackedRepos = [];
  onMount(async () => {
    trackedRepos = await fetchRepos();
  });

  async function fetchRepos() {
    if (!localStorage.getItem("username")) return window.location.reload();

    const res = await fetch("/api/listrepos?username=" + localStorage.getItem("username"));
    const data = await res.json();
    if (!res.ok) alert(data.message);
    else return data.repositories;
  }

  let repo = "";
  function track() {
    if (!localStorage.getItem("username")) return window.location.reload();

    fetch("/api/trackrepo", {
      body: JSON.stringify({ username: localStorage.getItem("username"), repo }),
      headers: { "Content-Type": "application/json" },
      method: "POST"
    })
      .then(async r => {
        // Return the data and the response itself
        return { r, data: await r.json() };
      })
      .then(({ r, data }) => {
        if (!r.ok) alert(data.message);
        else console.log("Repository tracked");
      });
    trackedRepos = [...trackedRepos, repo];
    repo = "";
  }

  function untrack(/** @type string*/ repo) {
    // If there is no username, reload the page and end the function
    if (!localStorage.getItem("username")) return window.location.reload();

    fetch("/api/untrackrepo", {
      body: JSON.stringify({ username: localStorage.getItem("username"), repo }),
      headers: { "Content-Type": "application/json" },
      method: "POST"
    })
      .then(async r => {
        // Return the data and the response itself
        return { r, data: await r.json() };
      })
      .then(({ r, data }) => {
        if (!r.ok) alert(data.message);
        else console.log("Repository untracked");
      });
    trackedRepos = trackedRepos.filter(r => r !== repo);
  }
</script>

<form
  on:submit|preventDefault={track}
  class="mx-auto min-w-[350px] max-w-[1100px] w-[50%] border border-gray-500 rounded my-4 px-6 py-4"
>
  <h1 class="text-center text-3xl m-4">GitHub tracker</h1>

  <input
    type="text"
    class="rounded px-4 py-2 border border-gray-300 w-full outline-none"
    placeholder="Enter the repository's URL"
    aria-label="Repository URL"
    bind:value={repo}
  />
  <button
    class="mt-2 border border-transparent bg-blue-500 text-white rounded px-4 py-2 w-full"
    >Track repository</button
  >

  <h2 class="mt-4 text-2xl">Tracked repositories</h2>
  <ul class="m-2 list-decimal">
    {#each trackedRepos as repo}
      <li class="py-1 flex items-center justify-between">
        <a class="text-gray-500 hover:underline" href="https://github.com/{repo}"
          >https://github.com/{repo}</a
        >
        <button class="text-red-500 cursor-pointer" on:click={() => untrack(repo)}
          >Untrack</button
        >
      </li>
    {/each}
  </ul>
</form>
And here’s a screenshot of how the app should now appear.
Step 4: Making the App Installable
Push notifications are only supported on installed apps. Yes, you can install web applications as regular applications using supported browsers — namely, Chrome and other Chromium-based browsers.
To make an app installable, you need to convert it into a progressive web app. This is a three-step process:
- add a service worker
- make your app work offline
- add a
manifest.jsonfile
If all three steps are completed, an install button will appear on the address bar when you visit the application.
Adding a service worker
Service workers are JavaScript files that can run in the background, off the browser’s main thread. This allows them to do stuff like run offline, run in the background and download large files. They’re mostly used for caching requests and for listening to events, both of which we will do.
To add a service worker, you need to add a JavaScript file that’s publicly available, like any CSS files. The name doesn’t really matter, but it’s usually named service-worker.js or sw.js. This file should be publicly served like your CSS, so put it in the public directory.
Service workers work by listening to events. For caching files, so your app works offline, you’ll listen to the install, activate and fetch events. The install event gets called when the service worker gets installed. The activate event gets called when the service worker is running, and the fetch event gets called whenever a network request is made. Event listeners can be added using self.addEventListener(). Let’s create a public/service-worker.js file and add the following code to it:
self.addEventListener("install", (event) => {
  console.log("Installed SW");
});

self.addEventListener("activate", (event) => {
  console.log("Activated SW");
});

self.addEventListener("fetch", (event) => {
  console.log("Fetch:", event.request);
});
All that’s left is to register this service worker. We’ll do that in the onMount function of App.svelte. Add this code at the end of the callback inside onMount:
if ("serviceWorker" in navigator) {
  // Service worker supported
  navigator.serviceWorker.register("/service-worker.js");
}
The above code first checks for service worker support in the browser, and then registers our service worker. It has to be noted that the path in the register() function is the path relative to your domain, not to the project folder — meaning that the service worker should be accessible at http://localhost:3000/service-worker.js, which it is, since it’s in the public directory.
Now if you reload the page and open the console, you should see the above messages.
Making our app work offline
To make an app work offline, you need to cache its contents using a service worker. Since our app makes requests to cloud functions, it can’t really do much when there’s no network. So instead of displaying a cached, functionless version of the app, let’s display a page that indicates that we’re offline. Create a public/offline.html file and put the following code in it:
<!DOCTYPE html>
<html lang="en">
  <head>
    <meta charset="UTF-8" />
    <meta http-equiv="X-UA-Compatible" content="IE=edge" />
    <meta name="viewport" content="width=device-width, initial-scale=1.0" />
    <title>You're offline</title>
  </head>
  <body>
    <h1>You're offline</h1>
    <p>This app doesn't work while offline. Please check your network</p>
  </body>
</html>
Feel free to customize this page however you want. You now need to cache this page. Caching is also a three-step process that uses the three above service worker events that we listened to. Here’s how it works:
-
The cache is opened and desired routes are added to the cache using
cache.add. This happens duringinstall. -
The older cache is deleted, so only the latest is saved to the user’s computer. This utilizes less storage. This happens during
activate. -
We intercept any network requests and check if those requests are page navigations — that is, changing routes. If the request succeeds, it’s all well and good, but if the request fails, we deliver the
offline.htmlpage to be displayed to the user. This happens duringfetch.
Let’s implement the first step. Open the service worker file and change the install event’s handler like so:
let CACHE_NAME = "cache-" + Date.now();

self.addEventListener("install", event => {
  console.log("Installed SW");
  event.waitUntil(
    caches.open(CACHE_NAME).then(cache => {
      return cache.add("/offline.html");
    });
  );
  self.skipWaiting();
});
event.waitUntil() is a function that’s similar to the await keyword. Callbacks of addEventListener can’t be asynchronous, so to implement that functionality, we should use event.waitUntil() and pass it a promise so that the promise will get awaited.
self.skipWaiting() tells the browser that we’re done with the install process, so activate the service worker. Speaking of activate, let’s now add the code to delete any old caches:
self.addEventListener("activate", (event) => {
  console.log("Activated SW");
  event.waitUntil(
    // Loop through the cache
    caches.keys().then((keys) => {
      // We must return a promise so it gets awaited
      return Promise.all(
        keys.map((k) => {
          // If the key doesn't match the name of the current cache, delete it
          if (k !== CACHE_NAME) return caches.delete(k);
        })
      );
    })
  );
});
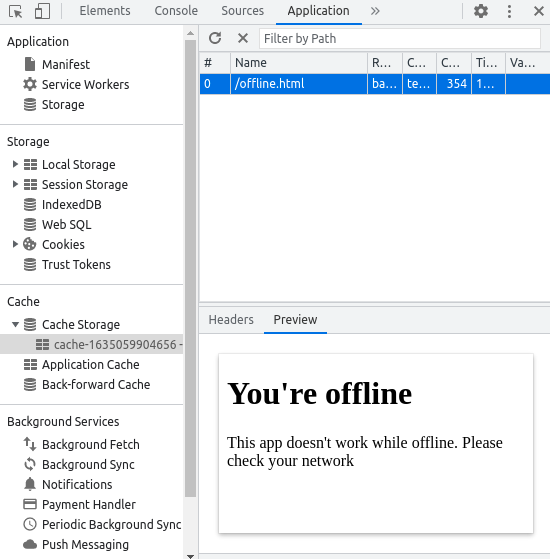
And with that, the offline.html page should be cached. To double-check, open the developer tools by pressing F12 and select the Application tab. On the sidebar, there should be a Cache Storage tab. Click on it and you should notice /offline.html.
Now all that’s left to do is to serve this file when there’s no network:
self.addEventListener("fetch", (event) => {
  console.log("Fetch:", event.request);

  // We only want to send /offline.html when the user is navigating pages,
  // not when they're requesting something else like CSS files or API requests.
  if (event.request.mode !== "navigate") return;

  event.respondWith(
    fetch(event.request).catch(() => {
      return caches.open(CACHE_NAME).then((cache) => {
        return cache.match("offline.html");
      });
    })
  );
});
The event.respondWith() function will respond to the network fetch request with whatever Response object is passed to it. In this case, we’re fetching the request first, and if the request fails, which will most likely be because of an internet problem, we’re sending the offline.html page, which was cached by the service worker.
Now refresh the page and turn off your Wi-Fi or Ethernet. You should now see our offline page instead of the default chrome “No network” page when you refresh. This offline page unfortunately doesn’t have the dinosaur game, but it does enable us to install the application as a PWA.
Here’s how the service worker should look:
let CACHE_NAME = "cache-" + Date.now();

self.addEventListener("install", (event) => {
  console.log("Installed SW");
  event.waitUntil(
    caches.open(CACHE_NAME).then((cache) => {
      return cache.add("/offline.html");
    })
  );
  self.skipWaiting();
});

self.addEventListener("activate", (event) => {
  console.log("Activated SW");
  event.waitUntil(
    // Loop through the cache
    caches.keys().then((keys) => {
      // We must return a promise so it gets awaited
      return Promise.all(
        keys.map((k) => {
          // If the key doesn't match the name of the current cache, delete it
          if (k !== CACHE_NAME) return caches.delete(k);
        })
      );
    })
  );
});

self.addEventListener("fetch", (event) => {
  console.log("Fetch:", event.request);

  // We only want to send /offline.html when the user is navigating pages,
  // not when they're requesting something else like CSS files or API requests.
  if (event.request.mode !== "navigate") return;

  event.respondWith(
    fetch(event.request).catch(() => {
      return caches.open(CACHE_NAME).then((cache) => {
        return cache.match("offline.html");
      });
    })
  );
});
Adding the manifest.json file
The manifest.json, or web manifest, contains some useful information about your application — things like the app’s name, its theme color, a description, its icons and much more. This file is usually called manifest.json and must be linked to your website using the <link> tag in the HTML, like how you link CSS files. Let’s add a manifest for our application. Feel free to use a generator for this one:
{
  "background_color": "#ffffff",
  "description": "Notifies you of new issues and PRs in GitHub repositories",
  "display": "standalone",
  "icons": [
    {
      "src": "/icons/icon-128x128.png",
      "sizes": "128x128",
      "type": "image/png"
    },
    {
      "src": "/icons/icon-144x144.png",
      "sizes": "144x144",
      "type": "image/png"
    },
    {
      "src": "/icons/icon-152x152.png",
      "sizes": "152x152",
      "type": "image/png"
    },
    {
      "src": "/icons/icon-192x192.png",
      "sizes": "192x192",
      "type": "image/png"
    },
    {
      "src": "/icons/icon-256x256.png",
      "sizes": "256x256",
      "type": "image/png"
    },
    {
      "src": "/icons/icon-512x512.png",
      "sizes": "512x512",
      "type": "image/png"
    },
    {
      "src": "/icons/maskable_icon.png",
      "sizes": "640x640",
      "type": "image/png",
      "purpose": "any maskable"
    }
  ],
  "name": "GitHub Tracker",
  "orientation": "portrait",
  "short_name": "GH Tracker",
  "start_url": "/",
  "theme_color": "#000000"
}
You need to download a bunch of icons for the application. These icons are of different sizes and are used by different operating systems. You can download them from the source code repository or by using this link. Be sure to extract the ZIP file to public/icons.
Next, you need to add the manifest and the icons to the index.html file. You can do so by putting the following code in it:
<!DOCTYPE html>
<html lang="en">
  <head>
    <meta charset="UTF-8" />
    <link rel="icon" href="/favicon.ico" />
    <meta name="viewport" content="width=device-width, initial-scale=1.0" />
    <title>GitHub Tracker</title>
    <meta
      name="description"
      content="Tracks GitHub repositories for new Issues/PRs and send you notifications"
    />

    <link rel="manifest" href="/manifest.json" />
    <meta name="description" content="Svelte PWA starter template" />
    <meta name="theme-color" content="#333333" />

    <meta name="apple-mobile-web-app-capable" content="yes" />
    <meta name="apple-mobile-web-app-status-bar-style" content="black" />
    <meta name="apple-mobile-web-app-title" content="Svelte PWA" />
    <link rel="apple-touch-icon" href="/icons/icon-152x152.png" />
  </head>
  <body>
    <div id="app"></div>
    <script type="module" src="/src/main.js"></script>
  </body>
</html>
Open Chrome’d developer tools by pressing F12 and head to the Lighthouse tab and create a new audit. You should now get an “Installable” score on the PWA section. This means that you have successfully converted your website to a webapp, and you can now install it by clicking the button on the address bar.
Step 5: Subscribing to Push Notifications
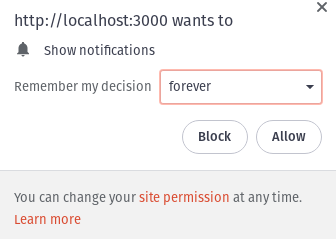
Before we can send push notifications, we need to get permission from the user. You can use the Notification.requestPermission() method to do so. This method is asynchronous and returns a string that can be equal to default, denied and granted. These are returned when the user either presses the X, presses Deny or presses Allow on the notification prompt, respectively. We’ll use the onMount hook in App.svelte to call this function:
onMount(async () => {
  isLoggedIn = !!localStorage.getItem("username");
  if ("serviceWorker" in navigator) {
    navigator.serviceWorker.register("/service-worker.js");
  }
  const status = await Notification.requestPermission();
  if (status !== "granted")
    alert(
      "Please allow notifications to make sure that the application works."
    );
});
You should now get a popup asking you to allow notifications in the app. Now that we have permission to send notifications, let’s use the service worker to subscribe to push events. This can be done using the pushManager.subscribe() function of the service worker. You can either do this in the service worker itself, or after registering the service worker in App.svelte. I’ll go with the latter, so if you want to do the same, just replace the navigator.serviceWorker.register function in onMount with the code below:
navigator.serviceWorker.register("/service-worker.js");
const reg = await navigator.serviceWorker.ready;
reg.pushManager.subscribe({ userVisibleOnly: true });
If you open the console, you’ll notice an error saying that the applicationServerKey is missing. Push notifications need servers to send them push messages, and these servers are authenticated with VAPID Keys. These keys identify the server and let the browser know that the push message is valid. We’ll use Vercel Cloud Functions to send push messages, so we need to set it up.
Creating a push message server
We’ll use the web-push npm package to help us generate keys and send push events. To install it, cd to the api folder and run the following:
npm i web-push
Remember to cd to the api folder, as otherwise the web-push package will be installed in the Svelte app.
To send push notifications, you’ll need to generate a public and private VAPID key pair. To do so, open the Node REPL using the node command and run the following commands:
$ node
> const webPush = require("web-push");
> webPush.generateVAPIDKeys()
{
  publicKey: "XXXXXXX",
  privateKey: "XXXXXX"
}
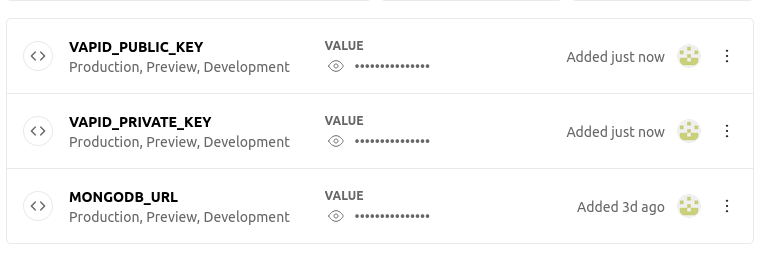
Copy these two keys and store them as environment variables on Vercel. Be sure to call them something memorable like VAPID_PRIVATE_KEY and VAPID_PUBLIC_KEY.
Now, we can start work on the cloud function. Create file api/vapidkeys.js. This file will be responsible for sending the public VAPID key to the client. You should never share the private VAPID key. In api/vapidkeys.js, first we need to initialize web-push:
const webPush = require("web-push");

webPush.setVapidDetails(
  "YOUR_VERCEL_DOMAIN",
  process.env.VAPID_PUBLIC_KEY,
  process.env.VAPID_PRIVATE_KEY
);
Be sure to replace YOUR_VERCEL_DOMAIN with your Vercel app’s domain. Next, let’s export a function to just return the public VAPID key to the requester:
module.exports = (_, res) => {
  res.send(process.env.VAPID_PUBLIC_KEY);
};
With that done, you can now update the onMount function in App.svelte to first fetch the cloud function to get the public key, and then use the public key in the subscribe function:
let sub;
onMount(async () => {
  // ...
  if ("serviceWorker" in navigator) {
    // Service worker supported
    navigator.serviceWorker.register("/service-worker.js");
    const reg = await navigator.serviceWorker.ready;
    sub = await reg.pushManager.getSubscription();
    if (!sub) {
      // Fetch VAPID public key
      const res = await fetch("/api/vapidkeys");
      const data = await res.text();
      sub = await reg.pushManager.subscribe({
        userVisibleOnly: true,
        applicationServerKey: data,
      });
    }
    console.log(sub);
  }
  // ...
});
Notice how we’re only fetching the VAPID keys if we haven’t subscribed to push notifications. If you open the console, you should see the subscription logged to the console.
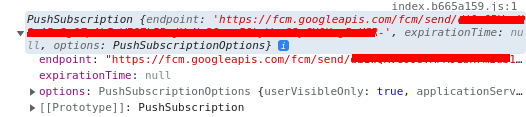
The endpoint that is provided is very important to us. This endpoint will allow us to notify this user using web-push. Let’s create a cloud function to store this endpoint in the database. Create file api/storeendpoint.js:
const mongoPromise = require("./_mongo");

module.exports = async (req, res) => {
  const mongo = await mongoPromise;
  const usersCol = mongo.db().collection("users");
  // TODO
};
Let’s grab the subscription and the username from the body:
const { username, subscription } = req.body;
if (typeof username !== "string" || typeof subscription !== "object") {
  res.status(400).json({ message: "Invalid body" });
  return;
}
And let’s add it to the database:
await usersCol.updateOne({ _id: username }, { $set: { subscription } });
And here’s how the final cloud function should look:
const mongoPromise = require("./_mongo");

module.exports = async (req, res) => {
  const mongo = await mongoPromise;
  const usersCol = mongo.db().collection("users");
  const { username, subscription } = req.body;
  if (typeof username !== "string" || typeof subscription !== "string") {
    res.status(400).json({ message: "Invalid body" });
    return;
  }
  await usersCol.updateOne(
    { _id: username },
    {
      $set: {
        subsciption,
      },
    }
  );
  res.status(204).end();
};
This function should be called every time we subscribe to push notifications. Let’s use a Svelte reactive block to call this cloud function every time the sub variable has a value and the isLoggedIn variable is true. Add this code just before the ending of the <script> tag in App.svelte:
// ...
$: if (sub && isLoggedIn) {
  // Push notifs have been subscribed to, and there's a username in localStorage
  const username = localStorage.getItem("username");
  fetch("/api/storeendpoint", {
    body: JSON.stringify({ username, subscription: sub.toJSON() }),
    headers: {
      "Content-Type": "application/json",
    },
    method: "POST",
  });
}
Refresh the page, and you should see that the current browser’s push endpoint and keys are stored in the MongoDB database in the subscription object.
All you have to do is handle the push event in the service worker and create a cloud function to check GitHub for new issues and PRs.
Let’s do the latter first. Create a new cloud function api/fetchgh.js. This function will be responsible for checking GitHub and sending push notifications:
const mongoPromise = require("./_mongo");
const webPush = require("web-push");

webPush.setVapidDetails(
  "YOUR_VERCEL_DOMAIN",
  process.env.VAPID_PUBLIC_KEY,
  process.env.VAPID_PRIVATE_KEY
);

module.exports = async (req, res) => {
  const mongo = await mongoPromise;
  const usersCol = mongo.db().collection("users");
};
Let’s get all the users from the database, so we know what repos to fetch:
const users = await usersCol.find().toArray();
Next, create two variables to store the currently fetched repositories, and the repositories with any new issues or PRs:
const alreadyFetchedRepos = [];
const reposWithIssues = [];
For each user, let’s check their tracked repositories for any new issues. To make sure that one repository is checked only once, we’ll add the repository to alreadyFetchedRepos, and we’ll add any repositories that have new issues to reposWithIssues. To do so, we need to loop over every user in the users array and get a list of repositories to fetch. This will be done by checking their trackedRepos for any duplicates. Once that’s done, we’ll call the fetchRepo function for every repository. fetchRepo will return a Boolean — true if there are new issues, false otherwise:
for await (let user of users) {
  // Make sure to fetch each repo ONCE.
  const reposToFetch = user.trackedRepos.filter(
    (i) => !alreadyFetchedRepos.includes(i)
  );
  await Promise.all(
    reposToFetch.map(async (repo) => {
      const hasNewIssues = await fetchRepo(repo, user._id);
      alreadyFetchedRepos.push(repo);
      if (hasNewIssues) reposWithIssues.push(repo);
    })
  );
}
Since fetchRepo will be asynchronous, I’ve used map to return promises every time and awaited them all using Promise.all. This works because the for loop is asynchronous. If promises aren’t awaited, variables can be undefined, so be sure to await promises!
Now for the fetchRepo function. This function will get the last time we’ve checked the GitHub API from the database. This is to only get the latest issues from GitHub. It then fetches the GitHub API for any new issues, and returns a Boolean value if there are any:
async function fetchRepo(repo) {
  const mongo = await mongoPromise;
  const fetchedCol = mongo.db().collection("fetched");
  const lastFetchedDoc = await fetchedCol.findOne(
    {},
    { sort: { createdAt: -1 } }
  );
  const timestamp = lastFetchedDoc ? lastFetchedDoc.createdAt : null;

  const { data: issues } = await axios.get(
    `https://api.github.com/repos/${repo}/issues?state=open${
      timestamp ? "&since=" + timestamp : ""
    }`
  );
  if (Array.isArray(issues)) {
    await fetchedCol.insertOne({ createdAt: new Date() });
  }
  if (Array.isArray(issues) && issues.length > 0) return true;

  return false;
}
Once that’s done, we need to send push notifications to any user that has tracked a repository that has any new issues. This can be done using web-push. Add these lines of code to the end of the exported function:
for await (let user of users) {
  // TODO
}
First, we need to check if any of the user’s tracked repos have new issues. This can be done with the Array.some method. Array.some() determines whether the specified callback function returns true for any element of an array, so we can easily use this to check:
if (user.trackedRepos.some((i) => reposWithIssues.includes(i))) {
  // TODO
}
And finally, we send the notification:
await webPush.sendNotification(user.subscription);
And here’s how the cloud function should look:
const mongoPromise = require("./_mongo");
const webPush = require("web-push");
const axios = require("axios");

webPush.setVapidDetails(
  "https://github-tracker-arnu515.vercel.com",
  process.env.VAPID_PUBLIC_KEY,
  process.env.VAPID_PRIVATE_KEY
);

async function fetchRepo(repo) {
  const mongo = await mongoPromise;
  const fetchedCol = mongo.db().collection("fetched");
  const lastFetchedDoc = await fetchedCol.findOne(
    {},
    { sort: { createdAt: -1 } }
  );
  const timestamp = lastFetchedDoc ? lastFetchedDoc.createdAt : null;

  const { data: issues } = await axios.get(
    `https://api.github.com/repos/${repo}/issues?state=open${
      timestamp ? "&since=" + timestamp : ""
    }`
  );
  if (Array.isArray(issues)) {
    await fetchedCol.insertOne({ createdAt: new Date() });
  }
  if (Array.isArray(issues) && issues.length > 0) return true;

  return false;
}

module.exports = async (req, res) => {
  const mongo = await mongoPromise;
  const usersCol = mongo.db().collection("users");
  const users = await usersCol.find().toArray();
  const alreadyFetchedRepos = [];
  const reposWithIssues = [];

  for await (let user of users) {
    // Make sure to fetch each repo ONCE.
    const reposToFetch = user.trackedRepos.filter(
      (i) => !alreadyFetchedRepos.includes(i)
    );
    await Promise.all(
      reposToFetch.map(async (repo) => {
        const hasNewIssues = await fetchRepo(repo, user._id);
        alreadyFetchedRepos.push(repo);
        if (hasNewIssues) reposWithIssues.push(repo);
      })
    );
  }

  for await (let user of users) {
    // Send push notifications
    if (user.trackedRepos.some((i) => reposWithIssues.includes(i))) {
      await webPush.sendNotification(user.subscription, "new-issues");
    }
  }

  // And we're done!
  res.status(200).json({ reposWithIssues, fetched: alreadyFetchedRepos });
};
Listening to push events
All that’s left to do is to listen to push events in the service worker. Open the service worker and add the code below:
self.addEventListener("push", (event) => {
  console.log(event.data.text());
});
When you call the cloud function, maybe using cURL, you should see new-issue logged in the browser console. That isn’t really very helpful, so let’s make it send a notification:
self.addEventListener("push", (event) => {
// Double check the push event
if (event.data.text() === "new-issue") {
event.waitUntil(
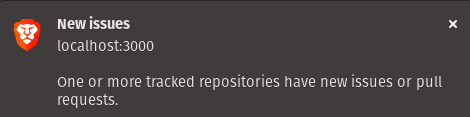
self.registration.showNotification("New issues", {
body: "One or more tracked repositories have new issues or pull requests.",
})
);
}
});
Delete the fetched collection from MongoDB and call the cloud function again. You should now receive a notification from the web browser.
Deploy the application using vercel . or by pushing to GitHub, install the app as a PWA, and run the cloud function by going to https://YOUR_VERCEL_APP/api/fetchgh and you should receive a notification, even if you haven’t opened the application!
If you don’t receive the notification, or you get a 410 error from web push, be sure to allow the notifications forever in the prompt when you get asked.
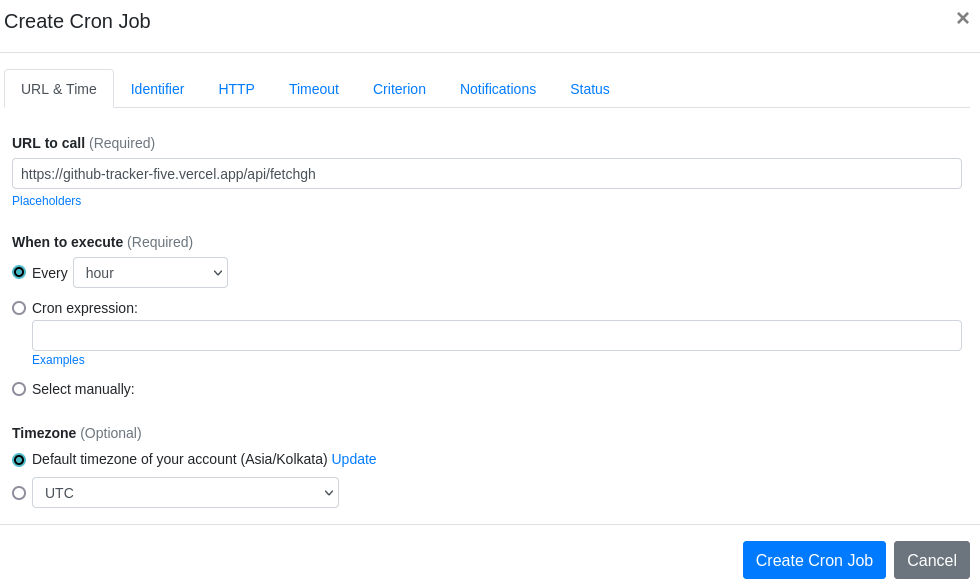
Step 6: Creating a CRON job
The tracker isn’t really a tracker if we have to manually call the cloud function, right? Let’s use EasyCron to call the cloud function automatically every hour.
Head to your EasyCron dashboard and create a new CRON job. For the URL, enter https://YOUR_VERCEL_DOMAIN/api/fetchgh, and choose an interval. I’ll go with every hour, but feel free to customize it however you like.
Conclusion
And with that, you should be getting notifications every time there’s a new issue/PR in any of your tracked repositories. Feel free to check out the source code or the live version if you’ve gotten stuck anywhere.
Frequently Asked Questions (FAQs) about Creating a GitHub Tracker with Push Notifications in Svelte
What is Svelte and why should I use it for creating a GitHub tracker?
Svelte is a modern JavaScript compiler that allows you to write easy-to-understand JavaScript code that is then compiled to highly efficient code that runs directly in the browser. It offers a simpler and more intuitive programming model than other JavaScript frameworks like React or Vue, and results in faster load times and better performance. When creating a GitHub tracker, using Svelte can make your code cleaner, easier to maintain, and more efficient.
How do push notifications work in Svelte?
Push notifications in Svelte work by using the built-in reactivity system. This system allows you to define reactive statements that automatically update whenever the state of your application changes. When a change occurs, such as a new commit being pushed to a GitHub repository, a reactive statement can trigger a push notification to inform the user of the change.
Can I use Svelte to track multiple GitHub repositories?
Yes, you can use Svelte to track multiple GitHub repositories. You would need to create a separate instance of the GitHub tracker for each repository you want to track. Each instance would have its own state and reactive statements, allowing it to independently track changes and send push notifications.
How can I customize the appearance of push notifications in Svelte?
The appearance of push notifications in Svelte can be customized using CSS. Svelte allows you to write scoped CSS that applies only to the components where it is defined. This means you can create unique styles for your push notifications without affecting the rest of your application.
Can I use Svelte with other JavaScript frameworks or libraries?
Yes, Svelte can be used alongside other JavaScript frameworks or libraries. However, one of the main advantages of Svelte is its simplicity and efficiency, so using it with other frameworks or libraries might negate some of these benefits. It’s best to use Svelte on its own if possible.
How do I handle errors when creating a GitHub tracker in Svelte?
Error handling in Svelte can be done using try/catch blocks in your JavaScript code. If an error occurs while fetching data from the GitHub API, for example, you can catch the error and display a helpful message to the user.
Can I use Svelte to create a GitHub tracker for private repositories?
Yes, you can use Svelte to create a GitHub tracker for private repositories. You would need to authenticate with the GitHub API using a personal access token, which can be generated from your GitHub account settings.
How do I test my GitHub tracker in Svelte?
Testing in Svelte can be done using various JavaScript testing libraries, such as Jest or Mocha. These libraries allow you to write tests for your components and reactive statements to ensure they are working correctly.
Can I deploy my Svelte GitHub tracker to a server?
Yes, you can deploy your Svelte GitHub tracker to a server. Svelte compiles your code to plain JavaScript, CSS, and HTML, which can be served by any static file server.
How do I update my GitHub tracker when Svelte or the GitHub API changes?
When Svelte or the GitHub API changes, you would need to update your GitHub tracker accordingly. This might involve updating your Svelte code to use new features or syntax, or updating your API calls to match changes in the GitHub API. It’s important to regularly check for updates to ensure your GitHub tracker continues to work correctly.

