Have you ever imagined speeding your WordPress website by implementing a Content Delivery Network (CDN)? This tutorial illustrates how the CDN configuration using Amazon CloudFront and Rackspace Cloud Files (with Akamai CDN) speeds up the WordPress website. Before going forward, if you are not aware about CDN, then this article will provide a quick glance around CDN fairy tales.
Setting up W3 Total Cache
Before starting, you should have working WordPress Installation. After this, install W3 Total Cache plugin.You will see a new tab in your sidebar, called “Performance”. To configure your CDN, start with the “General” section. There are a few steps you should take care of:-
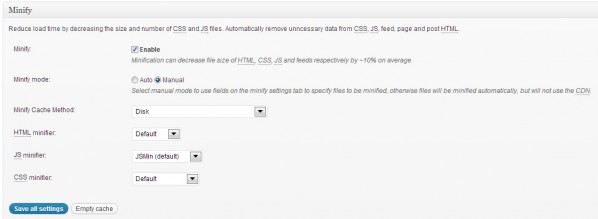
- Minify: Check “Enable”, and select “Manual” as minify mode.
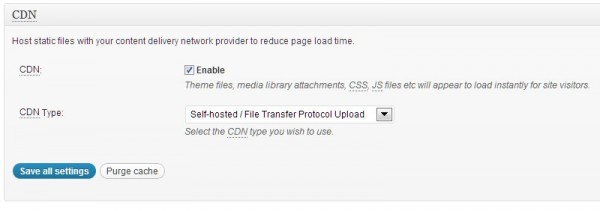
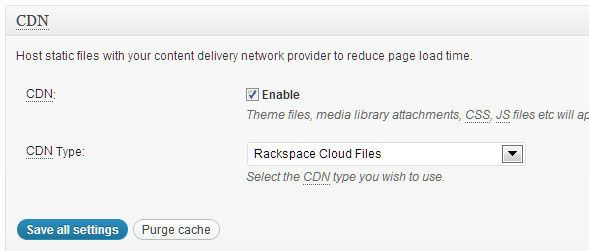
- CDN: Check “Enable”, and set the CDN Type to Self-hosted for now (we’ll change this to Amazon/Rackspace later on).
Hit the “Save all settings” button, and proceed to the “Minify” section. Now take the following actions:
- General: Enable “Rewrite URL structure”.
- HTML & XML: Enable “HTML minify settings”.
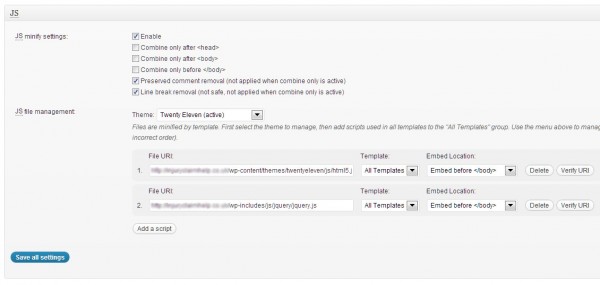
- JS: Enable “JS minify settings”, check the boxes as shown in the screenshot, and add your .JS files (you can find these by searching for them in your source code of your front-end).
- Use only the template files, no Adsense or Analytics code or something like that. Use “Blocking” in the embed location drop-down if the script is needed to load the page, otherwise use “Non-Blocking”.
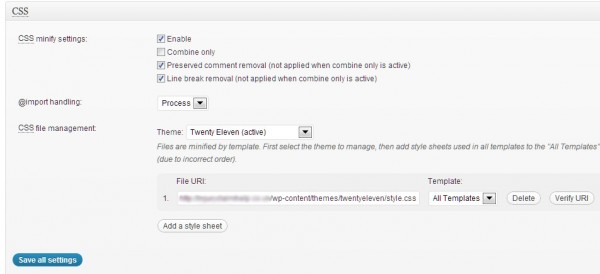
- CSS: Enable “CSS minify settings”, and again check the boxes as shown in the screenshot. Add your CSS files (which you can find the same way as the .JS files).
After that, save all your settings again and proceed to the CDN section. Here you need to take these steps:
- General: Check all the box from “Host attachments” to “Import external media library attachments” to have full control over content.
- Configuration: Leave these unattended for now, this is where you will fill in your Amazon or Rackspace details.
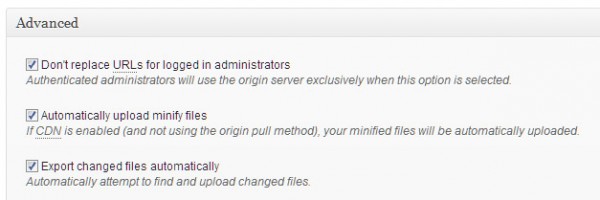
- Advanced:Check the first three boxes, and the last one Set cookie domain to “domainname.com”.
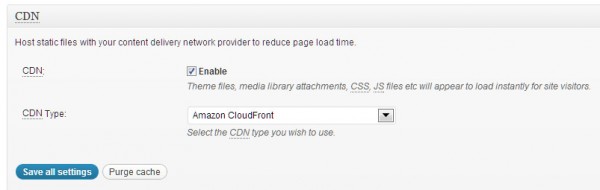
Save all settings. You will see some red and yellow messages on top of your W3 Total Cache settings screen. We will deal with these later, because first you need to setup up Amazon CloudFront or Rackspace Cloud Files as your CDN. Setting up Amazon CloudFront as your CDN Let’s start with Amazon CloudFront. If you haven’t done already, signup for Amazon Web Services and login to your account. When logged in, you should do a separate signup for S3 and CloudFront. Now head back to your WordPress installation, open the “General” section of W3 Total Cache, and where you first selected “Self-hosted”, now choose “Amazon CloudFront” under “Origin Pull” (this means the CDN will extract the necessary files from your site). Click “Save all settings”.
To get it working, take these steps:
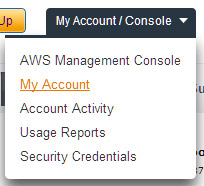
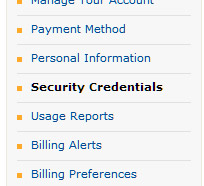
- Open the CDN section again, and scroll to “Configuration”. Fill in your “Access key ID” and “Secret key”. These keys can be find in “My Account” in the Amazon AWS portal, and then select “Security Credentials”.
 |
 |
- In the “Access Credentials”, you will find your “Access Key ID” and (after you click “Show”) your “Secret Access Key”. Now copy these into your WordPress CDN configuration.
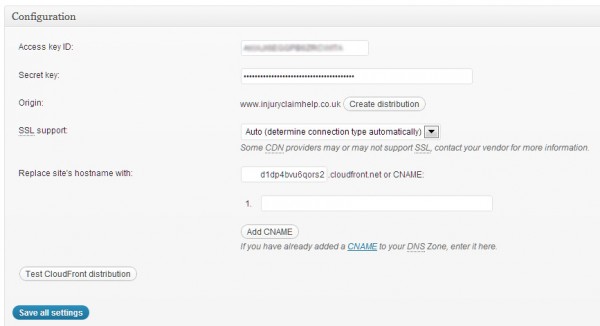
- Click on “Create distribution”, and if your credentials are right, you will see this notice:
![]()
- You will now see a new hostname filled in, which looks something like:
![]()
- Wait till your CloudFront distribution is deployed, which can be verified in the AWS Management Console at Amazon, in the CloudFront section.
 |
 |
| |
|
| While “InProgress” you will have to wait. | Once you see this, you’re good to go. |
- To make sure, use the “Test CloudFront distribution” button to test.
- Your files are automatically pulled into the CloudFront CDN (this happens when your distribution is “InProgress”). After the distribution is “InProgress”, import your attachments into the media library. There’s a button on top of the CDN section to do this, called “Importing attachments into the Media Library”. Press this, and click “Start” in the pop-up that follows. After uploading is done, close it and save configuration.
- To see if it’s really working, log out from WordPress and open the site again. In the source code you should see lines like:
| |
| This is your minified CSS file, loaded from CloudFront |
| |
| This is an header image, loaded from CloudFront. |
Setting up Rackspace Cloud Files as your CDN
With W3 Total Cache you can also choose for Rackspace Cloud Files, with Akamai as your CDN provider. First, make sure you have a Rackspace Cloud account. After that, in the “General” section of W3 Total Cache, scroll to the CDN configuration, and select “Rackspace Cloud Files” as CDN Type. You can only choose for “Origin push”, which means you have to upload the files yourself (the plugin helps you in this).
Hit “Save all settings”, and take the following actions:
- Go to the CDN section, and scroll to the configuration.
- Fill in your Rackspace Cloud username (which you choose when signing up).
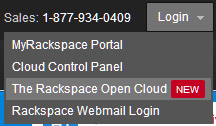
- Insert your API key. You can retrieve this by logging in at Rackspace.com into “The Rackspace Open Cloud”, and selecting “API keys” after logging in.
 |
 |
- If you haven’t got an API key already, make a new one. Click on “Show Key”, and copy it.
![]()
- Now go back to your WordPress installation, and insert the API key into your CDN configuration API key field.
- Keep the location to “US” (you can change this to UK, but it doesn’t matter).
- Fill in a container name (should only be a unique name in your account), and click on “Create container”. If you did it well, you will see this:
- To be sure, click on “Test Cloud Files upload, and make sure you pass the test.
![]()
- Hit the “Save all settings button”.
- Now scroll to the top, and you see a whole bunch of notices.

- You basically have to click them all, starting with “Export the media library”, than uploading all your files, and empty both the page cache and minify cache.
- That’s it! The plugin already made sure the CDN function is turned on for your files. And to make sure it’s working, check again after you log out of WordPress, and look for something like this in the source code:
 |
| Your minified CSS file loaded from Rackspace Cloud Files |
| |
| Your image loaded from Rackspace Cloud Files |
- You can also always login into your “Files” at your Rackspace Cloud account, and open your container.

Conclusion
As you can see, setting up a CDN for your WordPress blog is fairly simple. W3 Total Cache makes it very easy and fast, and as a result your site can load much faster.
 Jacco Blankenspoor
Jacco Blankenspoor is a website developer from the Netherlands, and is currently just building lots of different websites. When he is not working on HIPAAHQ.com you might catch him grinding coffee.