
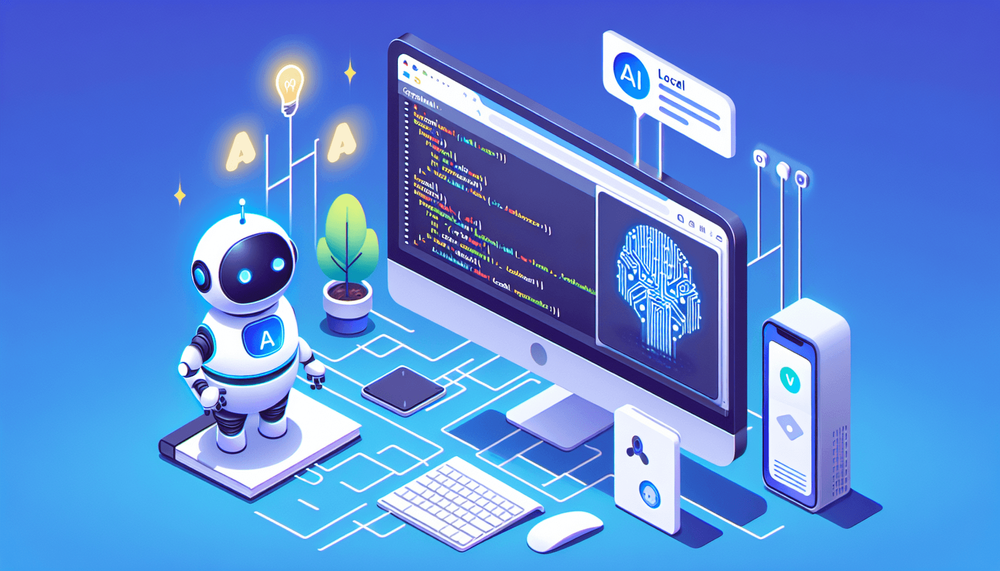
Developers seeking GitHub Copilot-level code assistance without sending proprietary code to third-party servers now have a local alternative that handles completions, chat-based generation, and refactoring. A local AI coding assistant built on VS Code, Ollama, and the Continue extension delivers inline completions, chat-based generation, and contextual code explanations, all run on your own hardware. The toolchain has shipped stable releases throughout 2025, with models like Qwen2.5-Coder and DeepSeek Coder V2 closing in on cloud-hosted options for single-function generation and everyday programming tasks.
How to Set Up a Local AI Coding Assistant
- Install Ollama on your machine using Homebrew, the install script, or the Windows installer.
- Pull coding models (
qwen2.5-coder:7bfor chat,qwen2.5-coder:1.5bfor autocomplete). - Verify the Ollama API is running by hitting
http://localhost:11434. - Install the Continue extension in VS Code from the marketplace.
- Configure Continue's config file to point at your local Ollama models.
- Test inline tab autocomplete by typing a function signature and pausing.
- Open the Continue chat panel to generate, explain, or refactor code.
- Tune performance settings (debounce delay, GPU layers, memory limits) for your hardware.
Versions used in this tutorial: This tutorial was written assuming Ollama 0.6.x, Continue extension pre-v1.0 (JSON config format), and models at Q4_K_M quantization unless otherwise noted. Pin model versions with
ollama pull qwen2.5-coder:7b@<digest>(find digests viaollama show qwen2.5-coder:7b). If you are using Continue v1.0 or later, see the configuration section below for differences.
Table of Contents
- Why Go Local with Your AI Coding Assistant?
- Understanding the Core Architecture
- Step 1: Installing and Configuring Ollama
- Step 2: Installing and Configuring Continue in VS Code
- Step 3: Testing Your Local AI Assistant with Real Code
- Performance Tuning and Optimization
- Local AI vs. GitHub Copilot: Honest Comparison
- Complete Setup Checklist
- Troubleshooting Common Issues
- Next Steps
Why Go Local with Your AI Coding Assistant?
The Case for Privacy and Cost Savings
The core argument for running AI code assistance locally needs no decoration: proprietary codebases never leave the machine. For teams working under NDA, in regulated industries, or simply protective of intellectual property, this eliminates the network-transmission risk surface. No telemetry, no server-side logging, no ambiguity about how code snippets might be used for model training.
The financial case is equally clear. GitHub Copilot runs $10 to $19 per month per developer depending on the plan (as of mid-2025 — verify current pricing at github.com/features/copilot). Cursor charges similarly. A local setup costs nothing beyond the hardware already sitting on the desk. There are no rate limits, no usage caps, and no degraded service during peak hours. The setup also works offline, making it functional on planes, restricted corporate networks, and air-gapped environments where cloud-based tools simply cannot operate.
Proprietary codebases never leave the machine. For teams working under NDA, in regulated industries, or simply protective of intellectual property, this eliminates the network-transmission risk surface.
What You'll Build in This Tutorial
By the end of this walkthrough, VS Code will have fully functional inline code completion triggered by tab, a chat panel for generating and explaining code, and the ability to refactor highlighted blocks, all powered by models running locally through Ollama. Every example in this tutorial uses JavaScript, React, and Node.js.
Prerequisites: VS Code installed and up to date, at least 8GB of RAM (16GB recommended for comfortable performance), and basic terminal familiarity. On macOS, ensure the code CLI is in your PATH by opening VS Code → Command Palette → "Shell Command: Install 'code' command in PATH."
Understanding the Core Architecture
How Ollama, Continue, and VS Code Work Together
The architecture follows a clean, layered design:
VS Code ↔ Continue Extension ↔ Ollama Local Server ↔ LLM Model
All connections use HTTP REST over localhost; VS Code ↔ Continue uses the Language Server Protocol.
You interact with Ollama through simple CLI commands, but behind those commands it manages model formats, GPU acceleration, and memory allocation directly. It downloads, quantizes, runs, and serves large language models through a REST API on localhost:11434.
Continue is an open-source VS Code extension that sits between the editor and any LLM backend. It routes autocomplete requests, chat prompts, and refactoring commands to whatever model server you configure, whether that is Ollama, a cloud API, or something else entirely.
Each component in this trio is open source, actively maintained, and modular. Ollama can serve models to any client, not just Continue. Continue can connect to any OpenAI-compatible API, not just Ollama, though provider-specific fields such as apiBase and apiKey must be configured per provider. Because the pieces are decoupled, you can swap any one without rebuilding the entire workflow.
Choosing the Right Model for Your Hardware
Model selection directly determines both quality and usability. Running a model that exceeds available RAM will cause constant swapping and render the experience unusable.
| Model | RAM Required (Q4_K_M) | Best For | Speed (tokens/sec, approximate — Apple M-series, 16GB unified memory, Q4_K_M quant; results vary significantly on other hardware) |
|---|---|---|---|
| Qwen2.5-Coder 1.5B | 4GB | Fast completions, low-end machines | ~60 |
| Qwen2.5-Coder 7B | 8GB | Balanced quality/speed | ~25 |
| DeepSeek Coder V2 Lite | 10GB | Complex reasoning, refactoring | ~18 |
| CodeLlama 13B | 16GB | Large context, detailed generation | ~12 |
⚠ Speed and RAM figures are approximate, measured on Apple M-series silicon with 16GB unified memory using Q4_K_M quantization. Results on Intel/AMD CPUs or Nvidia GPU systems will differ significantly. RAM requirements also vary by quantization level. Run ollama run <model> --verbose and observe eval rate for your hardware.
Start with the 7B parameter model if you have at least 8GB of RAM; it offers the best balance of response quality and speed for most configurations. If your machine has only 4-8GB, drop to the 1.5B model, which still produces usable completions. With 16GB or more available and a workload that involves multi-step reasoning or large-context generation, the 13B model is worth the latency tradeoff.
Step 1: Installing and Configuring Ollama
Install Ollama on macOS, Windows, or Linux
Installation is a single command on macOS and Linux. Windows uses an installer downloaded from the Ollama website.
# macOS with Homebrew
brew install ollama

# Linux or macOS without Homebrew
curl -fsSL https://ollama.com/install.sh | sh
# Security note: this executes a remote script directly. To inspect first:
# curl -fsSL https://ollama.com/install.sh -o install.sh && cat install.sh && sh install.sh

# Windows: Download and run the installer from https://ollama.com/download

# Verify installation on any OS
ollama --version
# Expected output: ollama version 0.x.x (version number confirms successful install)
Ollama also installs as a menu bar application on macOS, managing the background server process. The Linux install script sets up a systemd service, and on Windows, the installer handles background service configuration automatically.
Pull Your First Coding Model
Ollama uses a pull command analogous to Docker image pulls. Model tags specify the variant, including parameter count and quantization level.
# Pull the recommended model for this tutorial
ollama pull qwen2.5-coder:7b

# Also pull the smaller model for autocomplete (explained later)
ollama pull qwen2.5-coder:1.5b

# Test the model directly from the terminal
ollama run qwen2.5-coder:7b "Write a JavaScript function that debounces input"

# Expected output:
# function debounce(func, delay) {
#   let timeoutId;
#   return function (...args) {
#     clearTimeout(timeoutId);
#     timeoutId = setTimeout(() => {
#       func.apply(this, args);
#     }, delay);
#   };
# }
If the model generates a coherent debounce function, the local LLM is working. The first run after pulling takes longer as the model loads into memory; expect subsequent prompts to respond in under two seconds on the hardware referenced in the table above.
Note on this binding: The debounce snippet above uses a regular function (not an arrow function) for the returned wrapper. This is important — if the returned function were an arrow function, this would be lexically bound and func.apply(this, args) would not correctly forward the caller's context. The inner setTimeout callback remains an arrow function so that it captures the outer this correctly. If the AI generates a version using an arrow function for the outer return, correct it to a regular function to preserve proper this binding for method calls.
Verify the Ollama API Is Running
Continue communicates with Ollama through its local REST API. Confirming this endpoint responds is essential before moving to the extension configuration.
# First confirm the server is active (fail within 5 seconds if not responding)
curl --max-time 5 http://localhost:11434
# Expected response: Ollama is running

# Test the API endpoint with a generation request
curl --max-time 30 \
  -H "Content-Type: application/json" \
  http://localhost:11434/api/generate \
  -d '{
    "model": "qwen2.5-coder:7b",
    "prompt": "Write a hello world function in JavaScript",
    "stream": false
  }'

# Expected response (truncated):
# {"model":"qwen2.5-coder:7b","response":"function helloWorld() {
  console.log(\"Hello, World!\");
}

helloWorld();","done":true,...}
A JSON response containing a "response" field with generated code confirms the API is reachable and the model is loaded. If the curl command fails, check that Ollama's HTTP server is active with curl --max-time 5 http://localhost:11434, which should return Ollama is running. If the server is not responding, restart it from the menu bar app (macOS), systemctl start ollama (Linux), or the system tray (Windows). Use ollama list separately to verify which models are downloaded locally.
Step 2: Installing and Configuring Continue in VS Code
Install the Continue Extension
Open the VS Code Extensions panel (Ctrl+Shift+X or Cmd+Shift+X) and search for "Continue." The extension is published by Continue.dev and has a distinctive logo. Alternatively, install from the command line:
code --install-extension Continue.continueOn macOS, this requires the code CLI to be in your PATH. If the command is not found, open VS Code → Command Palette → "Shell Command: Install 'code' command in PATH" first.
On first launch, Continue presents a setup wizard. Select the "Local" option when prompted about model providers. This skips cloud API key configuration and points the extension toward local backends like Ollama. The Continue sidebar panel will appear in VS Code's left or right panel, depending on layout preferences. Note that the setup wizard's behavior may vary between Continue versions.
Configure Continue for Ollama
Continue's configuration file location depends on your installed version. Versions before v1.0 use ~/.continue/config.json; v1.0 and later use ~/.continue/config.yaml. Check your version in the Continue sidebar settings before editing. The JSON structure shown below applies to pre-v1.0 installations; consult the Continue migration guide for the YAML equivalent if you are on v1.0+.
{
  "models": [
    {
      "title": "Qwen2.5 Coder 7B",
      "provider": "ollama",
      "model": "qwen2.5-coder:7b",
      "apiBase": "http://localhost:11434"
    }
  ],
  "tabAutocompleteModel": {
    "title": "Qwen2.5 Coder 1.5B",
    "provider": "ollama",
    "model": "qwen2.5-coder:1.5b",
    "apiBase": "http://localhost:11434"
  },
  "tabAutocompleteOptions": {
    "debounceDelay": 400,
    "maxPromptTokens": 1500
  },
  "embeddingsProvider": {
    "provider": "ollama",
    "model": "nomic-embed-text",
    "apiBase": "http://localhost:11434"
  }
}
The split-model strategy here is deliberate. The 1.5B model handles tab autocomplete because completions must feel instantaneous; at roughly 60 tokens per second on Apple M-series with 16GB unified memory, it returns suggestions fast enough to avoid disrupting typing flow. The 7B model handles chat interactions where an extra second or two of latency is acceptable in exchange for substantially better reasoning and code quality. The embeddingsProvider block is required for the @codebase feature described later — pull the embeddings model with ollama pull nomic-embed-text.
Configure Tab Autocomplete Settings
The debounceDelay of 400 milliseconds prevents the extension from firing a completion request on every keystroke. Empirically, values between 300 and 500 milliseconds reduce unnecessary inference calls while maintaining responsiveness for most typists; adjust based on your typing speed and hardware latency.
The maxPromptTokens setting of 1500 controls how much surrounding context is sent with each completion request. Higher values provide more context awareness but increase latency. For the 1.5B model, 1500 tokens balances context quality against response speed. Multiline suggestions can be toggled through Continue's settings panel in VS Code if single-line completions are preferred.
Step 3: Testing Your Local AI Assistant with Real Code
Inline Code Completion in Action
Create a new file called utils.js in any Node.js project to test autocomplete behavior.
// Type the function signature below and pause — the AI suggests the body:

/**
 * Basic email format validation.
 * Covers the vast majority of real-world addresses.
 * Note: Full RFC 5321 compliance requires a dedicated library (e.g., validator.js).
 * Known limitations: rejects quoted local-parts, accepts some edge-case invalid domains.
 */
function validateEmail(email) {
  if (typeof email !== 'string') return false;
  // Requires: non-empty local part, @, domain with at least one dot,
  // non-empty TLD of at least 2 characters
  const emailRegex = /^[^\s@]+@[^\s@]+\.[^\s@]{2,}$/;
  return emailRegex.test(email);
}

// Type another signature:

/**
 * Formats a number as currency.
 * @param {number} amount
 * @param {string} currency - ISO 4217 currency code (default: 'USD')
 * @param {string} locale   - BCP 47 locale string (default: 'en-US')
 */
function formatCurrency(amount, currency = 'USD', locale = 'en-US') {
  return new Intl.NumberFormat(locale, {
    style: 'currency',
    currency: currency,
  }).format(amount);
}
After typing the function signature and the opening brace, pausing briefly triggers the autocomplete model. The suggestion appears as ghost text. Pressing Tab accepts it. The quality of suggestions improves when the file already contains related code, as the context window gives the model more to work with.
Review AI-generated code carefully. Autocomplete suggestions like the validateEmail regex above are convenient but may not cover all edge cases. The regex shown here is stricter than the common /^[^\s@]+@[^\s@]+\.[^\s@]+$/ pattern (which accepts invalid addresses like a@b.), but still does not fully comply with RFC 5321. For production email validation, consider a dedicated library such as validator.js. Similarly, formatCurrency accepts a locale parameter so that non-US formatting (e.g., formatCurrency(1234.5, 'EUR', 'de-DE') → 1.234,50 €) works correctly.
Chat-Based Code Generation
Open the Continue chat panel with Cmd+L (macOS) or Ctrl+L (Windows/Linux). Type a natural language prompt describing what is needed.
// Prompt: "Create a React component that fetches and displays a list of users
// from /api/users with loading and error states"

// AI-generated component:
import React, { useState, useEffect } from 'react';

function UserList() {
  const [users, setUsers] = useState([]);
  const [loading, setLoading] = useState(true);
  const [error, setError] = useState(null);

  useEffect(() => {
    const controller = new AbortController();
    const { signal } = controller;

    fetch('/api/users', { signal })
      .then((response) => {
        if (!response.ok) {
          throw new Error('Failed to fetch users');
        }
        return response.json();
      })
      .then((data) => {
        setUsers(data);
        setLoading(false);
      })
      .catch((err) => {
        if (err.name === 'AbortError') return; // ignore unmount cancellation
        setError(err.message);
        setLoading(false);
      });

    return () => controller.abort();
  }, []);

  if (loading) return <div>Loading users...</div>;
  if (error) return <div>Error: {error}</div>;

  return (
    <ul>
      {users.map((user) => (
        <li key={user.id}>{user.name} — {user.email}</li>
      ))}
    </ul>
  );
}

export default UserList;
The 7B model handles this type of structured generation reliably, producing components with proper state management, lifecycle handling, and conditional rendering. Note the use of AbortController to cancel the fetch request when the component unmounts — this prevents memory leaks and state-update-on-unmounted-component errors. If the AI generates a version without AbortController, add it manually following the pattern above.
Code Explanation and Refactoring
Highlight an existing block of code and press Cmd+L / Ctrl+L to ask questions about it. The /edit command refactors code inline. (The /edit command is available in Continue v0.8 and later. In v1.0+, inline editing may be invoked differently — consult the Continue changelog for your installed version if /edit is not available.)
// Before: callback-based Express route handler
// Note: authentication middleware is omitted for brevity.
// In production, add auth (e.g., app.use(authMiddleware)) before route handlers.
app.get('/api/users', function (req, res) {
  db.query('SELECT * FROM users', function (err, results) {
    if (err) {
      console.error('Database query failed:', err.message);
      res.status(500).json({ error: 'Internal server error' });
      return;
    }
    res.json(results);
  });
});

// After refactoring with Continue's /edit command ("Refactor to async/await"):
app.get('/api/users', async (req, res) => {
  try {
    const results = await db.query('SELECT * FROM users');
    res.json(results);
  } catch (err) {
    // Log only the message, not the full error object or stack trace,
    // to avoid leaking internal DB details to log aggregators.
    console.error('Database query failed:', err.message);
    res.status(500).json({ error: 'Internal server error' });
  }
});
Context-Aware Assistance with @Files and @Codebase
In the chat panel, typing @filename references a specific file from the workspace, injecting its contents as context. Typing @codebase triggers a broader project-wide search using embeddings. This is particularly useful when asking the AI to write tests for an existing module: @utils.js Write unit tests for the validateEmail and formatCurrency functions provides the model with the actual implementations to test against, rather than guessing at interfaces.
Note: @codebase requires an embeddings model. Add the "embeddingsProvider" block shown in the configuration section above and run ollama pull nomic-embed-text before use. Without this, @codebase queries will fail or return empty results.
Performance Tuning and Optimization
Speed Up Autocomplete Response Times
The single highest-impact change for autocomplete speed is using the smallest adequate model. The 1.5B variant at approximately 60 tokens per second on Apple M-series silicon feels nearly instant, while the 7B model at approximately 25 tokens per second introduces noticeable lag on every keystroke pause.
Tuning debounceDelay between 300 and 500 milliseconds prevents unnecessary inference calls. On machines with a discrete GPU, allocating GPU layers through Ollama's num_gpu parameter offloads computation from CPU to GPU. Run ollama run <model> --verbose before and after configuring GPU layers, and compare the eval rate values to confirm the speedup on your hardware.
GPU acceleration requires: Nvidia GPU → CUDA 11.x or later installed; AMD GPU → ROCm installed; Apple Silicon → Metal is used automatically. Confirm GPU detection with ollama run <model> --verbose and check for gpu layers > 0 in the output.
Reduce Memory Usage
Running two models simultaneously (one for chat, one for autocomplete) consumes significant RAM. On constrained systems, configure Ollama to limit concurrent models and unload idle ones.
# ── Shell session (temporary, does NOT affect an already-running daemon) ───
export OLLAMA_MAX_LOADED_MODELS=1
export OLLAMA_KEEP_ALIVE=5m

# ── Persist for interactive shells (new terminal sessions only) ────────────
echo 'export OLLAMA_MAX_LOADED_MODELS=1' >> ~/.zshrc   # or ~/.bashrc
echo 'export OLLAMA_KEEP_ALIVE=5m'       >> ~/.zshrc
source ~/.zshrc

# ── Linux systemd: apply to the running daemon (required for systemd) ──────
# Note: on Linux, the Ollama daemon runs via systemd and does NOT read
# shell environment variables. You must configure the daemon separately:
sudo systemctl edit ollama
# Add the following inside the override file that opens:
# [Service]
# Environment="OLLAMA_MAX_LOADED_MODELS=1"
# Environment="OLLAMA_KEEP_ALIVE=5m"

sudo systemctl daemon-reload
sudo systemctl restart ollama

# ── Verify the daemon sees the variable ────────────────────────────────────
systemctl show ollama | grep OLLAMA_MAX_LOADED_MODELS
# Expected: Environment=OLLAMA_MAX_LOADED_MODELS=1 (confirms daemon received it)

# GPU layer count is set per-model, not via environment variable.
# Confirm GPU detection with: ollama run qwen2.5-coder:7b --verbose
# Look for "gpu layers: N" in the output (N > 0 means GPU is active).
Quantization also affects memory use. Q4 quantized models use approximately half the parameter storage of Q8 variants (4 bits vs 8 bits per weight), though total memory usage including KV cache will differ. Quality drops too little to notice in autocomplete completions. The tradeoff becomes more visible in complex reasoning during chat interactions, where Q8 or higher quantization preserves more model capability.
Managing Multiple Models for Different Tasks
The configuration already separates chat and autocomplete models. For teams that also use embeddings (powering the @codebase feature), a third model can be configured independently. The principle is consistent: use the smallest adequate model for latency-sensitive tasks, and reserve larger models for interactions where quality matters more than speed.
Local AI vs. GitHub Copilot: Honest Comparison
Where Local Wins
You keep all inference local; the stack transmits no code to external servers. Note that VS Code and OS-level telemetry operate independently of Ollama and may require separate configuration to restrict. You pay nothing beyond hardware. You can customize every parameter: swap models, tune generation settings, add context providers. No vendor locks you in, and every component can be replaced independently. Offline access works by definition.
Where Cloud Still Leads
Cloud-hosted models like those powering Copilot use larger architectures, train on more data, and produce higher first-pass correctness on complex, multi-file reasoning tasks. The setup burden is zero for cloud tools. Multi-file context handling, where the model considers dozens of files simultaneously, remains more polished in cloud offerings.
The honest assessment: for most daily coding tasks like writing functions, generating boilerplate, explaining code, and simple refactoring, local models produce good-enough results. In our experience, they cover the majority of what a working developer does in a typical session. For the remaining slice involving complex architectural reasoning or unfamiliar domains, cloud models still produce more accurate and complete suggestions.
For most daily coding tasks like writing functions, generating boilerplate, explaining code, and simple refactoring, local models produce good-enough results. In our experience, they cover the majority of what a working developer does in a typical session.
Complete Setup Checklist
- VS Code installed and updated (with
codeCLI in PATH on macOS) - Ollama installed and
ollama --versionreturns output - Coding models pulled (
qwen2.5-coder:7bandqwen2.5-coder:1.5b) - Embeddings model pulled (
nomic-embed-text) for@codebasesupport - Ollama API confirmed running via
curl --max-time 5 http://localhost:11434 - Continue extension installed in VS Code
- Configuration file edited (check Continue version:
config.jsonfor pre-v1.0,config.yamlfor v1.0+) - Tab autocomplete tested and working
- Chat panel tested with code generation prompt
- Performance settings tuned for your hardware (and persisted via systemd override on Linux or shell profile on macOS)
- (Optional) GPU acceleration confirmed via
ollama run <model> --verbose
Troubleshooting Common Issues
"Model Not Found" or Connection Errors
Run ollama list to confirm pulled models and their exact tag names. The model name in your configuration file must match the tag precisely, including the parameter count suffix (e.g., qwen2.5-coder:7b, not qwen2.5-coder). If Ollama's HTTP server is not responding, verify with curl --max-time 5 http://localhost:11434 — a response of Ollama is running confirms the server is active. If the server is down, restart it from the menu bar app (macOS), systemctl start ollama (Linux), or the system tray (Windows).
Slow or Unresponsive Autocomplete
Switch to the 1.5B model if autocomplete lags. Increase debounceDelay to 500ms. Check system resource usage through Activity Monitor (macOS) or Task Manager (Windows) to identify whether memory pressure or CPU saturation is the bottleneck.
Continue Chat Returns Empty or Garbled Output
Verify model compatibility by testing the same model directly via ollama run in the terminal. If terminal output is correct but Continue output is garbled, clear Continue's cache via VS Code Command Palette → "Continue: Clear Cache" and restart VS Code. Some model variants have known compatibility issues with specific Continue versions; updating both to their latest releases typically resolves these.
Configuration Not Taking Effect
If changes to your configuration file seem to have no effect, verify you are editing the correct file for your Continue version. Run code --list-extensions --show-versions | grep -i continue to check your installed version. Pre-v1.0 uses ~/.continue/config.json; v1.0+ uses ~/.continue/config.yaml. Check ls -la ~/.continue/ to confirm which file is present.
Next Steps
The setup described here is a foundation. Continue supports custom context providers that can pull documentation, database schemas, or API specifications into chat context, making the AI aware of project-specific conventions. Importing a fine-tuned model into Ollama is possible via the Modelfile system. Fine-tuning itself requires separate tooling (such as Unsloth or llama.cpp) and significant GPU compute; Ollama then imports the resulting GGUF file.
Continue also supports JetBrains IDEs for teams not standardized on VS Code. Both the Continue Discord and Ollama GitHub Discussions are active communities where developers share model recommendations, configuration tips, and benchmarks for specific hardware configurations.