When I was starting with Rails, there were several “AHA!” moments that made me think I had been wasting my life as a .NET developer. Gems, rake, Active Record, and the list goes on.
One of these moments came years later in the form of Heroku. Heroku is a deployment platform for Ruby and Node.js based web applications. There are many “getting started” articles with Heroku, one of the best is Ben Scofield’s which I recommend you read before going any further in this article. Ben does a great job showing you how to get an app up on Heroku, along with detailing some of the constraints of the Heroku platform.
By the end of that article, you should see how crazy simple it is to get a Rails up on web. In this article, I plan to take the Heroku deployment scenario a step further, and show you how to have a development/staging app along with a production app.
When you are creating applications for clients/friends/your cat, it’s a good idea to have a “staging” application to test changes to the app and allow the end users to see it before you apply anything to production. You can test new gem versions or layout changes and get sign-off without hurting the money-making part of the site. The issue when you have a staging area is making it simple to administer, so you don’t have to juggle multiple code bases, copy source trees, etc. Heroku makes this a breeze.
Preparation
In order to get started, you will need the following:
- Knowledge of git (List Apart article)
- GitHub repo (Set Up for all Platforms)
- Heroku API account (Great startup article)
- Basic Rails knowledge
I encourage you to use RVM when investigating anything Ruby.
Process
Enough chit-chat, let’s get to the code.
Starting with a gem-free environment, we’ll need Bundler (1.0.14) and Rails (3.0.7)
gem install bundler
gem install rails
Now, create your Rails app (rails new your_heroku_app) and cd into the root of said app. Let’s make sure everything is working:
bundle install
rails s
If all is well, you should see the standard “Welcome to Rails” page. Now, let’s get this application under source control. Another great side-effect of using Heroku is it forces you to use source control.
git init
git add .
git commit -m "Initial repo commit"
GitHub
Excellent, now we have a local git repository. Since this app is going to change the world, we will need some collaborators. The best way to make collaboration easy is to use GitHub. GitHub makes forking (which is, basically, copying the repository) a mouse-click and pull requests (which is git’s way of saying “Hey, I have a patch for you”) dead simple. Also, adding a GitHub repository for your app gives you an offsite copy of that is not tied to your deployment platform.
Login to your GitHub account and create a new repository.

GitHub will then take you to a page that shows you exactly how to push your local repository to your new GitHub repository. You’ll notice that we call the remote repository “origin” which is a git euphemism for identifying the primary upstream repository. In this case, we want the GitHub repository to be our central repository for collaboration, so it needs the current version of our master branch. Let’s push our code to GitHub:
git remote add origin git@github.com:your-user-name/your_app.git
git push -u origin master
Rocking. Now our app is safe and we are exercising good coding practices. Yay us!
Heroku Staging Environment
Now it’s time to set up our staging environment on Heroku. We’ll need the Heroku gem, of course
gem install herokuHeroku adds a command-line interface (CLI) to allow the creation and manipulation applications. To create the application, it’s simple a matter of:
heroku create your-app-name --remote stagingHere we are passing in a couple of optional arguments to the create command. The first one is the name of the application, which must be unique on Heroku (meaning, you need to change it to something else). The second argument (–remote) will automatically add a git remote repository to our local git setup called “staging”. The staging git repository will be where we push changes to our app for client review. Let’s push our Rails app to staging now:
git push staging master
Now, your app is on the web. Pretty easy, huh? You can open it with the Heroku CLI:
heroku open --app your-app-nameDo Something
OK, so our app isn’t changing the world, yet. Let’s make it do something. For this contrived example, our app will allow the user to create a list of Scouts (I am a Den Leader for my boy’s troop). Keeping it as simple as possible, a Scout just has a name. I am going to use Ryan Bates’ very awesome nifty-generators gem so we can get someting up fast. I add this to the Gemfile:
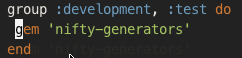
and then generate a layout and scaffold.
rails g nifty:layout
rails g nifty:scaffold Scout name:string index new destroy
rake db:migrate
Note: If you are having issues with Rake, please make sure either 0.8.7 or 0.9.1 is installed. Either one should get you through this tutorial.
Now we have our model defined. Let’s set up our routes and get rid of that default Rails page:
# config/routes.rb
root :to => "scouts#index"
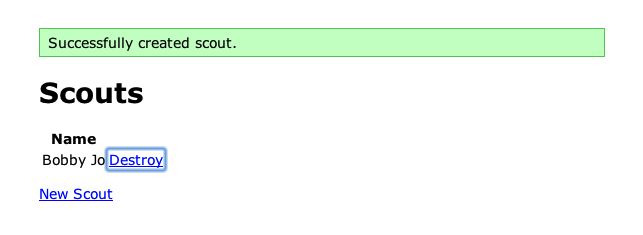
rm public/index.htmlStart up our local Rails server, and we can add Scouts.
We have a ton of local changes that we need to push to our various repositories. First, we’ll want to push to GitHub, so our collaborators can start working on our scout API.
git add .
git commit -m "Added layout and Scout scaffold"
git push origin master
Of course, we need to update staging as well.
git push staging masterBefore we can start adding Scouts in staging, we need to migrate our staging database. As you might have guessed, we leverage the Heroku CLI.
heroku rake db:migrate

Now a
heroku open --app stagingand we can add scouts!
Production
Our last step here is to create our production environment on Heroku. It’s simply a matter of running the ‘heroku create’ command again, giving our heroku app a different name and creating a ‘production’ git remote.
heroku create your-app-name-production --remote production
git push production master
heroku rake db:migrate --app your-app-name-production
And voila! You now have a production environment and a happy client!
There are other resources for this approach on Heroku, one of which comes from the Heroku site itself. It is certainly worth a read, as it mentions some aspects of multiple enviornments that we don’t cover here. Also, there is gem called heroku_san which handles a lot of the details we went through in this post for you, that you should check out, now that you know some of what it does.
 Glenn Goodrich
Glenn works for Skookum Digital Works by day and manages the SitePoint Ruby channel at night. He likes to pretend he has a secret identity, but can't come up with a good superhero name. He's settling for "Roob", for now.