

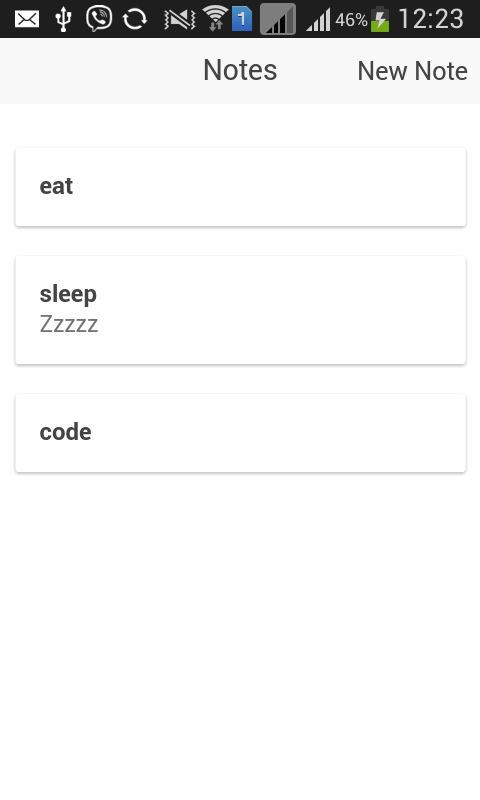
In this tutorial we’ll be creating a note taking app with Cordova and LokiJS. We’ll be using the Ionic Framework to handle the app structure and UI interactions. Here’s how the final app will look:
Key Takeaways
- LokiJS provides a fast, in-memory data storage solution for Cordova apps, eliminating the need to stringify data for storage and retrieval unlike localStorage.
- The tutorial utilizes the Ionic Framework for UI interactions and structures within the Cordova app, specifically focusing on creating a note-taking application.
- LokiJS can be integrated with various persistence adapters; this tutorial uses the FileSystem adapter for storing data in JSON files on the device’s filesystem.
- Essential plugins and libraries including LokiJS, Lodash for data manipulation, and Cordova plugins for file management and camera integration are detailed for setting up a functional app environment.
- Services in the app handle functionalities like camera access and data operations with LokiJS, promoting clean and maintainable code by encapsulating logic within reusable components.
- The tutorial covers the full spectrum of CRUD operations, enabling the app to create, read, update, and delete notes, with additional functionalities for handling images and modal interactions for a comprehensive user experience.
What Is LokiJS?
LokiJS is a fast, in-memory document-oriented datastore for node.js, browsers and Apache Cordova that provides a comprehensive API for storing and retrieving data. Unlike localStorage, with LokiJS there is no need to stringify for storage and access. LokiJS stores data to localStorage by default, but you can use other storage methods with ‘persistence adapters’, including an ‘IndexedAdapter’, which uses IndexedDB for persistence. For this tutorial we’ll be using the FileSystem adapter which stores the data using a JSON file saved in the FileSystem.
Setup
First install Cordova and Ionic via npm with the following command:
npm install -g cordova ionicOnce installed create a new Ionic project:
ionic start loki-notes blankThis creates a new Ionic project using the blank template. There are other templates available such as ‘tabs’ and ‘sidemenu’ but we’ll stick with the blank one.
Open the loki-notes directory and install the platforms needed.
cd loki-notes
ionic platform add android
Installing Dependencies
The app will depend on the following libraries, I have included installation instructions after each one.
LokiJS
Used for storing app data.
bower install lokijs --saveLodash
Used for truncating note descriptions.
bower install lodash --saveloki-cordova-fs-adapter
Used by LokiJS to store data to the filesystem. Unfortunately this library isn’t indexed in either bower or npm so you have to download it from Github and save it to the www/js directory.
Cordova-Plugin-File
The dependency for the LokiJS FileSystem adapter.
cordova plugin add cordova-plugin-fileCordova-Plugin-Camera
Used for capturing photos attached to each note.
cordova plugin add cordova-plugin-cameraOnce you’ve finished installing all the dependencies, add them to www/index.html file, after the main cordova JavaScript file.
<script src="js/app.js"></script><!-- the main cordova JavaScript file-->

<script src="lib/lokijs/src/lokijs.js"></script>
<script src="lib/lokijs/src/loki-angular.js"></script>

<script src="js/loki-cordova-fs-adapter.js"></script>

<script src="lib/lodash/dist/lodash.min.js"></script>
Note that cordova-plugin-file and cordova-plugin-camera are Cordova plugins so we don’t need to link them in the index.html file. Plugins have their APIs exposed to the global scope, so we can call them from any JavaScript file.
While we’re here, let’s reference the controller and services which we will be creating shortly.
<script src="js/controllers/NoteController.js"></script>

<script src="js/services/NoteService.js"></script>
<script src="js/services/CameraService.js"></script>
Building the App
Services
Services encapsulate common functionality within a single function. This allows us to have more concise code when calling different functions from the libraries we’re using. Services are stored under the www/js/services directory.
Camera Service
Create the camera service (www/js/services/CameraService.js) responsible for wrapping the call to the camera plugin and add the following code:
(function(){

  angular.module('starter')
  .service('CameraService', ['$q', CameraService]);

  function CameraService($q){

    var me = this;

    me.options = {
      quality: 80,
      correctOrientation: true
    };

    function getPicture(){

        var q = $q.defer();

        me.options.encodingType = Camera.EncodingType.JPEG;
        me.options.sourceType = Camera.PictureSourceType.CAMERA;

        navigator.camera.getPicture(
          function(result){
            q.resolve(result);
          },
          function(err){
            q.reject(err);
          },
          me.options
        );

        return q.promise;
      }

    return {
      getPicture: getPicture
    }
  }

})();
Breaking down the code above, we first wrap everything in an ‘IIFE’ (Immediately-Invoked Function Expression) to avoid exposing the code to the global scope.
(function(){
    ...
})();
Then we create the camera service. This uses the built-in angular service called $q which allows functions to be called asynchronously. This means we don’t have to wait for the camera plugin to return a result before the app becomes fully responsive. Once a photo has been selected from the default camera application, it returns control to the app.
angular.module('starter')
  .service('CameraService', ['$q', CameraService]);

function CameraService($q){
    ...
}
Inside the CameraService function we specify the default options for the camera. We’re specifying two options. quality which allows us to set the quality of the resulting photo (lesser quality means lesser file size) and correctOrientation which auto-corrects the photo orientation based on the orientation of the camera when the photo was taken.
var me = this;

me.options = {
  quality: 80,
  correctOrientation: true
};
The CameraService has one method, getPicture which launches the default camera application in the device. At the beginning of the function we initiate the $q service by calling the defer method. After that, we specify a couple of options. encodingType which sets the format of the photo and sourceType which allows us to specify the source of the photo, in this case, the camera. After specifying the options, the default camera app is launched by calling navigator.camera.getPicture. This accepts three arguments: the success callback function, the error callback function and the camera options. We then expose this function to the outside world using the revealing module pattern.
function getPicture(){

  var q = $q.defer();

  me.options.encodingType = Camera.EncodingType.JPEG;
  me.options.sourceType = Camera.PictureSourceType.CAMERA;

  navigator.camera.getPicture(
    function(result){
      q.resolve(result);
    },
    function(err){
      q.reject(err);
    },
    me.options
  );

  return q.promise;
}

return {
  getPicture: getPicture
}
Note Service
The note service (www/js/services/NoteService.js) encapsulates all the LokiJS function calls.
(function(){

    angular.module('starter')
    .service('NoteService', ['$q', 'Loki', NoteService]);

    function NoteService($q, Loki){

        var db;
        var notes;

        function initialize(){
            var adapter = new LokiCordovaFSAdapter({"prefix": "loki"});
            db = new Loki('notes_db', {
                autosave: true,
                autosaveInterval: 1000,
                adapter: adapter
            });
        }

        function getNotes(){

            return $q(function(resolve, reject){

                db.loadDatabase({}, function(){
                    notes = db.getCollection('notes');

                    if(!notes){
                        notes = db.addCollection('notes');
                    }

                    resolve(notes.data);
                });
            });

        }

        function addNote(note){
            notes.insert(note);
        }

        function updateNote(note){
            notes.update(note);
        }

        function deleteNote(note){
            notes.remove(note);
        }

        return {
            initialize: initialize,
            getNotes: getNotes,
            addNote: addNote,
            updateNote: updateNote,
            deleteNote: deleteNote
        };
    }

})();
Breaking down the code above. We use the Loki service provided by LokiJS to interact with the database.
(function(){

    angular.module('starter')
    .service('NoteService', ['$q', 'Loki', NoteService]);

    function NoteService($q, Loki){
        ...
    }

})();
Inside the NoteService function are two variables. db which stores the reference to the current database we’re working with and notes which stores the reference to the current collection. Collections is just a fancy term for tables.
var db;
var notes;
The initialize function initializes the database, first creating a new instance of the Cordova filesystem adapter. This accepts an object containing the options we want to pass in. In this case, we want to specify the prefix used. Next we create a new instance of Loki. This accepts the name of the database as its first argument and the database options for the second. For the options, we’re setting autosave to true. This is because lokiJS doesn’t automatically save the data into the persistence adapter of your choice. Everything is stored in memory until you call the saveDatabase method in the db. Setting autosave to true means it will automatically call the saveDatabase method behind the scenes. An additional option named autosaveInterval is required when you set autosave to true. This is the interval in milliseconds in which LokiJS should persist the data. In the example below, the interval is set to 5000 which means that it will save every 5 seconds.
function initialize(){
    var adapter = new LokiCordovaFSAdapter({"prefix": "loki"});
    db = new Loki('notes_db', {
        autosave: true,
        autosaveInterval: 5000,
        adapter: adapter
    });
}
The getNotes method loads the data stored in the notes collection. It creates one if the notes collection doesn’t exist yet. Note that we’re wrapping everything inside a call to the $q service. The syntax is different from the camera service but the idea is basically the same.
function getNotes(){

    return $q(function(resolve, reject){

        db.loadDatabase({}, function(){
            //retrieve data from notes collection
            notes = db.getCollection('notes');

            if(!notes){
                //create notes collection
                notes = db.addCollection('notes');
            }

            resolve(notes.data);
        });
    });

}
The addNote, updateNote, and deleteNote functions serve as a wrapper to the LokiJS API for inserting, updating and deleting data from the database. All of which accept an object containing the note data as an argument.
function addNote(note){
    notes.insert(note);
}

function updateNote(note){
    notes.update(note);
}

function deleteNote(note){
    notes.remove(note);
}
Expose everything to the outside world:
return {
    initialize: initialize,
    getNotes: getNotes,
    addNote: addNote,
    updateNote: updateNote,
    deleteNote: deleteNote
};
Controllers
The only controller for this app is the note controller responsible for handling UI interactions in the app.
(function(){
    angular.module('starter')
    .controller('NoteController', ['$scope', '$ionicModal', '$ionicPlatform', 'CameraService', 'NoteService', NoteController]);

    function NoteController($scope, $ionicModal, $ionicPlatform, CameraService, NoteService){

        var me = this;
        me.notes = [];

        $ionicPlatform.ready(function(){
            NoteService.initialize();

            NoteService.getNotes().then(function(notes){
                me.notes = notes;
            });
        });

        $ionicModal.fromTemplateUrl('new-note.html', {
            scope: $scope,
            animation: 'slide-in-up'
        }).then(function(modal){
            $scope.new_note_modal = modal;
        });

        $ionicModal.fromTemplateUrl('image-modal.html', {
            scope: $scope,
            animation: 'slide-in-up'
        }).then(function(modal){
            $scope.image_modal = modal;
        });

        me.truncate = function(string){
            return _.truncate(string, {length: 35});
        };

        $scope.deleteNote = function(note){
            NoteService.deleteNote(note);
        };

        $scope.newNote = function(){
            $scope.note = {};
            $scope.isUpdate = false;
            $scope.new_note_modal.show();
        };

        $scope.viewNote = function(note){
            $scope.note = {};
            $scope.note = note;
            $scope.isUpdate = true;
            $scope.new_note_modal.show();
        };

        $scope.takePicture = function(){
            CameraService.getPicture().then(function(photo){
                $scope.note.photo = photo;
            });
        };

        $scope.saveNote = function(){
            if($scope.isUpdate){
                NoteService.updateNote($scope.note);
            }else{
                NoteService.addNote($scope.note);
            }

            $scope.note = {
                title: '',
                text: '',
                photo: null
            };

            $scope.new_note_modal.hide();
        };

        $scope.viewImage = function(image){
            $scope.note.photo = image;
            $scope.image_modal.show();
        };

        $scope.closeModal = function(modal){
            $scope[modal + '_modal'].hide();
        };

    }

})();
Breaking down the code above. First we create NoteController and import all the services we need.
(function(){
    angular.module('starter')
    .controller('NoteController', ['$scope', '$ionicModal', '$ionicPlatform', 'CameraService', 'NoteService', NoteController]);

function NoteController($scope, $ionicModal, $ionicPlatform, CameraService, NoteService){
    ...
})();
Here’s a brief description of each one:
– $scope: Allows us to get and set data to the current scope. This data can then be used inside the views.
– $ionicModal: Used for creating a modal.
– ionicPlatform: Used for listening for the ready event for Ionic.
– CameraService: The camera service created earlier. This allows us to call the API provided by the camera plugin.
– NoteService: The note service that we created earlier. This allows us to make calls to the API provided by LokiJS.
Declare a me variable that will be used as a reference to the controller.
var me = this;Attach an empty array to the notes object and listen for the ready event in the $ionicPlatform. When this function is triggered, it means that the device is ready. It’s triggered only once when the app is launched so is the perfect place to initialize the database and get the data stored in the notes collection.
me.notes = [];

$ionicPlatform.ready(function(){ //when the device is ready
    NoteService.initialize(); //initialize the database

    //get all the notes from the notes collection
    NoteService.getNotes().then(function(notes){
        me.notes = notes; //assign it to the controller
    });
});
Initialize the modals for creating a new note and viewing the image attached to the note.
//modal for creating new note
$ionicModal.fromTemplateUrl('new-note.html', {
    scope: $scope,
    animation: 'slide-in-up'
}).then(function(modal){
    $scope.new_note_modal = modal;
});

//modal for viewing image attached to note
$ionicModal.fromTemplateUrl('image-modal.html', {
    scope: $scope,
    animation: 'slide-in-up'
}).then(function(modal){
    $scope.image_modal = modal;
});
Add a truncate method to the controller. All this does is limit the number of characters for a string. This uses the truncate method in lodash which accepts the string you want to work with as its first argument and an object containing the options. In this case, we want to limit the character count to 35 characters minus the 3 characters used for indicating that the string has been truncated. By default lodash uses triple dots (…).
me.truncate = function(string){
    return _.truncate(string, {length: 35});
};
Attach a deleteNote function to the current scope. This accepts an object containing the data for a specific note as its argument. All it does is call the deleteNote method from the NoteService.
$scope.deleteNote = function(note){

    NoteService.deleteNote(note);
};
The newNote function is called whenever the new note button is clicked. This empties the note currently stored in the $scope and sets isUpdate to false. This will serve as a switch for determining whether the current note is an existing one (see saveNote method). Lastly, it opens the modal for creating new notes.
$scope.newNote = function(){
    $scope.note = {};
    $scope.isUpdate = false;
    $scope.new_note_modal.show();
};
The viewNote function is called whenever the user double taps on a specific note. First resetting the note stored in the scope and assigning a new value to it. It sets isUpdate to true because we’re trying to open an existing note so it’s understood that the user is either trying to view it or update it. Lastly we show the modal.
$scope.viewNote = function(note){
    $scope.note = {};
    $scope.note = note;
    $scope.isUpdate = true;
    $scope.new_note_modal.show();
};
The takePicture function is called when the user taps the camera icon on the header for the new note modal. It launches the default camera app and when a photo is selected, assigns it to the current scope.
$scope.takePicture = function(){
    CameraService.getPicture().then(function(photo){
        $scope.note.photo = photo;
    });
};
The saveNote function saves and updates the note to the database. It uses the isUpdate property to determine whether the current note stored in the $scope is to be updated or created. Once that’s done, we clear the note and close the new note modal.
$scope.saveNote = function(){

    if($scope.isUpdate){
        NoteService.updateNote($scope.note);
    }else{
        NoteService.addNote($scope.note);
    }

    $scope.note = {
        title: '',
        text: '',
        photo: null
    };

    $scope.new_note_modal.hide();

};
The viewImage function shows the image attachment in a fullscreen modal.
$scope.viewImage = function(image){
    $scope.note.photo = image;
    $scope.image_modal.show();
};
The closeModal function closes the modal that’s specified as the argument.
$scope.closeModal = function(modal){
    $scope[modal + '_modal'].hide();
};
Views
There’s one view in the app, the notes view, so create www/templates/notes.html and add the following.
<ion-view title="Notes" ng-controller="NoteController as note_ctrl">
    <header class="bar bar-header bar-stable">
        <h1 class="title">Notes</h1>
        <button class="button button-clear" ng-click="newNote()">New Note</button>
    </header>

  <ion-content class="has-header padding">
    <div class="card" ng-repeat="note in note_ctrl.notes">
      <div class="item item-text-wrap" on-double-tap="viewNote(note)" on-drag-right="deleteNote(note)">
        <strong>{{note.title}}</strong>
        <div class="description">{{note_ctrl.truncate(note.text)}}</div>
      </div>
    </div>
    <div class="card" ng-if="note_ctrl.notes.length === 0">
        <div class="item item-text-wrap">
            No notes yet
        </div>
    </div>
  </ion-content>

  <script id="new-note.html" type="text/ng-template">
  <ion-modal-view>
    <ion-header-bar class="bar-stable">
      <button class="button button-clear icon ion-camera" ng-click="takePicture()"></button>
      <h1 class="title">New Note</h1>
      <button class="button button-clear" ng-click="closeModal('new_note')">Close</button>
    </ion-header-bar>
    <ion-content>

      <div class="list">
        <label class="item item-input item-stacked-label">
          <span class="input-label">Title</span>
          <input type="text" ng-model="note.title">
        </label>
        <label class="item item-input item-stacked-label">
          <span class="input-label">Note</span>
          <textarea ng-model="note.text"></textarea>
        </label>
      </div>

      <div class="padding" ng-if="note.photo">
        <button class="button button-clear icon ion-image" ng-click="viewImage(note.photo)"></button>
      </div>

      <div class="padding">
        <button class="button button-positive button-block" ng-click="saveNote()">
          Save
        </button>
      </div>

    </ion-content>
  </ion-modal-view>
  </script>

  <script id="image-modal.html" type="text/ng-template">
    <div class="modal image-modal transparent"
       ng-click="closeModal('image')">
        <img ng-src="{{note.photo}}" class="fullscreen-image" />
    </div>
  </script>
</ion-view>
Breaking down the code above. First we wrap everything in an <ion-view> tag. This is the standard container for view content and any navigational and header bar information. We’ve specified two attributes, title, which is the name that you want to give to the view, and ng-controller, which allows us to specify the controller used for this view. An alias of note_ctrl is given so that we can refer to any data or function attached to the controller by using the alias.
<ion-view title="Notes" ng-controller="NoteController as note_ctrl">
</ion-view>
The <header> tag creates the header for the app and contains an <h1> element which displays the title of the current page and a <button> element for creating a new note. An ng-click attribute specifies that when this button is clicked, it will execute the newNote function attached to the $scope.
<header class="bar bar-header bar-stable">
    <h1 class="title">Notes</h1>
    <button class="button button-clear" ng-click="newNote()">New Note</button>
</header>
The <ion-content> is used to specify the main content of the view. In this case the main content is the list of notes currently saved in the database.
We create a <div> with a class of card for that and use the ng-repeat directive to repeat the element for every note stored in the notes array. Inside each card is a <div> with a class of item. This serves as the container for any content you wish to add inside the card. Here we’re just outputting the title of the note and its description.
The on-double-tap attribute specifies the function executed whenever the user double taps on the item. This calls the viewNote function which opens the modal for viewing the note. The on-drag-right attribute specifies the function executed when the item is dragged to the right. This is a common gesture for removing something so we’ve attached the deleteNote function to it. If there are currently no notes in the database, we state that there are no notes yet.
<ion-content class="has-header padding">
<div class="card" ng-repeat="note in note_ctrl.notes">
  <div class="item item-text-wrap" on-double-tap="viewNote(note)" on-drag-right="deleteNote(note)">
    <strong>{{note.title}}</strong>
    <div class="description">{{note_ctrl.truncate(note.text)}}</div>
  </div>
</div>
<div class="card" ng-if="note_ctrl.notes.length === 0">
    <div class="item item-text-wrap">
        No notes yet
    </div>
</div>
</ion-content>
In Ionic, modals are created using a <script> tag which has a type of text/ng-template and a required attribute of id. The content is then wrapped inside an <ion-modal-view> tag. Inside is the header and the main content. The header contains the button for launching the default camera app, the title of the modal and the button for closing the modal. The main content is a form containing the text fields for title and description, and a button for saving the note. If a photo is attached to the note, an icon button is added. This will open the photo in fullscreen view when tapped by the user.
<script id="new-note.html" type="text/ng-template">
<ion-modal-view>
<ion-header-bar class="bar-stable">
  <button class="button button-clear icon ion-camera" ng-click="takePicture()"></button>
  <h1 class="title">New Note</h1>
  <button class="button button-clear" ng-click="closeModal('new_note')">Close</button>
</ion-header-bar>

<ion-content>
  <div class="list">
    <label class="item item-input item-stacked-label">
      <span class="input-label">Title</span>
      <input type="text" ng-model="note.title">
    </label>
    <label class="item item-input item-stacked-label">
      <span class="input-label">Note</span>
      <textarea ng-model="note.text"></textarea>
    </label>
  </div>

  <div class="padding" ng-if="note.photo">
    <button class="button button-clear icon ion-image" ng-click="viewImage(note.photo)"></button>
  </div>

  <div class="padding">
    <button class="button button-positive button-block" ng-click="saveNote()">
      Save
    </button>
  </div>

</ion-content>
</ion-modal-view>
</script>
The image modal displays the image attachment in fullscreen. This is shown when the viewImage function is called.
<script id="image-modal.html" type="text/ng-template">
<div class="modal image-modal transparent"
   ng-click="closeModal('image')">
    <img ng-src="{{note.photo}}" class="fullscreen-image" />
</div>
</script>
Styling
As the Ionic framework handles most of the styling for us, all we need to do is add the styling for the note description and the fullscreen image:
Add the following to www/css/style.css
.description {
    color: #737373;
    font-size: 15px;
}

.fullscreen-image {
    max-width: 100%;
    max-height: 100%;
    bottom: 0;
    left: 0;
    margin: auto;
    overflow: auto;
    position: fixed;
    right: 0;
    top: 0;
}
Bootstrapping
To bring everything together, open the www/js/app.js file and register lokijs right after ionic.
angular.module('starter', ['ionic', 'lokijs'])Then add the configuration for the app state. Since we have one page, we only have one state called notes. By using the state method we specify the name of the state, the url it can be accessed, and the path to where the view is (relative to the www directory). Lastly, we specify the default URL in which to navigate to.
.config(function($stateProvider, $urlRouterProvider) {
  $stateProvider

  .state('notes', {
    url: '/notes',
    templateUrl: 'templates/notes.html'
  });
  // if none of the above states are matched, use this as the fallback
  $urlRouterProvider.otherwise('/notes');
});
Conclusion
That’s it! In this tutorial you’ve learned how to use LokiJS for persisting data in Cordova apps. Using LokiJS we have performed basic CRUD (Create, Read, Update, Delete) operations in the database. We’ve barely scratched the surface in this tutorial though, so here are some topics for you to investigate:
- Find: In this tutorial we haven’t performed any complex queries, so check out the documentation on the find method.
- Changes API: If you need to persist data on a server, the changes API is useful. It allows you to sync changes made in the local copy of the database to a remote server.
The full code for this tutorial can be found on Github and if you have questions or comments, please let me know below.
Frequently Asked Questions (FAQs) about LokiJS and Cordova Apps
How does LokiJS compare to other databases in terms of speed and performance?
LokiJS is a fast, in-memory document-oriented database written in JavaScript. It’s designed to store data in a structured format, similar to databases like MongoDB. However, LokiJS stands out due to its speed and performance. It’s lightweight and has a small footprint, making it ideal for mobile applications developed using Cordova. It’s also faster than many other JavaScript databases because it operates in-memory, meaning it stores data in RAM rather than on disk, resulting in quicker data access and manipulation.
Can LokiJS be used with other mobile app frameworks apart from Cordova?
Yes, LokiJS is not limited to Cordova. It’s a versatile database that can be used with any JavaScript-based application. This includes other mobile app frameworks like React Native, Ionic, or even Node.js server applications. The key advantage of LokiJS is its flexibility and adaptability, making it a suitable choice for a wide range of applications.
How does LokiJS handle data persistence in Cordova apps?
LokiJS provides a persistence adapter for Cordova apps called LokiCordovaFSAdapter. This adapter allows LokiJS to persist data between app sessions, ensuring that your data remains intact even when the app is closed or the device is restarted. The adapter works by saving the database to a file on the device’s file system, which can then be loaded when the app starts up.
What are the main features of LokiJS that make it suitable for Cordova apps?
LokiJS offers several features that make it a great choice for Cordova apps. Firstly, it’s lightweight and fast, which is crucial for mobile apps where performance is key. Secondly, it provides powerful querying capabilities, allowing you to easily search and filter your data. Thirdly, it supports indexing, which can significantly speed up data retrieval. Lastly, it offers data persistence through the LokiCordovaFSAdapter, ensuring your data is saved between app sessions.
How do I install LokiJS in my Cordova project?
Installing LokiJS in your Cordova project is straightforward. You can install it via npm by running the command npm install lokijs. Once installed, you can require it in your project files using var loki = require('lokijs').
How can I migrate my existing Cordova app to use LokiJS?
Migrating your existing Cordova app to use LokiJS involves a few steps. Firstly, you’ll need to install LokiJS via npm. Then, you’ll need to replace your existing database calls with LokiJS equivalents. This will involve creating a new LokiJS database, defining collections, and replacing your existing CRUD operations with LokiJS methods.
Can LokiJS be used in conjunction with other databases in a Cordova app?
Yes, LokiJS can be used alongside other databases in a Cordova app. This can be useful if you need to use a different database for certain features, but want to take advantage of LokiJS’s speed and performance for other parts of your app.
How secure is LokiJS for storing sensitive data in a Cordova app?
LokiJS itself does not provide any built-in encryption or security features. However, you can implement your own security measures, such as encrypting sensitive data before storing it in the database. It’s also important to ensure that your Cordova app is secure, as this will help protect your LokiJS database.
How do I backup and restore a LokiJS database in a Cordova app?
LokiJS provides a saveDatabase method that you can use to manually save your database to a file. This file can then be used as a backup. To restore the database, you can use the loadDatabase method, which loads the database from a file.
Can I use LokiJS in a Cordova app that needs to work offline?
Yes, LokiJS is a great choice for Cordova apps that need to work offline. Because it’s an in-memory database, it can store and retrieve data without needing a network connection. Plus, with the LokiCordovaFSAdapter, you can persist data between app sessions, ensuring your data is available even when the app is offline.

