

Key Takeaways
- Creating realistic hair in Photoshop is a complex task that requires attention to detail, as each case can vary. There is no specific hair brush or instant hair button.
- The process involves extracting the subject from the background, adjusting the selection, creating a new layer for the basic shape of the hair, filling the path with a color, and creating texture using the ‘fibers’ feature.
- To add depth and realism, the ‘smudge tool’ can be used to refine the edges of the hair and simulate individual strands. The ‘dodge and burn’ tools can be used to add light and shadows.
- The hair will cast a slight shadow on the face and head, which can be created by making a new layer below the hair layer and filling the selection with black. This makes the hair look less ‘pasted on.’
- The final steps involve adding bangs and strands of hair for more realism, adjusting the brush angle, creating a layer mask, and adding shadows. The ‘smudge tool’ can be used again to lessen the harshness of the hair around the face.
Creating realistic hair in Photoshop is no easy task. There is no “hair” brush or instant hair button. One thing about creating realistic hair is that each case is different. Hair that you create for one scenario may not apply to the next subject. Although the process can be daunting, if you follow these steps, you will be able to create realistic hair in Photoshop quickly and easily.
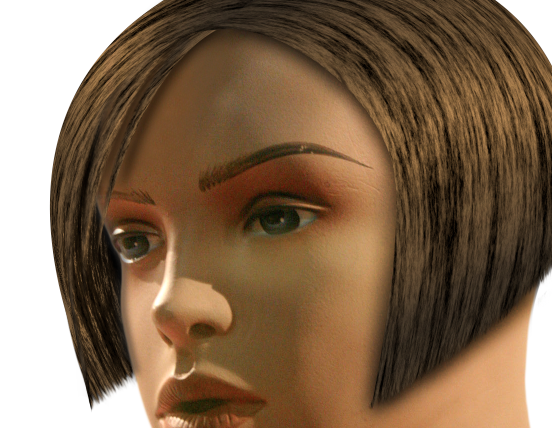
You can download the sample image here. We are going to create a short hairstyle from scratch using a few simple techniques.
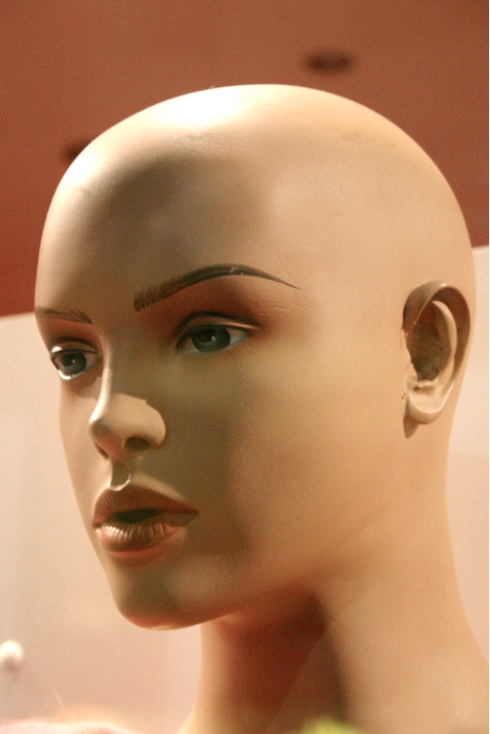
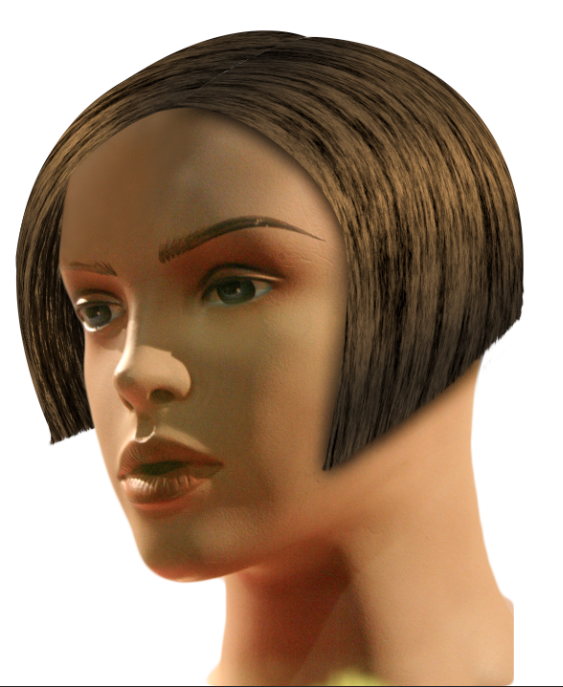
First, we need to extract her from the background. Use the quick selection tool and click and drag over the mannequin head, being sure not to let any of the background into the selection. To add to the selection, simply single-click the area that you want to include in the selection. To remove a portion of the image from your selection, hold alt/option and click to remove it.
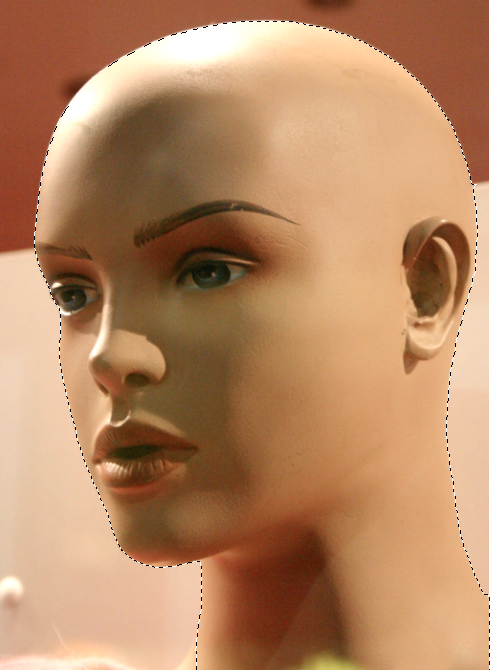
Once you are happy with the selection, adjust it by clicking the Refine Edge button in the Options Menu at the top. Bump the smooth value all the way up, since the mask reveals that the selection is bumpy and unnatural. Give the selection a 1.5px feather, and click the Decontaminate button. Choose to export to a new layer with a layer mask and click OK.

If there are any areas of your image that aren’t to your liking, alt/option-click on the layer mask and use black to mask out parts of an image and use white to paint areas back in. Once your are finished, you can leave the layer as-is, or you can right-click the mask icon and choose Apply Mask.

Next, the image is a little too narrow, so go to “Image” > “Canvas Size,” and change the width to 1400, to that there is plenty of room to construct the hair. It would be a lot more difficult to work within tighter constraints.
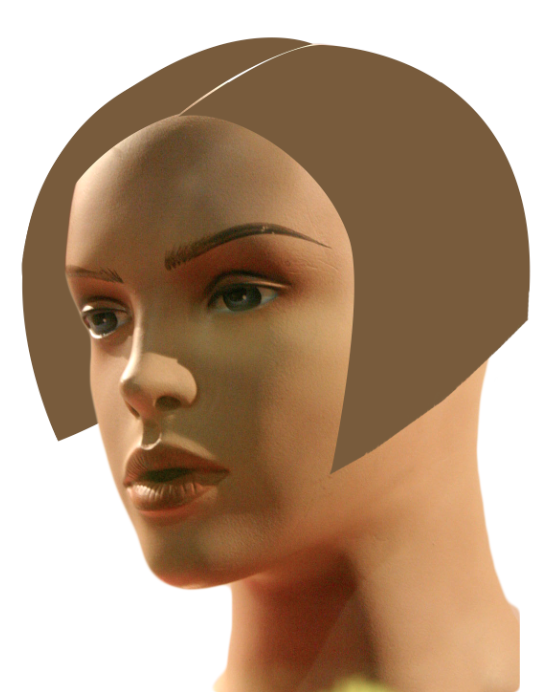
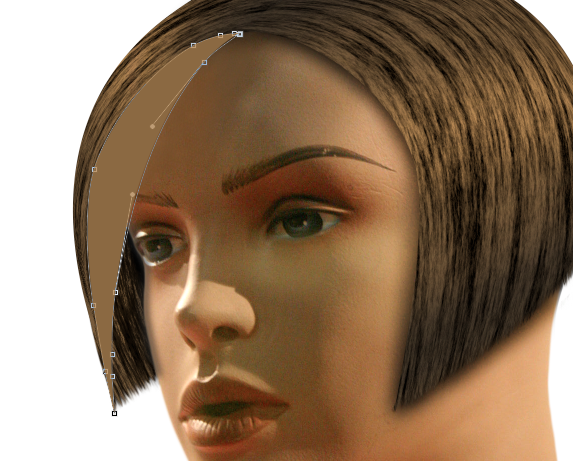
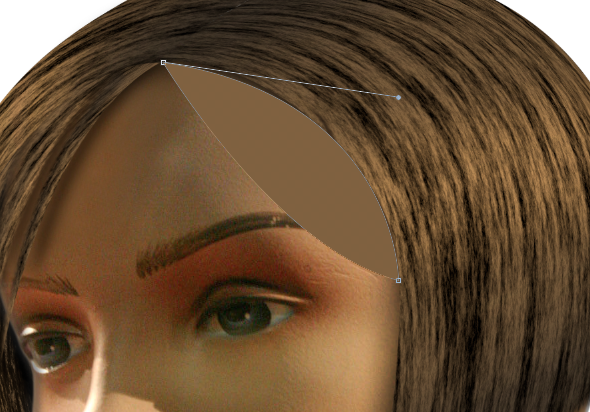
Next create a new blank layer above the head layer. Select the pen tool and begin to create the basic shape of the hair. Since our subject is going to have a part in her hair, we are going to create the base for the hair in three stages: one for each side, and the underside that will be visible. Each section will be created on its own layer, so that we can control each one differently.
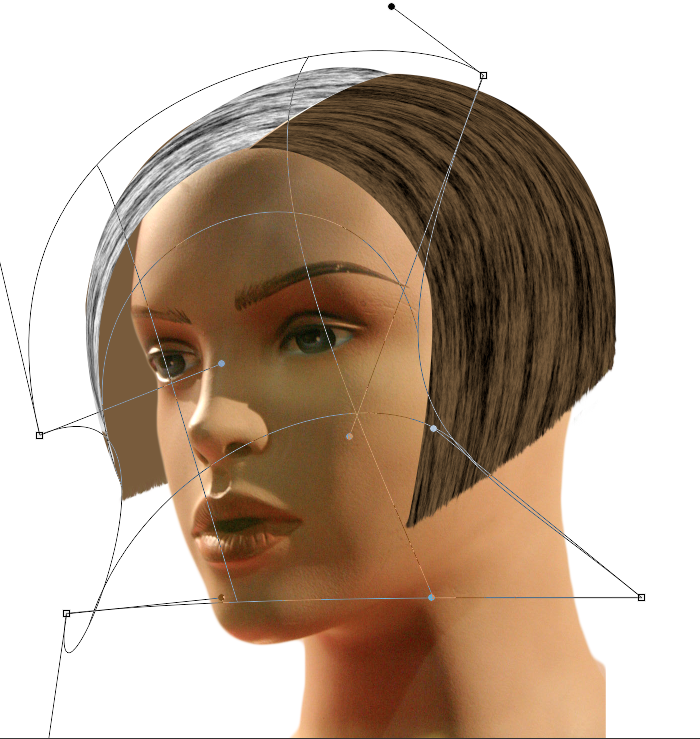
Create the first section to emulate the sample below. To make a rounded anchor point turn into a sharp one (so that you can turn a sharp angle), hold the Alt/Option key and click on the anchor point that you want to change. You will do this while you are drawing the path. Once you create the right side of the hair, with the pen tool, select a neutral brown as your foreground color, and go to the Paths Panel. Click the “Fill path with foreground color” icon at the bottom of the panel.

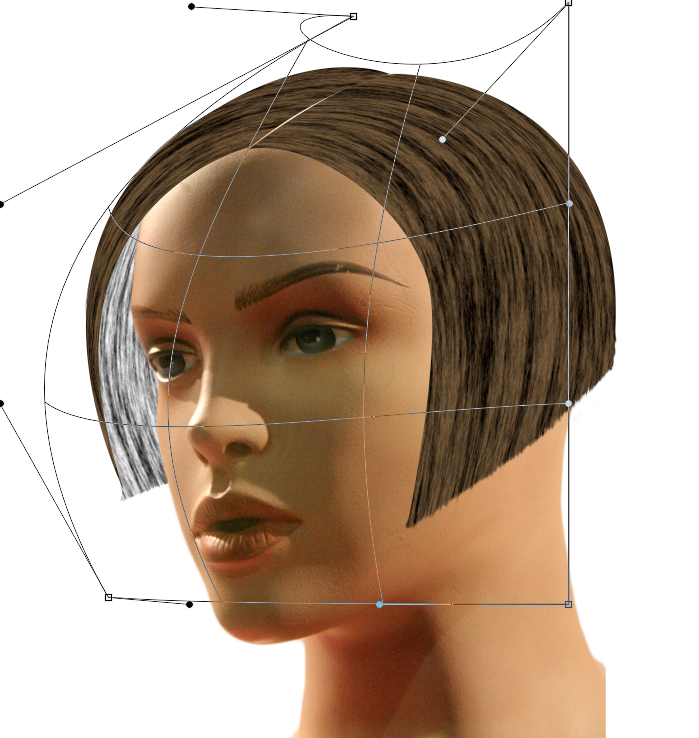
For the left side of her hair, we are going to create the overall shape using the Pen Tool again. Make sure that the part in the hair is visible, but make it as close to the edge of the right portion of the hair with just a tiny bit of the scalp visible. On this side, the underside of the hair will be visible, so we will create that on a separate layer, so that we can place it under the head layer. Replicate the overall shape shown below, repeating the steps in the path panel that we used for the right side of the hair.

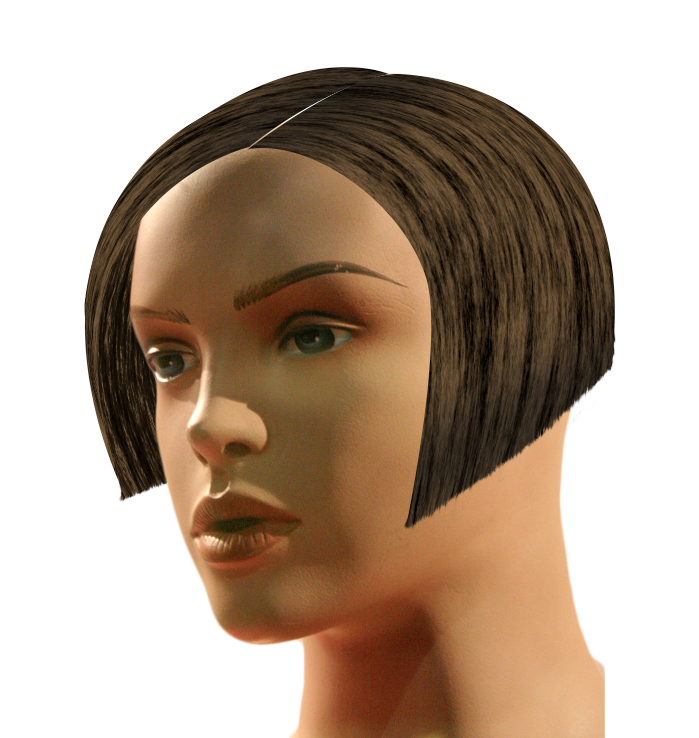
Next, create another new blank layer, but position it below the head layer, so that the hair disappears behind the head, adding depth and realism. Use the Pen Tool as you have before, and follow the contour of the hair that you have already created, giving the hair a rounded edge at the bottom. Make sure that the shape that you draw disappears well behind the head. Fill it with our base brown, just as before.
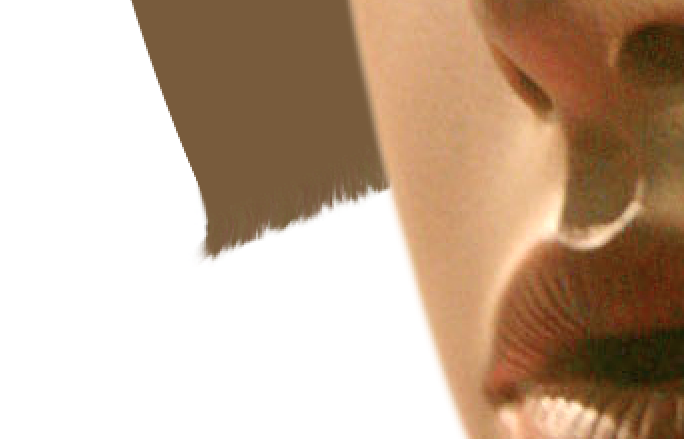
Now that we have our base shapes complete, we need to refine the bottom edges to make them look like natural hair. No hair in existence would have lines this sharp and perfect. Select the Smudge Tool, and choose the Splatter 14px brush from the presets menu in the Options Bar. Select the layer with the right half of the hair and zoom in to work on the bottom edge of the hair. Brush downward to make edges that simulate many strands of hair. It is these types of imperfections that make your work look more realistic.

We won’t need to do this to the left top portion of the hair, but we will need to do this step for the portion that disappears behind the subject’s head. Repeat the previous step, brushing downward to simulate individual strands of hair.
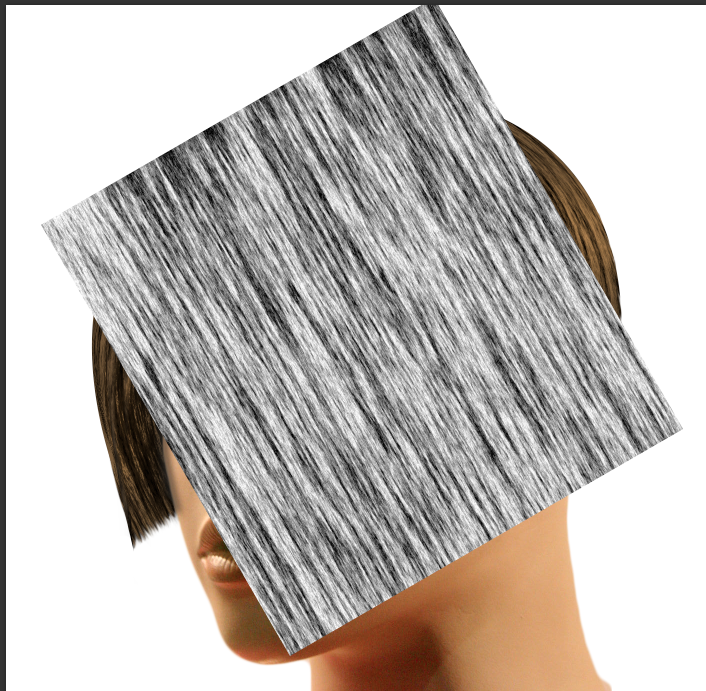
Next, we need to simulate strands of hair. We could use brushes to paint individual strands of hair, but doing this with a mouse can be difficult, and using a tablet would still require drawing each individual hair by hand. This can take a lot of trial and error, but there is an easier way. Select the layer that contains the right portion of hair and create a new layer above it. Make sure your foreground and background colors are the deafult black & white. Hit Alt/Option + Delete to fill the layer with your foreground color. Then, go to “Filter” > “Render” > “Fibers.” Click Randomize until you are happy with the results. Make sure you select a choice that is balanced overall with lights and darks and click OK.

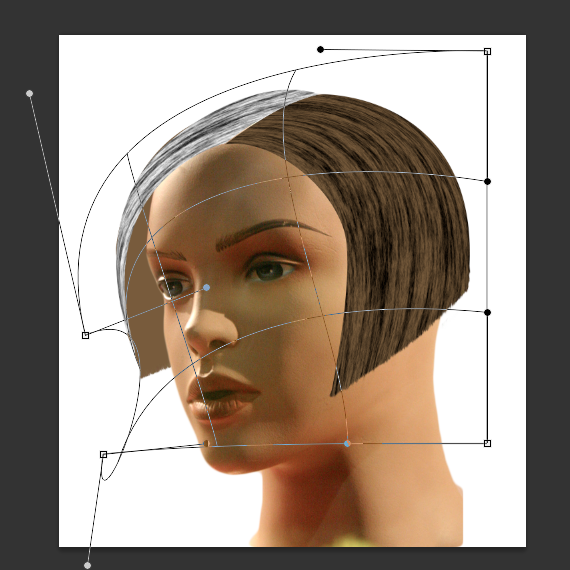
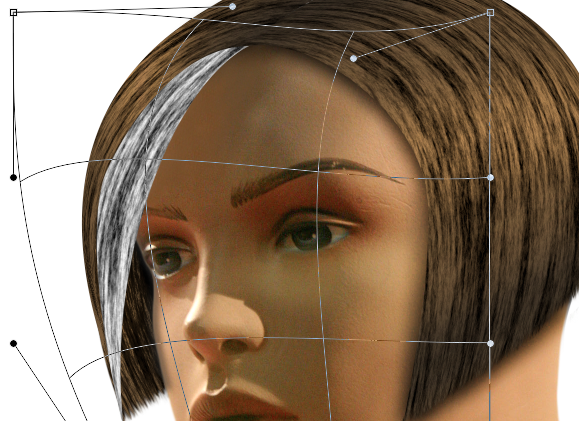
You can either Right-click a layer and choose Create Clipping Mask, or you can Alt/Option click between 2 layers in the Layers Panel to clip the fiber layer to the hair shape below. Then hit Command/Ctrl + “T” to transform the fiber layer. Tilt it so that the fibers loosely follow the direction that the hair will flow.


Right-click on the canvas while it the layer is in transform mode and select Warp. Then, you can mold the fibers to match the contour of the hair. Bend the bezier handles, and any of the grid lines can be manipulated. This will make the contour bend around the shape of the hair.
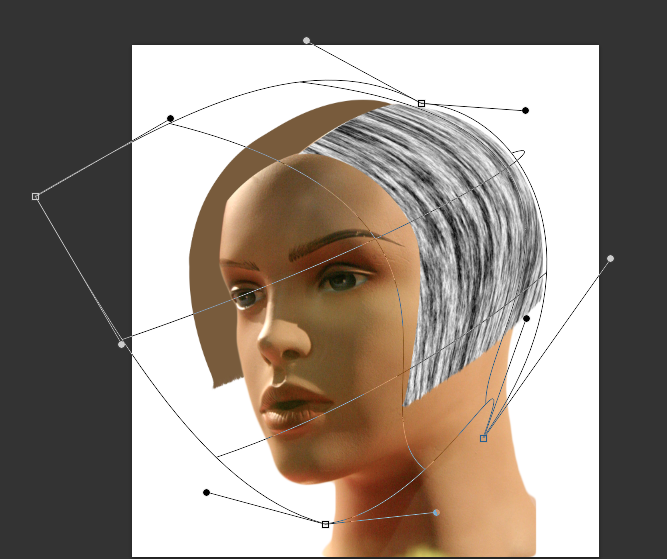

Once you are happy with the contour of the fibers layer, set the blend mode to Multiply, which will multiply dark colors over each other, giving the illusion of low-lights for the hair.
Repeat this process for the hair layer behind the head, and the hair on the left side, so that the hair has a consistent fibrous texture in all areas.
The shape of the mesh or grid really makes no difference as long as you convincingly bend the texture around the contour of the hair. If it flows in a certain direct, bend it in that direction.

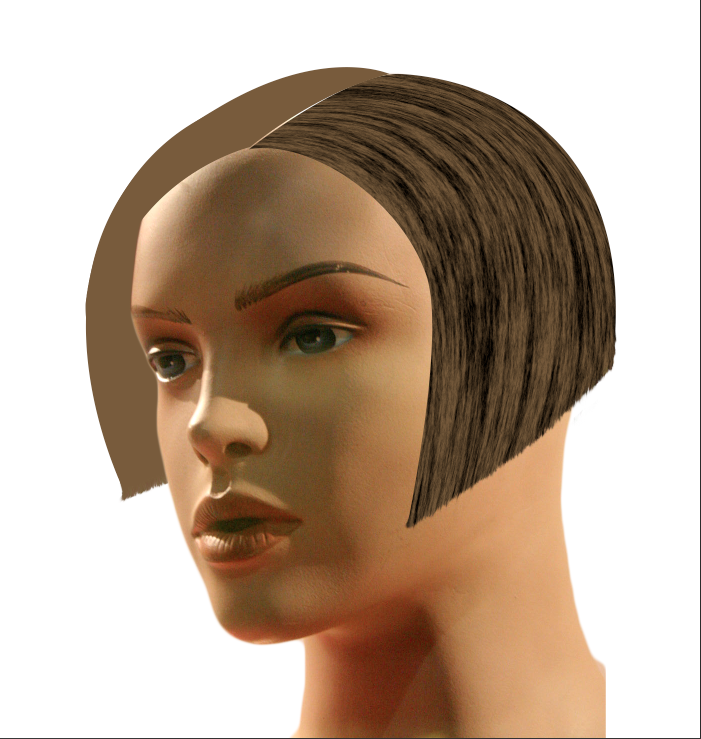
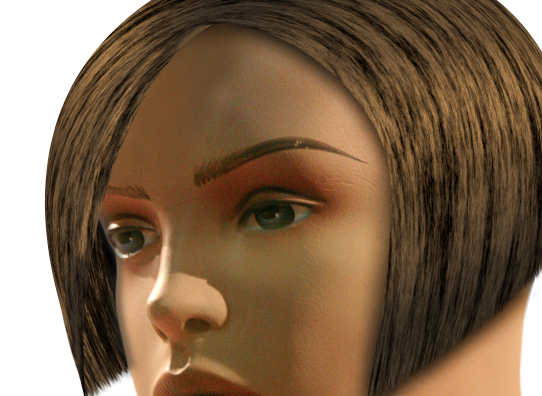
So far, we have added texture to simulate strands of hair, but the overall appearance is flat. It is time to add light and shadows. First, we will begin with shadows by selecting the burn tool. make sure that you have a large, soft edge brush ready. Select the brown base layers that we initially created. Since our texture layers are set to multiply, when we burn the brown base layers, the shadows will show through. With Exposure set to around 50%, brush over the upper portion of hair, next to the part in her hair. You will also want to brush over the underside of the hair on the left side, the part in the hair on the left side, and the bottom edges of the hair, but only slightly.
Select the Dodge Tool, and a soft edged brush and paint over the middle area of the hair to bring out the highlights in the hair. You generally want to try to match the highlights found on the face.

The hair in the back appears to be a little to rigid and flat. Select the original brown shape layer. Select the Smudge Tool and a soft edged round brush, setting the size to around 2px-5px. Set the strength to 50% and make small, quick strokes, following the contour of the hair, brushing from the outside inward.

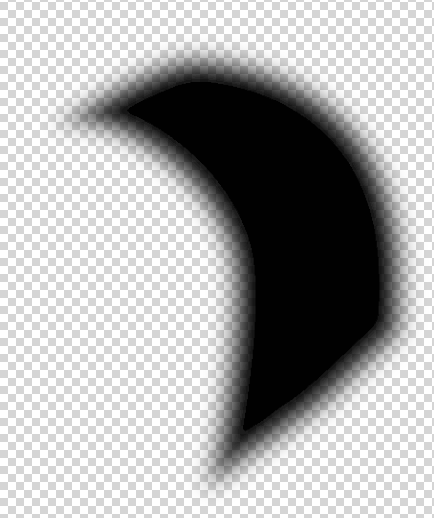
One thing that isn’t convincing about the hair is that is looks pasted on top of the head. The hair will actually cast a slight shadow on the face and head itself. Create a new layer below the hair layer on the right side. Command/Ctrl-click on the hair layer to make its shape a selection, but make sure the blank layer that you created below is active. Hit Shift+Delete and fill the selection with black. Hit Command/Ctrl+ “D” to deselect the shape. Go to “Filter” > “Gaussian Blur,” and set the blur amount to 20px.


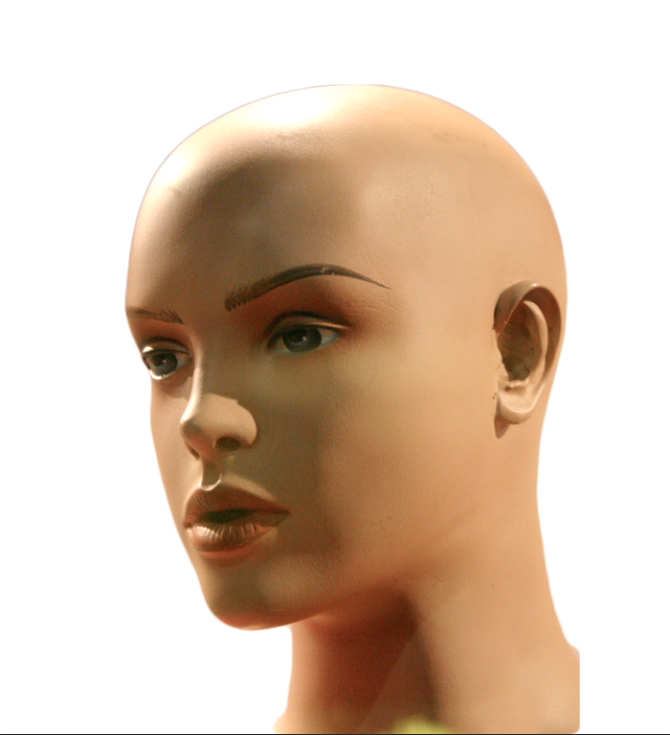
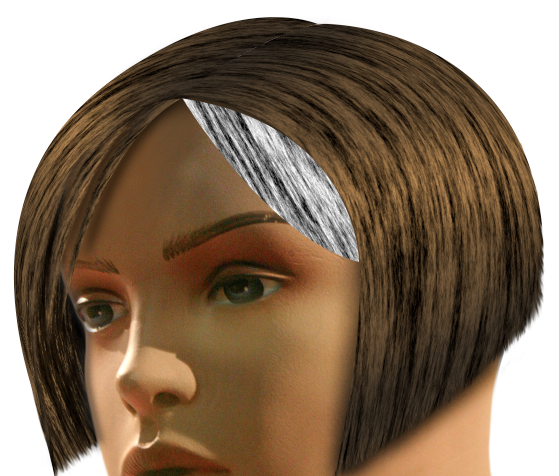
Before we make the shadows for the other side, we need to eliminate the highlight on the mannequin’s forehead. Select the Clone Tool and clone the midtone color of skin to fill in the highlight area up to her hairline. Hold Option/Alt and click to sample an area and simply paint it in like a brush. Sample different areas of color so that you don’t have a large block of color, this will tend to look unrealistic.
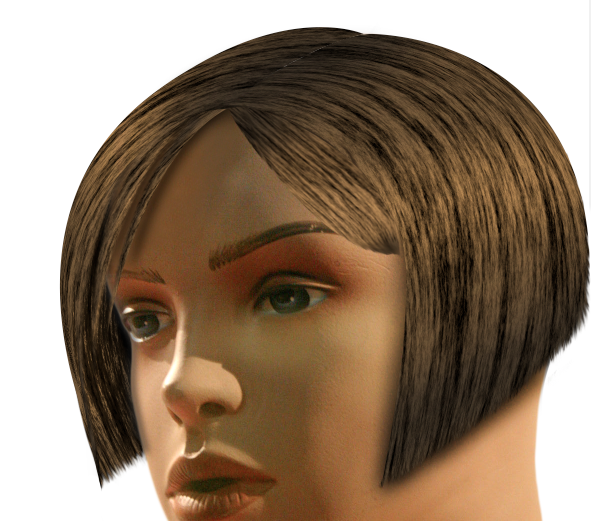
Next, we need to add the shadows for the left side as well. Simply select the base hair shape layer for each portion, create a new layer, and fill the selection with black. With the move tool selected, use the arrow keys to nudge the shadows to the right, so that they show on the face.

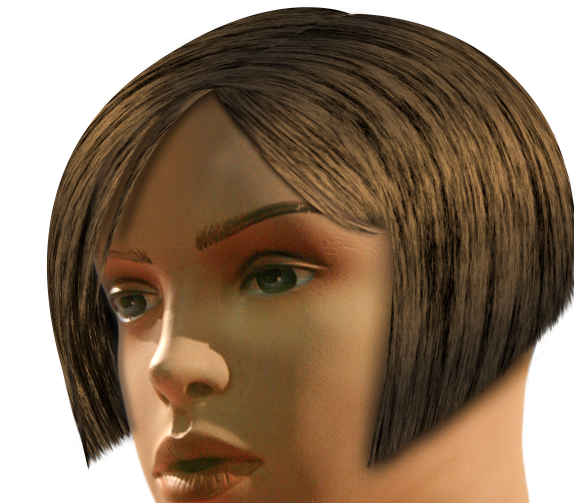
We could stop here, but the problem is that hair usually isn’t this sharp, unless it is styles in a salon, or for some sort of commercial. next, we are going to add bangs and strands of hair to add a little more realism and life. First, We need to create the general shape for the bangs. A simple overall shape that we can take away from with masks will be best, because you can always adjust a mask by painting with black to take more away, or white to add pixel information back into the image.
Next, we need to create the texture again using fibers, just like before.

Use the warp and transform method to shape the fibers into strands of hair. Then, set the blend mode to multiply.
Add in light and shadows with dodge and burn with a soft edged brush, just like the other portions of hair that we created before.
Next, we need to remove chunks of hair in order to simulate bangs and how the strands might chunk together. To do this, we need to use create a layer mask. Select the brush preset available in the default presets. The only problem is that it isn’t in the correct angle that matches our hair. To fix this, we need to go into the Brush options Panel.
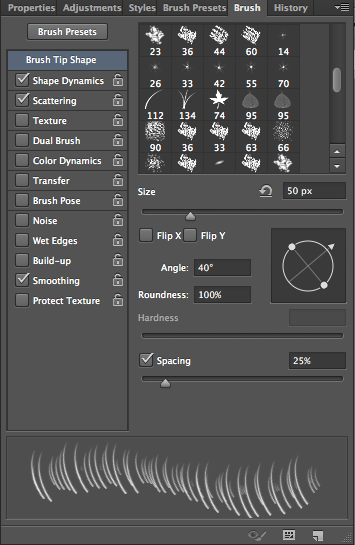
Above, I adjusted the angle of the brush itself. This may take so trial and error, but you can rotate the angle of the brush to match the contour of the hair. Otherwise, leave the brush at its default settings. make sure that the brush hardness is set to so that it isn’t blurred. You want a nice hard edged brush. If you don’t like your results, you can simply fill the mask with white and try again.


The hair would cast a shadow. To do create the shadow, duplicate the layer, even with the mask. Leave them both intact, and Command/Ctrl-click the bottom layer. Fill the selection with black and nudge the selection to the right. The layer mask won’t allow the shadow to show, but this can be fixed by selecting the layer mask. Alt/Option-click on the layer mask to make it visible and hit Command/Ctrl + “A” to select all. Then, simply nudge the mask over to the right until the shadow becomes visible. Go to “Filter” > “Blur” > “Gaussian Blur” to slightly blur the shadow.
Next we need to create bangs for the other side. This is going to follow the same principles that we used on the previous areas. Create the basic shape of the hair.
Add the texture layer and bend it as you have done on the previous sections of hair.
Set the texture layer to Multiple, and dodge and burn the highlights and shadows on the original brown shape layer. Make sure that is follows the light and shadows for the hair next to it, so that it flows well together.
Rotate the brush in the Brush Panel and use it to mask out bangs, as w did on the left side of her hair. If the edges are too harsh, select the Smudge Tool and feather the sharp edges to blend away the harsh lines.


Add shadows by duplicating the layer and filling the bottom shape with black. Use a subtle Gaussian Blur to feather the shadow and move it to the left, so that it pokes out from under the hair. Don’t forget to move the mask too.
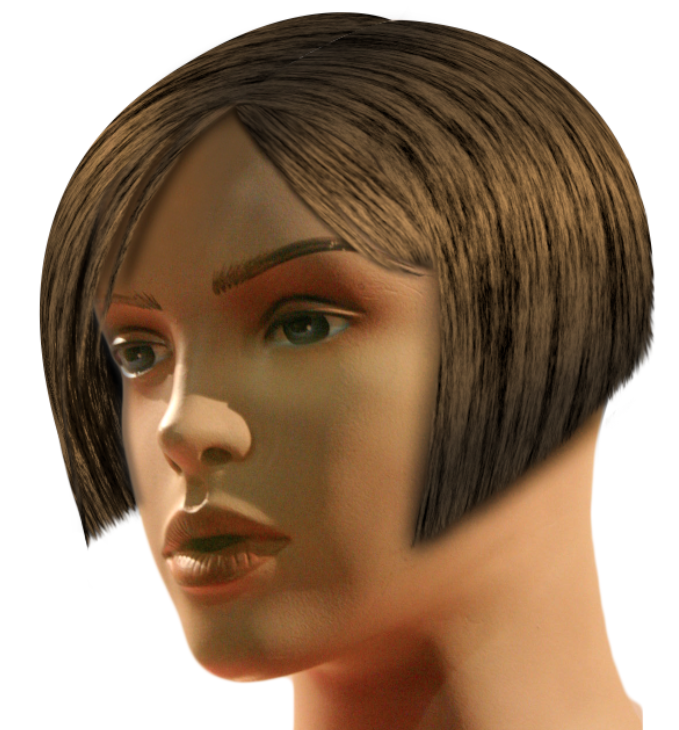
The last thing that we need to do is lessen the harshness of the hair around the face, such as the bangs themselves, and the hair on the sides. This will make the hair look more realistic and less harsh. Select the Smudge Tool with a soft edge brush, set the strength to 30% and bump the size up to around 40px. Select each hair shape layer (the brown base layer) and brush along the harsh edges.
Conclusion
Creating realistic hair in Photoshop is no easy task, but in a short time frame, you can create fibrous, shiny hair that matches the contours of your subject’s face and head. Adding light and shadows is as simple as using the Dodge and Burn Tools, and bending textures to your will is easy with the warp option in transform mode. Adding shadows adds depth to the hair, while making it look less “pasted on.” Using the Smudge Tool can blend harsh edges and help create realistic hair tips. Combining all of these techniques will allow you to create realistic hair from scratch.
Frequently Asked Questions on Creating Realistic Hair with Photoshop
How can I create a more natural look for the hair in Photoshop?
To create a more natural look for the hair in Photoshop, you can use the Smudge tool. This tool helps to blend the colors and give a more realistic appearance. Start by selecting the Smudge tool from the toolbar, then choose a brush with a hardness of 0% for a softer effect. Adjust the strength to around 15% to avoid over-smudging. Then, gently drag the tool along the hair strands to blend the colors. Remember to follow the direction of the hair flow for a more natural look.
What are the best Photoshop brushes for creating hair?
Photoshop offers a variety of brushes that can be used to create realistic hair. Some of the most popular ones include the ‘Spatter 59 pixels’ brush, the ‘Dune Grass’ brush, and the ‘Grass’ brush. These brushes have a natural, irregular pattern that mimics the texture of hair. You can also download custom hair brushes from websites like Brusheezy and Adobe.
How can I add highlights and shadows to the hair in Photoshop?
Adding highlights and shadows to the hair can make it look more realistic. To add highlights, create a new layer and set its blending mode to ‘Overlay’. Then, select a soft brush and choose a lighter color than the base hair color. Paint over the areas where the light would naturally hit. For shadows, do the same but choose a darker color and paint over the areas that would be in shadow.
How can I create different hair types in Photoshop?
Creating different hair types in Photoshop involves changing the brush settings and the way you paint the strands. For straight hair, use a small, hard brush and paint straight lines. For curly hair, use a small, soft brush and paint squiggly lines. For wavy hair, use a medium-sized brush and paint wavy lines. You can also use custom brushes designed for different hair types.
How can I create hair texture in Photoshop?
To create hair texture in Photoshop, you can use the Noise filter. First, create a new layer and fill it with a mid-tone gray color. Then, go to Filter > Noise > Add Noise and adjust the amount to around 10%. Set the distribution to ‘Gaussian’ and check the ‘Monochromatic’ box. This will create a grainy texture that can be used as a base for the hair.
How can I color the hair in Photoshop?
Coloring the hair in Photoshop can be done using the Brush tool and the Color Picker. First, select the Brush tool and choose a base color from the Color Picker. Paint the hair with this color. Then, choose a lighter color for the highlights and a darker color for the shadows. Paint these colors onto the hair, then use the Smudge tool to blend them together.
How can I create hair strands in Photoshop?
Creating hair strands in Photoshop can be done using the Pen tool. First, select the Pen tool and draw a path that follows the direction of the hair flow. Then, select the Brush tool and choose a small, hard brush. Go back to the Pen tool, right-click on the path, and choose ‘Stroke Path’. This will create a hair strand along the path.
How can I create a hair brush in Photoshop?
To create a hair brush in Photoshop, first, create a new document and paint a few hair strands using the Brush tool. Then, go to Edit > Define Brush Preset and give your brush a name. This will save the brush for future use. You can adjust the brush settings like size, spacing, and angle to customize the brush.
How can I add volume to the hair in Photoshop?
Adding volume to the hair in Photoshop can be done using the Dodge and Burn tools. The Dodge tool lightens areas of the image, making the hair look fuller, while the Burn tool darkens areas, adding depth. Select the tool and choose a soft brush. Then, paint over the hair to add volume.
How can I create a hair mask in Photoshop?
Creating a hair mask in Photoshop involves using the Quick Selection tool and the Refine Edge command. First, select the Quick Selection tool and make a rough selection of the hair. Then, go to Select > Refine Edge and adjust the settings to fine-tune the selection. Once you’re happy with the selection, click ‘OK’ to create the mask.

