I have to admit: I’ve been using “Whidbey” Alpha for months now and have been champing at the bit to write an article that explores some of the biggest changes included in ASP.NET 2.0. With last week’s release of the beta, I figure now’s the time to get started!
If you haven’t yet looked at the new features included with ASP.NET 2.0, you’re in for a treat. Microsoft has built on the successes of ASP.NET 1.x, adding a host of new features and functionality to streamline the process of building ASP.NET Web applications.
For instance, rather than manually accessing the Web.config file from the root of a Web application, ASP.NET 2.0 includes a Web-based administrative console. Administrators and developers can access it simply by typing in the application’s URL, followed by WebAdmin.axd.
Second, Microsoft has added a whole suite of controls (Portal controls, Data controls, etc.). It’s also extended the functionality of existing controls by making them more robust and versatile for client side rendering on desktops and mobile devices (Adaptive Device Rendering). Furthermore, ASP.NET 2.0 introduces Templating, Theming, the Portal Framework, and more.
In summation, ASP.NET 2.0 delivers the features developers have been asking about for the past few years. For more information on Whidbey, Microsoft’s codename for the next generation of Visual Studio, ASP.NET, and the .NET Framework, see the SitePoint article, “Prepare Yourself for Whidbey”.
What I want to cover here is the functionality that I’m most excited about: ASP.NET 2.0 Security! Specifically, we’ll cover the new Provider Model, security configuration via the Web Site Administration Tool, the suite of Login controls, and the Membership API.
This article assumes that you’ve downloaded and installed either Visual Studio 2005 beta or Visual Web Developer 2005 Express beta. If you haven’t done so, you can download Visual Web Developer 2005 Express beta at the ASP.NET support site — click the breaking news article on the left of the site’s homepage.
Also, don’t forget to download the archive of all the code I’ll present in this article. It’ll help you apply the solutions we discuss here to your own site.
The Provider Model
If you’ve downloaded and used the ASP.NET Starter Kits available from www.asp.net, the Provider Model and its implementation probably won’t have come as too much of a shock. Microsoft began to employ the “Provider Design Pattern” in its Starter Kits in the summer of 2002, but didn’t officially formalize it as a model until the development of ASP.NET 2.0’s Personalization feature.
Without boring you with the specifics, let me generalize by saying that because of the Provider Model, security in ASP.NET 2.0 is much more simplistic, easy to configure, and quick to implement than it was previously. The model assumes the configuration of users and roles by automatically creating a database within SQL Server (or, if you choose to use Access, as an .MDB file within the Data folder of your application). Immediately, you’re able to start to register and authenticate users against this newly created table. Gone are the days of having to build the database schema by hand, and then having to tailor each Web application to work in its respective database schema.
The Provider Model can be broken into two distinct security providers: the Membership Provider and the Role Provider. The Membership Provider is used to store usernames and passwords; the Role Provider is used to store — you guessed it — user roles.
Out of the box membership providers include the default AccessMembershipProvider, the SqlMembershipProvider, and an abstract MembershipProvider class. You can use this to create your own Membership Provider if, for instance, you need to store usernames and passwords within an XML file, or validate credentials via a Web service. For the sake of simplicity, we’ll use the default AccessMembershipProvider throughout this article.
The AccessMembershipProivder, like the SqlMembershipProvider, stores usernames and passwords within a database. The AccessMembershipProivder, however, stores this information within an Access database that’s created for you automatically within the Data folder of your application. Whenever you create a new Web application, the AccessMembershipProivder automatically will create everything you need to start registering and authenticating users.
Configure Security Using the Website Administration Tool
Configuring your applications to use ASP.NET 2.0 security is a simple three-step process. First, we create a new Website within either Visual Studio 2005 beta or Visual Web Developer 2005 Express beta, and ensure that Website is turned into an application within IIS. Second, we use the Web Site Administration Tool to enable and configure security for the newly created application. Finally, we use controls available in the suite of Login controls to build the UI with which our users will interact.
To demonstrate this simplicity and, most importantly, flexibility, let’s start by creating a new Website. Follow these steps:
- Open either Visual Studio 2005 beta or Visual Web Developer 2005 Express beta.
Now that your Web application has been created and configured, you’re ready to enable and configure security via the Web Site Administration Tool. Again, the Web Site Administration Tool is nothing more than a set of pre-built ASP.NET 2.0 pages and resources that reside within the C:Inetpubwwwrootaspnet_webadmin2_0_40607 directory. To enable and configure security, open the Web Site Administration Tool for your newly created Web application: navigate to the application’s URL and add the WebAdmin.axd file to the end of the URL. In my case, the URL string will look like this:
http://localhost/Dorknozzle/WebAdmin.axdIf you’re using Visual Studio 2005 beta or Visual Web Developer 2005 Express beta, you can also select ASP.NET Configuration from the Website menu. Either way, the Web Site Administration Tool will appear.
Immediately switch to the Security tab. Your screen will look like this:
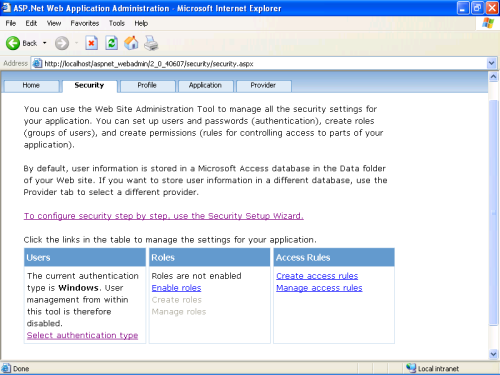
As you can see, security is divided into three core groups within the Web Site Administration Tool: Users, Roles, and Access Rules. If you are new to configuring security within the Web Site Administration Tool, it may be easier to simply select the link that reads, “To configure security step by step, use the Security Setup Wizard”. This launches the Security Setup Wizard’s Welcome screen. To begin the configuration process, select the Next button located near the bottom right of the browser window to advance to Step 2.
Step 2 allows you to choose the authentication type. If you’re using Windows authentication (default), simply click next. To work with Forms authentication (as we’re doing in this article) click the “From the Internet” option and choose Next.
Step 3 displays the default provider “AspNetAccessProvider” mentioned earlier in this article. Because the Access Provider is the default provider, we needn’t configure this option here. Simply choose Next.
Step 4 enables roles-based authentication for an application. If you were working with roles, you’d enable this checkbox and click Next. Configuration of roles would be handled within the Security tab in the main menu. For now, leave the checkbox unchecked and click Next.
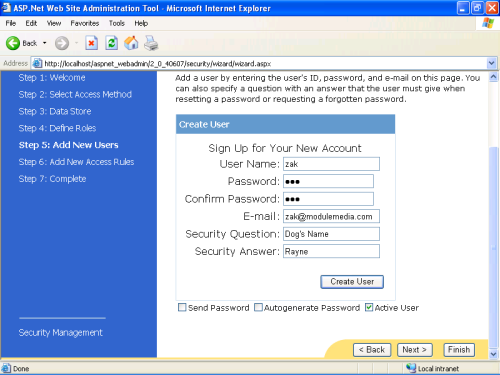
Step 5 is where the real fun begins. This is where you can add users to your application, auto-generate passwords, send the passwords via email, and activate the users. To keep this example simple, I’ll enter some basic information, outlined below, and click Create User.
Once you’ve added the user, you have the option to choose Continue, to create more users, or Next, to advance to the Next screen. I’ll add two more users and then click Next.
Step 6 allows you to configure rules to apply to particular users. For instance, since the user “zak” is an administrator, he’ll be given full access. However, if I had various departments within my Web application, I could configure certain users to be allowed access only within their department folder. I won’t configure any rules at this time, so I’ll click Next.
Step 7 alerts you that you’ve finished enabling and configuring security for your Web application. To complete the wizard, select Finish — you’ll be taken back to the Security tab in the main menu.
Now that you’re done, you can go ahead and close the Web Site Administration Tool.
Automatically, the AccessMembershipProvider creates a Microsoft Access database file called AspNetDB within your application’s Data folder. Open the database file to examine its structure. As you can see below, ten tables are created, including the aspnet_Users table, which includes generic user information, and the aspnet_Membership table, which contains detailed user credential information including the user’s hashed password and salt.
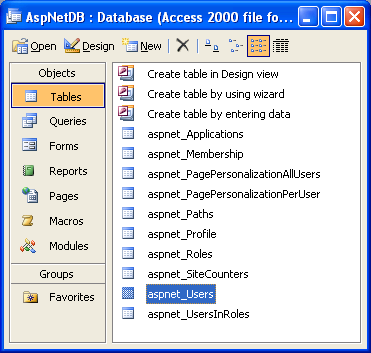
For more information on hashing and salting passwords, see the SitePoint article, “Securing Passwords in Your Database”.
Using Login Controls
As I mentioned earlier, some of the most exciting controls to be added to the collection of already-robust ASP.NET controls are contained in the suite known as the Login controls. The Login controls, which include the Login, LoginView, PasswordRecovery, LoginStatus, LoginName, CreateUserWizard, and ChangePassword controls, allow quick, seamless integration between ASP.NET 2.0 security and your Web applications.
Tightly integrated with the Provider Model, Login controls take full advantage of the configured provider. For instance, if you configured your application to use the AccessMembershipProvider (which is the default), you could easily add to your page a Login control that would automatically validate a user against the AspNetDB Access database located within your applications Data folder. Alternatively, if you configured your application to use the SqlMembershipProvider, the configured Login controls would validate users against a SQL database instead.
The Login Control
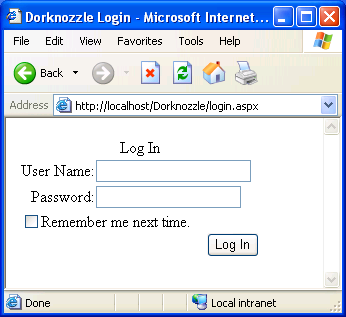
Now that you have a grasp on the Provider Model, AccessMembershipProvider, and have enabled and configured your site via the Web Site Administration Tool to use authentication, let’s build the UI with which your users can interact. As I’ve already mentioned, ASP.NET 2.0 includes a suite of Login controls spearheaded by the Login control. The Login control provides the necessary interface through which a user can enter their username and password. At its most basic level of functionality, a Login control can easily be added to the page. Just include the following markup within a Web form:
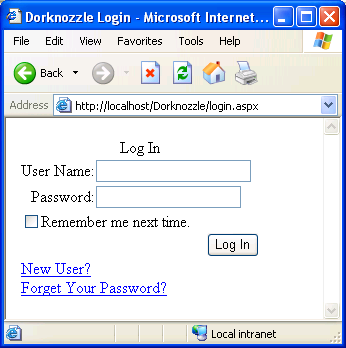
<asp:Login id="lcDorknozzle" runat="server"/>The control renders as a basic login page similar to that shown below.
While the Login control exposes myriad properties, some of which I’ll go over briefly, the great part of about it lies in the fact that only the DestinationPageUrl property really needs to be configured. When it’s set, this property automatically redirects the user to a destination page. Knowing this, we could configure our Login control to resemble the following:
<asp:Login

id="lcDorknozzle"

runat="server"

DestinationPageUrl="index.aspx"/>
In this case, if the users entered valid credentials, they would automatically be redirected to index.aspx. Other important properties include the ability to offer a customized error message when users enter the wrong credentials. This property, the FailureText property, is by default set to read, “Your login attempt was not successful. Please try again.” You may also want automatically to redirect the user to a page that allows them to create a new user or even recover a lost password. In this case, you would configure the CreateUserText, CreateUserUrl, PasswordRecoveryText, and PasswordRecoveryUrl properties as follows:
<asp:Login
id="lcDorknozzle"
runat="server"
DestinationPageUrl="index.aspx"
CreateUserText="New User?"
CreateUserUrl="newuser.aspx"
PasswordRecoveryText="Forget Your Password?"
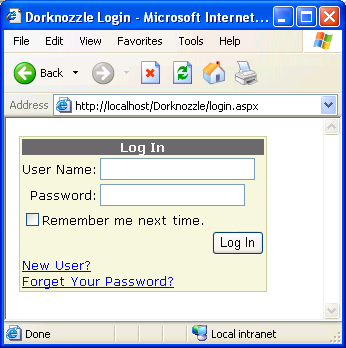
PasswordRecoveryUrl="forgotpassword.aspx"/>In this case, the control would render in the browser similar to the image shown below.
The flexibility of the Login control doesn’t stop there. Aside from the dozens of other properties that can be used to customize the control’s functionality, the Login control also supports Theming via the EnableTheming property, customized CSS classes via the CssClass property, and basic formatting through the dozens of style properties associated with each control available in the ASP.NET framework. In fact, if you’re using either Visual Studio 2005 beta or Visual Web Developer 2005 Express beta, you can simply right-click the control, select Auto Format..., and pick a style from a pre-defined list displayed in the Auto Format dialog box. I picked the Elegant style, which renders similarly to this:
The LoginName and LoginStatus Control
Once the user has logged in, you may want to utilize either the LoginName and/or LoginStatus control. These two useful controls allow you to display relevant information regarding the authentication status of a user. The LoginName control, for instance, allows you simply to display the username of the authenticated user:
<asp:LoginName id="lnUser" runat="server"/>The LoginStatus control, on the other hand, allows the user to log in or log out of your application. It resembles the following:
<asp:LoginStatus id=" lsUser" runat="server"/>To see these controls in action, I’ll add them to my index.aspx page (the page at which the user arrives once they’ve logged in):
<form runat="server">

  Welcome <asp:LoginName id="lnUser" runat="server"/>, your login was successful!<br /><br />

  <asp:LoginStatus id="lsUSer" runat="server"/>

</form>
When users log in now, they are presented with a customized message that contains their names, along with the ability to log out if they choose. The output renders in the browser as shown below.
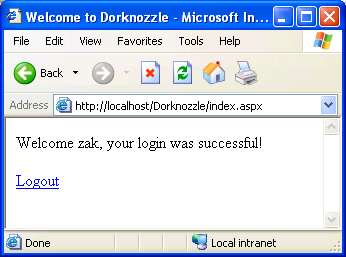
The LoginStatus control will allow users to log out if they are currently logged in, and will display a link to the login page if they’re logged out.
The LoginView Control
Another useful Login control is the LoginView control. This control allows you to customize information that will be shown to users through templates, based on their roles. For instance, you may decide that Administrators are able to see a complete department list once they enter the application, but that someone who belongs to a specific department — let’s say it’s Engineering — only sees information that relates to the company and the Engineering department. You can also use the LoginView control to display customized information based on users’ login status. For instance, if an anonymous user visits your site, you might want to alert them that the site is intended for registered users, and perhaps let them know that they can click the New User link to register. Alternatively, you may want to alert logged-in users that they don’t need to log in again. You might even show them a “welcome back” message, complete with their name, using the LoginName control discussed earlier.
To use the LoginView control, you would simply add the control to the page using the following syntax:
<asp:LoginView id="lvDorknozzle" runat="server">

</asp:LoginView>
Of course, without the use of templates, the control is fairly useless. In this case, we’ll make sure that anonymous users are told to register by clicking the New User link, and that logged-in users see a notification that they’ve already been logged in. Add the following LoggedInTemplate and AnonymousTemplate child tags to the LoginView parent tag:
<asp:LoginView id="lvDorknozzle" runat="server">
<LoggedInTemplate>
Welcome <asp:LoginName id="lnUser" runat="server"/>
</LoggedInTemplate>
<AnonymousTemplate>
Welcome to the Dorknozzle site!<br />
Please click on the New User link to register on our site.
</AnonymousTemplate>
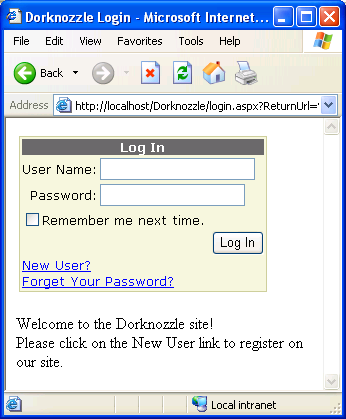
</asp:LoginView>Now, when users visit the login.aspx page for the first time, they are considered anonymous and are presented with the welcome message similar to the one shown here.
You could configure the LoginView control further by displaying customized messages depending on users’ roles. For instance, I could add within the LoginView tag the RoleGroups tag. To this, I’d add a RoleGroup control in which the name of the Role was a value of the Roles attribute:
<asp:LoginView ID="lvDorknozzle" Runat="server">

  <RoleGroups>

    <asp:RoleGroup Roles="Engineering">

      <ContentTemplate>

        You are a member of the Engineering department.

      </ContentTemplate>

    </asp:RoleGroup>

  </RoleGroups>

  <LoggedInTemplate>

    Welcome <asp:LoginName ID="lnUser" Runat="server" />

  </LoggedInTemplate>

  <AnonymousTemplate>

    Welcome to the Dorknozzle site!<br />

    Please click on the New User link to register on our site.

  </AnonymousTemplate>

</asp:LoginView>
The CreateUserWizard Control
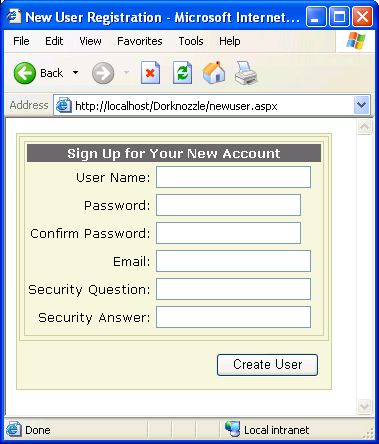
Chances are that if you went through the process of creating new users via the Web Site Administration Tool, you’ve already used the CreateUserWizard control and may not even have known it. The CreateUserWizard control simply allows a new user to add themselves (or register) to your Web application. This powerful tag offers many customizable features, but can quickly be added to and used in your site via the following tag:
<asp:CreateUserWizard id="NewUserWiz" runat="server">

</asp:CreateUserWizard>
In the browser, the page renders similar to that shown below.
Of course, the true power in the CreateUserWizard control lies in its flexibility. The control offers seven templates (HeaderTemplate, SideBarTemplate, StartNavigationTemplate, StepNavigationTemplate, FinishNavigationTemplate, Sign Up For a New Account Template, and a Complete Template) that can be customized according to your needs. Even better, the CreateUserWizard control allows you automatically to send an email to newly registered users simply by adding the MailDefinition tag as follows:
<asp:CreateUserWizard id="CreateUserWizard1" runat="server">

  <MailDefinition

    BodyFileName="NewUserEmail.txt"

    From="welcome@dorknozzle.com"

    Subject="Welcome to the Dorknozzle site!"/>

</asp:CreateUserWizard>
Once a new user is added to the site, an email is sent to that user. That email, defined within a text file, is loaded via the BodyFileName property, as shown in the code above. Variables can be customized simply with the addition of special expressions, such as <% UserName %>, to the text file.
Finally, in order for the email to be relayed, the email server must be specified in the <smtpMail> mail section of the Web.config file:
<configuration>

  <system.web>

    <authentication mode="Forms"/>

    <smtpMail serverName="Localhost"/>

  </system.web>

</configuration>
The PasswordRecovery Control
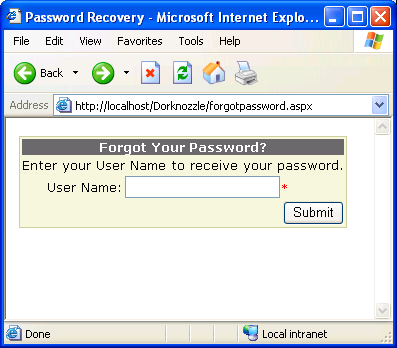
As an administrator of a Web application, the last things you want to do are answer phone calls and respond to emails for people who have forgotten their passwords. The PasswordRecovery control can ease this burden. By default, you can add the following tag, which allows users to enter their user names and answer their secret questions. In turn, an email message is generated with each user’s password, and sent:
<asp:PasswordRecovery id="prForgotPass" runat="server"> </asp:PasswordRecovery>In the browser, the PasswordRecovery control renders like so:
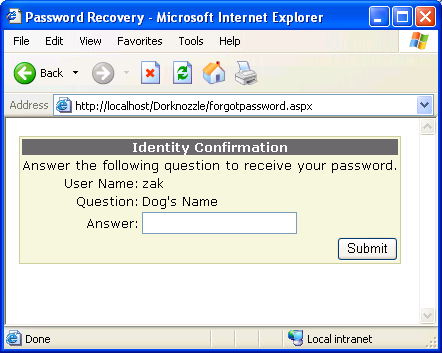
Once users enter valid user names, they must answer their secret questions. In the browser, the page looks like that shown below.
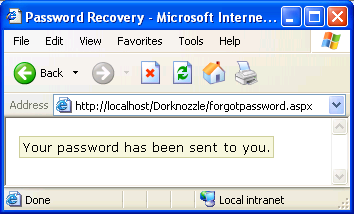
Similar to the CreateUserWizard control, the mail formatting is handled within the MailDefinition tag:
<asp:PasswordRecovery id="prForgotPass" runat="server">

  <MailDefinition

    BodyFileName="forgotpassword.txt"

    From="helpdesk@dorknozzle.com"

    Subject="Word has it, you forgot your password?"/>

</asp:PasswordRecovery>
If everything is formatted correctly, the email will be sent and a message will appear to the user similar to this:
The ChangePassword Control
Finally, The ChangePassword control, as you might expect, allows users to change their passwords. The ChangePassword control can be added to any page with the following tag:
<asp:ChangePassword id="cpChangePass" runat="server"/>In the browser, the control renders similar to this:
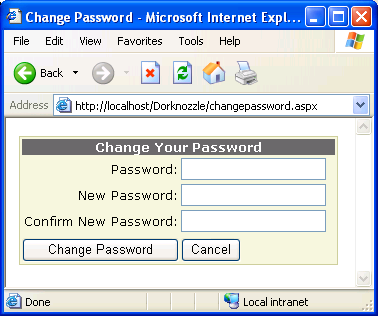
Like the CreateUserWizard and PasswordRecovery controls, the ChangePassword control can be configured, via the MailDefinition tag, to send a confirmation email to users once they’ve successfully changed their passwords. Unlike the CreateUserWizard and PasswordRecovery controls, however, the ChangePassword control requires that users are logged in before they can change their passwords.
The Membership API
In certain instances when working with security, you’ll need more flexibility than is provided either by the Web Site Administration Tool or the Login controls. In this case, you’ll want to work directly with the Membership API. Exposed through the Membership class, the Membership API allows you to create users, change passwords, and search for users based on specific criteria, programmatically. For the most part, the Login controls we’ve seen so far use the methods exposed by the Membership class anyway; your ability to use these directly from code is an added bonus. The following methods exposed by the Membership class are the ones you may find yourself using most often:
CreateUser– Allows you to creates new usersDeleteUser– Allows you to delete existing usersFindUsersByEmail– Allows you to retrieve a set of users that match an email addressFindUsersByName– Allows you to retrieve a set of users that match a certain usernameGeneratePassword– Allows you to generate a random passwordGetAllUsers– Allows you to retrieve all users stored in the Membership ProviderGetNumberOfUsersOnline– Allows you to return the number of users currently logged onGetUser– Allows you to retrieve the membership information associated with the current or supplied userGetUsernameByEmail– Allows you to retrieve a username for a user with a certain email addressUpdateUser– Allows you to update a particular user’s informationValidateUser– Allows you to authenticate a user against the Membership Provider
To demonstrate the flexibility of these methods, I’ll add some text and a Label control to my index.aspx as follows:
Number of Users Online:

<asp:Label id="lblNumUsersOnline" runat="server"/>
In my code-behind, I’ll add some code that accesses the number of users online:
Sub Page_Load(s As Object, e As EventArgs) Handles MyBase.Load

  lblNumUsersOnline.Text = _

    Membership.GetNumberOfUsersOnline().ToString()

End Sub
I could also add a GridView control to the page like so:
<asp:GridView id="gvUsers" runat="server" AutoGenerateColumns="False">

  <Columns>

    <asp:BoundField HeaderText="Username" DataField="Username" />

    <asp:BoundField HeaderText="Is Online?" DataField="IsOnline" />

    <asp:BoundField HeaderText="Is Approved?" DataField="IsApproved" />

    <asp:BoundField HeaderText="Email" DataField="Email" />

  </Columns>

</asp:GridView>
In the code-behind, I could add the following to my Page_Load event handler to fill the grid:
gvUsers.DataSource = Membership.GetAllUsers()

  gvUsers.DataBind()
The output renders in the browser similar to the below.

Conclusion
ASP.NET 2.0 builds on an already feature-rich framework by adding enhanced security features.
In this article, we focused on the new Provider Model exposed by the .NET Framework 2.0. Next, we looked at the suite of Login controls that you can take advantage of when building your Web applications. Finally, we looked at the Membership API and the methods exposed by the Membership class. Whether you use some or all of the security features offered within the newest release of ASP.NET is up to you, but I, for one, think there’s a great deal to be excited about in ASP.NET 2.0.
 Zak Ruvalcaba
Involved in the Web since 1995, Zak is founder of and advisor to Module Media, a full service design and development firm in San Diego. He is author of �The Ten Minute Guide to Dreamweaver 4� and �Dreamweaver MX Unleashed�, and SitePoint's own Build Your Own ASP.NET Website Using C# and VB.NET.