How to Take Incremental Backups in WordPress


Keeping a regular backup for your website will help you to restore lost data if something goes wrong. Incremental backups take it a step farther, backing up only the changes since the last backup, the perfect mix of safety and efficiency.
You must have heard people narrating their data loss horror stories, in which they were unable to recover their data because they were not keeping backups. Backups are no less than website insurance. It is like you have placed copies of your data in some safe locker, and in a case of emergency, you retrieve it and use it to rebuild your site. WordPress plugins have been very helpful in this respect, and you find many good choices to opt from to create backups easily. When a backup is created, you will want it to contain everything from the website at that very moment (files, database, etc).
Backups Secure a WordPress Website
You can learn more about Building a Custom WordPress Theme with our comprehensive course. For a quick introduction to WordPress themes, check out our course Build Your First WordPress Theme, which you can preview below:
WordPress security has been a discussion for quite a long time, and you find ample content regarding it. Backups are a permanent solution which should be in your arsenal of tools used to secure a site. However, WordPress backups can consist of different types, such as:
- Manual: Here all your web files (like plugins, themes, uploads directory) and database are downloaded manually via PhpMyAdmin, the terminal, FTP, etc. Manual backups are not so handy if you are making regular changing on your WP site. They require more time and more work. If you’re determined to perform manual backups, though, you can learn more about it on SitePoint Premium
- Automatic: You’ll use a WordPress plugin or some service to automatically take a backup. Plugins can be configured for the time interval (i.e. daily, weekly, monthly, hourly) at which the backup is to be made.
- Real-Time: These backups are synchronized live as you make any changes in your site content.
- Full-Site Backups: Here, the backups are taken for the entire site and not just the database or an XML export of the content.
- Incremental Backups: It is a type of backup that only copies files and data that have changed since the previous backup.
Incremental Backups
The primary purpose of this post is not, however, to highlight the importance of backups. I’m sure most of you are already aware that you need backups. Instead, I’m going to specifically discuss incremental backups, which not only offer site security, but also save web resources. But I get into further details let’s take a look at the few of the basics about incremental backups.
For example, consider that a full-site backup was made on Day 1. An incremental backup taken later will save all of the files which have been changed since Day 1’s backup. However, the next incremental backup will only backup files that have changed since the most recent incremental backup, and so on. The process is repeated until another full-site backup is performed.
The main advantage of incremental backups is that fewer files are backed up daily, allowing for shorter backup windows (backing up full sites can sometimes cause performance issues and require longer backup windows). In this way, you can preserve web resources like server memory and storage space usage.
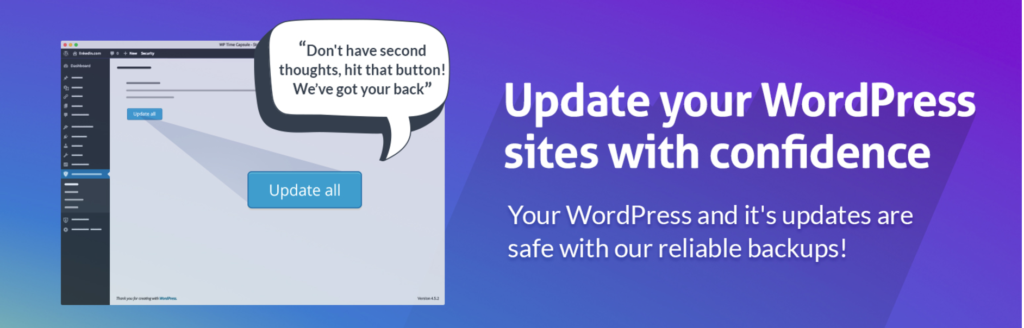
Hopefully, by now, you recognize the usefulness of taking incremental backups for your websites. There are a couple of go-to backup plugins for it, but the WP Time Capsule plugin replaces the need for nearly all backup solutions out there.
WP Time Capsule
Of all backup plugins, the WP Time Capsule offers one of the best implementations of taking incremental backups for a WordPress website. Upon installing the plugin, it takes an full backup of your site, including the database and files. Later, it only updates the changes which are made. This is impressive as it tends to utilize less of the server’s bandwidth. A complete site backup may be hundreds of MB large, but the many tiny changes are usually small enough that they get updated in a fraction of a second.
This plugin is aimed towards saving your time while creating automated backups. In addition, the WP Time Capsule plugin lets you create, schedule and send backups straight to Google Drive, Dropbox, and AWS automatically. Once a backup has been performed, it uses the app’s native versioning system to detect file changes in the future. Since only the modified files are backed up, WP Time Capsule lessen the burden of your storage and memory that might otherwise be retaining multiple huge backups. Likewise, retrieval of backups is also quick. Once the plugin setup is complete, all you need to do is to connect it with a WPTimeCapsule.com account.
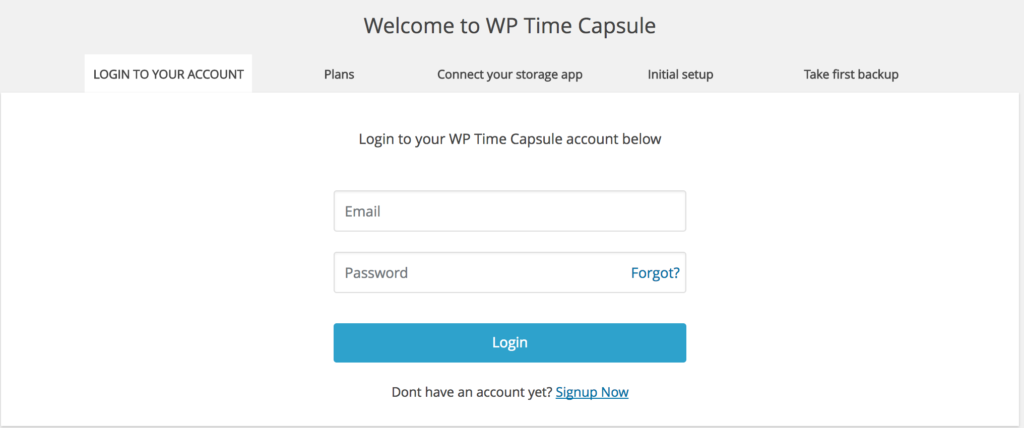
If you don’t have an account, then you can sign up for one.

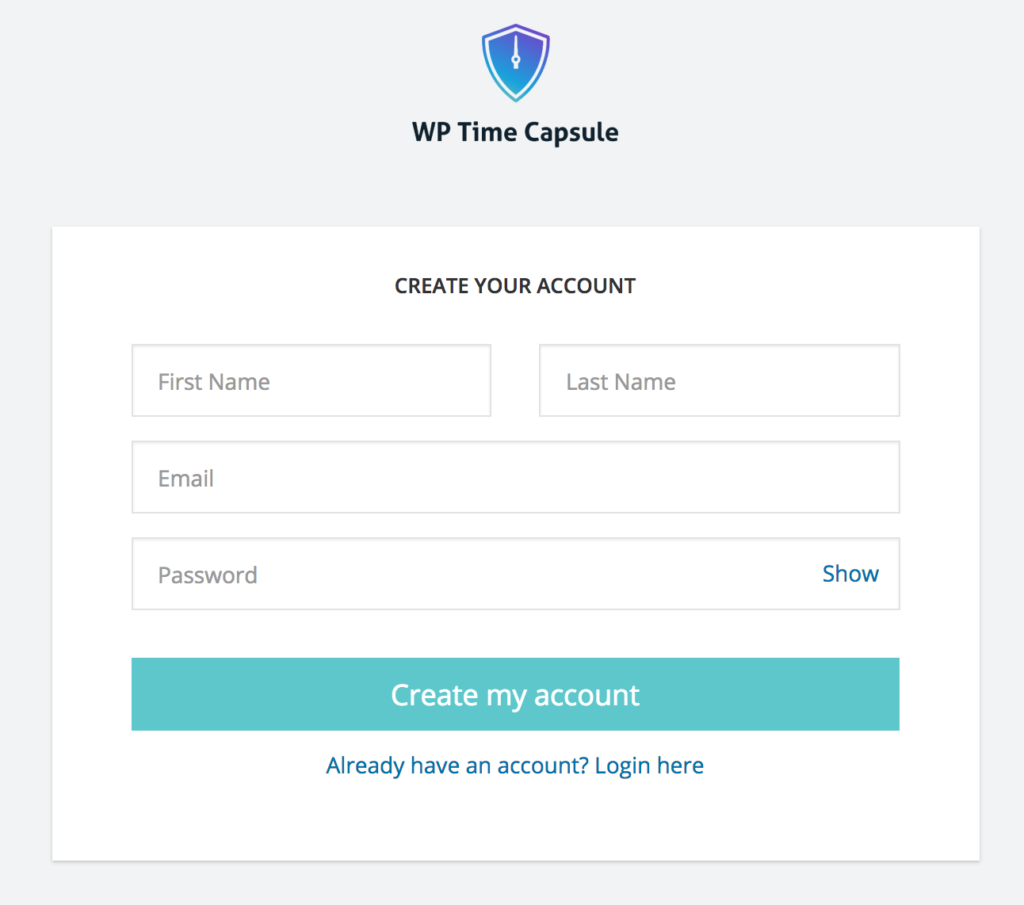
After you’ve entered your email id, you’ll be directed to this sign-up form.
The basic version of this plugin is available for free, but you can purchase the paid one as well for more advanced features. The monthly price is $5 per site, which is quite reasonable. However, if you are looking for other paid solutions for taking incremental backups, especially of multiple WordPress websites, then you might be interested in ManageWP, which has been around for quite a long time.
ManageWP Backups
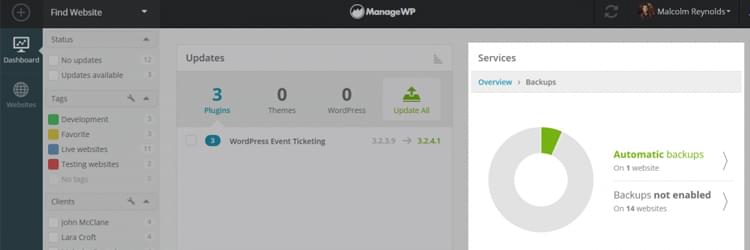
When you have to manage multiple WordPress websites, ManageWP is a traditional web application that you can use to do so. It offers one-click access to all of your websites from a single dashboard. This means you can monitor the security and backups from one place. Recently, they’ve undergone a major service upgrade which they call Orion. ManageWP Orion offers the ability to take incremental cloud backups. You can take a sigh of relief and let Orion make regular site backups. This is a great feature to have because the backups are stored on Amazon Web Services. With Orion, however, backups can only be scheduled on a monthly basis, which is where it lags behind the WP Time Capsule plugin. And if for some reason ManageWP doesn’t meet your needs for a multiple site management system to do your updates and backups, you can also check out this post on InfiniteWP, another potential solution.
Conclusion
Scheduling manual backups regularly is a tiresome process which you cannot repeatedly do. It is a waste of time, and is unreliable, depending on your busy schedule and your memory. With automatic, incremental backup solutions available, this is a set-it-and-forget-it situation. Especially when you are preserving web resources at the same time! So, it’s time for you to shift from traditional backups to incremental ones. What type of backup solution are you using? Is it incremental? Share your experience about it and drop your feedback in the comment box below!
Frequently Asked Questions about Incremental Backups in WordPress
What are the benefits of using incremental backups for my WordPress site?
Incremental backups are a smart and efficient way to backup your WordPress site. Unlike traditional backups that store the entire website data every time, incremental backups only save the changes made since the last backup. This results in less storage space usage and quicker backup times. It also reduces the load on your server, ensuring your website runs smoothly even during the backup process.
How often should I perform incremental backups on my WordPress site?
The frequency of incremental backups depends on how often you update your website. If you make daily changes, then daily backups are recommended. However, if you update your site less frequently, weekly or monthly backups may suffice. Remember, the goal is to minimize potential data loss.
Are incremental backups secure?
Yes, incremental backups are secure. They use the same level of encryption and security measures as full backups. However, it’s crucial to use reliable backup plugins and keep them updated to ensure maximum security.
Can I restore my WordPress site from an incremental backup?
Absolutely. You can restore your WordPress site from an incremental backup just like you would with a full backup. The restoration process might take a bit longer as the system needs to compile all the incremental backups to restore your site fully.
What happens if an incremental backup fails?
If an incremental backup fails, most backup plugins will attempt to retry the backup. If it continues to fail, it’s important to investigate the cause, which could be anything from server issues to problems with the plugin itself.
Do incremental backups affect my website’s performance?
Incremental backups are designed to have minimal impact on your website’s performance. They use fewer server resources compared to full backups, ensuring your site remains fast and responsive during the backup process.
Can I use incremental backups for large WordPress sites?
Yes, incremental backups are ideal for large WordPress sites. They save only the changes made, making them more efficient in terms of storage space and backup time, especially for large sites.
How do I set up incremental backups on my WordPress site?
Setting up incremental backups involves installing and configuring a backup plugin that supports this feature. Once installed, you can set the frequency of the backups according to your needs.
Can I choose what to include in my incremental backups?
Yes, most backup plugins allow you to choose what to include in your backups. You can select specific files, folders, or database tables to be included in the backup.
What should I look for in a backup plugin for incremental backups?
When choosing a backup plugin for incremental backups, look for features like easy setup, automatic backups, reliable restore functionality, and good customer support. Also, ensure the plugin is regularly updated and has good reviews.