More and more web designers are turning their skills to new and clever uses. Whether it be icons, themes, fonts, t-shirts, or prints, subsidizing client work by selling products and services online is on the increase—especially in the web community.
A few years ago opening up an online store was a scary and daunting task. Thankfully, the process today is a lot simpler; for some platforms it’s as easy as creating a theme using your existing HTML, CSS, and JavaScript knowledge. Even if you don’t want to open up your own store, having the skills to offer ecommerce to your new and existing clients is a big plus.
Key Takeaways
- Shopify is a user-friendly platform for designers, offering a fully hosted solution with a strong app ecosystem, making it an ideal choice for setting up an online store.
- Building a Shopify theme requires basic knowledge of HTML, CSS, JavaScript, and Liquid, Shopify’s templating language, which integrates logic and data manipulation directly into the markup.
- The structure of a Shopify theme includes several key folders such as Assets, Config, Layouts, Snippets, and Templates, each serving a specific purpose in theme customization.
- Liquid language in Shopify themes allows for dynamic content rendering and logic implementation, making it crucial for creating flexible and interactive e-commerce experiences.
- For those new to Shopify theme development, starting with a simple theme like ‘Radiance’ or using a minimalist starter theme like ‘Blankify’ can help in understanding the basic components and functionality of Shopify themes.
Evaluating Ecommerce Platforms
There are plenty of options when it comes to setting up shop online. These range from the humble “Buy Now” PayPal button to rolling your own custom web app with plenty in between. I have tried most offerings over the years, but when it came to choosing a solution for my own company, I decided to use Shopify. Here’s why:
- It’s a fully hosted solution, which means zero server set up and maintenance—a big bonus
- The monthly cost is not prohibitive. Our fees will grow in line with our needs and revenue
- It’s theme based and very designer friendly. We can use our existing markup and CSS
- It allows us to use our merchant account for payments. This was a big plus as we don’t want to use PayPal
- We can use our own domain with Shopify, e.g. shop.useourowndomain.com
- The “app” ecosystem is strong. We’ll need a digital delivery system and FetchApp fits the bill perfectly
- It’s popular. Over 25,000 stores use Shopify, including a lot of well-known web brands such as A Book Apart, United Pixelworkers, Tattly, and Hard Graft
- The company is strong, the product is constantly being developed, and above all they have a great logo!
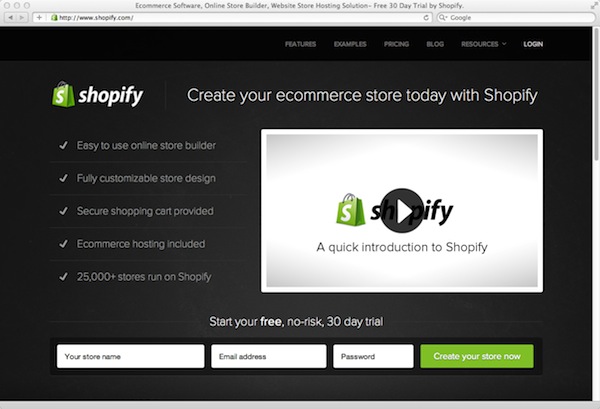 Shopify is a designer friendly ecommerce platform for designers
If you have built a website before then you are amazingly well equipped to build a theme for Shopify. During this tutorial I’ll be showing you the basics of how a Shopify theme is constructed, dissect a key template, and share a few hints and tips that I have picked up along the way.
Before We Begin
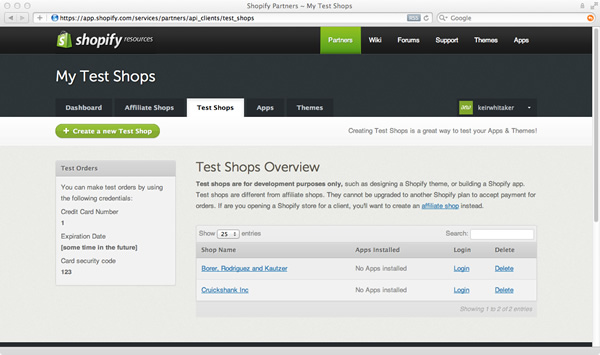 The Shopify test shop interface
In order to start developing your theme you will need a Shopify account. The simplest way to do this is to sign up to the partner program. This will enable you to create and work with a “test shop.” As the name suggests, it’s not a “live” shop—think of it more as a playground. When you are ready to open up your store “proper” you will need to register for a full account.
Once you have registered for the partner program click the “Test Shops” tab, and follow the instructions to set up your new test store. Once it has been created, following the link will take you directly into the Shopify admin. This is the heart of your store, but for our purposes we will be concentrating on the themes tab.
What’s a Theme?
A theme comprises a number of specially named templates as well as the normal kind of assets you would expect for any web project including images, CSS, and JavaScript.
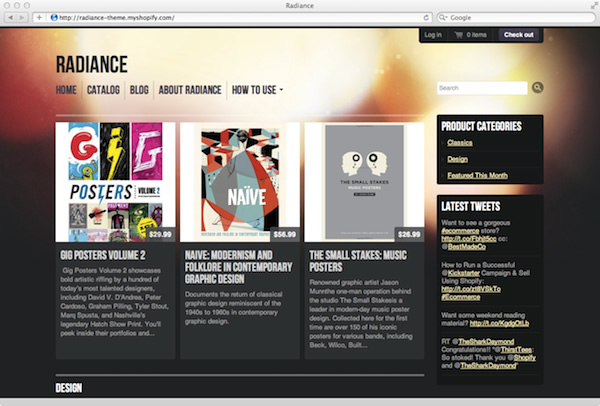 Radiance is a free Shopify theme
There’s one final component that you might not have come across before and that’s the templating language called Liquid. It’s similar in style to other templating tools like Twig and Smarty, and whilst it might feel a little alien at first, I am confident you’ll soon get the hang of it. If you have ever built a theme for WordPress, Tumblr, or Expression Engine, then many of the concepts will be familiar to you. If you haven’t, don’t worry, we’ll go through the main points to get you up and running.
Basic Theme Structure
At the time of writing, test stores are created using the free “Radiance” theme. You’ll find all the files that encompass this theme by entering the “Template Editor” section under the themes tab.
Before we carry on, let’s download the theme so we can look at it more easily. We aren’t going to go into the specifics of this theme, but we’ll use it to give you a taste of how things work and fit together.
To download a ZIP archive of the Radiance theme, follow the “Themes” tab and then the “Manage Themes” link. From here, you can request to “Export Theme.” You will receive an email once it’s available to download.
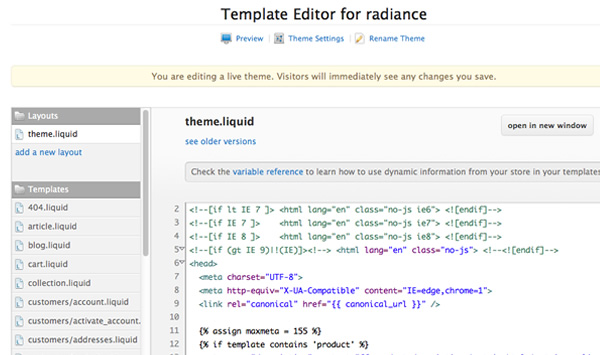 The online Shopify template editor
Once you have unpacked your ZIP archive, open up the folder. You will notice that there are 5 subfolders within it. These are:
- Assets
- Config
- Layouts
- Snippets
- Templates
Let’s have a more in-depth look at their contents.
Assets
The assets folder is home to all you images, JavaScript, and CSS files. If you are like me, you would normally separate your files into subfolders based on type, that is, one for CSS and another for JavaScript. Be aware that you can’t do this for a Shopify theme; all assets must be in this folder.
Config
Whilst creating Shopify themes is relatively easy, they do offer us the potential to customize them heavily. Config files give us the ability to change the way a site looks by selecting different colors or fonts from the admin area. It’s a little outside the scope of this article, but something worth considering if you ever produce a theme for sale in the Shopify Themes Store.
Layouts
The layout folder usually contains one file called “layout.liquid,” although it can contain more. A layout file enables you to define the outer skin of a page. This approach saves you having to include the same files in each and every template. I liken it to the outer skin of an onion. Our template files (the inner part of the onion) are then wrapped with this layout file (the outer skin) to give us the completed page.
Typically, the “layout.liquid” file will include your opening and closing HTML declarations, links to CSS and JavaScript files, principle navigation and footer. It will also include a special liquid tag {{ content_for_layout }}, which Shopify uses to add in the relevant subtemplate code and logic.
Don’t be put off by the amount of code in the Radiance theme “layout.liquid” file as there’s a lot going on. The Blankify theme, available on GitHub, features a much more basic “layout.liquid,” which is much easier to digest.
Snippets
Snippets are files containing chunks of reusable code, these also have the “.liquid” file extension. If you plan on having the same piece of code in more than one template (but not every template as you could arguably use your layout file for this) then a snippet is a good option. The Radiance theme contains a lot of snippets, including social links and pagination.
Templates
These files are generally the ones you will spend your time crafting, and represent the inner part of the onion.
In order for your theme to work, you must follow some simple naming conventions, for example, the template that is rendered when you are viewing a product must be called “product.liquid.”
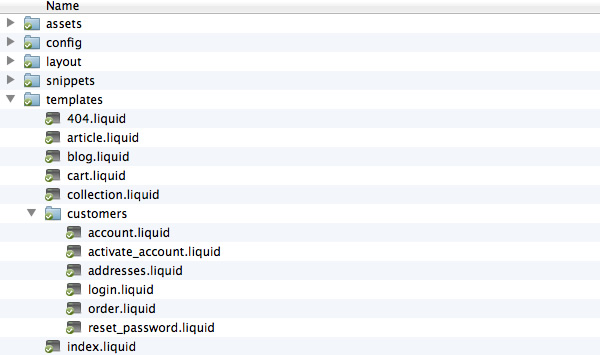 The Radiance theme in Mac OS X Finder
Here’s a list of the required templates that make up your theme:
- 404.liquid—Used when a page is not found
- article.liquid—The article page for the blog function
- blog.liquid—The archive listing page for a blog
- cart.liquid—A list page of all the items in your cart
- collection.liquid—This is used for displaying collections of your products (collections can also be thought of “product categories”)
- index.liquid—The “home page” that you can customize to display one or more products, blog items, and collections
- page.liquid—A basic page for content, ideal for terms and conditions, about pages, etc.
- product.liquid—Used to display the individual products to the customer
- search.liquid—The template to display search results
You will also notice from the image above that the Radiance theme contains a subfolder called customers. Customer templates allow you to customize your customer area, that is, log in pages, order history, and account details such as addresses for delivery.
You can find out more about these templates on the Shopify Wiki. If you don’t have this folder defined your shop will simply use the generic Shopify templates.
Intro to Liquid
You will have noticed that a number of our files have the “.liquid” extension. Liquid files are simply HTML files with embedded code in them. This embedded code is created using curly braces like {{ }} and {% %} so it’s easy to spot.
Liquid does two things really well. Firstly, it allows us to manipulate our output and, secondly, it allows us to include logic in our templates without having to know any back-end code.
Firstly, let’s look at output. Here’s a really simple example. If we want our <h2> element to display our product title then we can make use of the product data available to use, and do the following in our template:
<h2>{{ product.title }}</h2>
When Shopify renders a product page our Liquid code will be replaced by the title of our product. Notice how liquid uses the “dot” syntax. Our product also has a price attached to it, this would be displayed in a similar way using:
{{ product.price }}
The “dot” allows us to access the different properties of the product and display that data.
We could go further and say that we want to turn our product title into uppercase, that’s fairly easy too:
<h2>{{ product.title | upcase }}</h2>
Liquid can also help us generate elements quickly. For example, an image tag:
{{ 'logo.png' | img_tag }}
When rendered this will produce the following HTML:
<img src="logo.png" alt="" />
Of course this isn’t much use as this has resulted in a relative path to the file, which just won’t work. By adding in an extra filter Shopify will prepend the full path to the file. We can also add in our alt text for good measure:
{{ 'logo.png' | asset_url | img_tag: 'Site Logo' }}
This will produce the following HTML:
<img src="/files/shops/your_shop_number/assets/logo.png" alt="Site Logo" />
As well as allowing us to use data from our shop, that is, product titles and prices, Liquid enables us to control the flow of the page, this is the logic I referred to earlier.
Let’s say a product is sold out, great news for us, but not so good for our potential customer. By using Liquid we can show a special message if the product is no longer available. Liquid logic is very readable so should hopefully be easy to follow.
Here’s how that could work in your template:
{% if product.available %}
	Show Add to cart button here
	{% else %}
	Display message about when the product will be next available
	{% endif %}
There’s an easy way to remember the different tag structures, 2 curly braces equals output and 1 curly brace followed by a % equals logic.
Mark Dunkley of Shopify curates a very up-to-date cheat sheet. It’s a must bookmark for anyone working with Shopify themes. As well as being a great reference it’s a quick way to see what variables are available on each template.
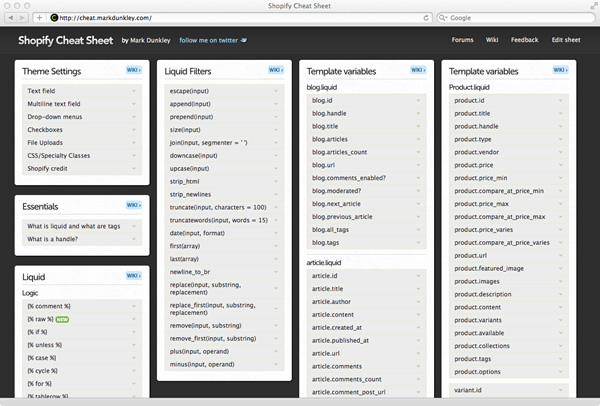 Mark Dunkley’s essential Shopify Cheat Sheet
Dissecting a Template
As I mentioned earlier the Radiance theme isn’t the simplest for first time theme designers. I encourage you, however, to have a look at the different files and consider how they all fit together.
When you are ready to build your full theme, I encourage you to read a great entry on the Shopify wiki called “Theme from scratch.”
TextMate users can take advantage of Meeech’s Shopify bundle. Of course, you can always ZIP up your theme and upload it to your test store yourself.
product.liquid
As mentioned earlier, the “product.liquid” template is used when a customer is viewing the product detail page. If you are familiar with WordPress this is very similar in nature to the “single.php” template.
If you have a look at Mark’s cheat sheet, you can see we have a number of product related variables available to us, many of which we will use in our example.
Here’s the code sample in full:
<h2>{{ product.title }}</h2>
	<p>{{ product.description }}</p>
	{% if product.available %}
	<form action="/cart/add" method="post">
	<select id="product-select" name='id'>
	{% for variant in product.variants %}
	<option value="{{ variant.id }}">{{ variant.title }} - {{ variant.price | money }}</option>
	{% endfor %}
	</select>
	<input type="submit" value="Add to cart" id="addtocart" />
	</form>
	{% else %}
	<p>Sorry, the product is not available.</p>
	{% endif %}
	{% for image in product.images %}
	{% if forloop.first %}
	<a href="{{ image | product_img_url: 'large' }}" title="{{ product.title }}"><img src="{{ image | product_img_url: 'medium' }}" alt="{{ product.title | escape }}" /></a>
	{% else %}
	<a href="{{ image | product_img_url: 'large' }}" title="{{ product.title }}"><img src="{{ image | product_img_url: 'small' }}" alt="{{ product.title | escape }}" /></a>
	{% endif %}
	{% endfor %}
Let’s break it down into manageable sections. First up, let’s output a basic title and description. As discussed earlier, these are rendered using the dot syntax:
<h2>{{ product.title }}</h2>
	<p>{{ product.description }}</p>
Next, we run a quick check to see if our product is available, in other words, is it “in stock”? If it is, the template will show a form that allows the customer to add the product to their cart. Additionally, it will render a select list displaying the different variants of that product.
Variants are one way of organizing your products in Shopify. Let’s say you have a children’s bike that comes in red, white, and blue, and costs £295. One approach here would be to have three variants of the bike product to handle the different colors. There are other approaches, but this works well.
If the product is out of stock the template will render the message, “Sorry, the product is not available.”
{% if product.available %}
	<form action="/cart/add" method="post">
	<select id="product-select" name='id'>
	{% for variant in product.variants %}
	<option value="{{ variant.id }}">{{ variant.title }} - {{ variant.price | money }}</option>
	{% endfor %}
	</select>
	<input type="submit" value="Add to cart" id="addtocart" />
	</form>
	{% else %}
	<p>Sorry, the product is not available</p>
	{% endif %}
A product is nothing without images. The next part of the template deals with displaying the images we have added in the admin. This is also a good introduction to another Liquid concept: the “forloop“.
The first line can be confusing at first, but it’s nothing to worry about. Essentially, what it means is:
“For every image associated with our product, do the following.”
Every Liquid loop must end with an “endfor”, you’ll notice this further down. Without this, your site can get very messy so remember to include it. It’s like a closing tag in HTML.
Inside our “for loop”, we run a little check to see if we are on the very first loop using {% if forloop.first %}. If we are, we output a large version of the image. If we are further along, we output a small version of our image that is linked to our full size image:
{% for image in product.images %}
	{% if forloop.first %}
	<a href="{{ image | product_img_url: 'large' }}" title="{{ product.title }}"><img src="{{ image | product_img_url: 'medium' }}" alt="{{ product.title | escape }}" /></a>
	{% else %}
	<a href="{{ image | product_img_url: 'large' }}"  title="{{ product.title }}"><img src="{{ image | product_img_url: 'small' }}" alt="{{ product.title | escape }}" /></a>
	{% endif %}
	{% endfor %}
And that is the “product.liquid” template. You can, of course, include other elements, perhaps links to other collections or similar products.
Learning From Others
Liquid, whilst very powerful, is rather straightforward. Once you have worked out how to use the dot syntax, the different template variables, and mastered loops, there really isn’t too much else to learn.
Each template works in a very similar way; for example, the collections template gives you access to data relating to the currently viewed collection of products. Likewise, the cart page will give you access to variables relevant to displaying the customer’s cart contents.
I learned a lot by working out how others have constructed their templates, for example, the collection.liquid template in Blankify—there’s really not much to it.
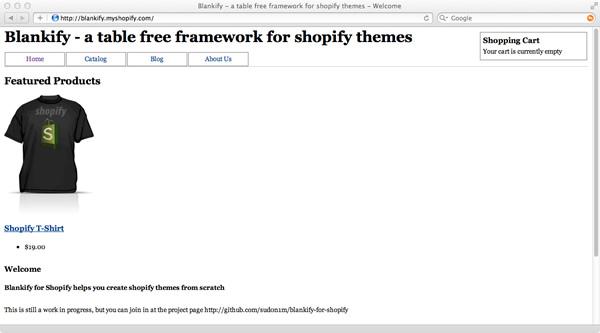 Blankify is an old but useful Shopify starter theme
Next Steps
I hope this tutorial has given you a good introduction to the elements involved in building a Shopify theme. I have included some great resources below that you should definitely check out as you progress and go deeper into your theme building.
If you have any questions please drop a comment below.
Further Resources
- Shopify Cheat Sheet
- Blankify—A Shopify starter theme
- Building a theme from scratch
- The Shopify partner program
Frequently Asked Questions (FAQs) about Building Shopify Themes
What are the basic requirements for building a Shopify theme?
To build a Shopify theme, you need a basic understanding of HTML, CSS, and JavaScript. You also need to be familiar with Liquid, Shopify’s templating language. It’s also helpful to have a basic understanding of Ruby, as Liquid is based on Ruby. Additionally, you’ll need a Shopify Partner account, which is free and gives you access to a development store where you can test your theme.
How can I customize my Shopify theme?
Shopify themes can be customized in several ways. You can use the built-in theme editor to make changes to the layout, colors, fonts, and other design elements. You can also edit the theme’s code directly to make more advanced changes. If you’re not comfortable with coding, there are many Shopify apps available that can help you customize your theme.
Can I use a pre-made theme for my Shopify store?
Yes, you can use a pre-made theme for your Shopify store. Shopify offers a variety of free and paid themes in their theme store. These themes are designed to be easy to install and customize, and they come with a range of features to suit different types of businesses.
How can I make my Shopify theme responsive?
Making your Shopify theme responsive involves ensuring that it adapts to different screen sizes and devices. This can be achieved by using flexible layouts, flexible images, and CSS media queries. Shopify’s Liquid templating language also includes several built-in features to help you create a responsive design.
What is the role of Liquid in building Shopify themes?
Liquid is a templating language developed by Shopify. It’s used to load dynamic content on your store’s pages. This includes product details, cart information, customer details, and more. Understanding Liquid is essential for building Shopify themes, as it allows you to create dynamic, customizable templates.
How can I test my Shopify theme?
You can test your Shopify theme by using a development store. This is a free, fully functional Shopify store that you can use to test your theme. You can add products, create orders, and do everything else you would do on a live store.
Can I sell my Shopify theme?
Yes, you can sell your Shopify theme. Shopify has a theme store where developers can sell their themes. To sell your theme, you’ll need to submit it for review by Shopify. If it’s approved, it will be listed in the theme store and you’ll receive a percentage of the sales.
How can I optimize my Shopify theme for SEO?
Optimizing your Shopify theme for SEO involves several steps. This includes using SEO-friendly URLs, adding meta tags and alt tags, optimizing your images, and ensuring your site loads quickly. Shopify also has built-in SEO features, such as automatically generated sitemaps and the ability to edit your robots.txt file.
How can I add functionality to my Shopify theme?
You can add functionality to your Shopify theme by using apps. Shopify has a large app store with thousands of apps that can add a wide range of features to your store. You can also add functionality by editing your theme’s code, although this requires a good understanding of Liquid and other web technologies.
How can I update my Shopify theme?
Updating your Shopify theme involves downloading the latest version of the theme and uploading it to your store. However, keep in mind that updating your theme will overwrite any customizations you’ve made to the theme’s code. To avoid losing your customizations, you can use a theme updater app, which will update your theme while preserving your customizations.