Building an eCommerce site is a deceptively complex undertaking. Even when using an off-the-shelf CMS solution like Magento, doing something as simple as adding a configurable product requires the setting up of many variables and stock-related options.
Anything you sell online, whether it’s a downloadable zip file or a shippable item, can be classified as a configurable product if it comes attached with options. Configurable products in Magento need to be assigned attributes, such as size and colour, before they are given prices and descriptions.
This bottom-up way of creating products in Magento is entirely rational. It’s much easier, for example, to keep stock control and assign SKU’s to individual variations this way.
Complex Products in Magento
Magento is a fully open-source, free to install web application for running eCommerce sites. When you add products to its database, you will be given the option of creating a Simple Product or Complex Product. A simple product has no variables and is only sold in one type. A complex product can be a Group Product, a Configurable Product or a Cross-Sell Product.
In this case, a configurable product could be anything which has a variation a user can choose on the front end — for example a T-shirt which comes in several different sizes and colours. Magento treats a configurable product as a collection of simple products: each variation has its own SKU and inventory listing.
Creating a Configurable Product
The basic steps to creating a configurable product are:
- Adding attributes. These will be configurable by the user – for our example they will be size and colour.
- Adding these attributes to the attribute set — for our example, we’ll call it
beds. - Creating a new configurable product, and add the
bedattribute set. - Creating an individual simple product for each variant of the configurable product.
Add Attributes
In this tutorial we’ll be creating a bed product, similar to the ones on my online retail site. The bed has two options — one for color and one for size. This is what we’ll be creating in the Magento admin area. In the top menu, select Catalog> Attributes> Manage Attributes.
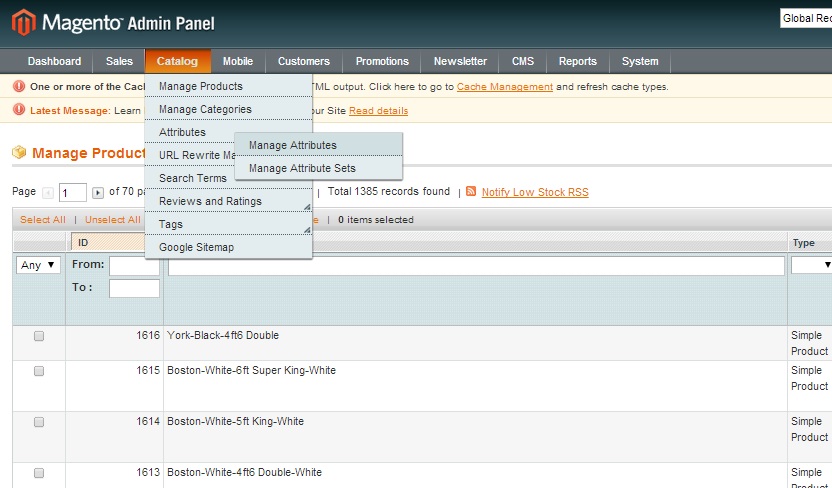
In the Attribute> Properties control panel, select Add New Attribute in the top right corner. This will allow you to create the variations for the configurable product’s size and color.
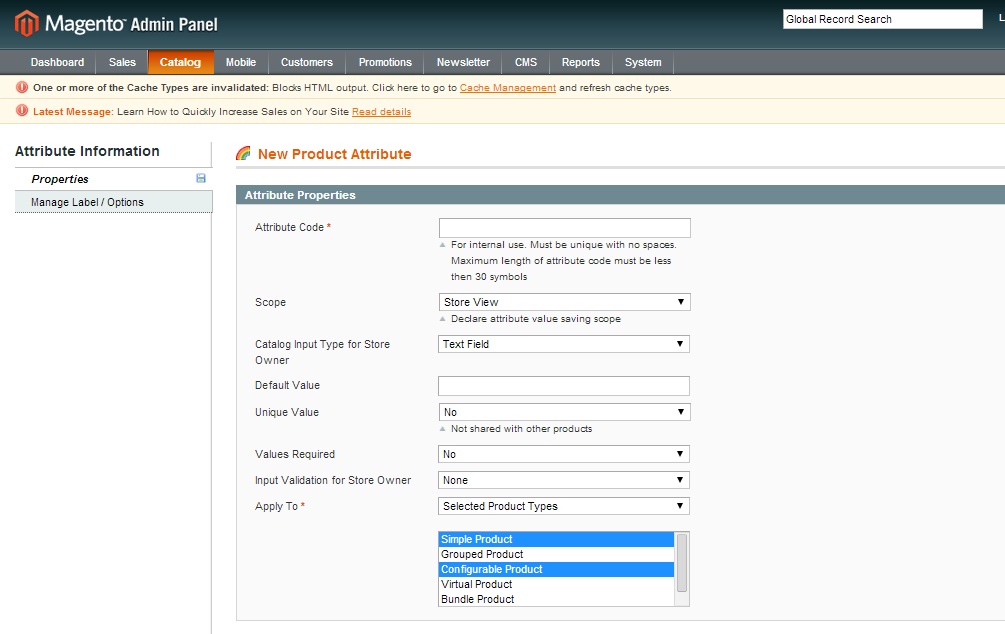
The screenshot above shows how the attribute color is set up. Briefly, Attribute Code would be color or size, and the Scope should be Global to apply to your entire site.
The Catalog Input Type for Store Owner is also set to Dropdown — this is required for the attribute to be compatible with configurable products. Leave Unique Value and Value Required to No and Input Validation for Store Owner to None.
Apply To should be Selected Product Types, and in the box below Ctrl+click Simple Product and Configurable Product to make the attribute apply to these two types. You’ll also notice the Use to Create Configurable Product dropdown menu has appeared. This must be set to Yes.
Next, in the left hand menu, select Manage Label/Options to begin choosing the different variables for the attributes. For the color attribute for our bed product, your label options should look like this:
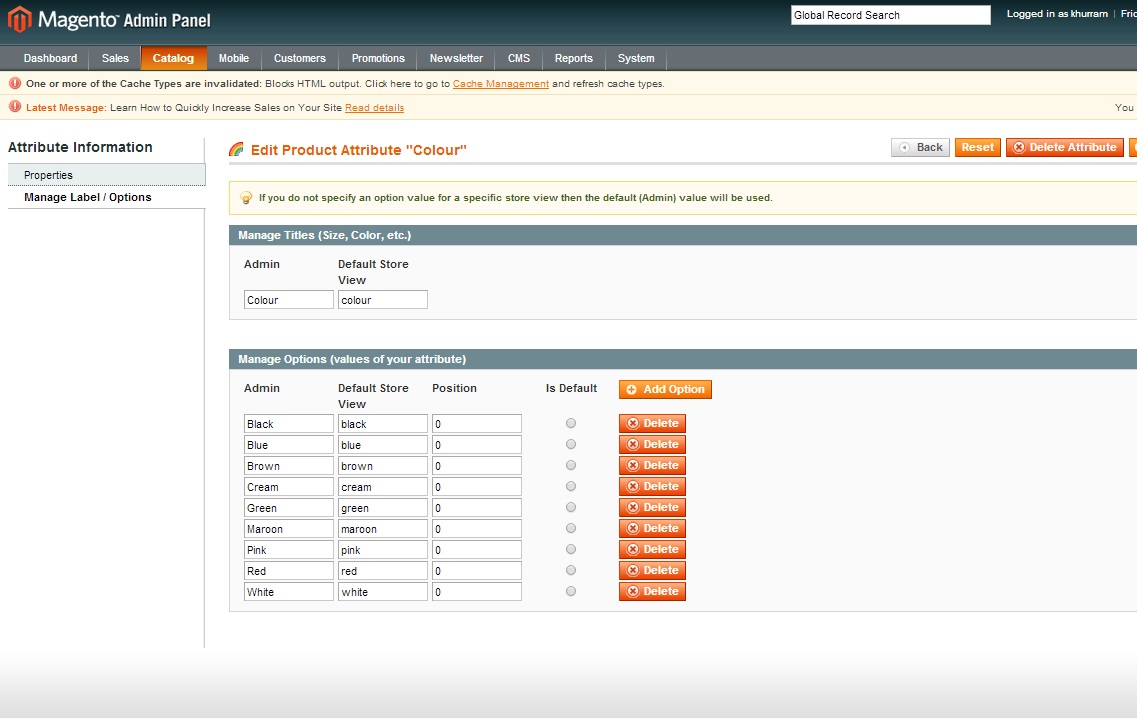
Each color option: black, blue, brown, cream, etc., is given an Admin Name and a Default Store View name, which is what your customers will see. For the size options, your attribute labels will look like this:
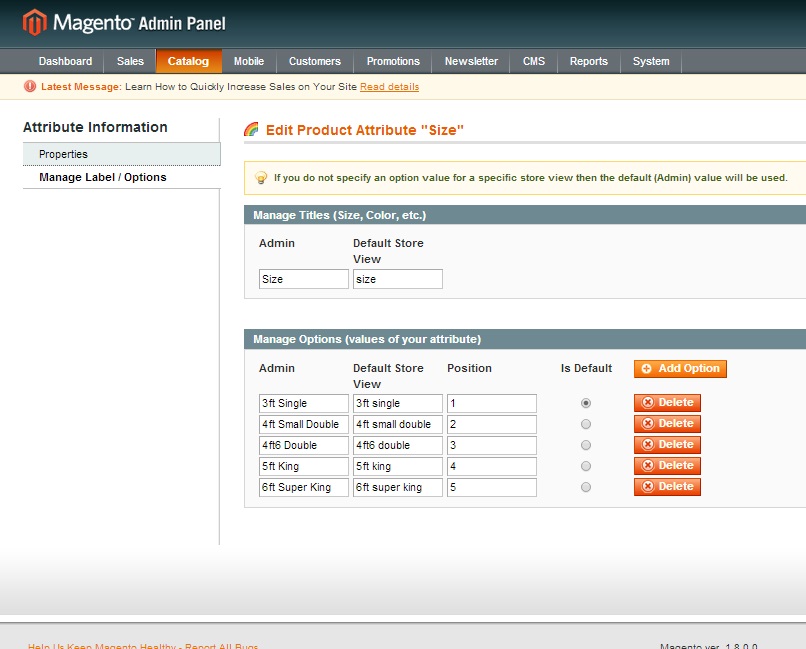
You’ll notice in the size options, we’ve numbered each size in the position column and assigned 3ft single as the default value. Every bed product has these variations so it makes sense to order them all in positions in the drop down and set a default value.
Make sure to click Save Attribute when you’re done adding labels.
Next you need to create an Attribute Set with these two attributes attached and then add the set to the product. You can create this by going to Catalog> Attributes> Manage Attribute Sets and then select Add New Set in the top right corner. Give the attribute the name Bed and leave it based on default.
In the next window you’ll see two panes, both containing attributes. The left panel shows attributes that are part of the set and the right panel has unassigned attributes.
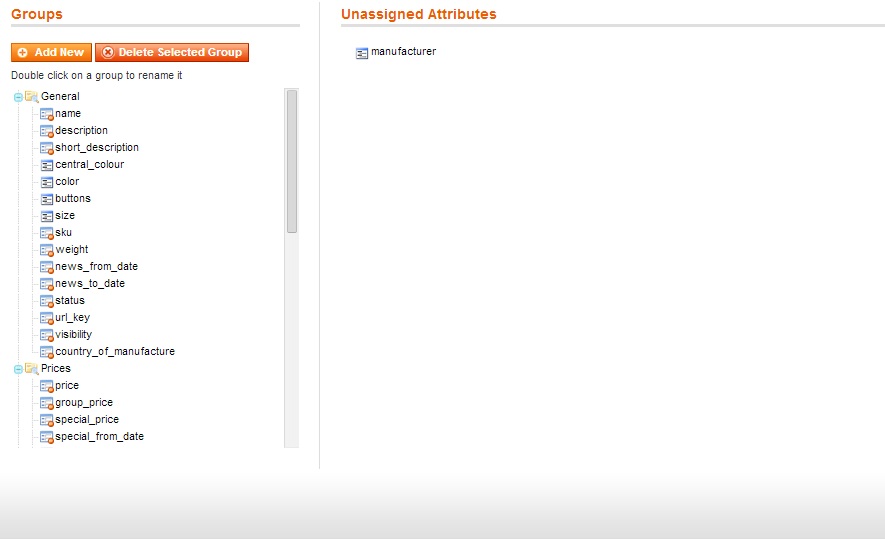
Drag both the color and size attributes into the left panel, under the folder General, and then click Save Attribute Set in the top right.
Create the simple products
Now that we created the attribute set, we’re ready to start entering the data for the simple products that will be part of the configurable product. Go to Catalog> Manage Products> New Product, in the Magento admin. You’ll be presented with the New Product creation window.
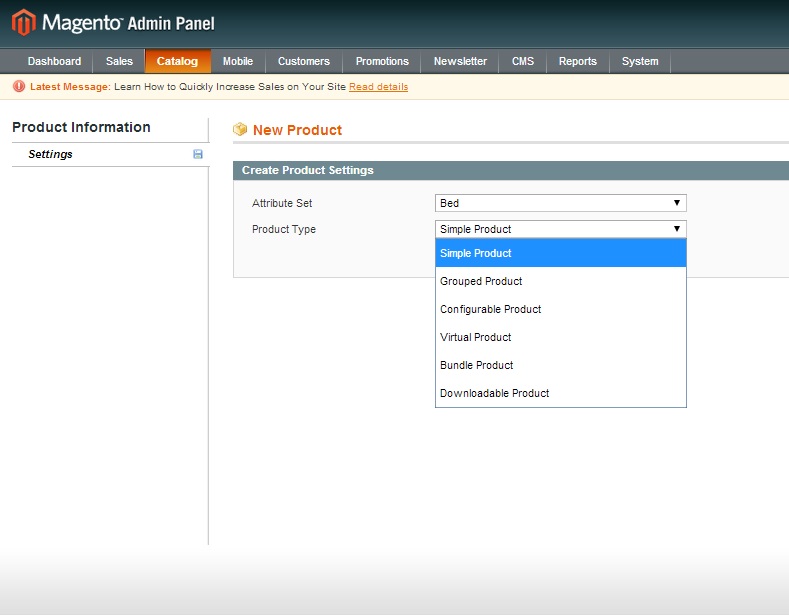
The first thing to do is to select the Attribute Set to apply to this product, which in our case is Bed. The Product Type should also be set to Configurable Product. Click Continue.
On the next screen, select color and size, the two attributes we created earlier for the beds product, and then continue. In the next screen, input all the details as shown below.
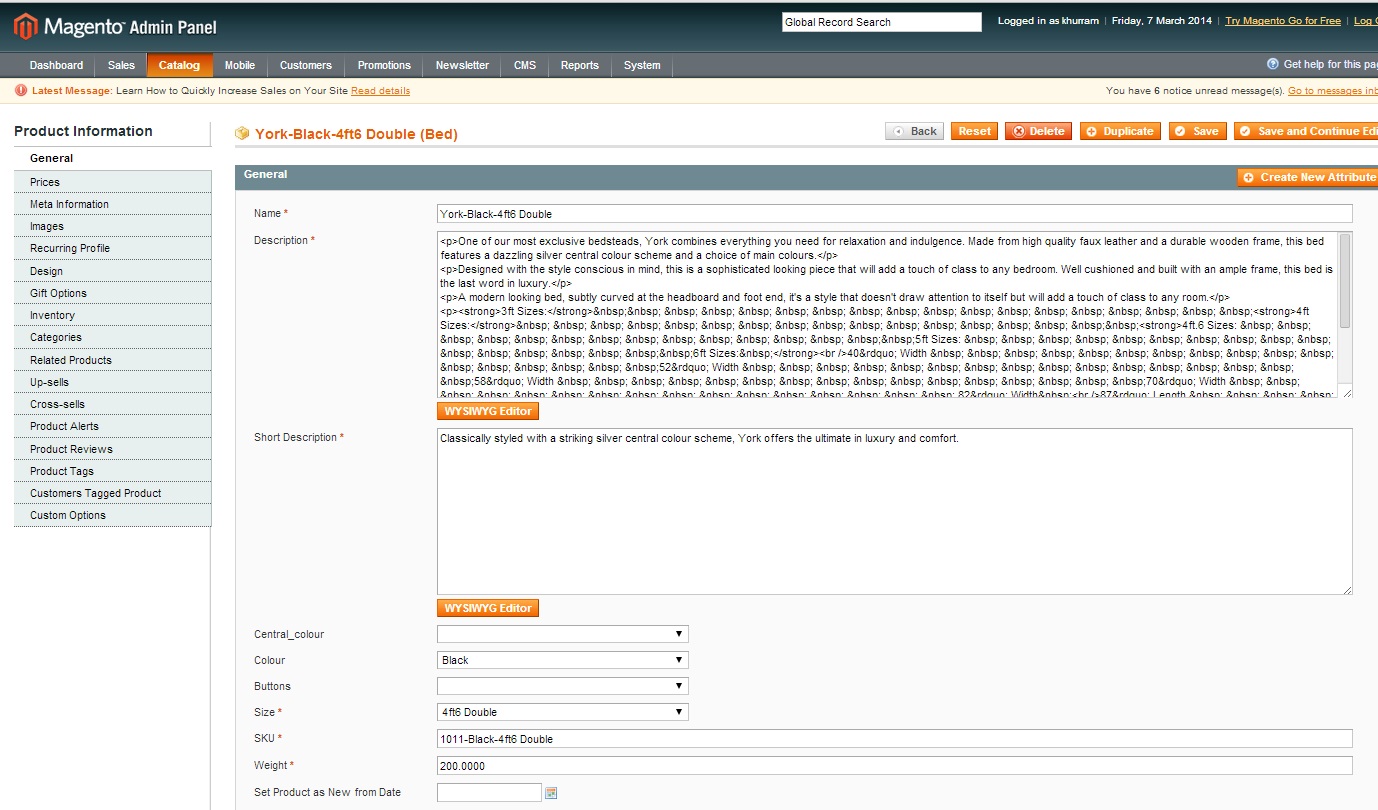
Choose a unique name for that variation of the product, with a description that will be shown alongside it on the front end. Note the two variations for size and color, which were created in our attributes. Pick a default variation for this, in our case set size to 3ft and color black. Make sure to also set Visibility to Not Visible Individually, because we want it to appear as a Configurable Product, not on its own.
You should then make your way down the tabs in the left hand menu, filling all the details as required. The tabs will allow you to set the base price, any meta-information for SEO purposes, and also add images for your products.
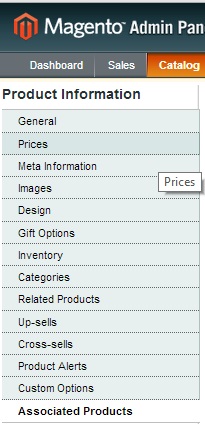
You’ll notice the last tab in the menu is Associated Products. This is where you create all the variations that will be part of this product. Select this tab and in the control panel that comes up on the right, select Create Empty. A now familiar window should pop up for entering information for the variation of the product.
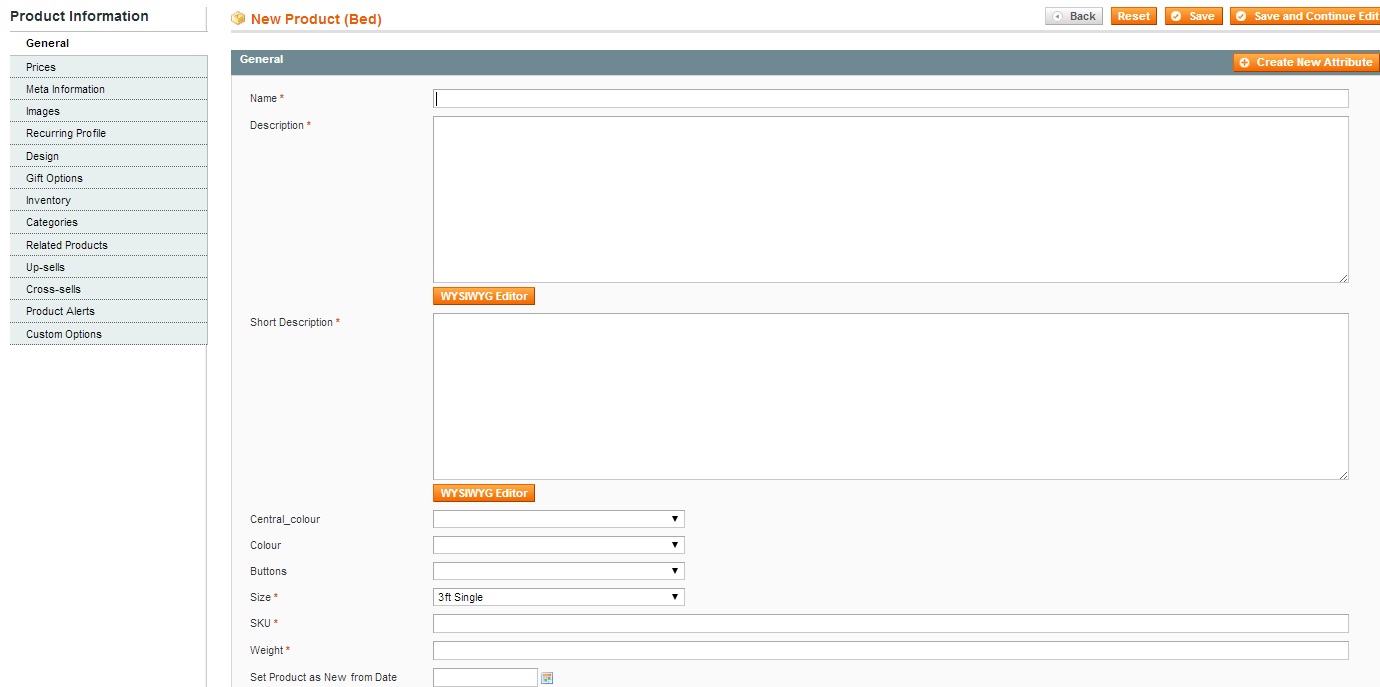
Fill this in as you did the default variation, making sure to select different options for the size and color attributes, and when you’re done, select Save. You need to repeat this process and create a simple product like this in the New Product window for every variation of your item. Your Associated Products tab should now be filled with as many products as below:
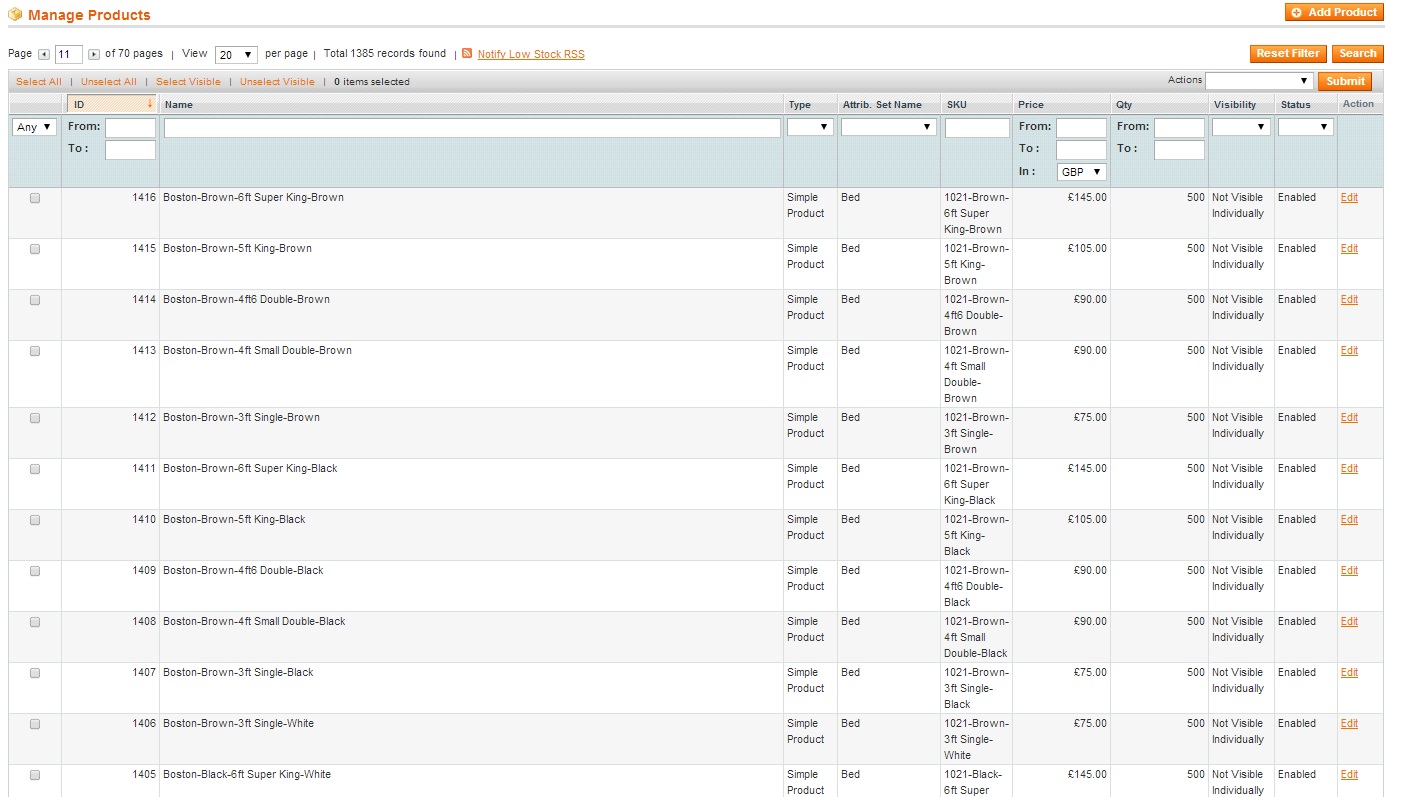
Select Save in the top menu and your configurable product should now be ready to display on the front end.
Conclusion
You’re all done. How the product will look on the front end will depend on the theme and plugins you’ve set up on your site, as well as custom design.
But however they look, entering each product and variable like this individually will allow you to have a consistent customer experience for your site.
All the products will be displayed with the options for size and color as we laid out in this tutorial, and, when selected, will automatically update the stock inventory and the front end shopping cart.
 kaziz
kazizJai Paul is a programmer and tech writer. Besides his freelance writing, he spends his time running several online ventures. He consults on all things related to web development.


