This article was sponsored by Beanstalk. Thank you for supporting the sponsors that make SitePoint possible.
Do you perform code reviews in your team? It’s a useful technique to find bugs quickly and improve the quality of your code. Simply put, the process works like this: A developer will present a code example to their team or superiors, explain what they have written, and then receive feedback on how they could improve their code. That sounds easy, but in reality it can often be complicated, time-consuming and difficult to take on.
But today I’m going to talk about Beanstalk, a platform that can help to incorporate a code review process into your workflow, seamlessly making it a part of your coding habits.
Let’s first have a look at the common code review techniques used by development teams and highlight where there’s room for improvement, before moving on to talk about how Beanstalk can help.
Code Review Tools and Techniques
There are many benefits to reviewing code. Some of the more important ones are as follows:
- Bugs are identified and eliminated quickly.
- Team members always know what’s going on in the team.
- Reviewed code is more readable.
- Various optimisations may be done in code review, improving speed.
Let’s look at how code review is usually done. Often teams adopt one or more of the following techniques to review code:
- Pair programming : Two programmers sit at the same workstation and write code together, with one typing out the code and the other offering suggestions. While this seems like a good solution, it comes with some problems. For example, sometimes the senior member in a team can take over and do most of the work, defeating the purpose of the pair programming.
- Over the shoulder review : Usually a senior member looks over the developer’s shoulder while the latter explains what they’ve done. This is a quick, lightweight, ad hoc technique to perform code review, and that may work for small teams and projects. But as your project grows and your team expands, it’s just not possible to do over the shoulder reviews effectively.
- Email : Here the version control system sends code to reviewers via email. Usually this is done once a new commit is pushed to the repo. But things can quickly get messy with this technique. It requires you to keep track of multiple email chains to review code and suggest changes. Also, because it uses email it’s also difficult for other team members to know what is going on in the review.
- Code review meetings : The developer schedules a specific meeting dedicated to code review, with one or more reviewers reviewing the code. Issues are noted as a part of the process. Once the developer addresses those issues, the reviewers are notified. Of course, as with any meeting, scheduling and executing a code review can be tricky and time consuming.
So those are some existing ways of managing code review, which each have their problems. Let’s have a look at a better way.
Introducing Beanstalk
Beanstalk is a code hosting solution for development teams. Once you signup you can start creating repositories (repos) to host your code. In case you’re not aware, a “repo” is a storage space for your code. You can create a new repo by clicking on the “Create a repository” button in your Beanstalk dashboard. You can also create “branches” for fixing bugs or developing new features. We’ll discuss branches more later on.
Beanstalk promotes a three-step process to ship your code :
- Commit your code
- Review with the team via Code Review
- Deploy the final reviewed code
This is a useful way to release your code because code review is built in as an essential step in the development workflow. This means the code quality will be improved and bugs eliminated earlier. Developers can update their code based on a comment or issue, make their changes and then get feedback from reviewers.
Code Hosting and Committing
To start using Beanstalk’s code review tools you’ll first need to host your code. This process is very simple. If you don’t have a Beanstalk account yet, go ahead and create one.
Once you’ve created an account you can go to the “repositories” tab to create a new repository. You can create both git- and subversion-based repos, but we’ll be using git for this example. In case you are new to git, here’s an article to help you get up to speed.
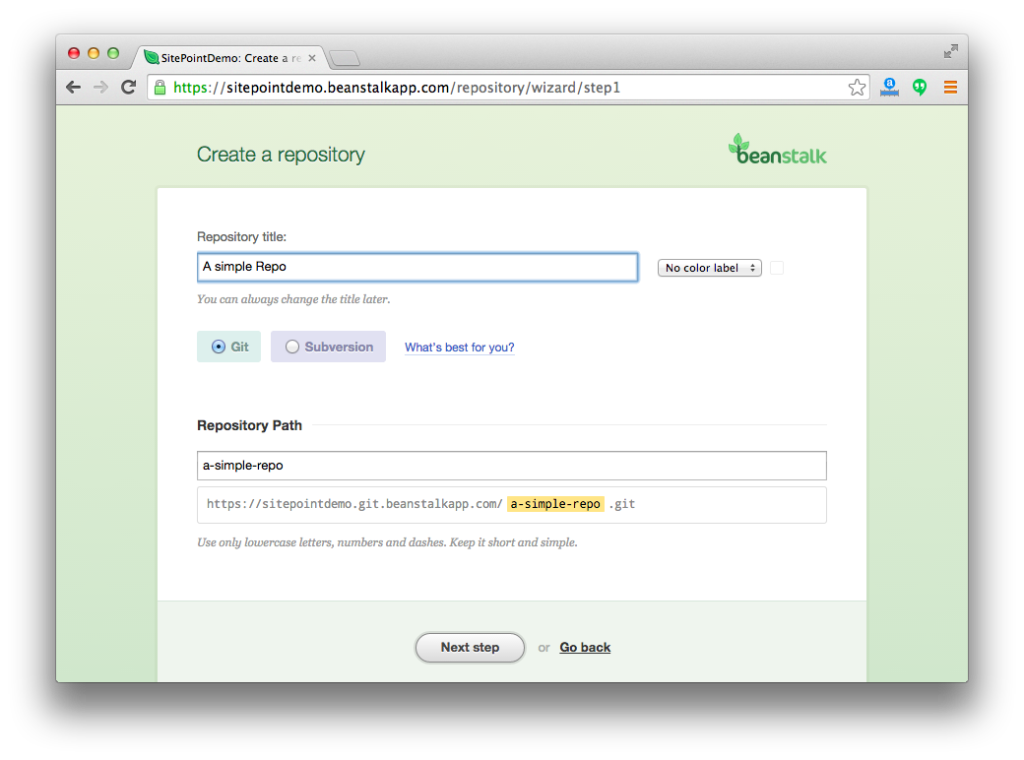
Creating a repo is easy. Once you click on the “Create a repository” button you’ll be presented with a wizard. It’ll ask you to choose a title and repo type (git, subversion or another.) Once you fill in the details your repo will be ready.
Here’s a screenshot of the repo creation wizard.
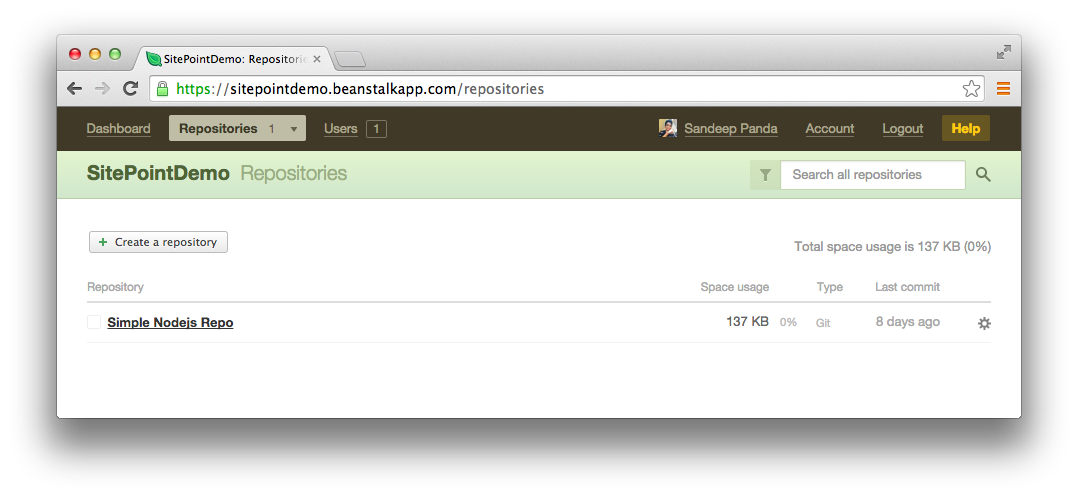
I created a simple git repository to demonstrate the process. My repositories tab looks like this:
Once your repo is ready, you’ll get a URL (mine is https://sitepointdemo.git.beanstalkapp.com/simple-nodejs-repo.git). You can use this URL to push ‘commits’ into your repository.
Again, if you’re unfamiliar with source control, think of commits as snapshots of your code at a particular point in time. Once you’ve committed some changes, you can always revert back to that point in the future.
Now your new repo is ready you can start committing the changes. If you have your source code on your machine you can commit locally and push those to your Beanstalk repo.
Every repo has one or more ‘branches’. The normal workflow involves a master branch for production. Every feature and bug fix should start in a new branch and be submitted for code review once it’s completed. Once the review is complete and issues are resolved, the branch can be merged back into the master branch and its changes applied to the production code.
The ‘branches’ tab, shown in the screenshot below, lists different branches in your repo. You can also create new branches and delete existing ones.
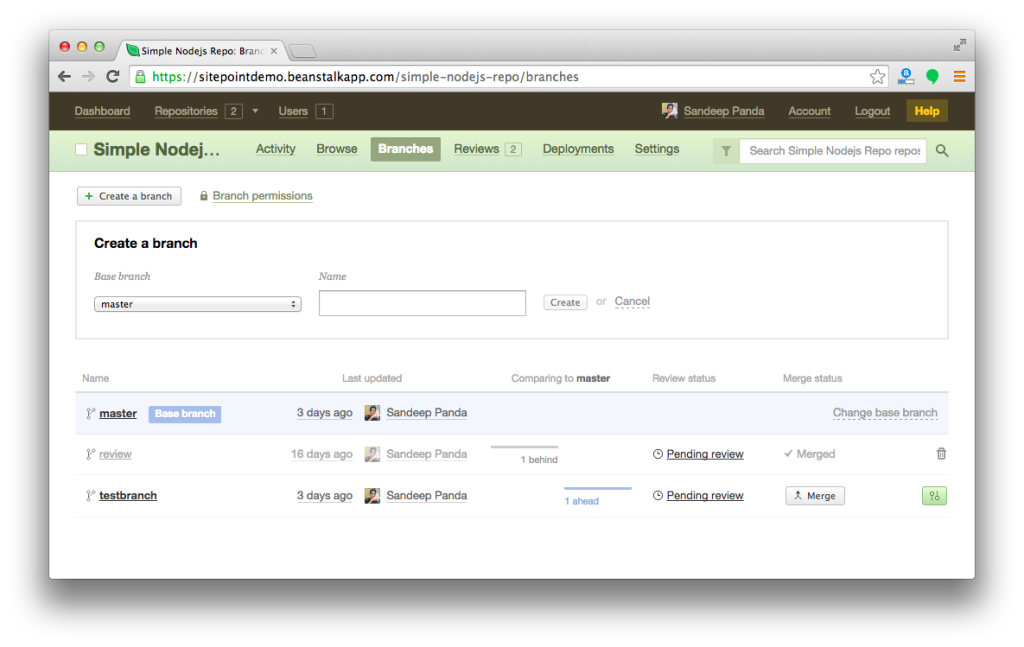
For more information on working with branches check out this tutorial.
Now you have the basics in mind, let’s create our first code review.
Code Reviewing
Creating a Review
Creating a code review request is easy. First, create a branch in your repo. Once the branch is ready you can create and assign a review to someone from your team. The following screenshot demonstrates the process:
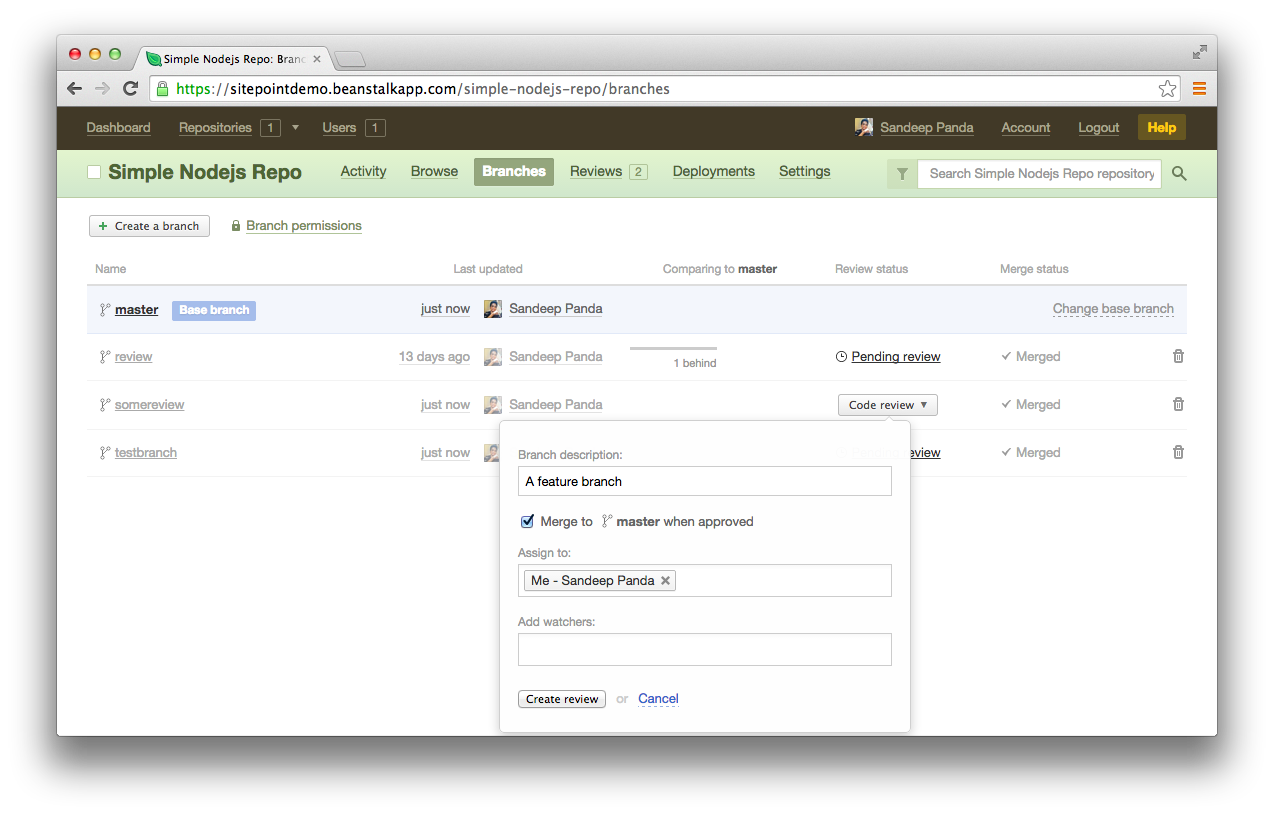
Since I’m the only one in the team in my lonely demo environment, I’ve assigned the review to myself. In a real-world app, you’d obviously want to assign this review to someone from your team. It’s also possible to assign the review to multiple reviewers, to help you get more perspective on your code.
You also have the option to add watchers. This is for those team members who don’t directly review your code, but who need to know about the progress of the reviewed branch. As a team grows, more people — product managers or developer managers, for example — will want to adopt this “watcher” status to keep track of code they have an interest in.
Once you create the review, go to the “Reviews” tab, where you can find a list of reviews.
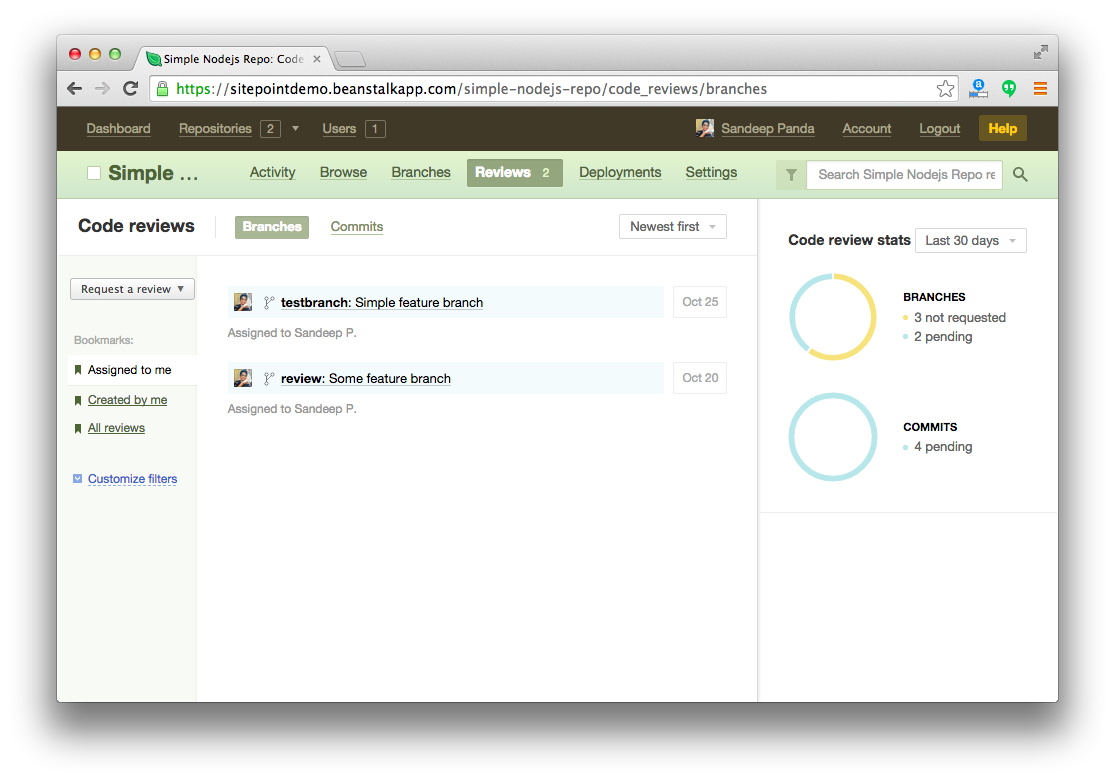
As you can see, the above screenshot displays the two pending code reviews I just created. Click on either of them and you’ll be taken to a detailed code review page, which lets you manage the review assigned to you. This is where things get interesting. You have a lot of cool and exciting code review tools. Let’s explore them one by one.
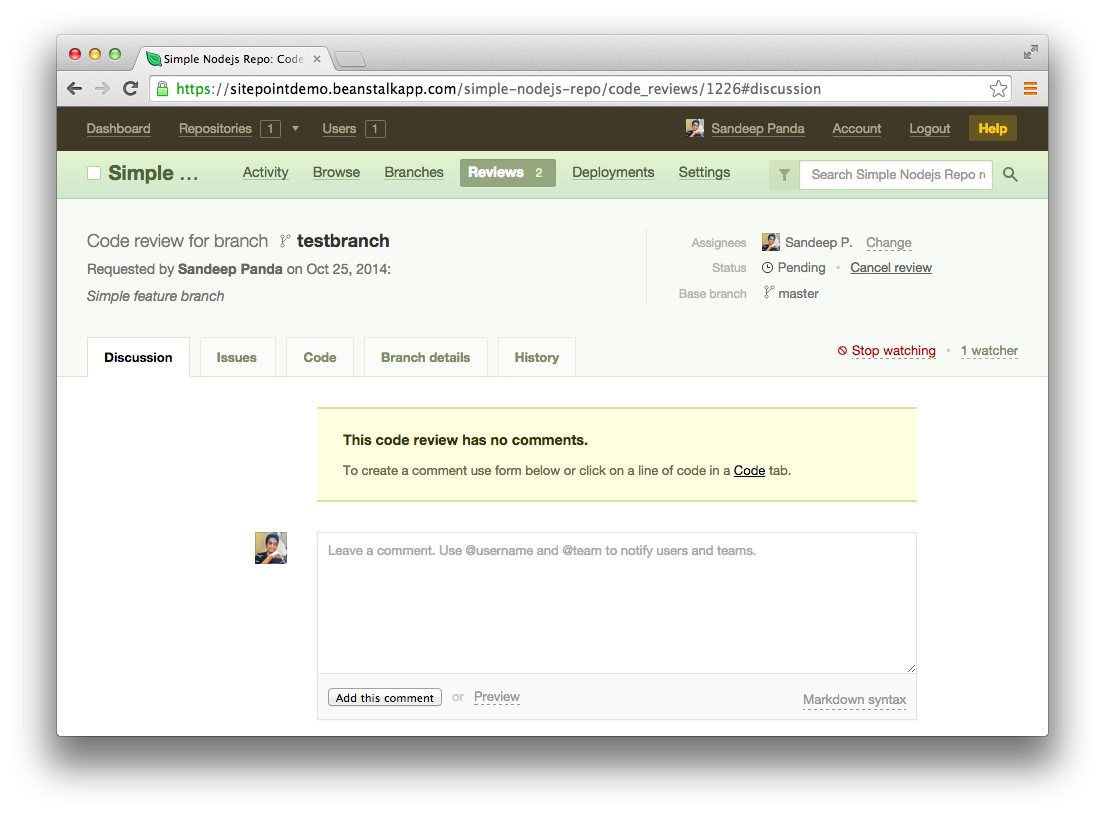
Discussion, Issues, and Your Branches’ Code
As a reviewer, many times you’ll find several problems with the code. After all, that’s why code review is done! Usually you’ll sit down with the developer and point out the issues one-by-one. You may also write a formal email to the developer outlining the issues found. But is that the best way to do things? It’s very easy to lose track of the issues, especially when there are too many moving parts.
To tackle this issue Beanstalk offers a feature called “Issues in Code Review”. In the code review section, you have a dedicated ‘Issues’ tab. As a reviewer, you should use this tab to add issues you find in the code. As soon as you find an issue in the code, add it here. This keeps things cohesive, as you and the developer can both keep track of what’s going on in the review. Take a look at the following screenshot, which describes the process of adding issues.
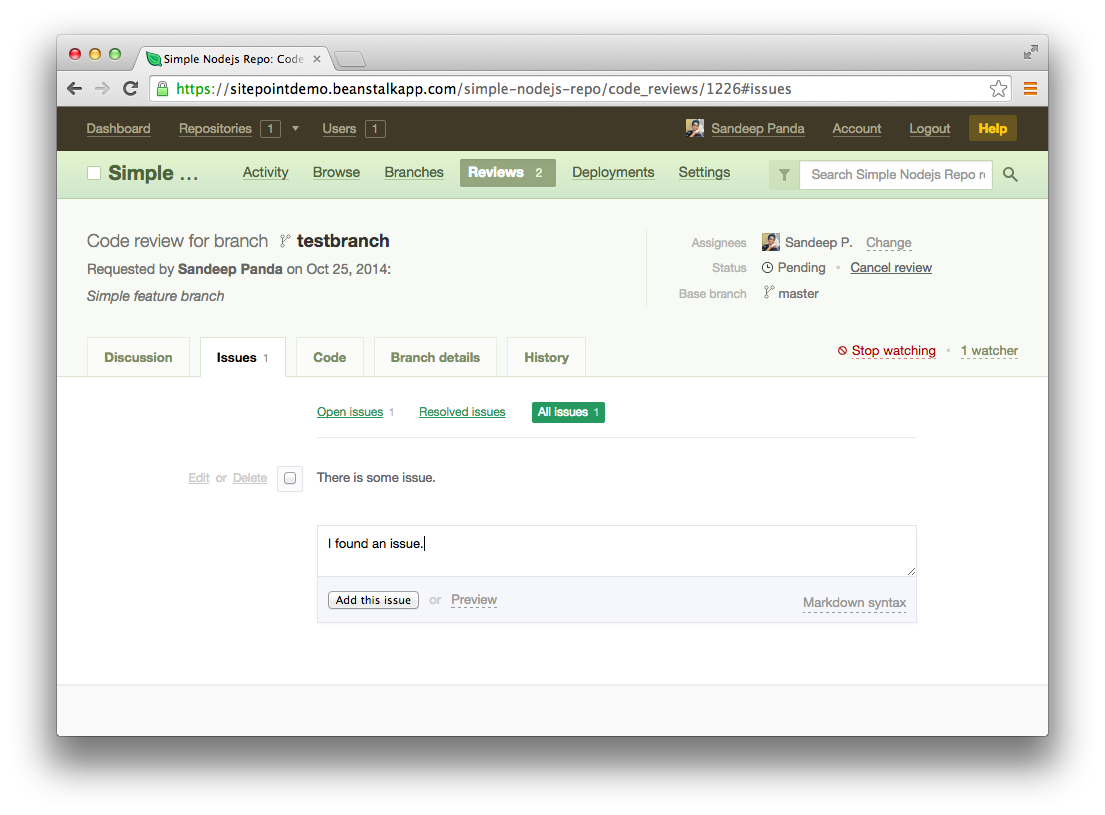
You can see comments and issues are kept separate in the discussion and issues tab so your team can have discussions and track issues related to the code without having to dig through a single comment thread to find issues, or vice versa.
You can also add comments inline to notify developers about any issues or ask questions. Not sure why a developer added a particular line? No problem! Just click on the line and ask them with an inline comment. Cool huh?
There is also a tick box associated with each issue. If you think the issue has been resolved, simply click on this box to label it as such and move on to the next issue.
You should also note that as long as there are open issues, the review can’t be approved and consequently the branch can’t be merged with the master brach. This is a very neat feature because it guarantees all issues will be fixed before the branch is merged.
Another nice thing about this tool is that it supports markdown syntax! Many times you’ll need to write code blocks to explain the issues clearly. Markdown makes it easy for you format your issue description and refer to code snippets inside it. You can easily switch between normal view and markdown view by clicking on the ‘preview’ button.
Code Editing
Code editing is a nice add-on to your code review workflow. You can find the ‘Code’ tab right beside ‘Issues’. In this section you can see the changed code, edit the files and commit changes made by you. You can also click on the ‘expand’ button to get more detailed information on a particular change.
Take a look at the following screenshot which shows the edit and expand options.
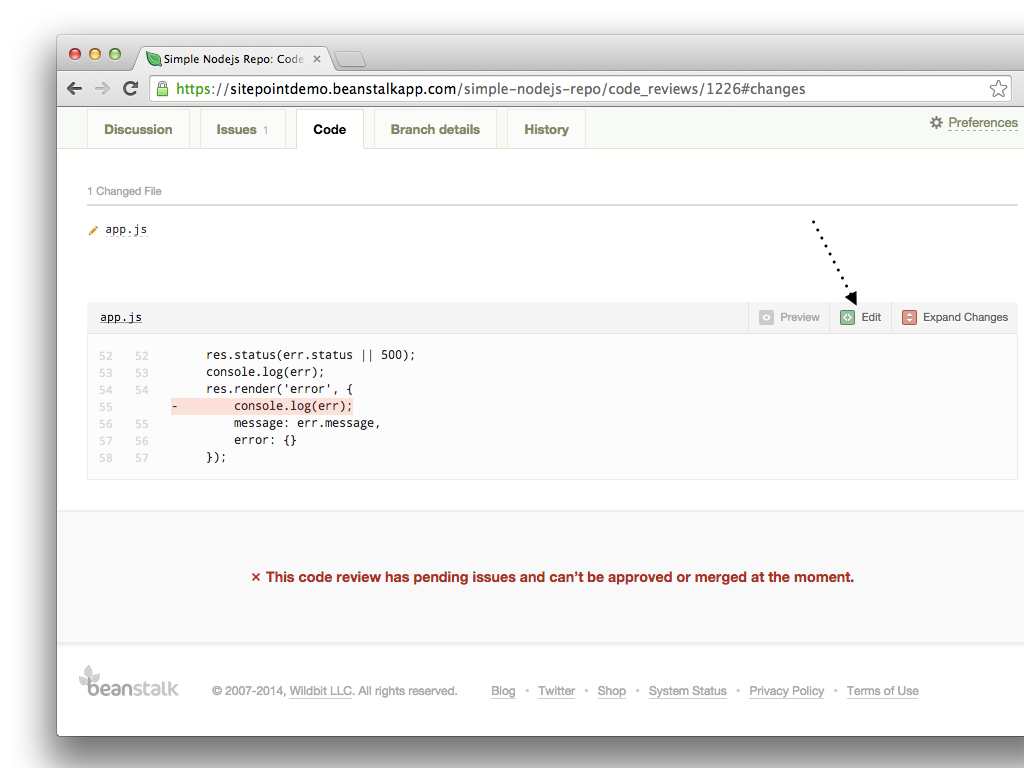
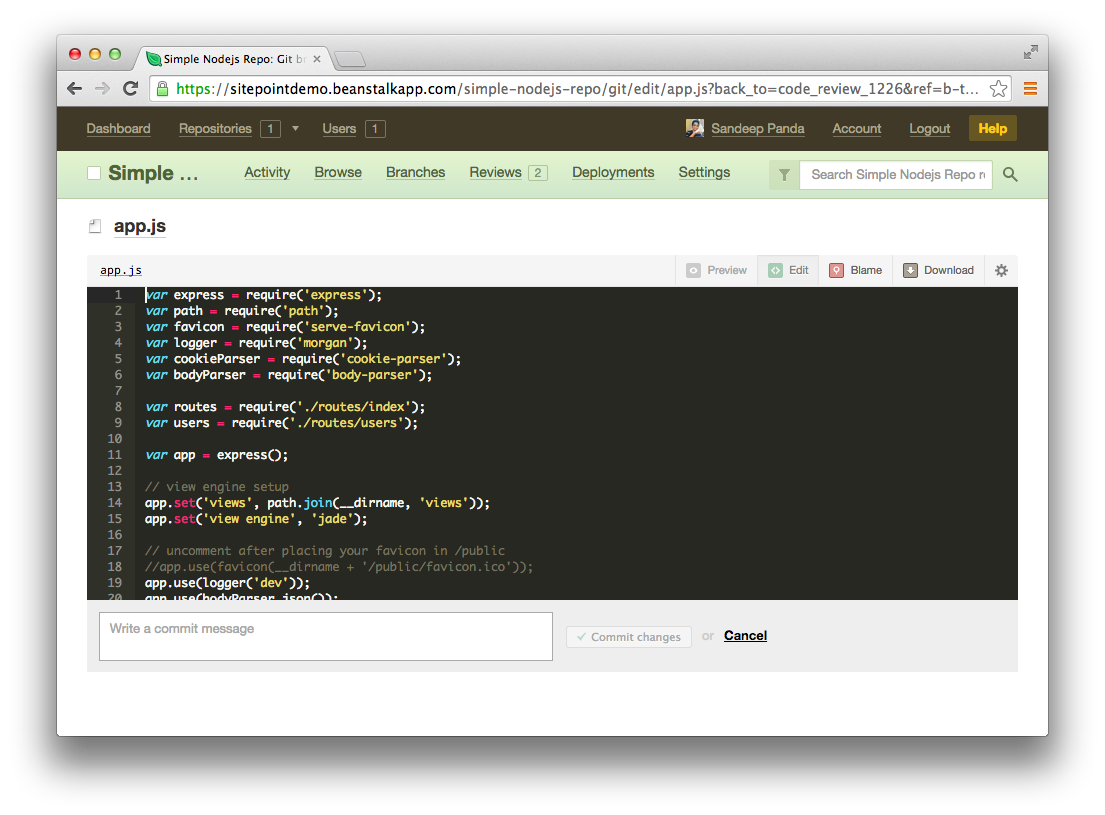
If you click on the edit button you’ll be taken to a new page where you can edit the file in an actual code editor (yes, there’s syntax highlighting too!) You also have the option to write a commit message and commit the changes directly.
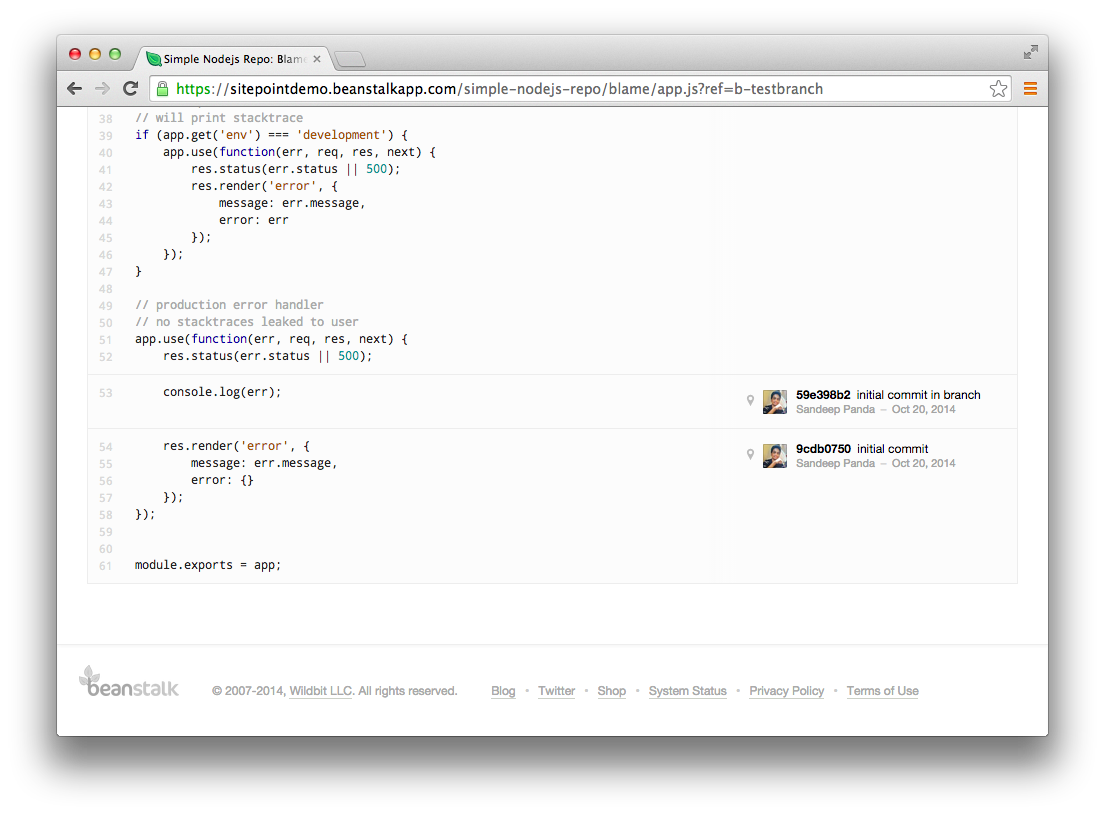
Integrated Blame Tool
When you ship code frequently, it becomes very hard to keep track of every code change. Often you’ll find yourself wondering exactly why a particular line was deleted or modified. Beanstalk has you covered. With the integrated blame tool you’ll know exactly why something changed, as it provides context for every change in the file.
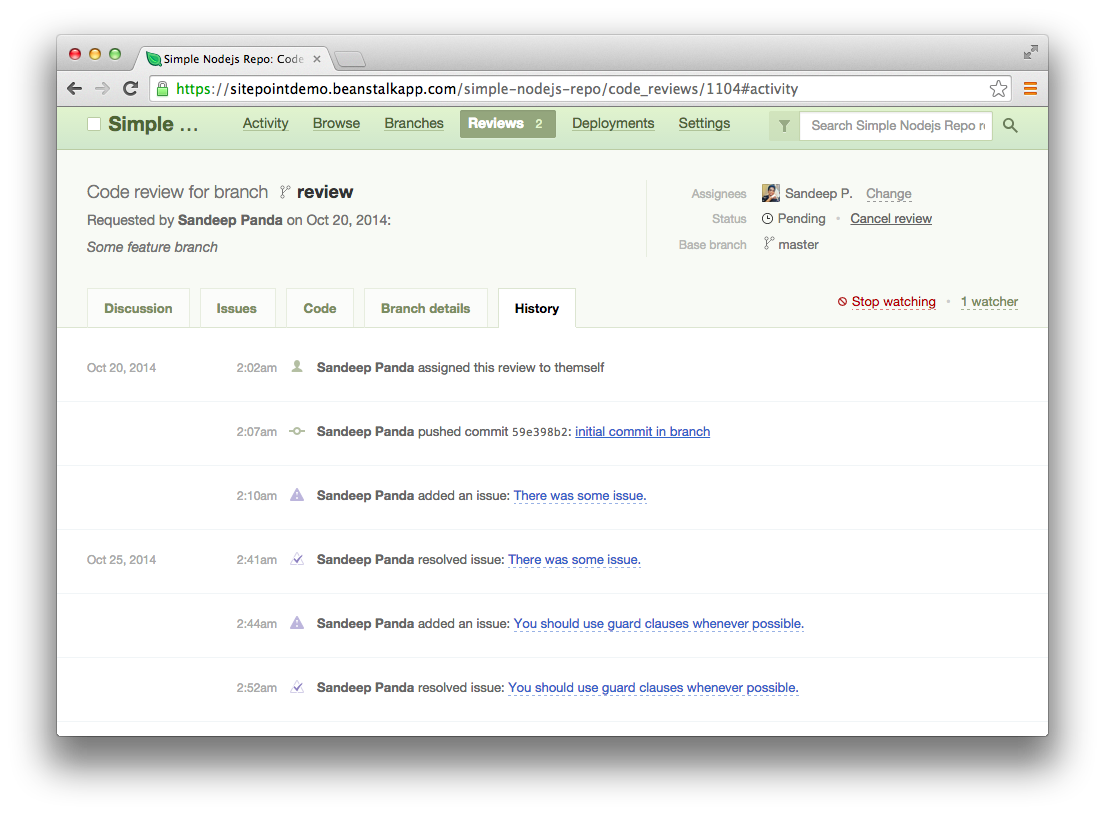
Branch Details and History
You can find all the relevant information related to a given branch in the ‘Branch Details’ tab. With this you will be able to identify who the contributors are and how many revisions have been made so far. The integrated ‘History’ tab lets you keep track of the all the actions done in the particular branch. For example, you can quickly browse through the history list to know when an issue was opened and closed. By clicking on an issue description you can directly jump to the particular issue in the Issues tab and start troubleshooting if you need to. The history tool is an uncomplicated yet very powerful addition to the feature set.
Branch Permissions and One Click Branch Merging
When you create a new review you have the option to choose to merge the branch automatically once all the issues are resolved. That’s awesome. But if you haven’t selected that option you can manually merge the branch with the main branch once all the issues are resolved. Assuming there are no outstanding conflicts you can click on the ‘Approve and Merge’ button in the ‘Issues’ tab to approve the changes and merge with the main branch with one click.
With Branch Permissions you can easily restrict write access for particular branches to selected developers. For example, the production branch should not be writable by everybody. This is a clever tool that will be useful in every project.
Compare View
When you are following a collaborative coding process, sometimes you’ll need to know how exactly one branch differs from another. With the “Compare View” feature, you can easily compare two different branches and identify what has changed. You can also take advantage of this tool to compare specific commits in same or different branches. Take a look at the following screenshot which shows the Compare View.

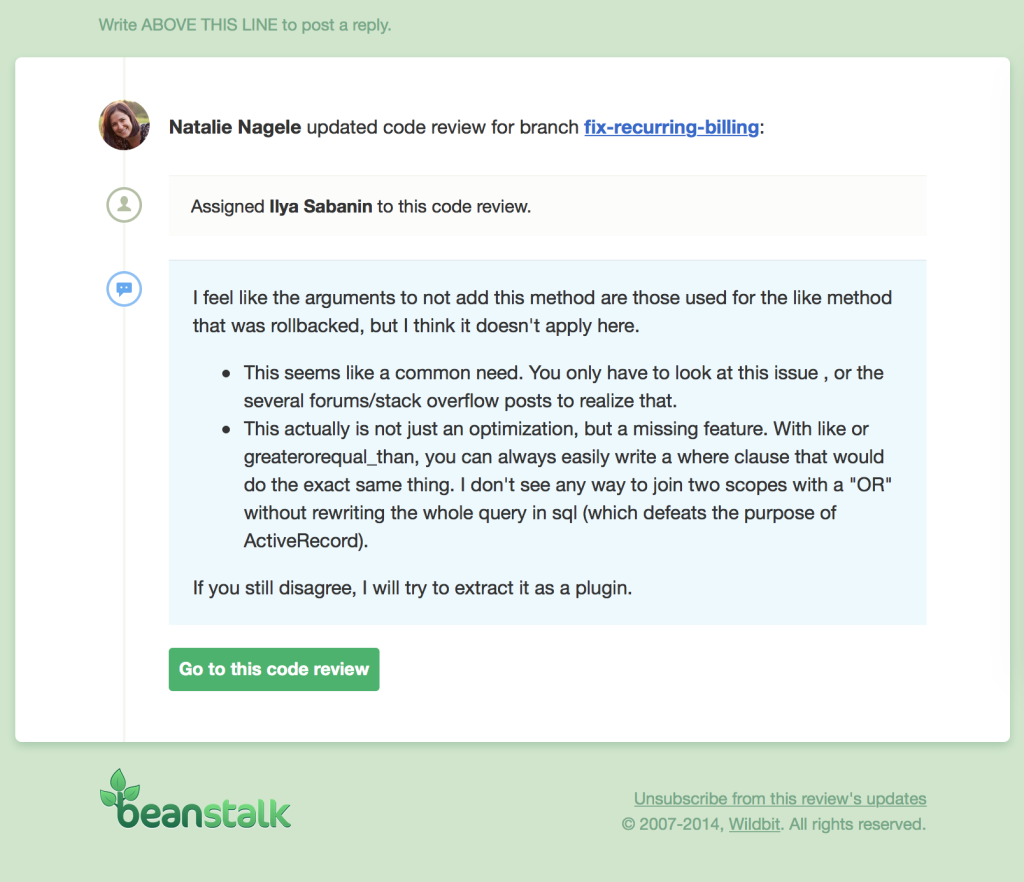
Email Notifications
Not at your desk? Travelling a lot? Don’t worry, Beanstalk can send you automatic email notifications whenever there’s activity in any of the repos you are interested in. Reviewers and watchers will get these updates, and the email notification system also makes sure you don’t get overwhelmed with too many emails. For example, if someone comments on 10 lines of code in a few minutes, you’ll only receive one email rather than 10.
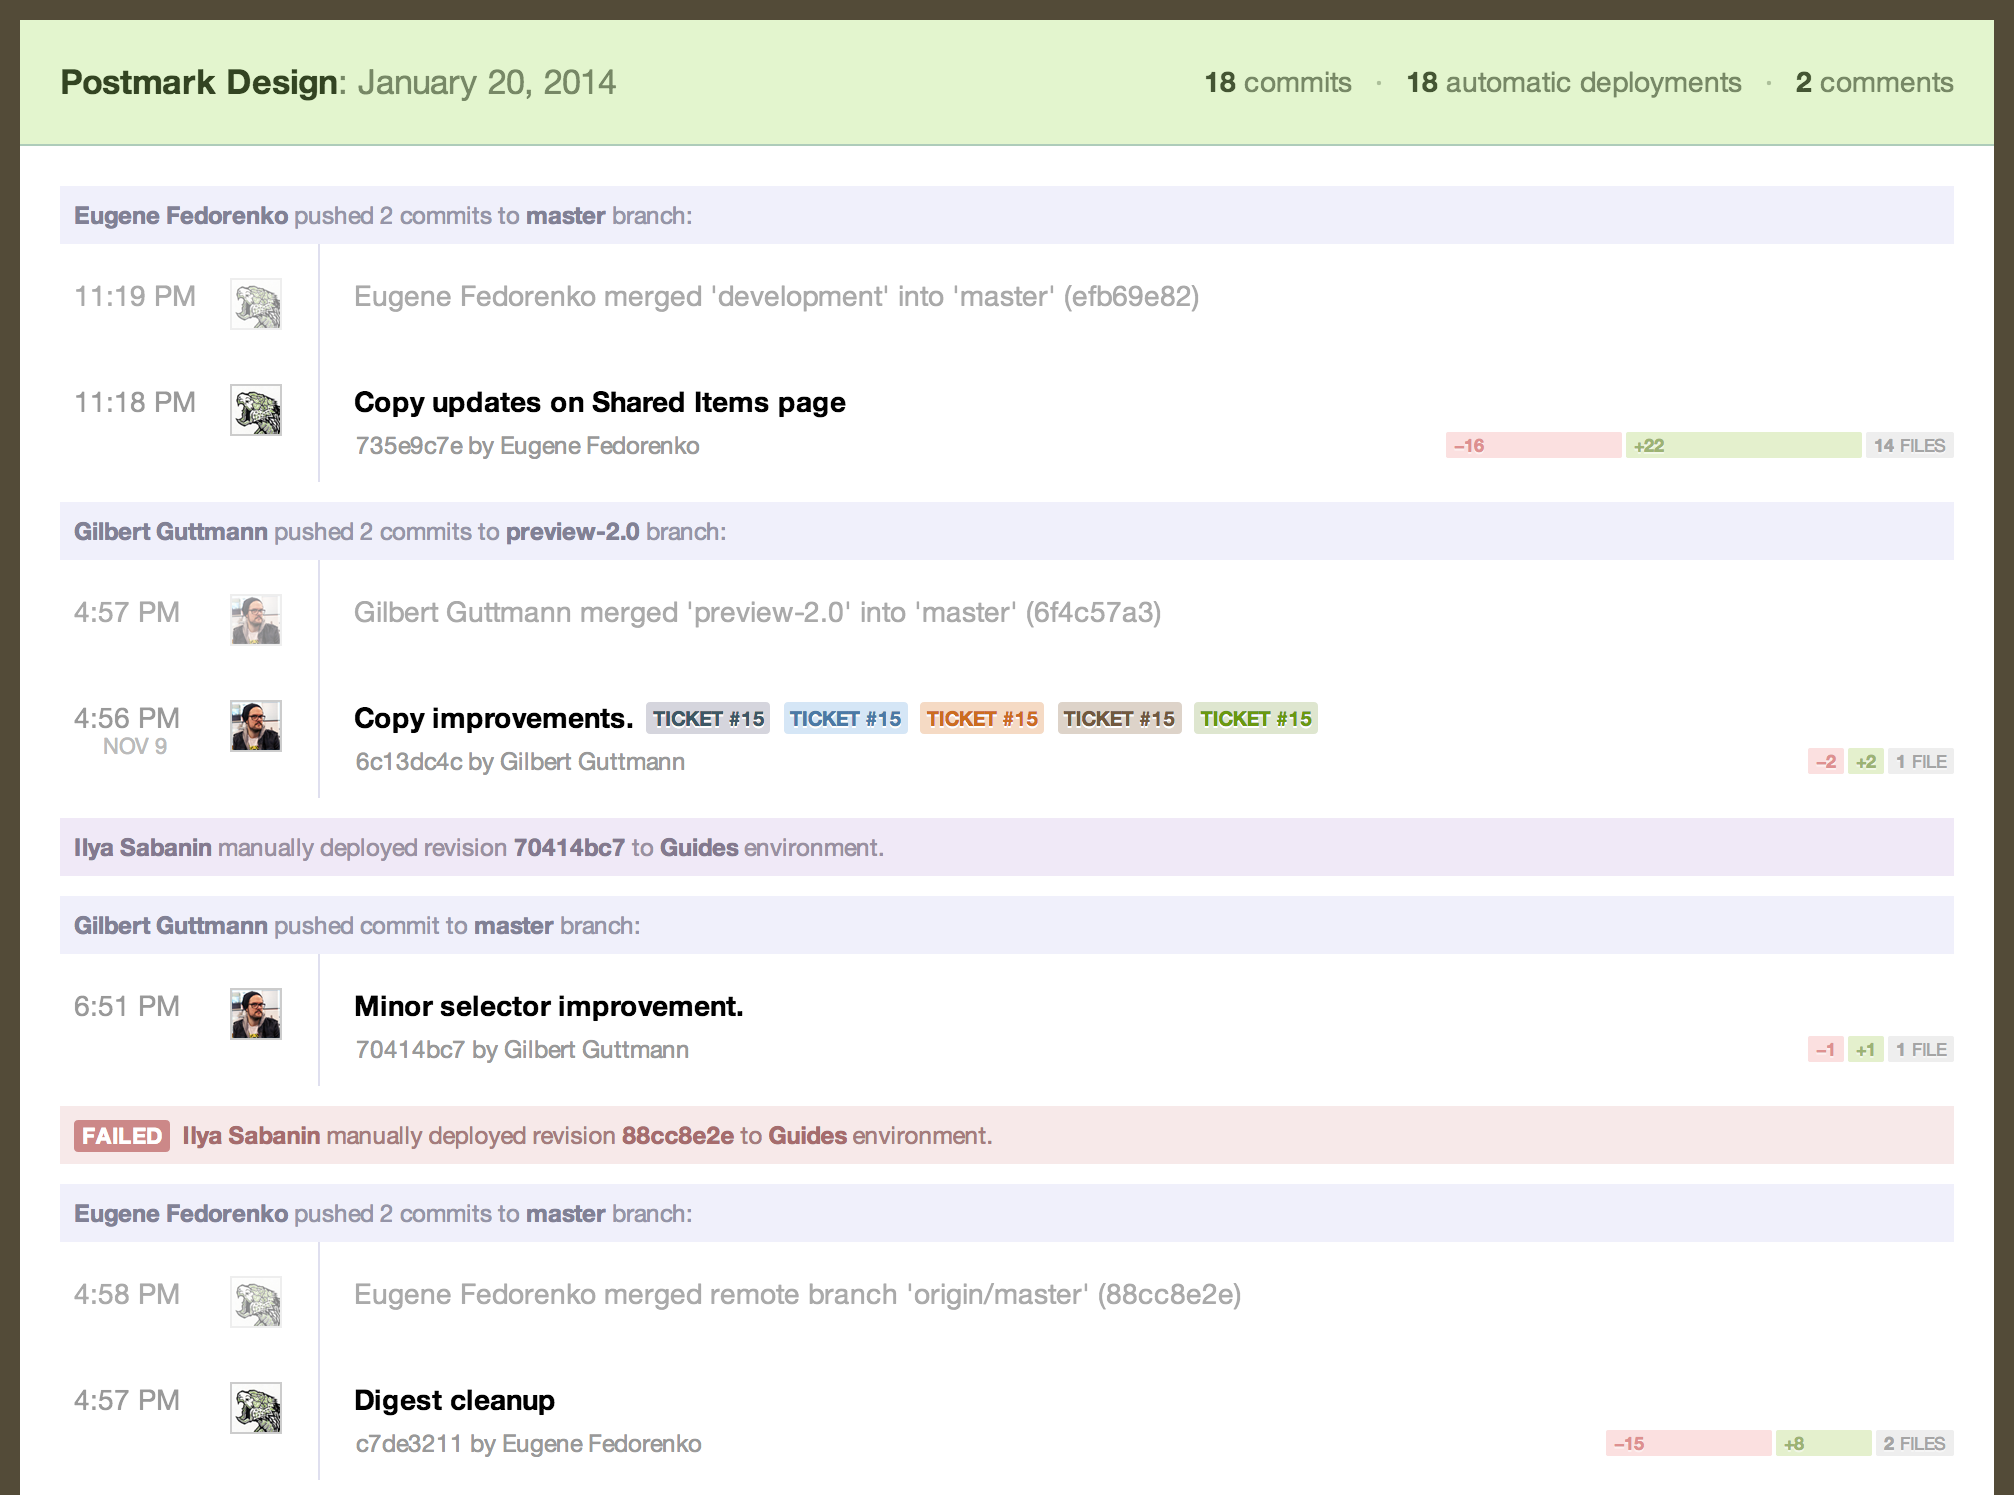
There is also a Smart Digest tool which shows you a list of activities in your repository. This is a very useful tool to start your day with. I grabbed the following image from Beanstalk’s website which shows the smart digest view.
Deployment
Once the review is approved and the branch is merged with production, you need to ship the final code. Beanstalk’s deployment system lets you instantly deploy the code to your servers (via SFTP, SSH) or your favorite cloud services such as Rackspace Cloud Files, Amazon S3, and Heroku. Here’s a summary of how that deployment process works.
The benefits are obvious. You don’t need to switch between products for deployment —everything is handled in a single app. Everything you need for a proper deployment process — from code commits to reviews to deployment — all takes place in the same environment.
Conclusion
Code review and collaboration are two major parts of any development workflow. Beanstalk takes collaborative coding to a whole new level. With Beanstalk, code review doesn’t wait until the end of the process; it’s done as a part of the overall collaborative coding process. Furthermore, Beanstalk’s code review tools and techniques can be easily applied to your existing development workflow.
This was my take on the important code review features available in Beanstalk, but if you want to learn more, check it out here. I have personally found Beanstalk immensely useful in my development workflow.
How do you manage your code review process? Have you given Beanstalk a try? Let us know in the comments.
 Sandeep Panda
Sandeep is the Co-Founder of Hashnode. He loves startups and web technologies.