

I probably don’t need to talk much about Firefox OS, as many of you will know a lot about it already. If not, we have several great articles covering the topic on SitePoint, this is a good starting point.
All you need to know for this tutorial is that Firefox OS applications are simply webapps, ergo programmed using HTML5, CSS and JavaScript.
I am going to create a simple game, called YALG, Yet Another Logo Game.
Key Takeaways
- Firefox OS applications are essentially webapps that leverage HTML5, CSS, and JavaScript, making them highly accessible for web developers looking to transition into app development.
- The Ionic Framework, utilized in this tutorial, is praised for its simplicity, extensive documentation, and mobile orientation, which are advantageous for cross-platform development.
- The tutorial demonstrates a step-by-step approach to setting up a simple game called YALG (Yet Another Logo Game), including configuring the app environment, coding with AngularJS, and deploying to a Firefox OS emulator.
- Key features of AngularJS such as modules, routing, and controllers play a crucial role in managing the game’s structure and navigation, highlighting the MVC framework’s utility in complex app development.
- Despite being a tutorial for beginners, the guide underscores the importance of understanding AngularJS directives and expressions to effectively utilize the Ionic Framework for creating interactive and dynamic game interfaces.
What do we need?
Firstly, the Mozilla Firefox browser. Most of us don’t have a Firefox OS device, the Firefox OS emulator is a Firefox plug-in, you can find out how to install it here.
I decided to use a framework called Ionic for this project.
Why Ionic?
- It is simple and has great documentation
- It allows for cross platform development, using its Cordova-based CLI
- It is based on AngularJS, one of the best Javascript frameworks
- It is mobile oriented
Starting the project
Firstly install Ionic, you can do this by following our tutorial on Ionic. Then using Ionic CLI tool, execute:
ionic start YALG blank

cd YALG

ionic platform add firefoxos

# You can add more platforms as required
This creates a new Ionic blank Project with Firefox OS support (you may want to change some things in the config.xml file created by Cordova).
Now execute:
cordova prepare firefoxos
This makes your application ready to deploy to Firefox OS.
To run the new application in the emulator, add products/firefox/www as a ‘packaged app’ and click the ‘Update’ button.
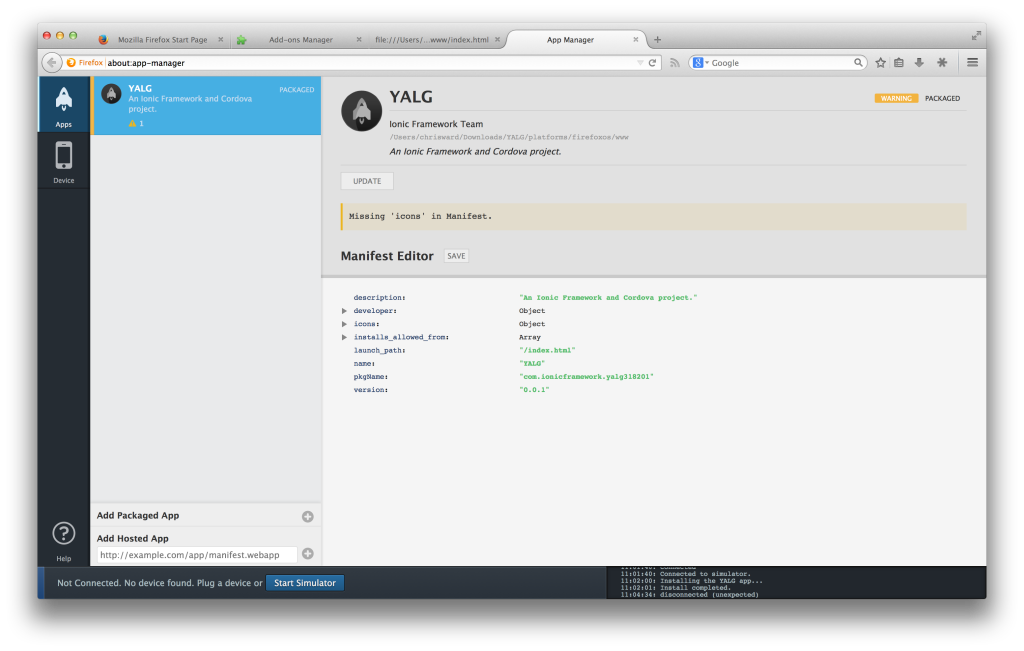
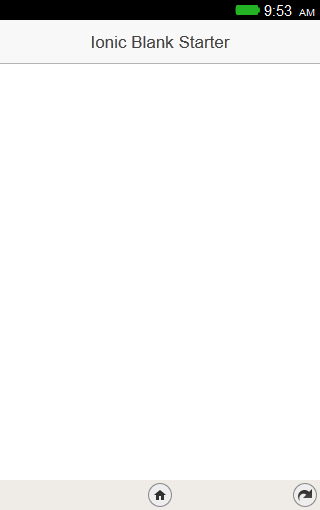
You should see something like this running in the emulator:
Now we will make some changes to the source code in the www folder.
Firstly, open index.html file. Change it’s content to this:
<!DOCTYPE html>

<html>

  <head>

    <meta charset="utf-8">

    <meta name="viewport" content="initial-scale=1, maximum-scale=1, user-scalable=no, width=device-width">

    <title>YALG</title>
    <link href="lib/ionic/css/ionic.css" rel="stylesheet">

    <link href="css/style.css" rel="stylesheet">

    <script src="lib/ionic/js/ionic.bundle.js"></script>
    <!-- cordova script (this will be a 404 during development) -->

    <script src="cordova.js"></script>
    <script src="js/app.js"></script>

  </head>

  <body ng-app="yalg">
      <ion-nav-view>

          <!-- View Goes Here -->

      </ion-nav-view>
  </body>

</html>
If you are not familiar with AngularJS, you may notice a couple of odd things. One is ng-app="yalg". This is a way of telling the HTML page that it should work as an Angular Project, managed by an Angular Module called yalg.
Another is ion -nav-view. This is an HTML directive created by the Ionic Framework and is used to load different views, since AngularJS is an MVC framework. These views are defined in the app.js file, edit this file to be the following:
var app = angular.module('yalg',['ionic']);
app.config(function($stateProvider, $urlRouterProvider, $compileProvider) {

    $stateProvider.

        state('main', {

            url         : '/',

            templateUrl : 'templates/main.html',

            controller  : 'MainCtrl'

        }).

        state('levels', {

            url         : '/levels',

            templateUrl : 'templates/levels.html',

            controller  : 'LevelsCtrl'

        }).

        state('level', {

            url         : '/level/:levelId',

            templateUrl : 'templates/level.html',

            controller  : 'LevelCtrl'

        }).

        state('logo', {

            url         : '/level/:levelId/logo/:logoId',

            templateUrl : 'templates/logo.html',

            controller  : 'LogoCtrl'

        }).

        state('about', {

            url         : '/about',

            templateUrl : 'templates/about.html',

            controller  : 'MainCtrl'

        });
    $urlRouterProvider.otherwise('/');
    /**

     * Firefox OS only

     * @see http://goo.gl/cKJyRm

     */

    $compileProvider.aHrefSanitizationWhitelist(/^\s*(https?|ftp|mailto|app):/);

});
Using angular.module we create an Angular application, which called yalg. Next, we define different views and how each of them will be reached by the application. We do this by creating different application states.
For each different view we add a state, defined with a state name, and an object containing the URL of the state, the template (i.e. the view) and the controller, which we will create later.
If we browse to #/, the content of templates/main.html will be loaded into theion -nav-view> tag. If we browse to #/about, the content of templates/about.html will load, and so on. If we browse to an unknown URL, the content of templates/main.html will be loaded, because of $urlRouterProvider.otherwise('/');.
The last line of code is a way to fix an issue with Firefox OS with AngularJS routes. If you are planning to test this application in any other platform, remove the last line of code.
If you reload this application in the simulator, you will see only a blank page. This is because between the
www

 |---- css

 |      |---- style.css

 |

 |---- img

 |---- js

 |      |---- app.js

 |

 |---- lib

 |---- templates

        |---- about.html

        |---- level.hmtl

        |---- levels.html

        |---- logo.html

        |---- main.html
The lib folder contains useful files for the Ionic Framework and the project, so leave it as is.
Add this to the templates/main.html file:
<ion-pane>

  <ion-header-bar class="bar-positive">

    <h1 class="title">{{appname}}</h1>

  </ion-header-bar>
  <ion-content class="content">
    <div class="main-view">

      <ul>

        <li>

          <a target="_blank" href="#/levels">

          <button class="button button-positive main-button">Start Game</button>

          </a>

          <br>

        </li>
        <li>

          <a target="_blank" href="#/about">

          <button class="button button-positive main-button">About</button>

          </a>

        </li>

      </ul>

    </div>
  </ion-content>

</ion-pane>
If you don’t recognize any of the HTML tags, search for them in the Ionic Framework documentation. Ionic adds many useful tags/Angular directives.
Now let’s add some style to this view, by editing the css/style.css file:
.content {

    text-align: center;

    padding-top: 8%;

}
.button.main-button {

    border-radius: 10px;

    width: 300px;

}
ul li {

    padding: 8px;

}
You may have noticed that the title of the view is {{appname}}. We don’t want that, we want the title to be YALG. Since this is an Angular project, it uses Angular templating, and everything between {{ and }} is an Angular expression evaluated by a controller.
We added a controller called MainCtrl to this view when we created the states. Now we create this controller. Append this to the js/app.js file:
app.controller('MainCtrl', ['$scope',

    function($scope) {

        $scope.appname = "YALG";

        $scope.descr = "Yet Another Logo Game";

}]);
Since main.html has this as a controller, {{appname}} will be replaced by the value of $scope.appname.
Run:
cordova prepare firefoxos
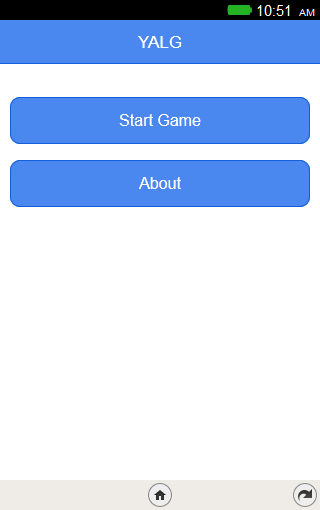
Run the updated app in the emulator. This is how things should look so far:
Clicking on the buttons won’t do anything, since we have not added their views. Add this to templates/about.html:
<ion-pane>

  <ion-header-bar class="bar-positive">

    <a target="_blank" href="#/">

    <button class="button icon-left ion-chevron-left button-clear button-white">

    </button></a>
    <h1 class="title">About</h1>

  </ion-header-bar>

  <ion-content class="content">
    <div class="about-view">

      {{appname}} <br>

      {{descr}}

    </div>
  </ion-content>

</ion-pane>
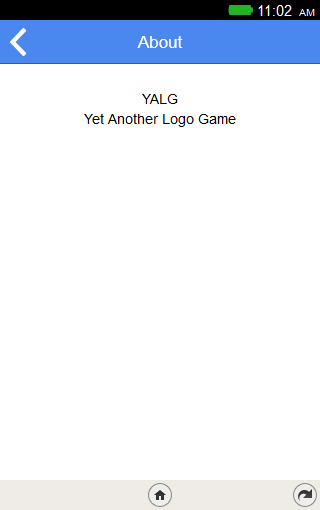
What we have added here is a back button with an Ionicon. This is what you should see in the simulator after you reload the app:
After clicking the Start Game button, a view of all levels should appear. So we firstly create a list of all levels, by creating data/levels.json file with this content:
[

    {

        "id"        : 1,

        "name"      : "Level 1",

        "content"   : {

            "logo_num"  : 2,

            "logos"     : [

                {

                    "id"    : "sitepoint",

                    "name"  : "Sitepoint",

                    "img"   : "img/lvl1/sitepoint.jpg"

                },

                {

                    "id"    : "fb",

                    "name"  : "Facebook",

                    "img"   : "img/lvl1/fb.png"

                }

            ]

        }

    },
    {

        "id"        : 2,

        "name"      : "Level 2",

        "content"   : {

            "logo_num"  : 2,

            "logos"     : [

                {

                    "id"    : "twitter",

                    "name"  : "Twitter",

                    "img"   :"img/lvl2/twitter.jpg"

                },

                {

                    "id"    : "android",

                    "name"  : "Android",

                    "img"   : "img/lvl2/android.jpg"

                }

            ]

        }

    }

]
I’ve only created two levels with two logos per level, but you can add more by following the same logic. The reason we create this JSON file is that we can load it’s content into an HTML page using ng-repeat without too much Javascript code.
All we need is to fetch the content of data/levels.json inside a controller. So we start by implementing LevelsCtrl. Append this to the js/app.js file:
app.controller('LevelsCtrl', ['$scope','$http',

    function($scope,$http) {
        //getting list of levels

        $http.get('data/levels.json').success(function(data) {

            $scope.levels = data;

        });

}]);
It is to that simple. You notice the Dependency Injection of Angular here, injecting the $http service into the controller.
Now to create the view, add this code to your template/levels.html:
<ion-pane>

  <ion-header-bar class="bar-positive">

    <a target="_blank" href="#/">

    <button class="button icon-left ion-chevron-left button-clear button-white">

    </button></a>

    <h1 class="title">Levels</h1>

  </ion-header-bar>
  <ion-content class="content">
    <ul class="level-list">

      <li ng-repeat="lvl in levels" class="level-card">

        <a target="_blank" href="#/level/{{lvl.id}}">

          <button class="button button-positive level-button">{{lvl.name}}</button><br>

        </a>

      </li>

    </ul>
  </ion-content>

</ion-pane>
Just for fun, add this into the css/style.css file, to make your app look better:
.level-button {

    height: 150px;

    width: 150px;

    border-radius: 8px;

}
And this is the view you get by clicking the Start Game button:
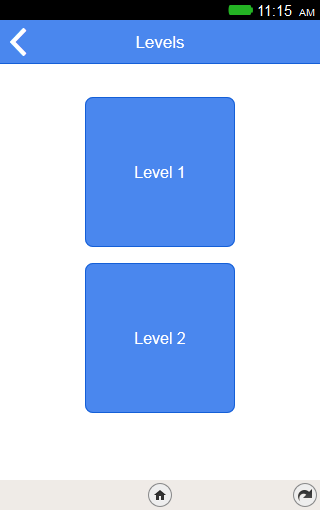
Clicking them won’t work… yet!
Now we implement the other view, templates/level.html. This file will show all the logos for one level (2 logos in this case).
Firstly create the image files as they are shown in data/levels.json. Add this directory tree to www folder:
img

 |---- lvl1

 |      |---- fb.png

 |      |---- sitepoint.jpg

 |

 |---- lvl2

        |---- twitter.jpg

        |---- android.jpg
Now add this to your template/level.html file:
<ion-pane>

  <ion-header-bar class="bar-positive">

    <a target="_blank" href="#/levels">

    <button class="button icon-left ion-chevron-left button-clear button-white">

    </button></a>

    <h1 class="title">{{lvl.name}}</h1>

  </ion-header-bar>

  <ion-content class="content">
    <ul id="logo-list">
    </ul>
  </ion-content>

</ion-pane>
If you are developing for another platform, all you need to do is to put this code between the ul tags (and, of course, create the controller):
<li ng-repeat="logo in lvl.content.logos">

    <a target="_blank" href="#/level/{{levelId}}/logo/{{logo.id}}">

        <img ng-src="{{logo.img}}" class="logo-img">

    </a>

</li>
Unfortunately, ng-src doesn’t work on Firefox OS, so we have to do this manually, inside js/app.js:
app.controller('LevelCtrl', ['$scope', '$stateParams', '$http',

    function($scope,$stateParams,$http){

        $scope.levelId = $stateParams.levelId;
        //getting list of levels

        $http.get('data/levels.json').success(function(data) {

            $scope.levels = data;

            for (var i=0;i<$scope.levels.length;i++) {

                if($scope.levels[i].id == $scope.levelId) {

                    // lvl is the clicked level

                    $scope.lvl = $scope.levels[i];

                    break;

                }

            }
            var logoList = angular.element(document.querySelector('#logo-list'));

            var cnt = ""; //content of logoList

            for (var i=0;i<$scope.lvl.content.logos.length;i++) {

                var currLogo = $scope.lvl.content.logos[i];
                cnt += '<li>'+

                    '<a target="_blank" href="#/level/'+$scope.levelId+'/logo/'+currLogo.id+'">' +

                    '<img src="'+currLogo.img+'" class="logo-img">'+

                    '</a>'+

                    '</li>';

            }

            //set the desired content

            logoList.html(cnt);
        });

}]);
You can see another dependency injection here, that of the $stateParams service. This Angular service is used to access parameters in the URL. When we created the state for this view, we defined the URL as /level/:levelId. Here, :levelId is a state parameter, and $stateParams is used to access these parameters.
As you can see, using this
angular.element(document.querySelector('#logo-list'));
we have selected a DOM element, just like using
$('#logo-list')
in jQuery.
AngularJS comes with a tiny subset of jQuery, called jqLite. Using this subset, we are able to put the desired content between the ul tags of the view.
This is the view you will get after reloading to the simulator:
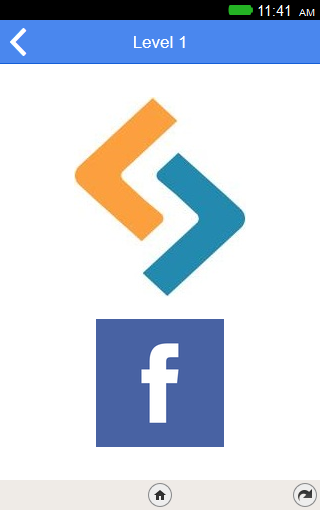
Currently, nothing will happen when you click the logos. We still need to add another view, the last view, templates/logo.html. Add this code to it:
<ion-pane>

  <ion-header-bar class="bar-positive">

    <a ng-href="#/level/{{lvl.id}}">

    <button class="button icon-left ion-chevron-left button-clear button-white">

    </button></a>

  </ion-header-bar>
  <ion-content class="content">
    <div class="logo">

      <img src="" alt="{{logo.img}}" id="logo-img">

    </div>
     <div class="item item-input">

        <input type="text" name="logoName" ng-model="logo_name">

        <button class="button button-small button-royal" ng-click="check(logo_name)">

            Check

        </button>
    </div>
  </ion-content>

</ion-pane>
Also add this controller to js/app.js:
app.controller('LogoCtrl', ['$scope','$stateParams','$http',

    function($scope,$stateParams,$http){

        $scope.levelId = $stateParams.levelId;

        $scope.logoId = $stateParams.logoId;
        //getting list of levels

        $http.get('data/levels.json').success(function(data) {

            $scope.levels = data;

            for (var i=0;i<$scope.levels.length;i++) {
                //level found

                if($scope.levels[i].id == $scope.levelId) {

                    $scope.lvl = $scope.levels[i];

                    break;

                }

            }
            for (var i=0;i<$scope.lvl.content.logos.length;i++) {

                //getting the clicked logo as $scope.logo

                if($scope.lvl.content.logos[i].id == $scope.logoId) {

                    $scope.logo = $scope.lvl.content.logos[i];

                    break;

                }

            }
            var img = angular.element(document.querySelector('#logo-img'));

            img.attr('src',$scope.logo.img); //loading the image

        });

}]);
Using the same technique as in the last controller, we load the image of the clicked logo. Now the last thing to do is add some CSS:
.logo-img {

    height: 70px;

    width: auto;

}
.logo {

    padding-bottom: 20px;

}
.button.button-small {

    padding: 5px 20px;

}
One last reload and your app should look like this:
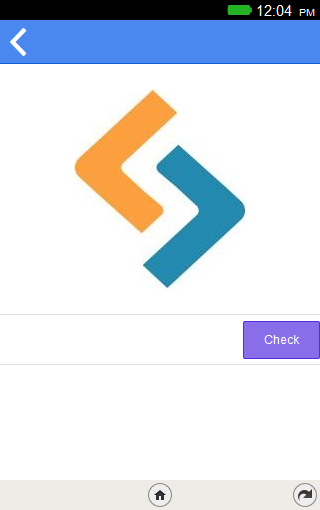
Conclusion
We do not have a working game yet, but we have its structure and a working User Interface. In the next instalment of this tutorial we will add functionality to turn this into a real game!
Frequently Asked Questions (FAQs) about Firefox OS Game Development with Ionic Framework
What is the Firefox OS and how does it relate to game development?
Firefox OS is an open-source operating system developed by Mozilla for smartphones and tablet computers. It is designed to allow HTML5 applications to communicate directly with the device’s hardware using JavaScript. This feature makes it an excellent platform for game development as it allows developers to create high-performance games that can run on any device that supports Firefox OS.
How does the Ionic Framework benefit game development on Firefox OS?
The Ionic Framework is a powerful tool for building mobile apps using web technologies like HTML, CSS, and JavaScript. It provides a library of pre-designed components, which makes it easier to build interactive user interfaces. For game development, Ionic offers benefits such as easy scalability, cross-platform compatibility, and access to native device features, which can enhance the gaming experience.
Can I develop games for Firefox OS without any coding experience?
While it’s possible to build simple games using drag-and-drop game builders, developing more complex games for Firefox OS typically requires knowledge of coding languages like HTML5, CSS3, and JavaScript. However, learning these languages can be a rewarding experience and there are many resources available online to help beginners get started.
How can I test my Firefox OS game during development?
Firefox OS provides a simulator that allows developers to test their games directly in the browser. This tool can simulate different screen sizes and resolutions, making it easier to ensure your game will work well on a variety of devices.
What are some challenges I might face when developing games for Firefox OS?
Some challenges you might face when developing games for Firefox OS include ensuring cross-platform compatibility, optimizing performance, and accessing device-specific features. However, these challenges can be overcome with careful planning and testing.
Can I monetize my Firefox OS game?
Yes, there are several ways to monetize your Firefox OS game. You can charge for the game itself, offer in-app purchases, or include advertising in your game. The Firefox Marketplace also allows developers to sell their games directly to users.
Are there any resources available to help me get started with Firefox OS game development?
Yes, there are many resources available to help you get started with Firefox OS game development. Mozilla Developer Network offers extensive documentation on Firefox OS, and there are numerous tutorials and guides available online. Additionally, the Ionic Framework community is a great place to find help and inspiration.
How can I optimize the performance of my Firefox OS game?
Optimizing the performance of your Firefox OS game involves a combination of efficient coding practices, careful resource management, and thorough testing. Using the Ionic Framework can also help improve performance, as it is designed to optimize the use of hardware acceleration and other device features.
Can I port my existing HTML5 game to Firefox OS?
Yes, one of the advantages of Firefox OS is its support for HTML5, which makes it relatively easy to port existing HTML5 games. However, you may need to make some adjustments to ensure compatibility and optimize performance on Firefox OS devices.
What is the future of Firefox OS game development?
While Mozilla has officially discontinued Firefox OS for smartphones, the platform is still being developed for other devices such as smart TVs. Furthermore, the skills and technologies used in Firefox OS game development, such as HTML5 and JavaScript, are widely applicable in the broader field of web and mobile game development.