Simplifying Reducers in React with TypeScript
Many of the example React applications we see tend to be small and easily understandable. But in the real world, React apps tend to grow to a scale that makes it impossible for us to keep all of the context in our head. This can often lead to unexpected bugs when a given value isn’t what we thought it would be. That object you thought had a certain property on it? It turns out it ended up being undefined somewhere along the way. That function you passed in? Yeah, that’s undefined too. That string you’re trying to match against? It looks like you misspelled it one night when you were working after hours.
Using TypeScript in a React application enhances code quality by providing static type checking, which catches errors early in the development process. It also improves readability and maintainability through explicit type annotations, making it easier for teams to understand the code structure. Additionally, TypeScript features like interfaces and generics make it easier to build robust, scalable applications.
Large applications also tend to come with increasingly complicated state management. Reducers are a powerful pattern for managing state in client-side applications. Reducers became popular with Redux, and are now built into React with the useReducer hook, but they’re framework and language agnostic. At the end of the day, a reducer is just a function. Redux and React’s useReducer just add some additional functionality to trigger updates accordingly. We can use Redux with any frontend framework or without one all together. We could also write our own take on Redux pretty easily, if we were so inclined.
That said, Redux (and other implementations of the Flux architecture that it’s based on) often get criticized for requiring a lot of boilerplate code, and for being a bit cumbersome to use. At the risk of making an unintentional pun, we can leverage TypeScript not only to reduce the amount of boilerplate required, but also to make the overall experience of using reducers more pleasant.
Following Along with This Tutorial
You’re welcome to follow along with this tutorial in your own environment. I’ve also created a GitHub repository that you can clone, as well as a CodeSandbox demo that you can use to follow along.
Reducer Basics
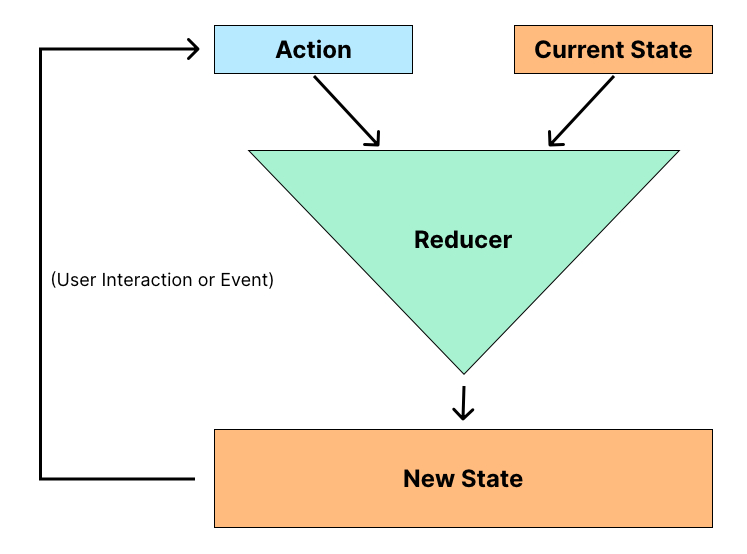
A reducer, at its most fundamental level, is simply a function that takes two arguments: the current state, and an object that represents some kind of action that has occurred. The reducer returns the new state based on that action.

The following code is regular JavaScript, but it could easily be converted to TypeScript by adding any types to state and action:
export const incrementAction = { type: 'Increment' };export const decrementAction = { type: 'Decrement' };
export const counterReducer = (state, action) => {  if (action.type === 'Increment') {    return { count: state.count + 1 };  }
  if (action.type === 'Decrement') {    return { count: state.count - 1 };  }
  return state;};
let state = { count: 1 };
state = counterReducer(state, incrementAction);state = counterReducer(state, incrementAction);state = counterReducer(state, decrementAction);
console.log(state); // Logs: { count: 1 }
Repo Code
You can find the code above (01-basic-example) in the GitHub repo for this tutorial.
Let’s review what’s going on in the code sample above:
- We pass in the current state and an action.
- If the action has a
typeproperty of"Increment", we increment thecountproperty onstate. - If the action has a
typeproperty of"Decrement", we decrement thecountproperty onstate. - If neither of the above two bullet points is true, we do nothing and return the original state.
Redux requires an action to be an object with a type property, as shown in the example above. React isn’t as strict. An action can be anything—even a primitive value like a number. For example, this is a valid reducer when using useReducer:
const counterReducer = (state = 0, value = 1) => state + value;In fact, if you’ve used useState in React before, you’ve really used useReducer. useState is simply an abstraction of useReducer. For our purposes, we’ll stick to a model closer to Redux, where actions are objects with a type property, since that pattern will work almost universally.
The useReducer hook of Redux and React adds some extra functionality around emitting changes and telling React to update the state of a component accordingly—as opposed to repeatedly setting a variable, as shown above—but the basic principles are the same regardless of what library we’re using.
Adding Types to Our Reducer
Adding TypeScript will protect us from some of the more obvious mistakes—by making sure that we both pass in the correct arguments and return the expected result. Both of these situations can be a bit tricky to triage in our applications, because they might not happen until after the user takes an action—like clicking a button in the UI. Let’s quickly add some types to our reducer:
type CounterState = { count: number };type CounterAction = { type: string };
export const incrementAction = { type: 'Increment' };export const decrementAction = { type: 'Decrement' };
export const counterReducer = (  state: CounterState,  action: CounterAction,): CounterState => {  if (action.type === 'Increment') {    return { count: state.count + 1 };  }
  if (action.type === 'Decrement') {    return { count: state.count - 1 };  }
  return state;};
Repo Code
You can find the code above (02-reducer-with-types) in the GitHub repo for this tutorial.
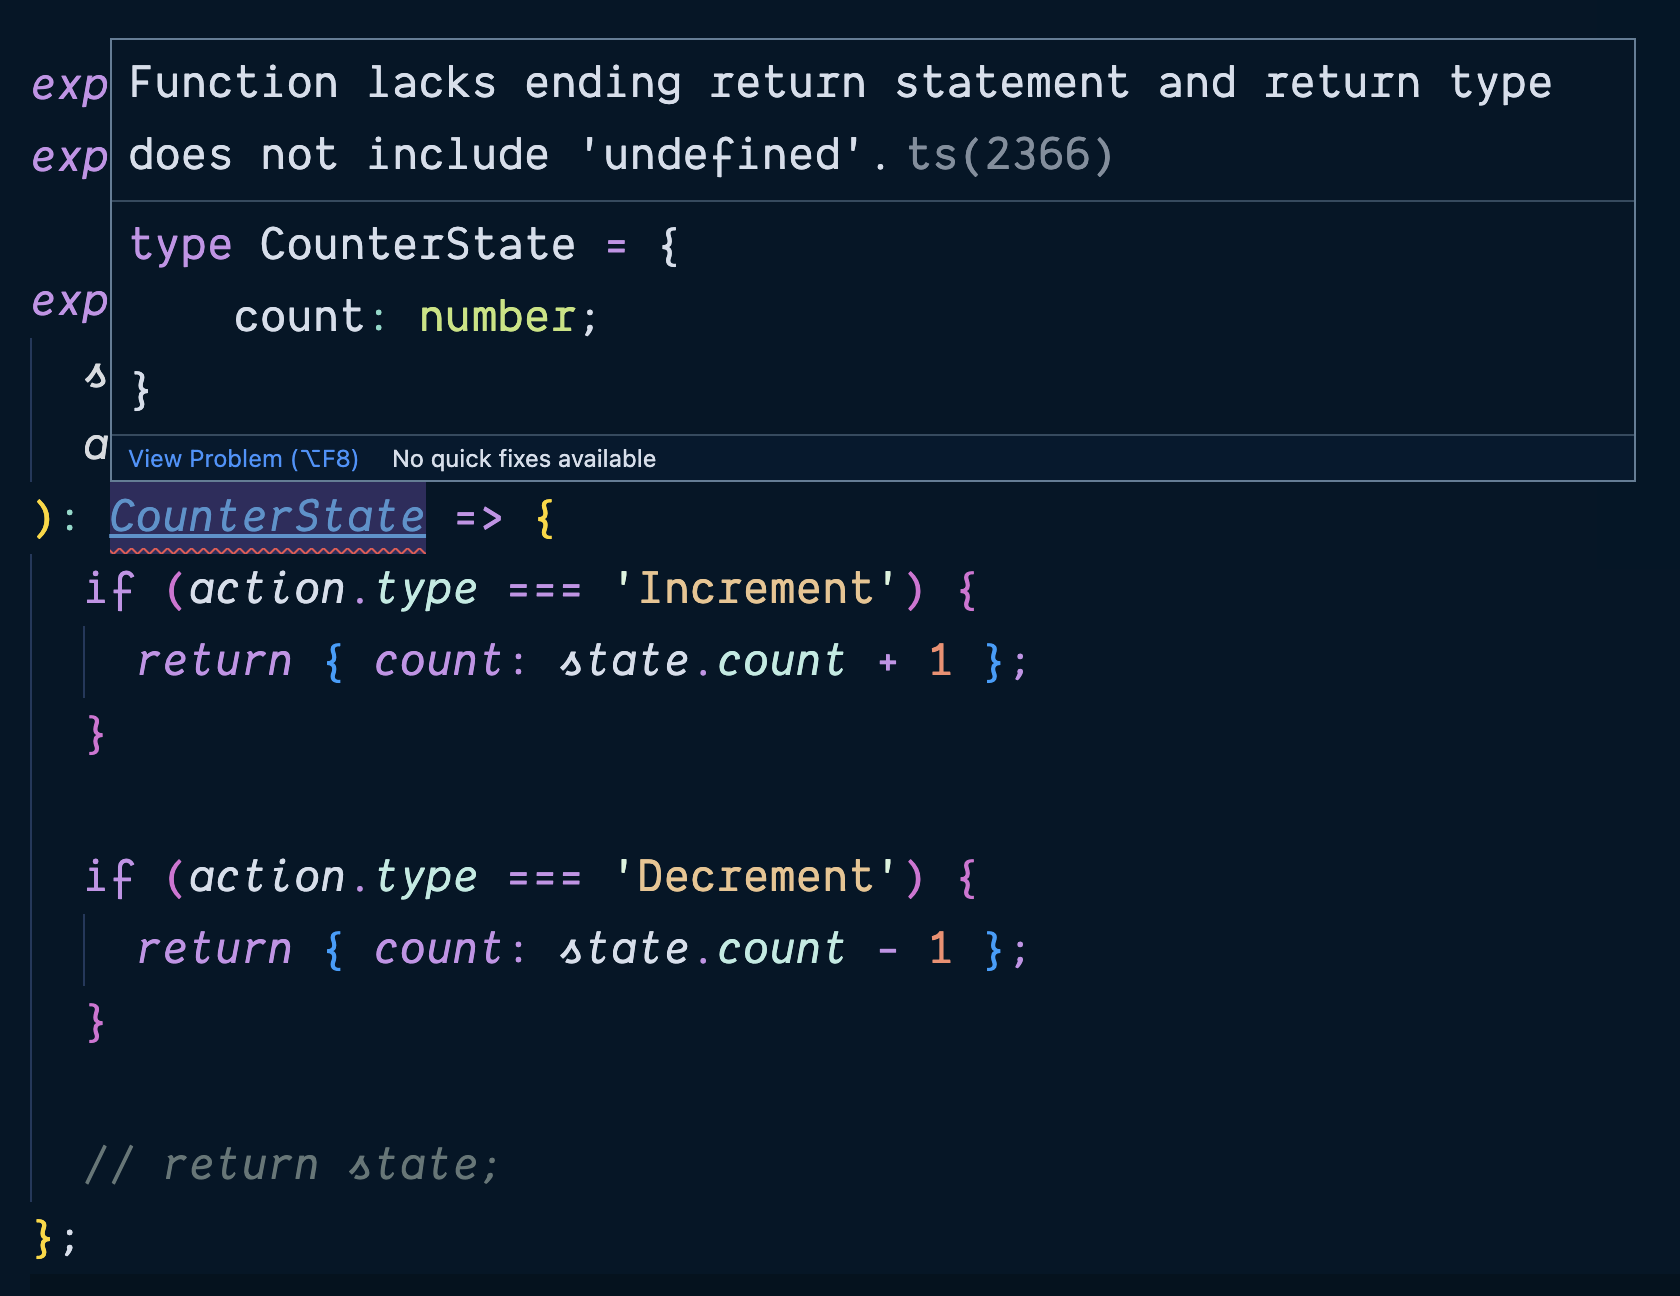
Let’s say that we forget to return state when none of the actions match any of our conditionals. TypeScript has analyzed our code and has been to told to expect that counterReducer will always return some kind of CounterState. If there’s even so much as a possibility that our code won’t behave as expected, it will refuse to compile. In this case, TypeScript has seen that there’s a mismatch between what we expect our code to do and what it actually does.

We’ll also get the other protections we’ve come to expect from TypeScript, such as making sure we pass in the correct arguments and only access properties available on those objects.
But there’s a more insidious (and arguably more common) edge case that comes up when working with reducers. In fact, it’s one that I encountered when I was writing tests for the initial example at the beginning of this tutorial. What happens if we misspell the action type?
let state: CounterState = { count: 0 };
state = counterReducer(state, { type: 'increment' });state = counterReducer(state, { type: 'INCREMENT' });state = counterReducer(state, { type: 'Increement' });
console.log(state); // Logs: { count: 0 }
This the worst kind of bug, because it doesn’t cause an error. It just silently doesn’t do what we expect. One common solution is to store the action type names in constants:
export const INCREMENT = 'Increment';export const DECREMENT = 'Decrement';This is where the typical boilerplate begins. Since JavaScript can’t protect us from accidentally using a string that doesn’t match any of the conditionals in our reducer, we assign these strings to constants. Misspelling a constant or variable name will prevent our code from compiling and make it obvious that we have an issue.
Luckily, when we’re using TypeScript, we can avoid this kind of boilerplate altogether.
Adding Payloads to Actions
It’s common for actions to contain additional information about what happened. For example, a user might type a query into a search field and click Submit. We would want to know what they searched for in addition to knowing they clicked the Submit button.
There are no hard and fast rules for how to structure an action—other than Redux’s insistence that we include a type property. But it’s a good practice to follow some kind of standard like Flux Standard Action, which advises us put to any additional information needed in a payload property.
Following this convention, our CounterAction might look something like this:
type CounterAction = {  type: string;  payload: {    amount: number;  };};
let state = counterReducer(  { count: 1 },  { type: 'Increment', payload: { amount: 1 } },);
This is getting a bit complicated to type out. A common solution is to create a set of helper functions called action creators. Action creators are simply functions that format our actions for us. If we wanted to expand counterReducer to support the ability to increment or decrement by certain amounts, we might create the following action creators:
export const increment = (amount: number = 1): CounterAction => ({  type: INCREMENT,  payload: { amount },});
export const decrement = (amount: number = 1): CounterAction => ({  type: DECREMENT,  payload: { amount },});
Repo Code
You can find the code above (03-action-creators) in the GitHub repo for this tutorial.
We’re also going to need to update our reducer to support this new structure for our actions. This also feels like a good opportunity to look at the example holistically:
export const INCREMENT = 'Increment';export const DECREMENT = 'Decrement';
type CounterState = { count: number };
type CounterAction = {  type: string;  payload: {    amount: number;  };};
type CounterReducer = (  state: CounterState,  action: CounterAction,) => CounterState;
export const increment = (amount: number = 1): CounterAction => ({  type: INCREMENT,  payload: { amount },});
export const decrement = (amount: number = 1): CounterAction => ({  type: DECREMENT,  payload: { amount },});
export const counterReducer: CounterReducer = (state, action) => {  const { count } = state;
  if (action.type === 'Increment') {    return { count: count + action.payload.amount };  }
  if (action.type === 'Decrement') {    return { count: count - action.payload.amount };  }
  return state;};
let state: CounterState = { count: 0 };
Using Unions
But wait, there’s more! We used some of the traditional patterns to get around the issue where our reducer ignores actions that it wasn’t explicitly told to look for, but what if we could use TypeScript to prevent that from happening in the first place?
Let’s assume that, in addition to being able to increment and decrement the counter, we can also reset it back to zero. This gives us three types of actions:
IncrementDecrementReset
We’ll start with Increment and Decrement and address Reset later.
In the last section, we added the ability to increment or decrement by a certain amount. Reseting the counter will be a bit unusual — in that we can only ever reset it back to zero. (Sure, I could have just created a Set action that took a value, but I’m setting myself up to make a more important point in a bit.)
Let’s start with our two known quantities: Increment and Decrement. Instead of saying that the type property on an action can be any string, we can get a bit more specific.
In 04-unionsin our GitHub repo, I use the union of 'Increment' | 'Decrement'. We’re now telling TypeScript that the type property on a CounterAction isn’t just any string, but rather that it’s one of exactly two strings:
type CounterAction = { type: 'Increment' | 'Decrement'; payload: { amount: number; };};We get a number of benefits from this relatively simple change. The first and most obvious is that we no longer have to worry about misspelling or mistyping an action’s type.

You’ll notice that TypeScript not only detects the error, but it’s even smart enough to provide a suggestion that can help us quickly address the issue.
We also get autocomplete for free whenever TypeScript has enough information to determine that we’re working with a CounterAction.

If you look carefully, you’ll notice that it’s only recommending Decrement. That’s because we’ve already created a conditional defining what we should do in the event that the type is Increment. TypeScript is able to deduce that, if there are only two properties and we’ve dealt with one of them, there’s only one option left.
As promised, we can also now get rid of these two lines of code from 03-action-creators:
- export const INCREMENT = 'Increment';- export const DECREMENT = 'Decrement';With TypeScript’s help, we can now go back to using regular strings and still enjoy all of the benefits of using constants. This might not seem like much in this simple example, but if you’ve ever used this pattern before, you know that it can get cumbersome to have to import these values in each and every file that uses them.
Removing the Default Case in the Reducer
Earlier on, TypeScript tried to help us by throwing an error when we omitted the line with return state at the end of the function that served as a fallback if none of the conditions above it were hit.
But now we’ve given TypeScript more information about what types of actions it can expect. I prefer to use conditionals (which is why I’ve done so throughout this tutorial), but if we use a switch statement instead, we’ll notice that something interesting happens.

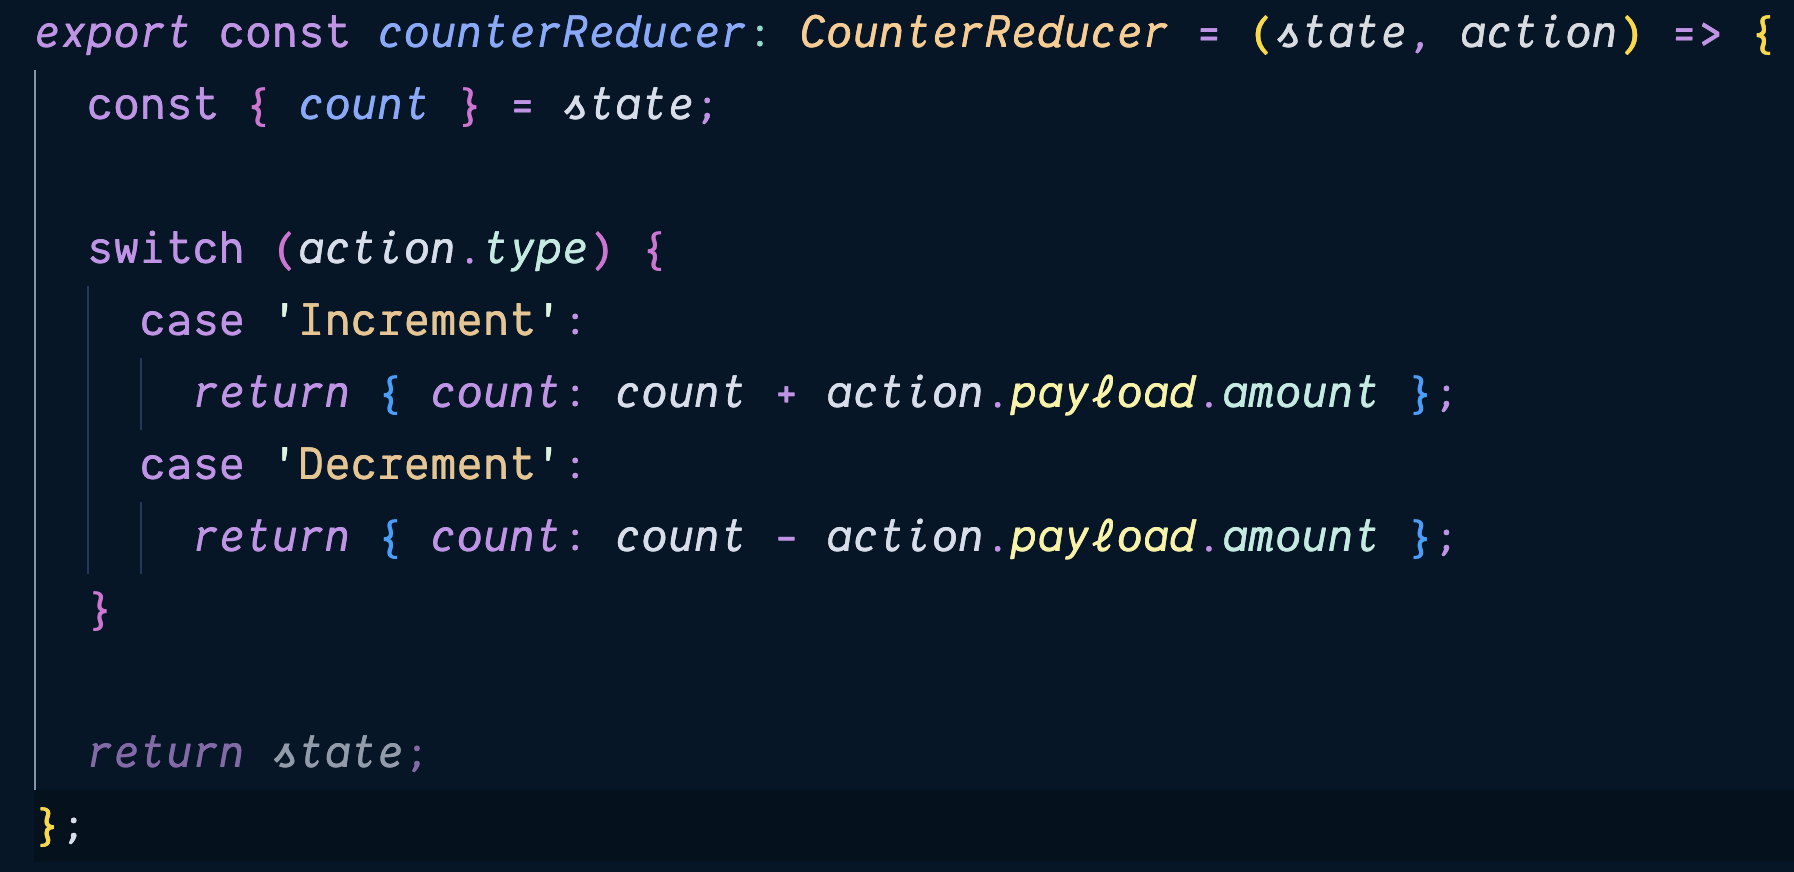
TypeScript has figured out that, since we’re returning from each case of the switch statement and we’ve covered all of the possible cases of action.type, there’s no need to return the original state in the event that our action slips through, because TypeScript can guarantee that will never happen.
There are a few things to take away from this:
- TypeScript will use the information we provide it to help us avoid common mistakes.
- TypeScript will also use this information to enable us to write less protective code.
Dealing with Different Kinds of Actions
Earlier, I hinted that we might add a third type of action: the ability to Reset the counter back to zero. This action is a lot like the actions we saw at the very beginning. It doesn’t need a payload. However, it might be tempting to do something like this:
type CounterAction = { type: 'Increment' | 'Decrement' | 'Reset'; payload: { amount: number; };};You’ll notice that TypeScript is again upset that we risk returning undefined from our reducer. We’ll handle that in a moment. But first, we should address the fact that Reset doesn’t need a payload.
We don’t want to have to write something like this:
let state = counterReducer({ count: 5 }, { type: 'Reset', { payload: { amount: 0 } } });We might be tempted to make the payload optional:
type CounterAction = { type: 'Increment' | 'Decrement' | 'Reset'; payload?: { amount: number; };};But now, TypeScript will never be sure if Increment and Decrement are supposed to have a payload. This means that TypeScript will insist that we check to see if payload exists before we’re allowed to access the amount property on it. At the same time, TypeScript will still allow us to needlessly put a payload on our Reset actions. I suppose this isn’t the worst thing in the world, but we can do better.
Using Unions for Action Types
It turns out that we can use a similar solution to the one we used with the type property on CounterAction:
type CounterAdjustmentAction = {  type: 'Increment' | 'Decrement';  payload: {    amount: number;  };};
type CounterResetAction = {  type: 'Reset';};
type CounterAction = CounterAdjustmentAction | CounterResetAction;
TypeScript is smart enough to figure out the following:
CounterActionis an object.CounterActionalways has atypeproperty.- The
typeproperty is one ofIncrement,Decrement, orReset. - If the
typeproperty isIncrementorDecrement, there’s apayloadproperty that contains a number as theamount. - If the
typeproperty isReset, there’s nopayloadproperty.
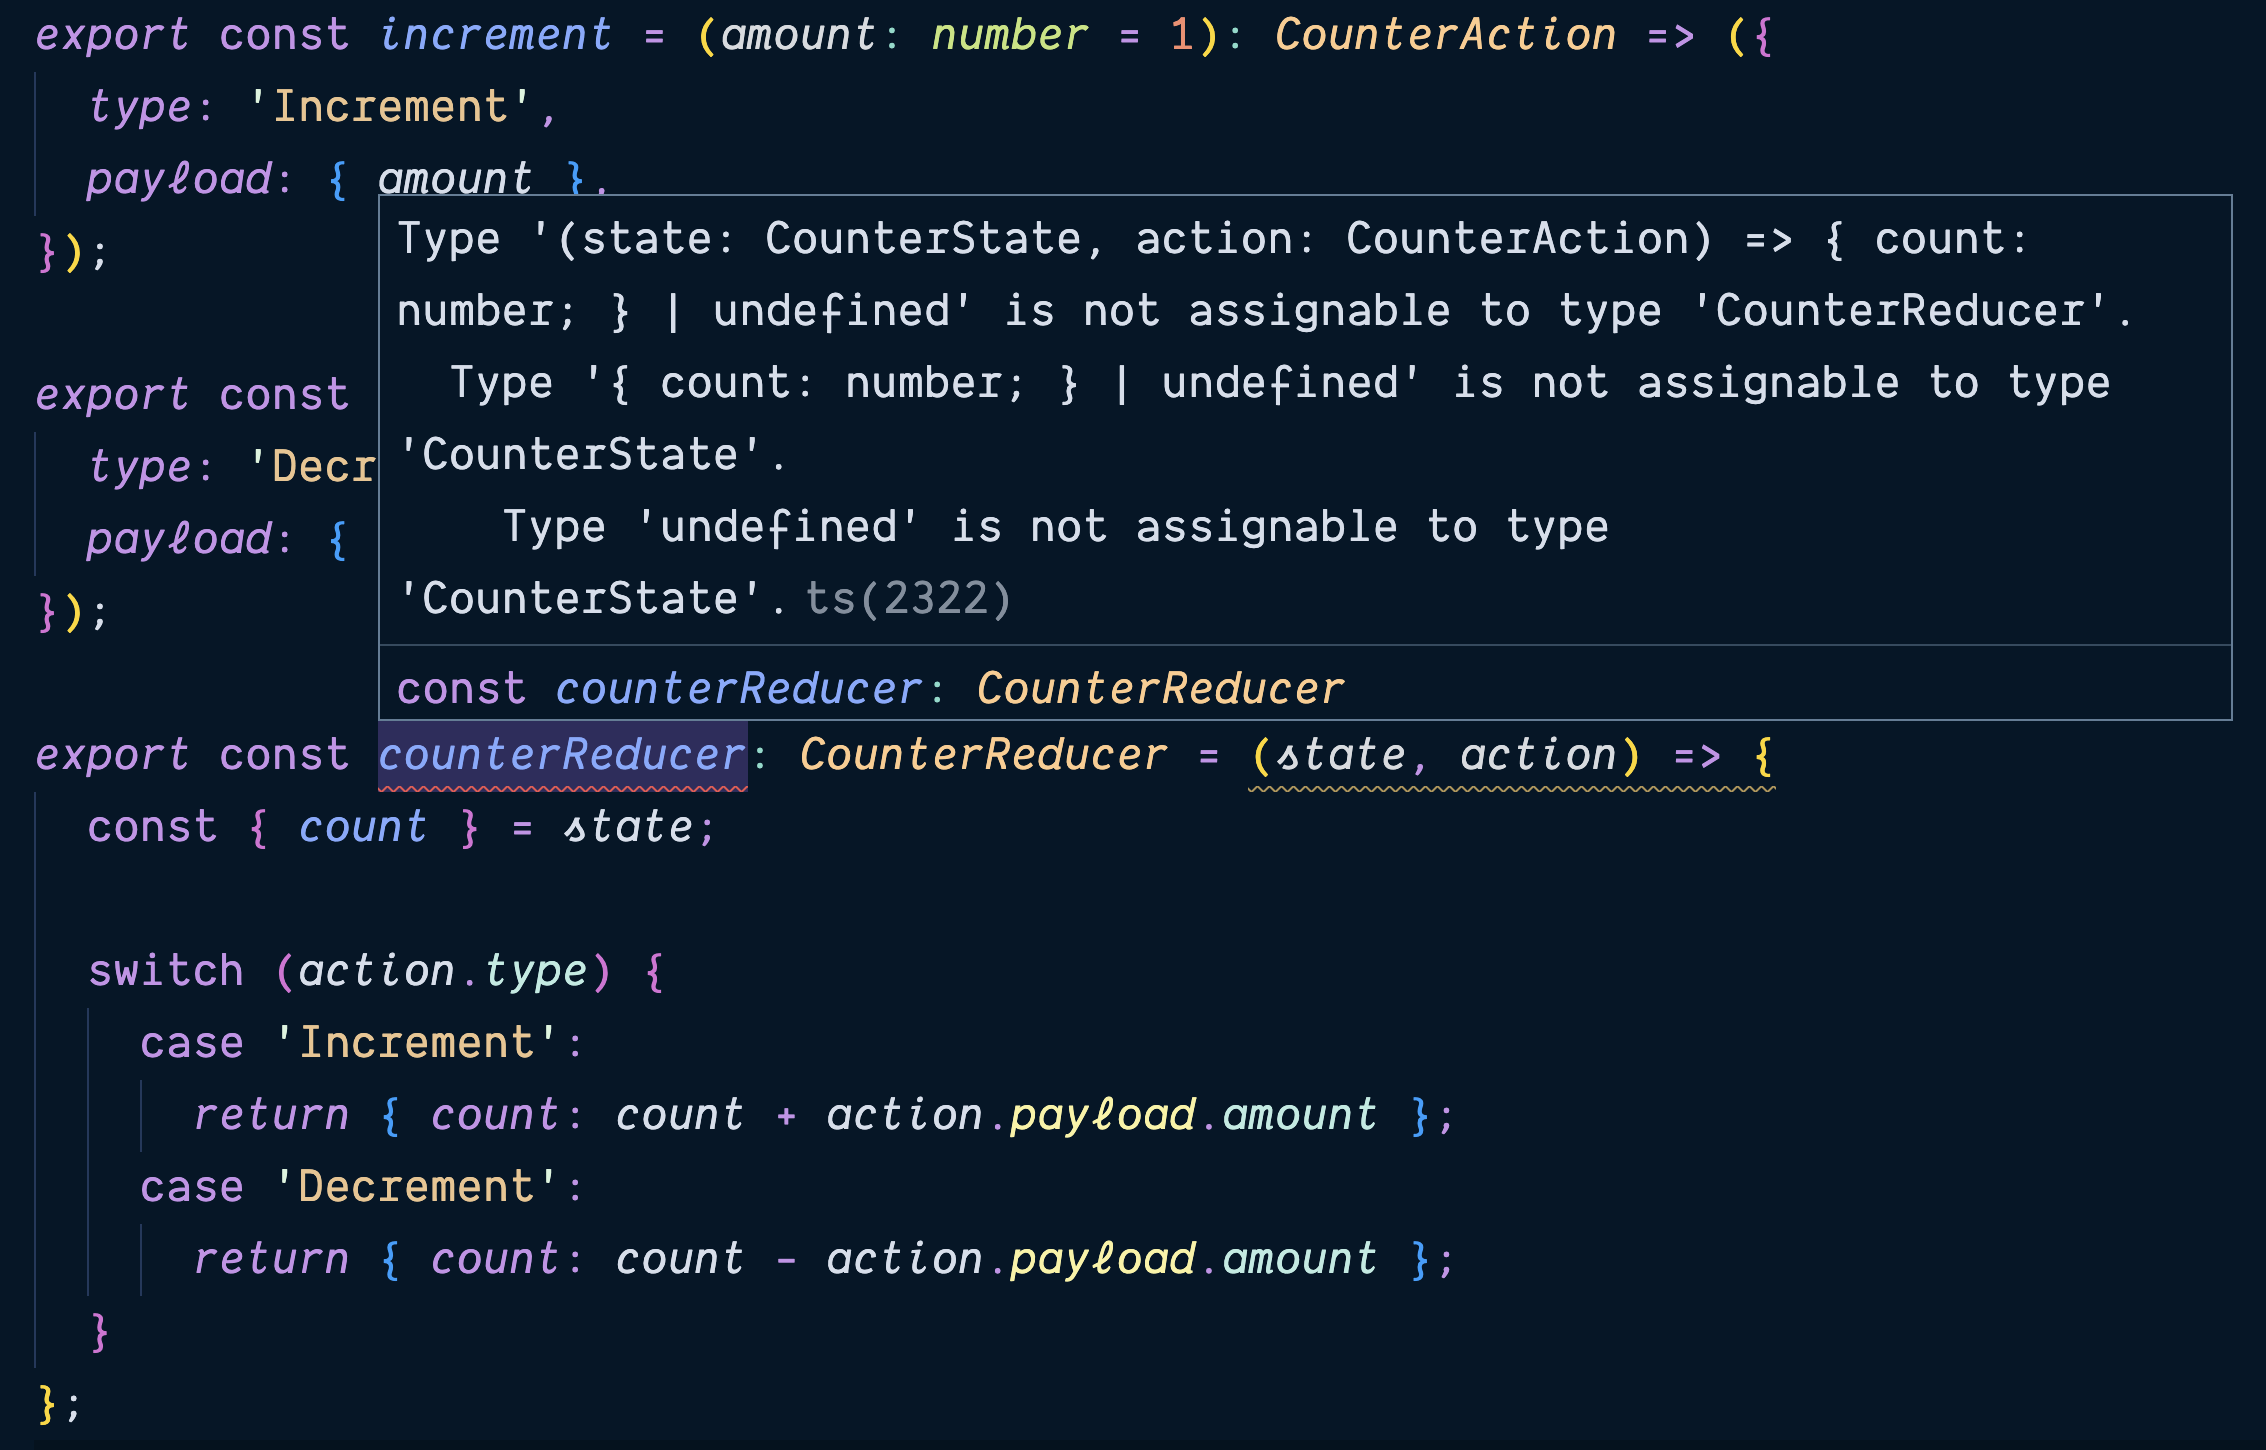
By updating the type to include CounterResetAction, TypeScript has already figured out that we’re no longer providing an exhaustive list of cases to counterReducer.

We can update the code:
export const counterReducer: CounterReducer = (state, action) => {  const { count } = state;
  switch (action.type) {    case 'Increment':      return { count: count + action.payload.amount };    case 'Decrement':      return { count: count - action.payload.amount };    case 'Reset':      return { count: 0 };  }};
Repo Code
You can find the code above (05-different-payloads) in the GitHub repo for this tutorial.
If you’ve been following along, you might have noticed a few cool features (albeit unsurprising at this point). First, as we added that third case, TypeScript was able to infer that we were adding a case for Reset and suggested that as the only available autocompletion. Secondly, if we tried to reference action in the return statement, we would have noticed that it only let us access the type property because it’s well aware that CounterResetActions doesn’t have a payload property.
Other than clearly defining the type, we didn’t have to tell TypeScript much of anything in the code itself. It was able to use the information at hand to figure everything out on our behalf.
If you want to see this for yourself, you can create an action creator for resetting the counter:
export const reset = (): CounterAction => ({ type: 'Reset' });I chose to use the broader CounterAction in this case. But you’ll notice that, even if you try to add a payload to it, TypeScript has already figured out that it’s not an option. But if you change the type to "Increment" for a moment, you’re suddenly permitted to add the property.
If we update the return type on the function to CounterResetAction, we’ll see that we only have one option for the type— "Reset" —and that payloads are forbidden:
export const reset = (): CounterResetAction => ({ type: 'Reset' });Using Our Reducer in a React Component
So far, we’ve talked a lot about the reducer pattern outside of any framework. Let’s pull our counterReducer into React and see how it works. We’ll start with this simple component:
const Counter = () => {  return (    <main className="mx-auto w-96 flex flex-col gap-8 items-center">      <h1>Counter</h1>      <p className="text-7xl">0</p>      <div className="flex place-content-between w-full">        <button>Decrement</button>        <button>Reset</button>        <button>Increment</button>      </div>    </main>  );};
export default Counter;
Repo Code
You can find the code above (06-react-component) in the GitHub repo for this tutorial.
You might notice that there isn’t much happening just yet. The counterReducer that we’ve been working on throughout this tutorial is ready for action. We just need to hook it up to the component, using the useReducer hook.
In the context of a reducer in React—or Redux, for that matter— state is the current snapshot of our component’s data. dispatch is a function used to update that state based on actions. We can think of dispatch as the way to trigger changes, and the state as the resulting data after those changes.
Let’s add the following code inside the Counter component:
const [state, dispatch] = useReducer(counterReducer, { count: 0 });Now, if we hover over state and dispatch, we’ll see that TypeScript is able to automatically figure out what the correct types of each is:
const state: CounterState;const dispatch: React.Dispatch<CounterAction>;It’s able to infer this from the type annotations on counterReducer itself. Similarly, it also will only allow us to pass in an initial state that matches CounterState —although the error isn’t nearly as helpful. If we change the count property to amount in the initial state given to useReducer, we’ll see a result similar to that pictured below.

We can now use the state and dispatch from useReducer in our Counter component. TypeScript will know that count is a property on state, and it will only accept actions or the values returned from action creators that match the CounterAction type:
import { useReducer } from 'react';import {  counterReducer,  increment,  decrement,  reset,} from './05-different-payloads';
const Counter = () => {  const [state, dispatch] = useReducer(counterReducer, { count: 0 });
  return (    <main className="mx-auto w-96 flex flex-col gap-8 items-center">      <h1>Counter</h1>      <p className="text-7xl">{state.count}</p>      <div className="flex place-content-between w-full">        <button onClick={() => dispatch(decrement())}>Decrement</button>        <button onClick={() => dispatch(reset())}>Reset</button>        <button onClick={() => dispatch(increment())}>Increment</button>      </div>    </main>  );};
export default Counter;
Repo Code
You can find the code above (07-react-component-complete) in the GitHub repo for this tutorial.
I’d like to draw your attention to just how little TypeScript is in this component. In fact, if we were to change the file extension for .tsx to .jsx, it would still work. But behind the scenes, TypeScript is doing the important work of ensuring that our application will work as expected when we put it in the hands of our users.
Conclusion
The power of reducers is not in their inherent complexity but in their simplicity. It’s important to remember that reducers are just functions. In the past, they’ve received a bit of flack for requiring a fair amount of boilerplate.
TypeScript helps to reduce the amount of boilerplate, while also making the overall experience of using reducers a lot more pleasant. We’re protected from potential pitfalls in the form of incorrect arguments and unexpected results, which can be tricky to troubleshoot in our applications.
The combination of reducers and TypeScript can make it super easy to build resilient, error-free applications.
Don’t forget to refer to the GitHub repository and CodeSandbox demo to play around with any of the examples discussed above.
In the next part of this series, we’ll look at taking some of the mystery out of using generics in TypeScript. Generics allow us to write reusable code that works with multiple types, rather than a single one. It acts as a placeholder for the type, letting us write code that can adapt and enforce type consistency at compile time.