Following hot on the heels of its recent announcement that it would add support for Java to the support already given to apps written in Ruby, Node.js and Clojure, Platform-as-a-service provider Heroku this morning announced a breakthrough partnership with Facebook that effectively allows anyone with a Heroku account to become an adept, cloud-based Facebook app developer.
To give SitePoint readers a head start, we’ve obtained permission to publish the following tutorial, drawing on functionality in Facebook that is only available from today.
Let me hand you over to Adam Wiggins of Heroku.
Getting Started with Your Facebook App on Heroku
This guide is for Facebook developers who are creating apps on Heroku via the Facebook Cloud Services integration. It assumes no previous knowledge of Heroku. Heroku is a cloud application platform, not an old-fashioned web host, so some things may be unfamiliar to you.
This article will walk through every part of the process: creating an app and a Heroku account, setting up local development tools, and deploying changes to your Facebook app.
Create an App
(If you’ve already created a Heroku app via Facebook, you can skip to the next section.)
Start by going to Facebook Developers and clicking Create New App in the upper-right corner:

Enter anything you wish for the app name, check the terms box, then click Continue:

Fill out the captcha in the subsequent dialog and click Submit. After a brief delay you’ll be taken to your (currently blank) Facebook app settings page. On this page, under Cloud Services, click Get Started:

Heroku is the only option in this dialog, so click Next:

If you already have a Heroku account under your selected email address, the new app will be associated with your existing account.
Choose your favorite programming language from the dropdown (PHP, Ruby, and Python are available). Enter the email address you wish to use for your Heroku user account, then click Create:

You’ll be taken to a success dialog showing the new URL of your Facebook app running on Heroku:
A template app, written in the language you chose, has been copied and deployed just for you! Click the URL or Go To Page to visit your new app.
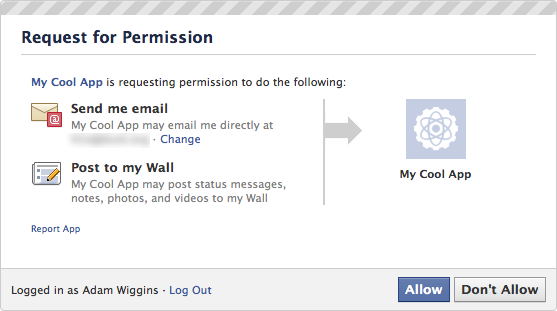
Other users visiting your app will need to grant permission via a similar dialog. Users only need to do this the first time they visit the app.
Because you’re visiting your app as a user, you need to grant permission for the app to access your Facebook profile by clicking Allow:
By default, your new app is configured as a website that integrates with Facebook. This means it will display as a standalone page. If you’d like your app to run as a Canvas Page inside the Facebook chrome, follow this guide
Congratulations! You now have your very own Facebook app, running on Heroku:

The app shows examples of accessing the Facebook API to list friends, photos, interests, and more. Once you start editing the code, you can use these capabilities to make your app do more interesting things.
So now we want to get you set up for editing your app. We’ll get to that shortly, but first, a brief aside.
What is Heroku?
(If you’re already familiar with Heroku, you can skip ahead.)
Your Facebook app needs to run somewhere. This can be traditional hosting such as your own hardware or a VPS; however, these options are time-consuming and costly to set up. Apps on Heroku can be created instantly, and they cost you nothing unless the app grows to a large amount of traffic or users.
Heroku is a cloud application platform. With Heroku, you don’t need to think about servers at all. You can write apps in the programming language of your choice, back it with add-on resources such as SQL and NoSQL databases, Memcached, and many others. You manage your app using the Heroku command-line tool and you deploy code using the Git revision control system. Take a tour of the Heroku architecture.
Any kind of web app can be deployed to Heroku, and you can read all about the platform’s capabilities in the Heroku Dev Center. For the rest of this guide, we’ll focus on editing the Facebook app you’ve already created in the previous section.
Heroku Account and Tools Setup
(If you already have a Heroku account and the local development tools set up, you can skip to the next section.)
Although an account as already been created for you, and the app has already been deployed, you still need to create a password and set up local tools to begin editing it.
1) Choose a Password
A Heroku user account was created for you when you created an app through Facebook. Check your email under the email address you used to the welcome message from Heroku:

Follow the first link in that email to the page where you can choose a password for your Heroku account:

When finished, close that browser window and proceed to the next step.
2) Install the Heroku Toolbelt
To manage and edit your app, you’ll need the Heroku command-line tool and the Git revision control system, both of which will be installed by the Heroku toolbelt. Download and install the toolbelt for your OS from the list below:
| If you have… | Install with… |
|---|---|
| Mac OS X | Download OS X package |
| Windows | Download Windows .exe installer |
| Ubuntu Linux | apt-get repository |
| Other | Tarball (add contents to your $PATH) |
3) Log In from the Command Line
Once installed, you’ll have access to the heroku command from your terminal. Log in using the email address and password for your Heroku account:
:::term
$ heroku login
Enter your Heroku credentials.
Email: adam@example.com
Password:
Could not find an existing public key.
Would you like to generate one? [Yn]
Generating new SSH public key.
Uploading ssh public key /Users/adam/.ssh/id_rsa.pub
Press enter at the prompt to upload your existing ssh key or create a new one, used for pushing code later on.
Editing Your App
With your Heroku account and local tools set up, you can start making changes to your Facebook app.
1) Fetch Your App’s Sourcecode
We’ll start by grabbing a copy of your app’s sourcecode using Git. You’ll need to know the name of your app for this: Heroku gave it a randomly-generated haiku name to start with, so look in the URL to find your app name. For example, if your URL is http://furious-robot-218.herokuapp.com, then your app name is furious-robot-218. Paste this into a git clone command like so:
:::term
$ git clone git@heroku.com:furious-robot-218.git -o heroku
Initialized empty Git repository in /Users/adam/facebook-template-php/.git/
remote: Counting objects: 273, done.
remote: Compressing objects: 100% (183/183), done.
remote: Total 273 (delta 2), reused 261 (delta 0)
Receiving objects: 100% (273/273), 25.55 KiB, done.
Resolving deltas: 100% (2/2), done. $ cd furious-robot-218 $ ls AppInfo.php FBUtils.php close.php images index.php stylesheets utils.php
The directory output shown above is from the PHP sample app. Other languages will have different files.
2) Make a Change
Let’s tweak something small in the app and push it back up to Heroku, illustrating the deploy process. For example, find the line of HTML which shows the welcome banner (in the PHP app, this is in index.php line 157), which should look like this:
<p>Welcome to your Facebook app, running on <span>heroku</span>!</p>Use your favorite text editor to change this line to:
<p>This is my app, I can edit it all I want.</p>Save the file, then use your terminal to commit the change to Git:
:::term
$ git commit -am
"changed greeting" [master 0ff313a]
changed greeting 1 files changed, 1 insertions(+), 1 deletions(-)
3) Deploy to Heroku
Now, the fun part: pushing our modified app up to Heroku, so that anyone who visits the app on Facebook sees the new version. Push it to Heroku with Git:
:::term
$ git push heroku
Counting objects: 5, done.
Delta compression using up to 4 threads.
Compressing objects: 100% (3/3), done.
Writing objects: 100% (3/3), 347 bytes, done.
Total 3 (delta 1), reused 0 (delta 0)

-----> Heroku receiving push
-----> PHP app detected
-----> Bundling Apache... done, v2.2.19
-----> Bundling PHP... done, v5.3.6
-----> Discovering process types
 Procfile declares types -> (none)
 Default types for PHP -> web
-----> Compiled slug size is 20.9MB
-----> Launching... done, v2
 http://furious-robot-218.herokuapp.com deployed to Heroku To git@heroku.com:furious-robot-218.git 396ec84..994290d master -> master
Now view the app in your browser. You should see the changed welcome banner:

Congratulations, you’re now a Facebook app developer!
Working Locally
In the previous section, we pushed changes to the app to the live production environment without testing it in a local environment. A better workflow for working on your app is to run the it locally, test there, and commit changes as you make improvements that you’ve tested as working. When you’re ready to deploy, use git push heroku to push up changes to the live production app.
Methods for running your app on your local computer will vary by programming language and your own choice in local development environment. For example, PHP developers on Mac OS X can use the version of Apache and PHP that comes with the operating system by putting a checkout of the app’s code into the Sites subdirectory of their home folder, and configuring a VirtualHost in /etc/apache2/users/USERNAME.conf. Ruby developers, on the other hand, will probably run their app with Foreman and visit it at http://localhost:5000/.
Regardless of how you run your app locally, there are two techniques you’ll need to know about that are specific to running a local development version of a Facebook app.
1) Creating a Development Facebook App
The Facebook app you previously created points at the URL of your Heroku app (which will look like https://furious-robot-218.herokuapp.com). This is the production app.
For development, you’ll need to register another app with Facebook. Unlike the first app, this one will not run on Heroku, but instead will run on your local workstation and have a URL like http://localhost:5000/ (or whatever URL you’ve configured for your local machine).
Go to Facebook Developers and again click Create New App. Choose a name to indicate that this is the development version of your existing app. For example, if your other app is named “My Cool App”, you might call this one “My Cool App – Dev”.
Once created, click the Website checkbox and enter your local URL:

Click Save Changes.
2) Setting Facebook App Env Vars
On the same settings page for your app used to set the website URL, you’ll also find the App ID and App Secret:

These were automatically added to your Heroku app as config vars, but in your local environment you’ll need to set them as environment variables. How you’ll set env vars depends on your OS and method of running your app. Here are two examples:
Forman .env
If you run your app with Foreman, it will automatically source a file named .env in the root of your app’s code checkout. Cut-and-paste your App ID and App Secret into .env:
FACEBOOK_APP_ID='964173273189'
FACEBOOK_SECRET='dcd5d23d003d53cb2b68e01'
You should also exclude .env from source control by appending this line to your .gitignore`:
.envApache SetEnv
If you’re running your app with Apache, you can set the env vars for your local app’s VirtualHost using the SetEnv directive. For example:
<VirtualHost *:80> DocumentRoot /Users/adam/Sites/mycoolapp-dev ServerName mycoolapp-dev.localhost SetEnv FACEBOOK_APP_ID 964173273189 SetEnv
FACEBOOK_SECRET dcd5d23d003d53cb2b68e01 </VirtualHost>
Conclusion
With these two changes in place, you should be able to visit your app locally and access all Facebook functionality. When you’re ready to share your changes in the world, git commit them and then git push heroku, then visit your production app to confirm that your changes work correctly on the live app.
Further Reading
- The Heroku Dev Center
- Facebook Graph API docs
 Aaron Osteraas
Aaron Osteraas is a Full Stack Engineer at Vintrace. He lives and works in Melbourne, Australia. In the early 2010s, he was the Managing Editor here at SitePoint.