

The combination of Arduinos and Node.js allows us to do a lot of unexpected things. In this article, I’ll show how you can create a remote control for your Mac via Arduinos, Node.js and AppleScript.
If you are new to combining Arduinos and Node.js, I’ve previously covered turning on LED lights and displaying web API data on LCD text displays.
Our Arduino remote control will increase and decrease our Mac’s volume, tell our Mac to play an iTunes playlist of our choosing and set it to stop whatever is playing on iTunes (which is likely to be that playlist!).
Keep in mind, this demo provides access to commands directly on your Mac – there is the potential for this to be misused or harmful if you provide too much access! Keep it for personal use rather than big corporate projects.
Key Takeaways
- The article demonstrates how to create a remote control for a Mac using Arduinos, Node.js, and AppleScript, enabling the control of volume, iTunes playlist, and stopping iTunes.
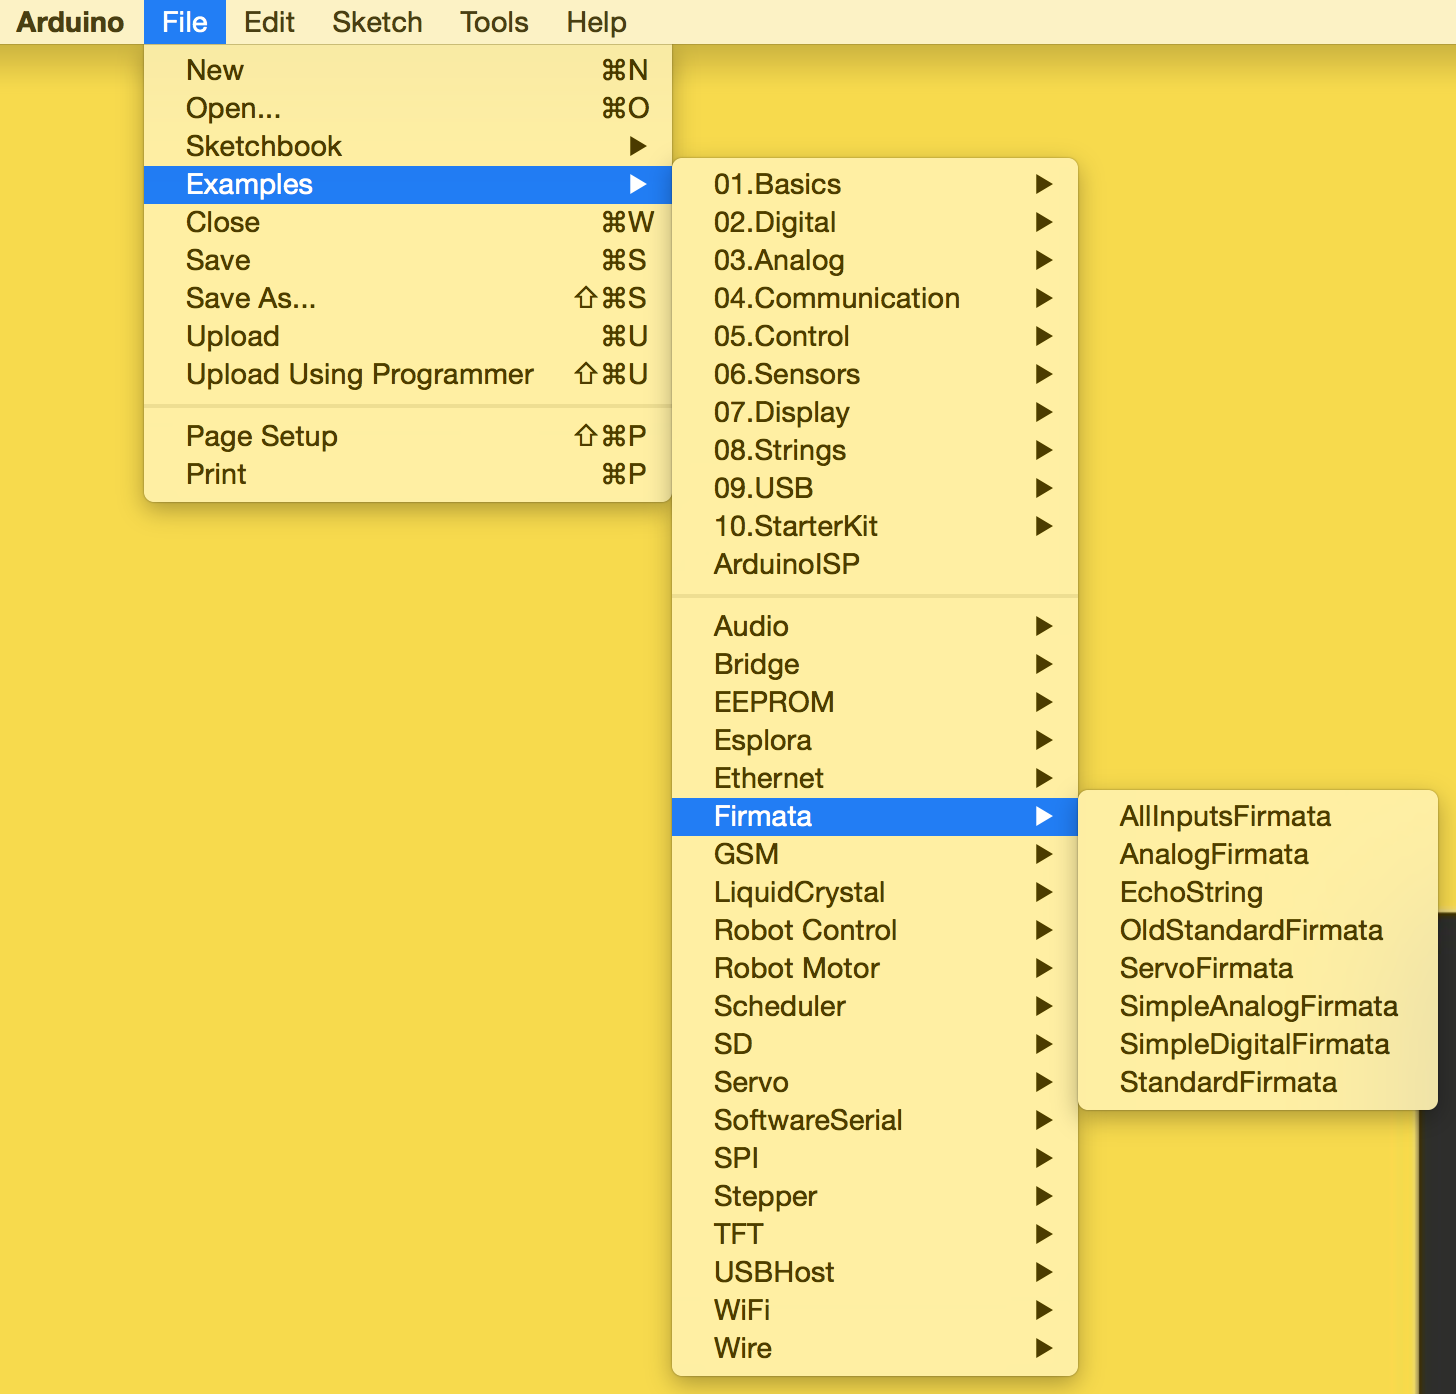
- The setup requires the StandardFirmata sketch installed on the Arduino board and uses the johnny-five library to send instructions to the Arduino.
- The server code in Node.js includes functions for controlling iTunes, adjusting the volume, and muting/unmuting the volume.
- The article explains the code in detail, including how to interface with the Arduino board, defining variables for buttons, setting up the exec() function to run AppleScript commands, and assigning functions to button events.
- The piece also suggests other possible uses, such as launching applications, opening a new Finder window, and making the Mac speak, and provides a basic package.json file for the project.
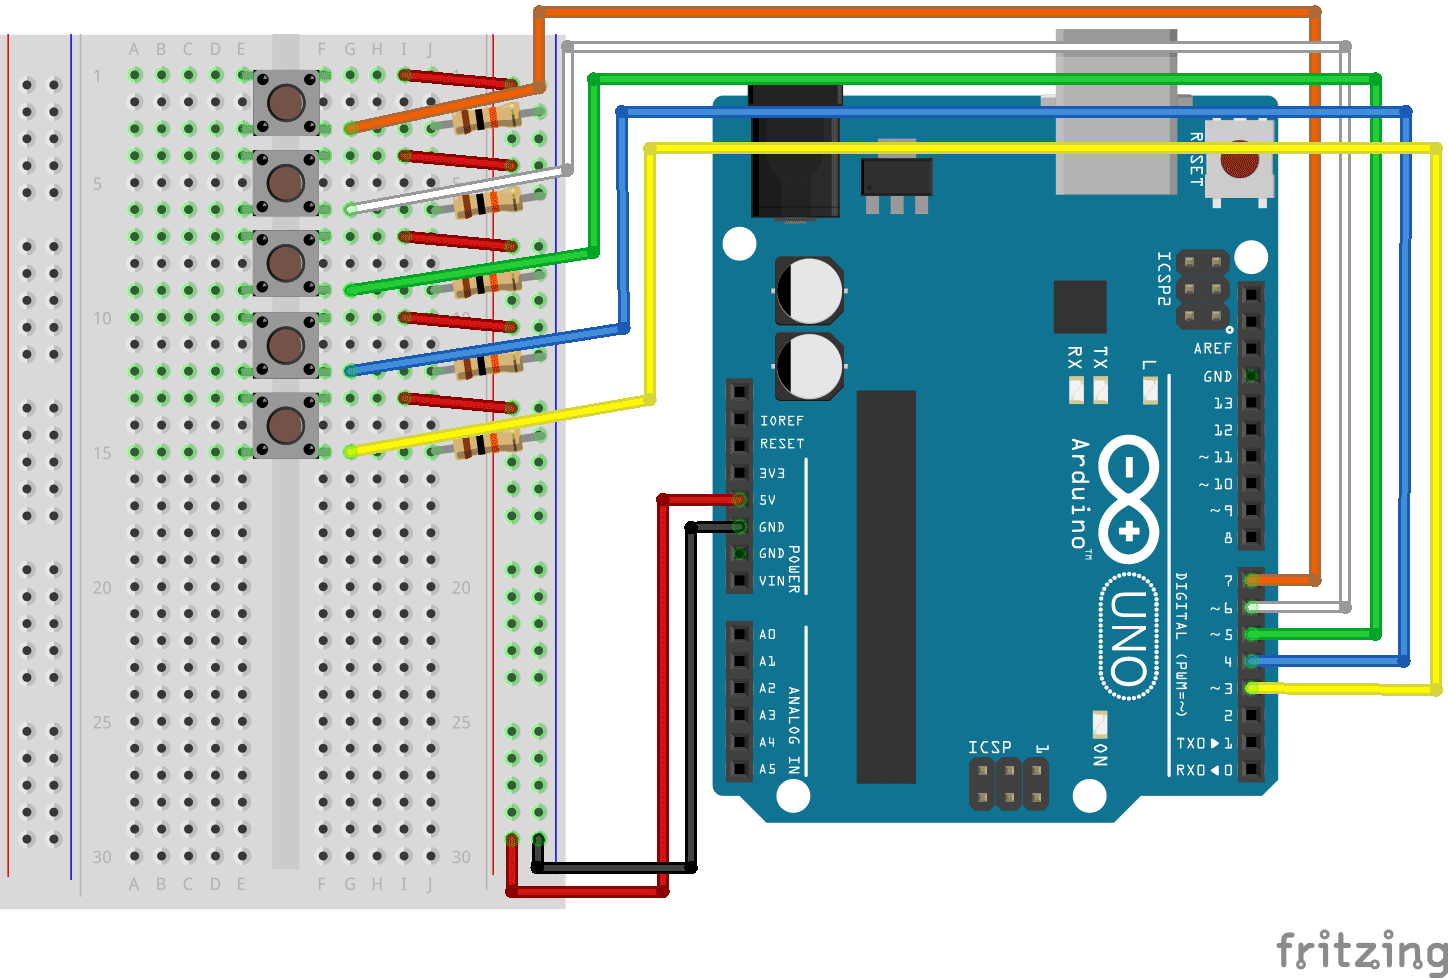
Setting Up Our Arduino
Ensure that you’ve got the StandardFirmata sketch installed on your Arduino board itself, as we’ll be using the johnny-five library to send instructions to our Arduino. That will only work if you’ve got StandardFirmata on there first:
Our Arduino breadboard set up for this demo looks like so:
Our Server Code
Our Node.js server code is relatively short and sweet for this demo:
  var five = require('johnny-five'),

      board = new five.Board(),

      exec = require('child_process').exec,

      btn1, btn2, btn3, btn4, btn5,

      currentVolLevels = {};
  board.on('ready', function() {

    console.log('Arduino board is ready!');
    btn1 = new five.Button(7);

    btn2 = new five.Button(6);

    btn3 = new five.Button(5);

    btn4 = new five.Button(4);

    btn5 = new five.Button(3);
    btn1.on('down', function(value) {

      askiTunes('play playlist \"Top 25 Most Played\"');

    });
    btn2.on('down', function(value) {

      askiTunes('stop');

    });
    btn3.on('down', function(value) {

      setVolumeLevel(currentVolLevels['output volume'] + 5);

    });
    btn4.on('down', function(value) {

      setVolumeLevel(currentVolLevels['output volume'] - 5);

    });
    btn5.on('down', function(value) {

      toggleMute();

    });
    getVolumeLevels();

  });
  function getVolumeLevels() {

    exec("osascript -e 'get volume settings'", function(err, stdout, stderr) {

      if (!err) {

        var levels = stdout.split(', ');
        levels.forEach(function(val,ind) {

          var vals = val.split(':');
          if (vals[1].indexOf('true') > -1) currentVolLevels[vals[0]] = true;

          else if (vals[1].indexOf('false') > -1) currentVolLevels[vals[0]] = false;

          else currentVolLevels[vals[0]] = parseInt(vals[1]);

        });

        console.log(currentVolLevels);

      }

    });

  }
  function setVolumeLevel(level) {

    console.log('Setting volume level to ' + level);

    exec("osascript -e 'set volume output volume " + level + "'",

      function() {

        getVolumeLevels();

      });

  }
  function toggleMute() {

    var muteRequest = currentVolLevels['output muted'] ? 'without' : 'with';

    console.log('Toggling mute to ' + muteRequest + ' muted');
    exec("osascript -e 'set volume " + muteRequest + " output muted'", function() {

      getVolumeLevels();

    });

  }
  function askiTunes(event, callback) {

    exec("osascript -e 'tell application \"iTunes\" to "+event+"'", function(err, stdout, stderr) {

      console.log('iTunes was just asked to ' + event + '.');

    });

  }
That Code Explained
Now the all important part of the article – what all of that code means! Lets go over how everything fits together.
In order to interface with our Arduino board, we are using johnny-five. We start by setting up our johnny-five module and our Arduino board through that. Then we define variables to store our five buttons.
  var five = require('johnny-five'),

      board = new five.Board(),

      btn1, btn2, btn3, btn4, btn5,
We also set up our exec() function which is what allows us to run AppleScript commands from Node.js.
exec = require('child_process').exec,
When johnny-five lets us know our board is ready to use, we run a quick console.log and define our five buttons and the Arduino pins they are connected to (7, 6, 5, 4 and 3).
  board.on('ready', function() {

    console.log('Arduino board is ready!');
    btn1 = new five.Button(7);

    btn2 = new five.Button(6);

    btn3 = new five.Button(5);

    btn4 = new five.Button(4);

    btn5 = new five.Button(3);
On each button’s down event, we run a different function. On our first button, we run the askiTunes() function which sends iTunes a request. In our case, it is requesting our “Top 25 Most Played” playlist.
  btn1.on('down', function(value) {

    askiTunes('play playlist \"Top 25 Most Played\"');

  });
The askiTunes() function executes our first bit of AppleScript using the exec() function. All of our AppleScript commands run within Node.js using the command osascript.
Our askiTunes() function runs the command osascript -e 'tell application \"iTunes\" to "+event+"'. This gives us a generic command telling iTunes to do something. We can adjust what that something is via the event variable.
When done, we run a console.log just so we know that the event has been recognised.
  function askiTunes(event, callback) {

    exec("osascript -e 'tell application \"iTunes\" to "+event+"'", function(err, stdout, stderr) {

      console.log('iTunes was just asked to ' + event + '.');

    });

  }
Our second button runs the same askiTunes() function but we pass it the event of stop to stop anything that is currently playing.
  btn2.on('down', function(value) {

    askiTunes('stop');

  });
If we had more buttons to play with, we could add buttons to pause and a generic play event that’ll resume what is currently in queue.
Our third and fourth buttons turn our Mac’s volume up and down via a function we’ll call setVolumeLevel().
  btn3.on('down', function(value) {

    setVolumeLevel(currentVolLevels['output volume'] + 5);

  });
  btn4.on('down', function(value) {

    setVolumeLevel(currentVolLevels['output volume'] - 5);

  });
setVolumeLevel() uses an object we define at the start of our code called currentVolLevels. This object stores the four different values which AppleScript returns from our Mac. A sample of this data looks like so:
{

  'output volume': 5,

  'input volume': 83,

  'alert volume': 100,

  'output muted': false

}
As you can see, we’ve got a value in that JSON object called 'output volume'. We add five to the volume level on our third button (increasing it) and reduce it by five on our fourth button (decreasing it), then we pass that value into the function to make the change happen.
Our setVolumeLevel() function uses the AppleScript command of set volume output volume to change our Mac’s volume to the level we’ve passed it. We also run a console log just so we can keep track of the volume level requests.
  function setVolumeLevel(level) {

    console.log('Setting volume level to ' + level);

    exec("osascript -e 'set volume output volume " + level + "'", function() {

      getVolumeLevels();

    });

  }
When our AppleScript code has been run, we call getVolumeLevels() which is our function that sets up all of our currentVolLevels values and keeps track of our Mac’s volume. I’ll explain it in detail after we’ve covered our final button.
That aforementioned final button runs the toggleMute() function that’ll mute and unmute our Mac.
  btn5.on('down', function(value) {

    toggleMute();

  });
Our toggleMute() function looks at the currentVolLevels['output muted'] and uses either osascript -e 'set volume without output muted' to turn off muting or osascript -e 'set volume with output muted' to turn it on. If currentVolLevels['output muted'] is true, then we set the keyword to 'without' to take away muting. If it is false, we set the keyword to 'with' to turn on muting.
  function toggleMute() {

    var muteRequest = currentVolLevels['output muted'] ? 'without' : 'with';

    console.log('Toggling mute to ' + muteRequest + ' muted');
    exec("osascript -e 'set volume " + muteRequest + " output muted'", function() {

      getVolumeLevels();

    });

  }
This AppleScript call also runs the getVolumeLevels() function once it is finished. In this function, we run osascript -e 'get volume settings' to retrieve the current volume of our Mac. It returns these values in the format:
"output volume:5, input volume:83, alert volume:100, output muted:false"
Within our getVolumeLevels() we take the value returned within the stdout variable and format it into a JSON object stored in currentVolLevels using code that looks like this:
  function getVolumeLevels() {

    exec("osascript -e 'get volume settings'", function(err, stdout, stderr) {

      if (!err) {

        var levels = stdout.split(', ');
        levels.forEach(function(val,ind) {

          var vals = val.split(':');
          if (vals[1].indexOf('true') > -1) currentVolLevels[vals[0]] = true;

          else if (vals[1].indexOf('false') > -1) currentVolLevels[vals[0]] = false;

          else currentVolLevels[vals[0]] = parseInt(vals[1]);

        });

        console.log(currentVolLevels);

      }

    });

  }
The JSON conversion is tailored specifically to the string we receive above. First, we split each key/value pair into an array called levels by splitting it between each comma to create an array like so:
['output volume:5', 'input volume:83', 'alert volume:100', 'output muted:false']
We then iterate through each string in the array, rearranging it neatly into our currentVolLevels JSON object. To do this, we split each key/value pair into an array called vals using the : character as our splitter. vals[0] will be each key such as output volume, whilst vals[1] contains the actual volume level values. We use vals[0] as our JSON object key, e.g currentVolLevels[vals[0]] = something.
There is one factor we need to keep in mind and account for in the volume levels that get returned. One of these values is a true/false value (our muted/unmuted status) whilst the rest are numbers. All of these are represented as strings and need to be converted. We’ll do this via a simple if statement that looks at the value of vals[1]. We check for the string of "true" and the string of "false". If we find either of these, we set the relevant value inside currentVolLevels to be the matching boolean. If it is neither of these, we parse the string into an integer that will represent a numeric volume level and store it inside currentVolLevels.
The end result looks like so:
{

  'output volume': 5,

  'input volume': 83,

  'alert volume': 100,

  'output muted': false

}
Our Package.json File
Our package.json file is rather simple in this case and mainly needs to ensure we’ve got the johnny-five and serialport npm modules installed.
  {

    "name": "nodemaccontroller",

    "version": "1.0.0",

    "description": "Code to control your Mac via Node",

    "main": "index.js",

    "dependencies": {

      "johnny-five": "^0.8.76",

      "serialport": "^1.7.1"

    },

    "author": "Patrick Catanzariti"

  }
Our Remote Control In Action
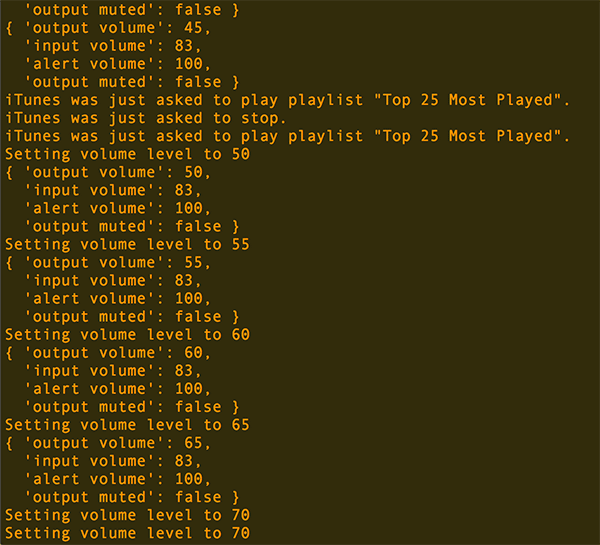
Install all of the above dependencies using npm install, ensure your Arduino is connected and running the StandardFirmata sketch, then run node index.js. Upon running it, press a few buttons and you should be able to control your Mac! Whilst it’s running, it’ll look like this in the console:
Other Possibilities
If you’re not a big music fan or you don’t use your Mac for your music, there are a bunch of other AppleScript shortcuts you could hook up your Node.js server to. Here are a few ideas.
Launch Applications
  function openCalculator() {

    exec("osascript -e 'tell application \"Calculator\" to launch'");

  }
Open a New Finder Window
  function openFinderWindow() {

    exec("osascript -e 'tell app \"Finder\" to make new Finder window'");

  }
Make Your Mac Speak!
  function tellMacToSpeak() {

    exec("osascript -e 'say \"I am completely operational, and all my circuits are functioning perfectly.\"'");

  }
Conclusion
You’ve now got a neat way of making your own personal Mac peripheral! If you wanted to make it work as a portable device, you could set up either websockets, socket.io or a basic HTTP server, give your Arduino Wi-Fi or some other way of accessing your Node.js server remotely (or use something like a Particle Photon or Particle Electron microcontroller, and then make these exec() calls based upon remote commands (please be careful though, exec() can be misused!). There’s plenty of opportunity for some very fun projects here! As always, if you do make something neat, leave a note in the comments or get in touch with me on Twitter (@thatpatrickguy), I’d love to check it out!
Frequently Asked Questions (FAQs) about Remote Control Mac with Node.js and Arduino
How can I install Node.js on my Mac for Arduino control?
To install Node.js on your Mac, you first need to download the installer from the official Node.js website. Choose the version that is compatible with your Mac OS. Once downloaded, open the installer and follow the instructions. After installation, you can verify it by opening Terminal and typing “node -v”. This should display the installed version of Node.js.
What is the role of Arduino in remote controlling a Mac?
Arduino is a microcontroller board that can be programmed to perform various tasks. In the context of remote controlling a Mac, Arduino can be used to receive signals from an infrared remote control, interpret these signals, and then send commands to the Mac via a USB connection. This allows you to control various functions on your Mac using a remote control.
How can I program my Arduino to work with an infrared remote control?
Programming your Arduino to work with an infrared remote control involves using the IRremote library. This library allows your Arduino to send and receive infrared signals. To use this library, you need to install it via the Arduino IDE. Once installed, you can use the functions provided by the library to program your Arduino to receive and interpret signals from your remote control.
How can I map the buttons on my remote control to specific functions on my Mac?
Mapping the buttons on your remote control to specific functions on your Mac involves writing a Node.js script. This script will listen for signals from your Arduino, interpret these signals as specific commands, and then execute these commands on your Mac. The specific mapping of buttons to functions will depend on the layout of your remote control and your personal preferences.
What is the role of Node.js in remote controlling a Mac?
Node.js is a JavaScript runtime that allows you to run JavaScript on your Mac. In the context of remote controlling a Mac, Node.js is used to write and run the script that listens for signals from your Arduino and executes commands on your Mac. This allows you to control your Mac using JavaScript, a language that is widely used and easy to learn.
Can I use other programming languages instead of Node.js to control my Mac with Arduino?
Yes, you can use other programming languages to control your Mac with Arduino. However, Node.js is a popular choice due to its ease of use and wide support. Other languages you could use include Python, C++, and Java. The choice of language will depend on your personal preference and the specific requirements of your project.
How can I troubleshoot issues with my Arduino and remote control setup?
Troubleshooting issues with your Arduino and remote control setup can involve several steps. First, check the physical connections between your Arduino, remote control, and Mac. Ensure that all components are properly connected and powered. Next, check your Arduino and Node.js code for errors. Use the debugging tools provided by the Arduino IDE and Node.js to identify and fix any issues. Finally, ensure that your remote control is working properly by testing it with another device.
Can I use this setup to control other devices besides a Mac?
Yes, you can use this setup to control other devices besides a Mac. The specific steps and code may vary depending on the device you want to control. However, the basic principles of using an Arduino to receive signals from a remote control and then sending commands to a device remain the same.
What kind of remote control should I use for this setup?
You can use any infrared remote control for this setup. The specific choice of remote control will depend on your personal preference and the specific requirements of your project. However, it’s important to ensure that your remote control is compatible with the IRremote library used by your Arduino.
Can I customize the functions that I control on my Mac with this setup?
Yes, you can customize the functions that you control on your Mac with this setup. This involves modifying the Node.js script that listens for signals from your Arduino and executes commands on your Mac. You can map any button on your remote control to any function on your Mac that can be controlled via a command line interface.

