This chapter explores the applications of CSS for styling text, and covers a lot of CSS basics as well as answering some of the more frequently asked questions. If you’re new to CSS, these examples will introduce you to a variety of properties and usages, and will give you a broad overview from which to start your own experiments with CSS. For those who are already familiar with CSS, this chapter will serve as a quick refresher for those moments when you can’t quite remember how to achieve a certain effect.
The examples provided here are well supported across a variety of browsers and versions. As always, testing your code across different browsers is important; however, the text styling properties have good support. While there may be small inconsistencies or some lack of support in older browsers, nothing here should cause you any serious problems. Note also that, if you’d rather read this information offline, you can download the .pdf version of the first 4 chapters here.
How do I replace font tags with CSS?
The styling of text with CSS is supported by version 4 browsers and above, so there is no compelling reason to continue to use <font> tags to style text. At its very simplest, you can use CSS to replace the font tags in your site.
Using font tags, you would need to set the style for each paragraph on your page.
<p><font color="#800080"

      face="Verdana,Geneva,Arial,Helvetica,sans-serif">These

    stuffed peppers are lovely as a starter, or as a side dish

    for a Chinese meal. They also go down well as part of a

    buffet and even children seem to like them.</font></p>
Solution
Using CSS, you would simply define in the style sheet that the color property of the <p> tag is #800080, and that the font-family should be Verdana,Geneva,Arial,Helvetica,sans-serif:
p {

  color: #800080;

  font-family: Verdana,Geneva,Arial,Helvetica,sans-serif;

}
Now, every time you add to your document text enclosed in a <p> tag, it will take on this style, and save you from needing to add reams of extra markup to your document. It also makes life a lot easier if your client suddenly wants to change the font from Verdana to Times on 100 documents!
Should I use pixels, points, ems or something else for font sizes?
You can size text in CSS using the font-size property. For example:
font-size: 12px;However, there are a variety of other ways to set the size of your fonts. Deciding which to use requires you to know a little about the relative merits of each.
Solution
The Units of Font Sizing
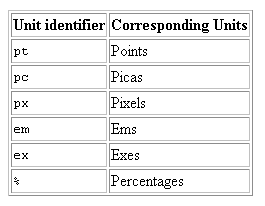
Table 2.1 describes the units that you can use to size fonts.
Points and Picas
p {

  font-size: 10pt;

}
You should avoid using points and picas to style text for display on screen. These units are an excellent way to set sizes for print design, as their measurements were designed for that purpose. A point has a fixed size of one seventy-second of an inch, while a pica is one sixth of an inch. A printed document specified using these units will come out exactly as you intended. However, computers cannot accurately predict the actual size at which elements will appear on the monitor, so they guess – and guess badly – at the size of a point or pica, with varying results across platforms. If you’re creating a print style sheet, or a document that’s intended for print, not on-screen, viewing, these are the units to use. However, a general rule of thumb is to avoid them when designing for the Web.
Pixels
p {

  font-size: 12px;

}
Many designers like to measure font sizes in pixels, as this unit of measurement makes it easy to achieve consistent displays across various browsers and platforms. However, pixels ignore any preferences users may have set in their own browsers and, in most browsers, font sizes that the designer has dictated in pixels cannot be resized by users. This is a serious accessibility problem for those who need to make text larger in order to read it clearly. Therefore, while pixels may seem like the easiest option, pixel measurements should be avoided if another method can be used, particularly for large blocks of content. If you’re creating a document for print, or using a print style sheet, you should avoid pixels entirely. Pixels have no meaning in the world of print and, similar to the application of points to the on-screen environment, print applications provided with a pixel measurement will simply try to guess the size at which the font should appear on paper, with erratic results.
Ems
The em is a relative font measurement, where one em is equal to the height of the letter “M” in the default font size. Where CSS is concerned, 1em is seen to be equal to the user’s default font size, or the font size of the parent element when it differs. If you use ems (or any other relative unit) for all your font sizing, users will be able to resize the text, which will comply with the text size preferences they have set in their browsers. For example, imagine I create a declaration that sets text within the <p> tag to 1em, as is shown in the following CSS:
p {

  font-size: 1em;

}
A user with an Internet Explorer 6 browser in which text size is set to Medium will see the paragraph shown in Figure 2.1.
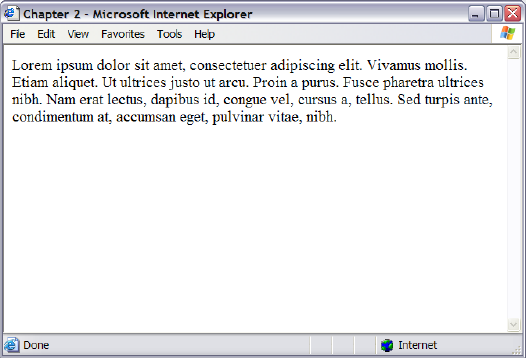
Figure 2.1. The font-size is set to 1em and text size is Medium.
If the users have their text set to Largest, the 1em text will display as shown in Figure 2.2.
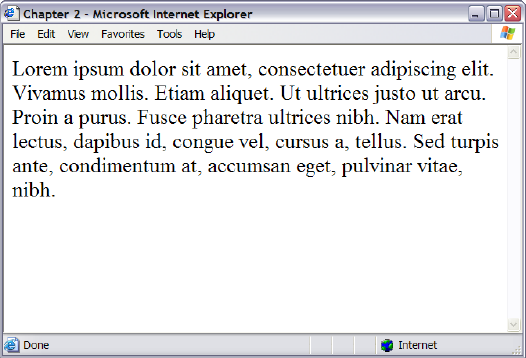
Figure 2.2. The font-size is set to 1em and text size is set to Largest.
As a designer, this gives you less control over the way users view the document. However, it means that users who need a very large font size, for instance, can read your content.
Ems values can be set using decimal numbers. For example, to display text at a size 10% smaller than the user’s default (or the font size of its parent element) you could use:
p {

  font-size: 0.9em;

}
To display the text 10% larger than the default or inherited size:
p {

  font-size: 1.1em;

}
Exes
The ex is a relative unit measurement that corresponds to the height of the lowercase letter “x” in the default font size. In theory, if you set the font-size of a paragraph to 1ex, the uppercase letters of the text should be the same height as the letter “x” would have been if the font size had not been specified.
Unfortunately, modern browsers don’t yet support the typographical features needed to determine the size of an ex precisely. They usually make a rough guess for this measurement. For this reason, exes are rarely used at this time.
Percentages
p {

  font-size: 100%;

}
As with ems and exes, font sizes that are set in percentages will honor users’ text size settings and are resizable by the user. Setting the <p> tag to 100% would display your text at users’ default settings for font size (as would setting the font size to 1em). Decreasing the percentage will make the text smaller:
p {

  font-size: 90%;

}
Increasing the percentage will make the text larger:
p {

  font-size: 150%;

}
Keywords
You can also size text using absolute and relative keywords.
Absolute Keywords
There are seven absolute keyword sizes for use in CSS, as follows:
xx-smallx-smallsmallmediumlargex-largexx-large
These keywords are defined relative to each other, and browsers implement them in different ways. Most browsers display medium at the same size as unstyled text, with the other keywords resizing text to varying degrees. Internet Explorer 5 (and version 6, depending on the document type), however, treats small as being the same size as unstyled text.
These keyword measurements are considered absolute in that they don’t inherit from any parent element. Yet, unlike the absolute values provided for height, such as pixels and points, they do allow the text to be resized in the browser, and will honor the user’s browser settings. The main problem with using these keywords is the fact that, for example, x-small-sized text may be perfectly readable in one browser, and miniscule in another.
Relative Keywords
Relative keywords – larger and smaller – take their size from the parent element, in the same way that em and % do. Therefore, if you set your <p> tag to small using absolute keywords, and you simply want emphasized text to display comparatively larger, you’d add the following to the style sheet:
Example 2.1. relative.css
p {

  font-size: small;

}

em {

  font-size: larger;

}
The following markup would display as shown in Figure 2.3, because the text wrapped in the <em> tag will display larger than its parent – the <p> tag.
Example 2.2. relative.html (excerpt)
<p>These <em>stuffed peppers</em> are lovely as a starter, or as a

  side dish for a Chinese meal. They also go down well as part of

  a buffet and even children seem to like them.</p>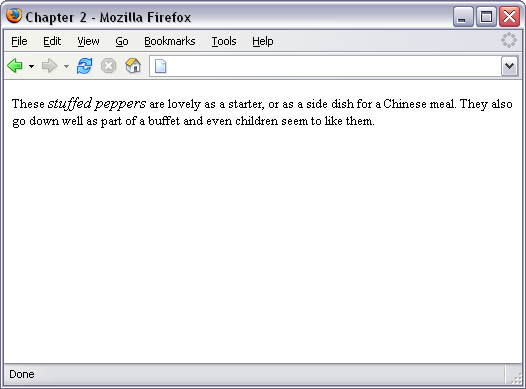
Figure 2.3. The emphasized text displays larger than its containing paragraph.
Relative Sizing and Inheritance
When you use any kind of relative sizing, remember that the element inherits its starting size from its parent element, then adjusts its size accordingly. This is fairly easy to understand in layouts in which elements are not nested in a complex manner; however, this inheritance pattern can become problematic in nested table layouts in which the parent element is not always obvious – things can seem to inherit very strangely indeed! The following example demonstrates this.
My style sheet contains the following code, which sets td to display text at 80%. This is slightly smaller than the user’s default font size, but they will be able to resize it:
Example 2.3. nesting.css
td {

  font-size: 80%;

}
On a page in which there are no nested table cells, the text will display consistently at that slightly smaller size. However, in a nested table layout, the text within each nested table will display at 80% of the font size of its containing table.
Example 2.4. nesting.html (excerpt)
<table>

  <tr>

    <td>This is a table

      <table>

        <tr>

          <td>This is the second table

            <table>

              <tr>

                <td>This is the third table</td>

              </tr>

            </table>

          </td>

        </tr>

      </table>

    </td>

  </tr>

</table>
The example markup above will display as in Figure 2.4. As you can see, the text becomes progressively smaller in each nested table.
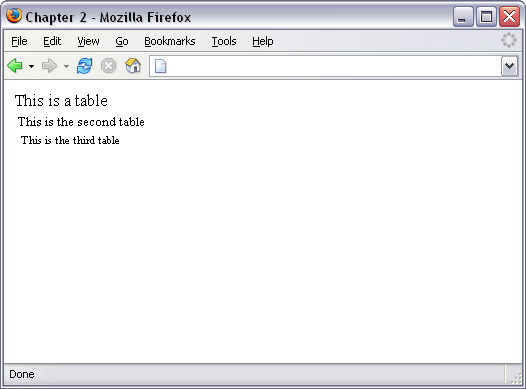
Figure 2.4. The display demonstrates the use of relative font sizing within nested tables.
Discussion
When choosing which method of sizing text to use, it’s best to select one that allows all users to resize the text, and that ensure that the text complies with the settings users have chosen in their browsers. Relative font sizing tends to work well with CSS layouts and simple table-based layouts, but it can be tricky to implement in a complex nested table layout because of the way the elements inherit sizing. If you decide that your only option is to size fonts using an absolute unit of measurement, consider developing a style sheet switcher to allow users to change the font size from within the interface of your site.
How do I specify that my text is shown in a certain font?
Solution
Specify the typeface that your text will adopt using the font-family property like so:
p {

  font-family: Verdana;

}
Discussion
As well as specific fonts, such as Verdana or Times, CSS allows the specification of some more generic font families, which are:
serifsans-serifmonospacecursivefantasy
When you specify fonts, it’s important to remember that users probably don’t have the same fonts you have on your computer. If you define a font that they don’t have, your text will display in their Web browser’s default font, regardless of what you’d have preferred, or your site design.
You can simply use generic font names and let users’ systems decide which font to apply. For instance, if you want your document to appear in a sans-serif font such as Arial, you could simply use the following code:
p {

  font-family: sans-serif;

}
However, you’ll probably want to have a little more control over the way your site displays – and you can. It’s possible to specify font names as well as generic fonts. Take, for example, the following CSS declaration for the <p> tag. Here, we’ve specified that if Verdana is installed on the system, it should be used; if it’s not installed, the computer is directed to see if the user has Geneva installed; failing that, the computer will look for Arial, then Helvetica. If none of these fonts is available, the computer is instructed to use that system’s default sans-serif font.
p {

  font-family: Verdana, Geneva, Arial, Helvetica, sans-serif;

}
How do I remove underlines from my links?
The default indication that text on a Web page is a link to another document is that it’s underlined and is a different color from the rest of the text. There may be instances in which you want to remove that underline.
Solution
We use the text-decoration property to remove the underlines. By default, the browser will set the text-decoration of an <a> tag to underline. To remove the underline, simply set the following property for the link:
text-decoration: none;The CSS used to create the effect shown in Figure 2.5 is as follows:
Example 2.5. textdecoration.css
a:link, a:visited {

  text-decoration: none;

}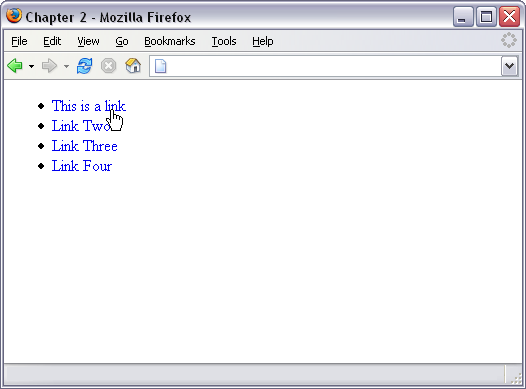
Figure 2.5. Use text-decoration to create links that aren’t underlined.
Discussion
In addition to underline and none, there are other values for text-decoration that you can try out:
overlineline-throughblink
You can also combine these values. For instance, should you wish to have an underline and overline on a particular link, as shown in Figure 2.6, you’d use the following code:
Example 2.6. textdecoration2.css
a:link, a:visited {

  text-decoration: underline overline;

}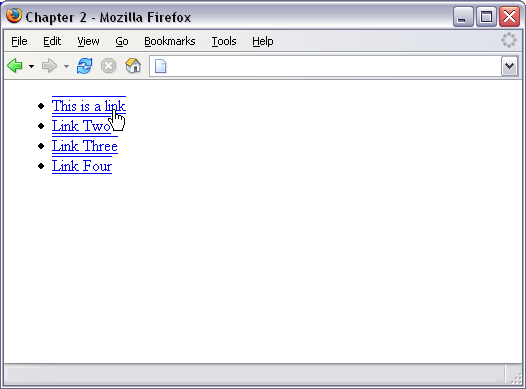
Figure 2.6. Combine text-decoration values to create links with underlines and overlines.
Misleading Lines
You can use the text-decoration property on text that’s not a link, however, be wary of this. The underlining of links is such a widely-accepted convention that users tend to think that any underlined text is a link to another document.
When is Removing Underlines a Bad Idea?
Underlining links is a standard convention followed by all Web browsers and, consequently, users expect to see links underlined. Removing the underline from links that are within text can make it very difficult for people to realize that these words are in fact links – not just highlighted text. I’d advise against removing the underlines from links within text. There are other ways in which you can style links so they look attractive and removal of the underline is rarely, if ever, necessary.
Links that are used as part of a menu, or in some other situation in which the text is quite obviously a link – for instance, where the text is styled with CSS to resemble a graphical button – are a different story. If you wish, you can remove the underline from these kinds of links because it’s obvious from their context that they’re links.
How do I create a link that changes color on mouseover?
An attractive link effect changes the color or otherwise alters the appearance of links when the cursor moves across them. This effect can be applied to great advantage when CSS is used to replace navigation buttons; however, it can also be used on links within your document.
Solution
To create this effect, we style the :hover and :active pseudo-classes differently than the other pseudo-classes of the anchor tag.
Our links are styled with the following declaration in the style sheet:
Example 2.7. textdecoration3.css
a:link, a:visited, a:hover, a:active {

  text-decoration: underline;

  color: #6A5ACD;

  background-color: transparent;

}
When this style sheet is applied, our links will display in the blue color #6A5ACD with an underline, as shown in Figure 2.7.
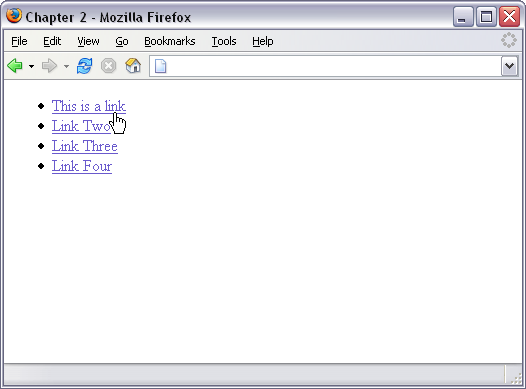
Figure 2.7. The same declaration is used for all pseudo-classes of these links.
To make our :hover and :active pseudo-classes different, we need to remove them from the declaration with the other pseudo-classes and give them their own declaration. I decided to apply an overline in addition to the underline, a background color, and make the text a darker color. The resulting CSS is below (see also Figure 2.8):
Example 2.8. textdecoration4.css
a:link, a:visited {

  text-decoration: underline;

  color: #6A5ACD;

  background-color: transparent;

}

a:hover, a:active {

  text-decoration: underline overline;

  color: #191970;

  background-color: #C9C3ED;

}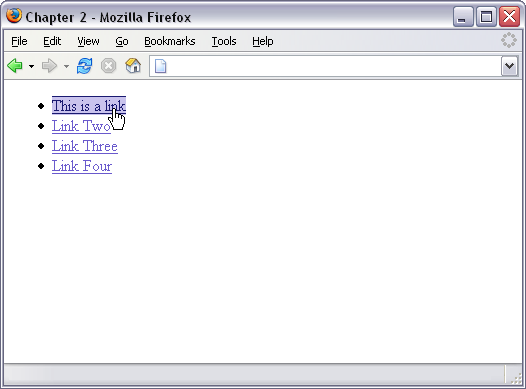
Figure 2.8. The effect of our CSS is evident when we roll over a link with a hover style.
As you’ve probably realized, you can style the other pseudo-classes separately, too. In particular, you might like to style differently links that the user has visited. To do this, you’d simply style the :visited pseudo-class separately.
When styling pseudo-classes, take care that you don’t change either the size or weight (boldness) of the text. If you do, you’ll find that your page appears to “jiggle,” as the content has to move to make way for the larger text to appear on hover.
Pseudo Order
The link pseudo-classes should be declared in the following order: link, visited, hover, active. If they aren’t, you may find that they don’t work as you intended. One way to remember this order is the mnemonic: LoVeHAte.
How do I display two different styles of link on one page?
The previous tip explained how to style the different selectors of the anchor tag, but what if you want to use different link styles within the same document? Perhaps you want to display links without underlines in your navigation menu, yet make sure that links within the body content are easily identifiable. Maybe part of your document has a dark background color, so you need to use a light-colored link style there.
Solution
To demonstrate how to create multiple styles for links, let’s take an example in which we’ve already styled the links.
Example 2.9. linktypes.css (excerpt)
a:link, a:visited {

  text-decoration: underline;

  color: #6A5ACD;

  background-color: transparent;

}


a:hover, a:active {

  text-decoration: underline overline;

  color: #191970;

  background-color: #C9C3ED;

}
These should be taken as the default style – this is how links will normally be styled within your documents. This link style makes the link blue, so, if you have an area with a blue background on your page, the links will be unreadable. You need to create a second set of styles for any link within that area.
First, you need to give a class or an ID to the area that will contain the differently colored links. If the area is already styled with CSS, it will already have a class or ID that you can use. Imagine your document contains the following markup:
Example 2.10. linktypes.html (excerpt)
<div class="boxout">

  <p>Visit our <a href="store.html">online store</a>, for all your

    widget needs.</p>

</div>
You will need to create a CSS rule to affect any link appearing within an area for which the parent element has the class boxout applied:
Example 2.11. linktypes.css (excerpt)
.boxout {

  color: #FFFFFF;

  background-color: #6A5ACD;

}

.boxout a:link, .boxout a:visited {

  text-decoration: underline;

  color: #E4E2F6;

  background-color: transparent;

}


.boxout a:hover, .boxout a:active {

  background-color: #C9C3ED;

  color: #191970;

}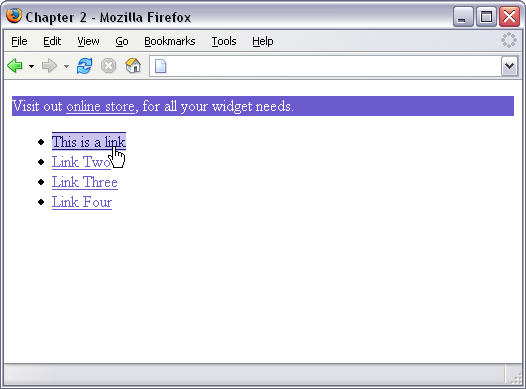
Figure 2.9. Two different styles of links can be used in one document.
As shown in Figure 2.9, this will display all links in the document as per the first style except those that appear in the boxout – these links will be displayed in the lighter color.
How do I add a background color to a heading?
You can add a background color to any element, including a heading.
Solution
Below, we’ve created a CSS rule for all level one headings in a document. The result is shown in Figure 2.10.
Example 2.12. headingcolor.css (excerpt)
h1 {

  background-color: #ADD8E6;

  color: #256579;

  font: 18px Verdana, Geneva, Arial, Helvetica, sans-serif;

  padding: 2px;

}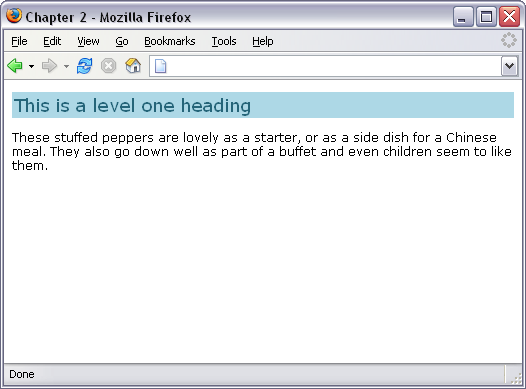
Figure 2.10. Headings can display with a background color.
Make Way for Color
When adding a background to a heading, you may also want to adjust the padding so that there’s space between the heading text and the edge of the colored area, as we did in the above example.
How do I style headings with underlines?
Solution
There are two ways in which you can add an underline to your text. The simplest way is to use the text-decoration property that we encountered when styling links above. This method will allow you to underline the text in the same color as the text itself, as shown in Figure 2.11.
Example 2.13. headingunderline.css (excerpt)
h1 {

  font: 18px Verdana, Geneva, Arial, Helvetica, sans-serif;

  text-decoration: underline;

}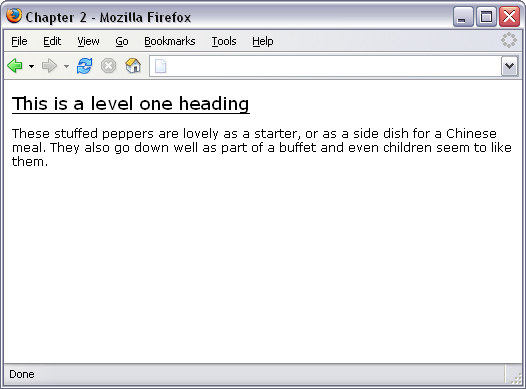
Figure 2.11. Add an underline to a heading using text-decoration.
You can also create an underline effect by adding a bottom border to the heading. This solution is more flexible, in that you can separate the underline and the heading with the use of padding, and you can change the color of the underline to be different than the text. However, the effect may display slightly differently in different browsers, so you’ll need to test it to make sure the effect looks reasonable on the browsers your visitors may use (see Figure 2.12).
Example 2.14. headingunderline2.css
h1 {

  font: 18px Verdana, Geneva, Arial, Helvetica, sans-serif;

  padding: 2px;

  border-bottom: 1px solid #aaaaaa;

}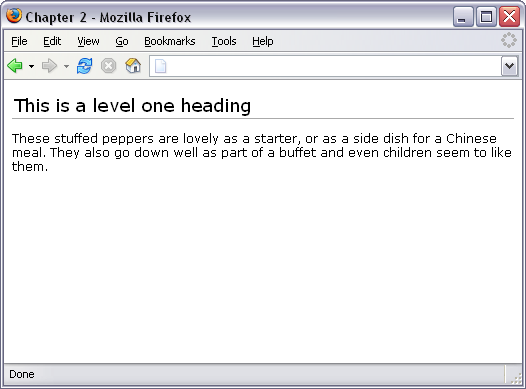
Figure 2.12. Add an underline effect using a bottom border.
How do I get rid of the large gap between an <h1> tag and the following paragraph?
Solution
By default, browsers render a gap between heading and paragraph tags. This is produced by a default top and bottom margin that browsers apply to these tags.
To remove all space between a heading and the paragraph that follows it, you must not only remove the bottom margin from the heading, but also the top margin from the paragraph. But since it can be inconvenient to target the first paragraph following a heading with a CSS selector, it’s easier to simply assign a negative bottom margin to the heading. Margins can be set to negative values, though padding cannot.
The margin of the heading shown in Figure 2.13 has not been changed.
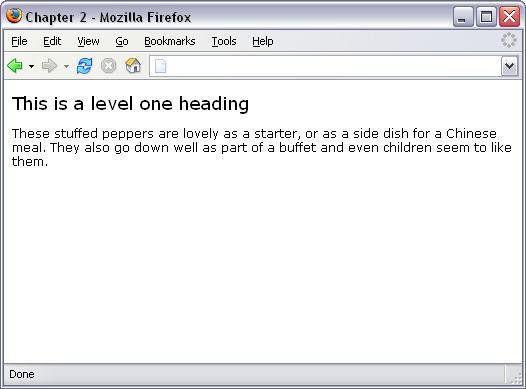
Figure 2.13. This heading and paragraph show the default spacing.
Figure 2.14 shows the same heading after the CSS below has been applied to the <h1> tag.
h1 {

  font: 18px Verdana, Geneva, Arial, Helvetica, sans-serif;

  margin-bottom: -12px;

}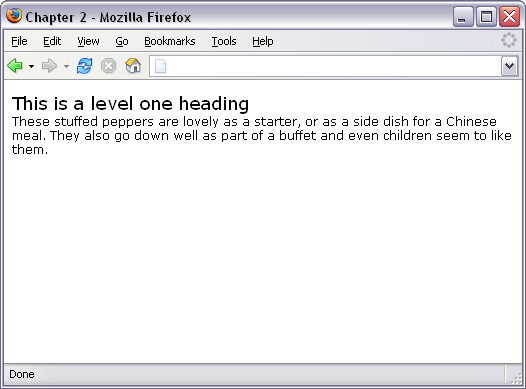
Figure 2.14. The heading display changes when the margin-bottom is set to -15px.
How do I highlight text on the page without using font tags?
Before CSS, we might have used font tags to highlight an important term on the page, or to identify the search terms visitors had used to locate the document through a search engine.
Solution
CSS allows you to create a class for the highlighting style and apply it by wrapping the highlighted text with <span> tags that apply the class. For example, in the following paragraph, we’ve wrapped a phrase in span tags that apply the class, hilite.
Example 2.15. hilite.html (excerpt)
<p>These <span class="hilite">stuffed peppers</span> are lovely as

  a starter, or as a side dish for a Chinese meal. They also go

  down well as part of a buffet and even children seem to like

  them.</p>
The hilite class is shown below; the section will display as in Figure 2.15:
Example 2.16. hilite.css (excerpt)
.hilite {

  background-color: #FFFFCC;

  color: #B22222;

}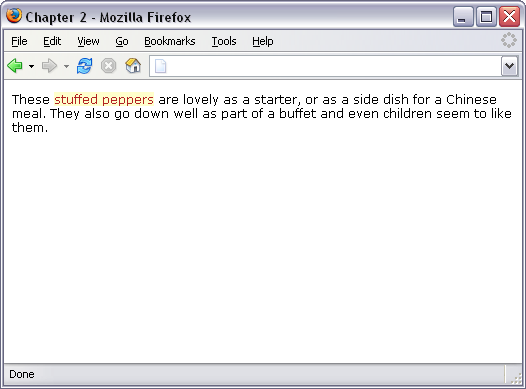
Figure 2.15. Highlight text with CSS.
How do I alter the line-height (leading) on my text?
One of the great advantages of using CSS instead of font tags is that you have far more control over the look of the text on the page. In this solution, we’ll see how to alter the leading of text in your document.
Solution
If the default spacing between lines of text looks a little narrow, change it with the line-height property.
Example 2.17. leading.css
p {

  font: 11px Verdana, Geneva, Arial, Helvetica, sans-serif;

  line-height: 2.0;

}
The result is shown in Figure 2.16.
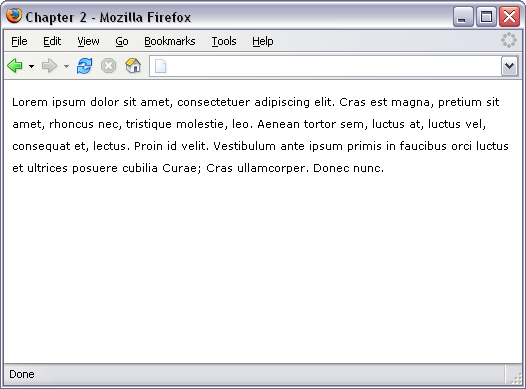
Figure 2.16. Alter the leading using the line-height property.
Be careful not to space the text out so much that it becomes difficult to read.
No Units?
You can also specify the line-height using standard CSS units of measurement, such as ems or even pixels. But doing so breaks the link between the line height and the font size for child elements.
For example, if the example above contained a <span> that set a large font-size, then the line height would scale up proportionally to maintain the same ratio because line-height of the paragraph was set to the numerical value 2.0. If, however, line-height was set to 2em or 200%, the <span> would inherit the actual line height, not the ratio, and the large font size would not affect the line height of the span. Depending on the effect you’re going for, this may actually be desirable.
How do I justify text?
When you justify text, you alter the spacing between the words so that both the right and left margins are straight, as with the text in this book. You can create this effect using CSS.
Solution
You can justify paragraph text with the help of the text-align property.
Example 2.18. justify.css
p {

  text-align: justify;

  font: 11px Verdana, Geneva, Arial, Helvetica, sans-serif;

  line-height: 2.0;

}
Figure 2.17 shows the effect of this code.
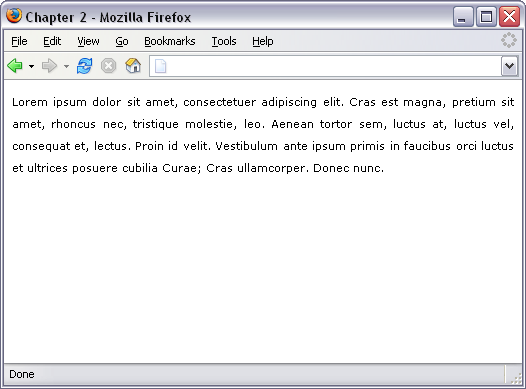
Figure 2.17. Justify text using text-align.
Discussion
Other values for text-align are:
right– aligns the text to the right of the containerleft– aligns the text to the left of the containercenter– aligns the text center
How do I style a horizontal rule?
Solution
You can change the color, height and width of a horizontal rule. Note that, in the CSS below, I’ve used the same values for color and background-color because Mozilla-based browsers color the rule using background-color, while IE uses color.
Example 2.19. hrstyle.css (excerpt)
hr {

  border: none;

  background-color: #ADD8E6;

  color: #ADD8E6;

  height: 1px;

  width: 80%;

}
The result can be seen in Figure 2.18.
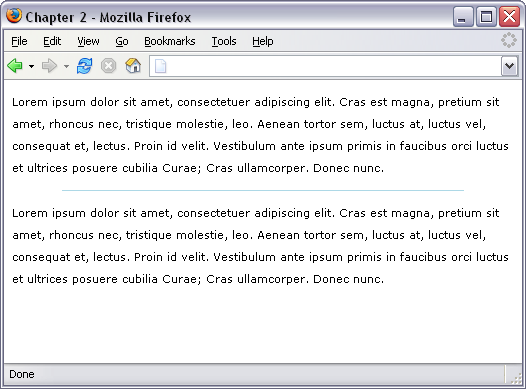
Figure 2.18. Change the color, height and width of a horizontal rule.
How do I indent text?
Solution
You can indent text by applying a rule to the container that sets a padding-left value.
Example 2.20. indent.html (excerpt)
<p class="indent">Lorem ipsum dolor sit amet, consectetuer

  adipiscing elit. Vivamus mollis. Etiam aliquet. Ut ultrices

  justo ut arcu. Proin a purus. Fusce pharetra ultrices nibh.

  Nam erat lectus, dapibus id, congue vel, cursus a, tellus.

  Sed turpis ante, condimentum at, accumsan eget, pulvinar

  vitae, nibh.</p>
Example 2.21. indent.css (excerpt)
.indent {

  padding-left: 30px;

}
You can see the indented paragraph in Figure 2.19.
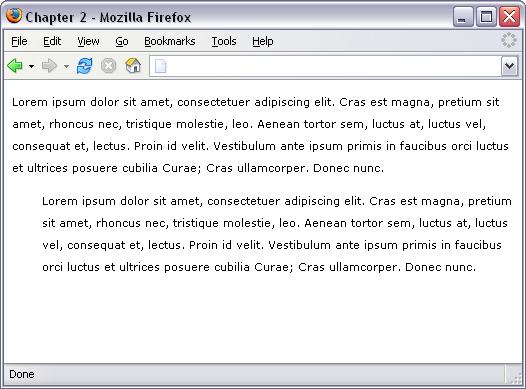
Figure 2.19. Indent text using CSS.
Discussion
You should not use the HTML tag <blockquote> to indent text, unless the text is actually a quote. Although visual editing environments such as Macromedia Dreamweaver frequently refer to <blockquote> as “indent text,” resist the temptation to use it for this purpose; instead, set up a CSS rule to indent the appropriate blocks. <blockquote> is designed to mark up a quote, and devices such a screen readers for the visually impaired will read this text in a way that helps users understand that what they’re hearing is a piece of quoted text. If you use <blockquote> to indent regular paragraphs, it will be very confusing for users to whom the content is read as a quote.
A One-Liner
A related technique enables the indentation of just the first line of each paragraph. To do this, use the CSS property text-indent applied either to the paragraph, or to a class that’s applied to paragraphs you wish to display in this way.
p {

  text-indent: 20px;

}
How do I center text?
Solution
You can center text, or any other element, using the text-align property with a value of center.
Example 2.22. center.html (excerpt)
<p class="centered">Lorem ipsum dolor sit amet, consectetuer

  adipiscing elit. Vivamus mollis. Etiam aliquet. Ut ultrices

  justo ut arcu. Proin a purus. Fusce pharetra ultrices nibh. Nam

  erat lectus, dapibus id, congue vel, cursus a, tellus. Sed

  turpis ante, condimentum at, accumsan eget, pulvinar vitae,

  nibh.</p>
Example 2.23. center.css (excerpt)
.centered {

  text-align: center;

}
The result can be seen in Figure 2.20.
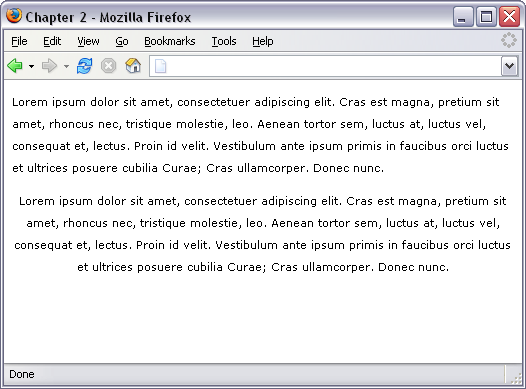
Figure 2.20. Center text using text-align.
How do I change text to all-capitals using CSS?
Solution
You can change text to all-capitals and perform other transformations using the text-transform property.
Example 2.24. uppercase.html (excerpt)
<p class="transform">Lorem ipsum dolor sit amet, consectetuer

  adipiscing elit. Vivamus mollis. Etiam aliquet. Ut ultrices

  justo ut arcu. Proin a purus. Fusce pharetra ultrices nibh. Nam

  erat lectus, dapibus id, congue vel, cursus a, tellus. Sed

  turpis ante, condimentum at, accumsan eget, pulvinar vitae,

  nibh.</p>
Example 2.25. uppercase.css (excerpt)
.transform {

  text-transform: uppercase;

}
Note the uppercase text in Figure 2.21.
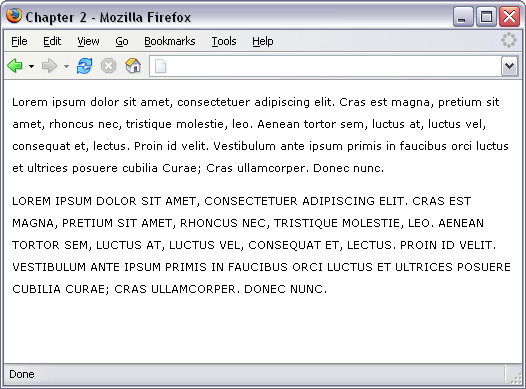
Figure 2.21. This text-transform makes all the letters uppercase.
Discussion
There are other useful values for the text-transform property. The value capitalize will capitalize the first letter of each word, as shown in Figure 2.22:
Example 2.26. capitalize.css (excerpt)
.transform {

  text-transform: capitalize;

}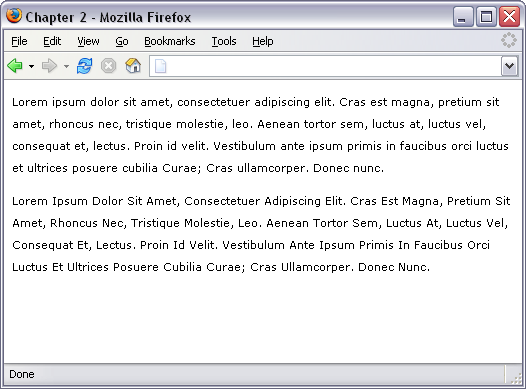
Figure 2.22. The application of text-transform changes the appearance of the words.
Other values of the text-transform property are:
lowercasenone(the default)
How do I change or remove the bullets on list items?
Solution
You can change the style of bullets used in your lists by altering the list-style-type property.
Example 2.27. listtype.html (excerpt)
<ul>

  <li>list item one</li>

  <li>list item two</li>

  <li>list item three</li>

</ul>
To use square bullets, as shown in Figure 2.23, set the property to square:
Example 2.28. listtype.css
ul {

  list-style-type: square;

}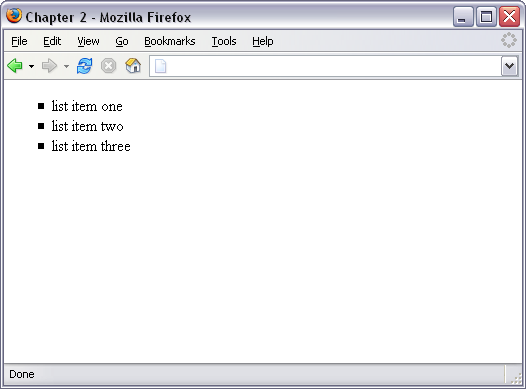
Figure 2.23. This list uses square bullets.
Discussion
Other values for the list-style-type property are:
disccircledecimal-leading-zerodecimallower-romanupper-romanlower-greeklower-alphalower-latinupper-alphaupper-latinHebrewArmenianGeorgiannone
Not all of these values are supported by all browsers; those that don’t provide support for a particular type will display the default bullet type instead. You can see the different types and check your browser’s support for them at the CSS Test Suite for list style type. Setting list-style-type to none will result in no bullets being displayed, although the list will still be indented as if the bullets were there. You can see this in Figure 2.24.
Example 2.29. listtype2.css
ul {

  list-style-type: none;

}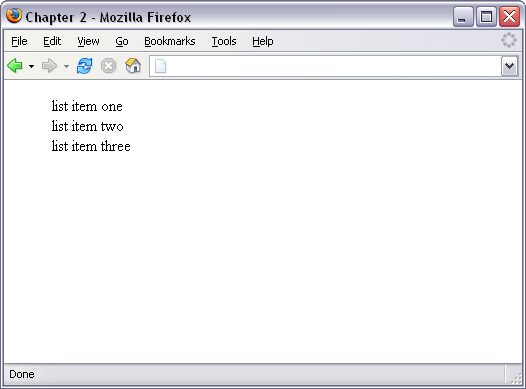
Figure 2.24. This list displays without bullets.
How do I use an image for a list item bullet?
Solution
To use an image for a bullet, create your image, then use the list-style-image property, instead of list-style-type, for your bullets. This property accepts a URL, which incorporates the path to your image file as a value.
Example 2.30. listimage.css
ul {

  list-style-image: url(bullet.gif);

}
You can see an example of an image used as a bullet in Figure 2.25.
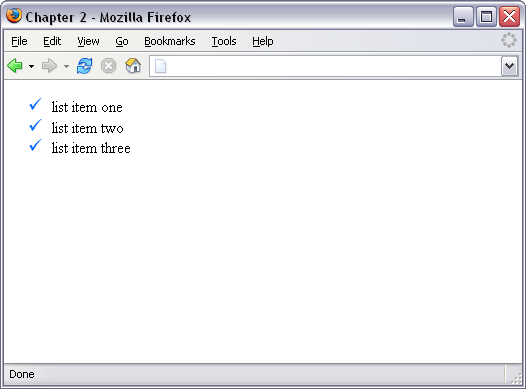
Figure 2.25. Use an image as a list bullet.
Per Item Bullets
The list-style-image property actually applies to the list item (<li>) tags in the list, but by applying it to the list as a whole the individual items will inherit it. You do, however, have the option of setting the property on individual list items, giving individual items their own bullet images.
How do I remove the indented left margin from a list?
If you have set list-style-type to none, you may also wish to remove or decrease the default left margin that the browser sets on a list.
Solution
To remove the indentation entirely so that the list will align left with any other content, as shown in Figure 2.26, use the following code:
Example 2.31. listnomargin.css
ul {

  list-style-type: none;

  padding-left: 0;

  margin-left: 0;

}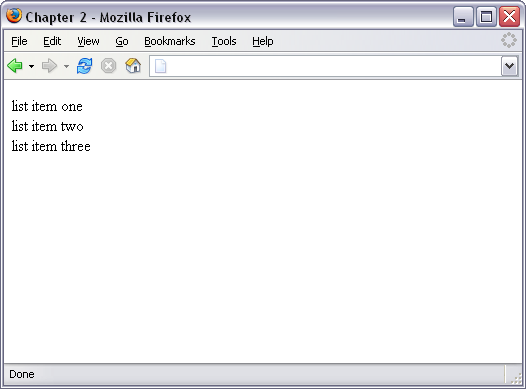
Figure 2.26. The list has no indentation or bullets.
Discussion
You can tweak the indentation after doing this. To indent the content by a few pixels, try this:
ul {

  list-style-type: none;

  padding-left: 5px;

  margin-left: 0;

}
How do I display a list horizontally?
By default, list items display as block elements; therefore, each new item will display on a new line. However, there may be times when some content on your page is, structurally speaking, a list, even though you mightn’t want to display it as such. What happens if, for instance, you want to display the “list items” horizontally?
Solution
You can make a list display horizontally by altering the display property of the <li> tag to inline.
Example 2.32. listinline.html (excerpt)
<ul class="horiz">

  <li>list item one</li>

  <li>list item two</li>

  <li>list item three</li>

</ul>
Example 2.33. listinline.css
ul.horiz li {

  display: inline;

}
The result of the above code can be seen in Figure 2.27.
How do I add comments to my CSS file?
You can, and should, add comments to your CSS file. CSS files that are very simple, with just a few rules for text styling, for instance, may not require commenting. However, once you start to use large CSS files and multiple style sheets for a site, comments come in very handy! Without them, you can spend a lot of time hunting around for the right classes, pondering which class does what and in which style sheet it lives.
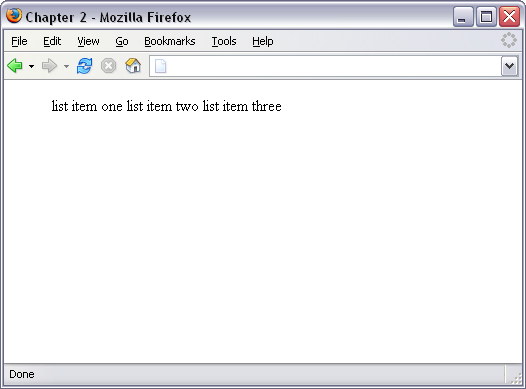
Figure 2.27. A list can be displayed horizontally.
Solution
CSS supports multiline C-style comments, just like JavaScript. So, to comment out an area, use the following:
/*

  ...

*/
At the very least, you should add a comment at the top of each style sheet to explain what’s in that style sheet.
/* This is the default style sheet for all text on the site */How do I get rid of the page margins without adding attributes to the body tag?
Before CSS support, we would remove the default gutter between the document and the browser window by adding attributes to the <body> tag:
<body topmargin="0" leftmargin="0" marginheight="0"

    marginwidth="0">
Solution
The above attributes of the body tag are now deprecated. They should be replaced by CSS defined for the <body> tag.
body {

  margin: 0;

  padding: 0;

}
Opera Sings its Own Tune
Some versions of Opera apply margin and padding to the <html> element instead of the <body> tag. Therefore, to support Opera, you’ll need to use this code:
html, body {

  margin: 0;

  padding: 0;

}
Summary
In this chapter, we’ve covered some of the more common questions asked by those who are relatively new to CSS: questions that relate to styling and manipulating text on the page. By combining these techniques, you can create attractive effects that will degrade appropriately for those who aren’t using a browser that supports CSS.
Watch out for the next chapter of The CSS Anthology: 101 Essential Tips, Tricks & Hacks — it’ll be on SitePoint soon. Or, if you can’t wait, download the fist 4 chapters free now.
Rachel Andrew is a front and back-end web developer, author and speaker. Her books include the recent Get Ready for CSS Grid Layout and she is a regular contributor to a number of publications both on and offline. Rachel is co-founder of the CMS Perch, a Google Developer Expert and an Invited Expert to the CSS Working Group. She writes about business and technology on her own site at rachelandrew.co.uk.


