An excerpt from http://www.sitepoint.com/crud-create-read-update-delete-laravel-app/, by @callmenick
This entry is part 2 of 2 in the series “How to Build a Basic Laravel CRUD App”
In the previous part, we’ve bootstrapped our Laravel CRUD application by creating the database, some controllers, basic routes and simple views. In this part, we’ll wrap things up and implement proper CRUD.
If you’d like to follow along through this interactive walk through Laravel’s docs, please catch up by reading the first part now.
Creating A Record
Continuing right where we left off, let’s create the page where we’ll actually perform this action. In our TasksController, let’s return a view like this:
public function create()
{
    return view('tasks.create');
}
And now, in our views directory, let’s create tasks/create.blade.php, and enter some starter content:
@extends('layouts.master')

@section('content')

<h1>Add a New Task</h1>
<p class="lead">Add to your task list below.</p>
<hr>

@stop
At this point, we could manually create a form, but Laravel offers a package to lighten this load for us – Illuminate/Html. Let’s pull that in quickly by running the following command:
composer require illuminate/html
Now, inside our config/app.php file, let’s add the service provider to the list:
'Illuminate\Html\HtmlServiceProvider',
Let’s add the aliases:
'Form'      => 'Illuminate\Html\FormFacade',
'Html'      => 'Illuminate\Html\HtmlFacade',
We can now easily create a form in our create.blade.php file. Let’s go ahead and do that using the form facade and blade syntax:
{!! Form::open([
    'route' => 'tasks.store'
]) !!}

<div class="form-group">
    {!! Form::label('title', 'Title:', ['class' => 'control-label']) !!}
    {!! Form::text('title', null, ['class' => 'form-control']) !!}
</div>

<div class="form-group">
    {!! Form::label('description', 'Description:', ['class' => 'control-label']) !!}
    {!! Form::textarea('description', null, ['class' => 'form-control']) !!}
</div>

{!! Form::submit('Create New Task', ['class' => 'btn btn-primary']) !!}

{!! Form::close() !!}
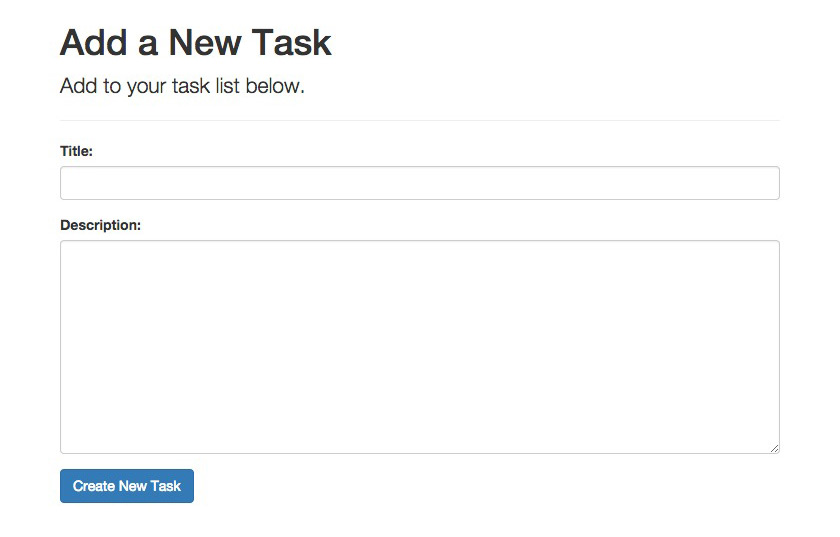
Check out this screenshot of our create view so far.
One important thing to note here is that I’ve specified the route on which we will POST to, according to our resourceful routes list. We’ll use the store method to process the data, so let’s head back to our TasksController, and start processing that data.