Infinite Scrolling in Rails: The Basics

Key Takeaways
- Infinite scrolling is a technique where more records are loaded asynchronously as the user scrolls down the page, making the scrolling experience more natural and user-friendly compared to the traditional pagination.
- The tutorial uses Rails and JavaScript (and CoffeeScript) to implement infinite scrolling, with the will_paginate gem for basic pagination. If JavaScript is disabled in the browser, the solution will fall back to the default pagination.
- The implementation involves setting up the project with the necessary gems, creating a simple blog with paginated posts, and then transforming the pagination to infinite scrolling using jQuery. The pagination.js.coffee file is created to handle the scroll event and load more posts when the user reaches the bottom of the page.
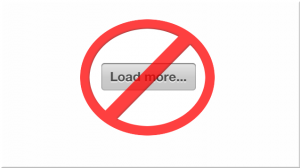
- The tutorial also mentions the option to implement a “Load more” button instead of infinite scrolling, and discusses potential issues with infinite scrolling, such as the large number of scroll events fired, which can be managed using the BindWithDelay library.
Pagination is a very common and widely-used navigation technique, and with good reason. First of all, consider performance. Loading all the available records in a single query can be very costly. Moreover, a user may be interested only in a couple of the most recent records (i.e., the latest posts in a blog) and does not want to wait for all records to load and render. Also, pagination makes reading the page easier by not flooding it with content.
Nowadays, many websites use a slightly different technique, called infinite scrolling (or endless page). Basically, as the user scrolls down the page, more records are loaded asynchronously using AJAX. In this manner, scrolling seems more natural and can be easier for a user than constantly clicking on a ‘Next page’ link.
In this article, I am going to explain how to implement infinite scrolling in place of classic pagination.
First, we will prepare our demo project, implementing basic pagination using the will_paginate gem. This pagination will become infinite scrolling as we work through the tutorial. This will require writing some JavaScript (and CoffeeScript) code, along side our Ruby.
The provided solution will fallback to the default pagination if a user has javascript disabled in the browser. Finally, our view will require virtually no modifications, so you can easily implement this on any website.
Other items that will be covered:
- How to implement a “Load more” button instead of infinite scrolling, much like the one
used on SitePoint. - Some gotchas and potential problems, specifically, how the History API and scroll spying can help us.
The working demo can be found at http://sitepoint-infinite-scrolling.herokuapp.com.
The source code can be found on GitHub.
Sound good? Let’s get rolling!
Preparing the Project
For this article I will be using Rails 3.2.16 but you can implement the same solution with Rails 4.
Lets create a very simple blog. For now, it will only display demo posts.
$ rails new infinite_scrolling -T-T here means that we want to skip generating a test suite (I prefer RSpec but of course you can omit this flag).
We are going to hook up some gems that will come in handy:
Gemfile
gem 'will_paginate', '~> 3.0.5'
gem 'betterlorem', '~> 0.1.2'
gem 'bootstrap-sass', '~> 3.0.3.0'
gem 'bootstrap-will_paginate', '~> 0.0.10'
will_paginate will, well, paginate our records. I will go into more detail about this gem in the next section. betterlorem generates demo text in our records. There are other similar gems that produce “Lorem Ipsum” text, but I’ve found this one to be the most convenient for our case (we are going to use it in seeds.rb, not in the view).
There is no point to create an award-winning design, so as a fast and easy (though not the smallest, considering the weight) solution we will use Twitter Bootstrap 3. The bootstrap-sass gem adds it into our Rails project. bootstrap-will_paginate contains some Bootstrap styling for the pagination itself.
Do not forget to run
$ bundle installNow add
//= require bootstrapto the application.js and
@import "bootstrap";to the application.css.scss to include all the Bootstrap styles and scripts. Of course, in the real application you would choose only the required components.
The Model
There will be only one table: Post. It will be dead simple and contain the following
columns:
id(integer, primary key)title(string)body(text)created_at(datetime)updated_at(datetime)
Running
$ rails g model Post title:string body:text
$ rake db:migrate
will create an appropriate migration and then apply it to the database.
The next step is to produce some test data. The easiest way to do this is to use seeds.rb.
seeds.rb
50.times { |i| Post.create(title: "Post #{i}", body: BetterLorem.p(5, false, false)) }This creates 50 posts with the body generated by BetterLorem. Each set of generated content consists of 5 paragraphs. The last two arguments tell BetterLorem to wrap the text in a p tag and include a trailing period.
Running
$ rake db:seedwill populate our database with some test posts. Awesome!
The last thing is to create a PostsController with index and show methods, along with the corresponding views (index.html.erb and show.html.erb). Also, do not forget to set up the routes:
routes.rb
resources :posts, only: [:index, :show]
root to: 'posts#index'
Finally, if you’re using Rails 3, be sure to delete the public/index.html file.
The Controller
We are ready to move to the fun part. At first, let’s display some paginated posts with a truncated body. For this, we are going to use will_paginate – a simple yet convenient gem by Mislav Marohnić that works with Ruby on Rails, Sinatra, Merb, DataMapper and Sequel.
There is an alternative to this solution – kaminari by Akira Matsuda that is more powerful and more sophisticated. You can also give it a try. Basically, it doesn’t matter which gem you use.
In our controller:
posts_controller.rb
@posts = Post.paginate(page: params[:page], per_page: 15).order('created_at DESC')The call to the paginate method accepts a page option telling it which GET parameter to use to fetch the required page number. The per_page option specifies how many records should be displayed per page. The per_page option can be specified for the whole model or for the whole project like this:
post.rb
class Post
  self.per_page = 10
end
will_paginate.rb (in an initializer)
WillPaginate.per_page = 10The paginate method returns a an ActiveRecord::Relation so we can chain on a call to the order method.
The View
index.html.erb
<div class="page-header">
  <h1>My posts</h1>
</div>
<div id="my-posts">
  <%= render @posts %>
</div>
<div id="infinite-scrolling">
  <%= will_paginate %>
</div>
A page header is specified with the help of a Bootstrap class. The next block, #my-posts, contains our paginated posts. Using render @posts displays each post from the array using the _post.html.erb partial. The last block, #infinite-scrolling, houses the pagination controls.
Note that will_paginate is clever enough to understand that we want to paginate @posts. You can specify it explicitly like this: will_paginate @posts.
Here is our post partial.
_post.html.erb
<div>
  <h2><%= link_to post.title, post_path(post) %></h2>
  <small><em><%= post.timestamp %></em></small>
  <p><%= truncate(strip_tags(post.body), length: 600) %></p>
</div>
We wrap every post with a div, then display the title that acts as a link to read the whole post. The timestamp indicates when the post was created. This timestamp method is defined inside the model like this:
post.rb
def timestamp
  created_at.strftime('%d %B %Y %H:%M:%S')
end
Lastly we use the strip_tags method to remove all the tags from the post and truncate to strip all but the first 600 symbols. This ends our work with the views (I have omitted markup for the layout.html.erb and show.html.erb as it is not that important; you can check it in the GitHub repo).
Infinite Scrolling
We are ready to transform our pagination to infinite scrolling. jQuery will help us with this task.
Create a new file pagination.js.coffee inside the javascripts directory.
pagination.js.coffee
jQuery ->
  if $('#infinite-scrolling').size() > 0
    $(window).on 'scroll', ->
      more_posts_url = $('.pagination .next_page a').attr('href')
        if more_posts_url && $(window).scrollTop() > $(document).height() - $(window).height() - 60
            $('.pagination').html('<img src="/assets/ajax-loader.gif" alt="Loading..." title="Loading..." />')
            $.getScript more_posts_url
        return
      return
Here we are binding a scroll event to the window, only if the pagination is present on the page. When the user scrolls, fetch the link to the next page – visiting it will make Rails load the records from that page (we still need to make some modifications to the controller to get this working).
Then, check that the URL is present and the user scrolled to the bottom of the page minus 60px. This is when we want to load more posts. This value of 60px is arbitrary, and you’ll probably want to change it for your case.
If these conditions are true we are replacing our pagination with a “loading” GIF image that can be freely downloaded at ajaxload.info. The last thing to do is to actually perform an asynchronous request using the URL that we’ve fetched previously. $.getScript will load a JS script from the server and then execute it.
Note the two return instructions. By default, CoffeeScript will return the last expression (the same concept applies to Ruby) but here we do not want the jQuery function or event handler to return anything so specifying return means “return nothing”.
The PostController#index method should respond to both HTML and JavaScript. We are going to use respond_to to achieve that:
posts_controller.rb
@posts = Post.paginate(page: params[:page], per_page: 15).order('created_at DESC')
respond_to do |format|
  format.html
  format.js
end
The last thing to do is to create a view that will be rendered when responding with JS:
index.js.erb
$('#my-posts').append('<%= j render @posts %>');
<% if @posts.next_page %>
  $('.pagination').replaceWith('<%= j will_paginate @posts %>');
<% else %>
  $(window).off('scroll');
  $('.pagination').remove();
<% end %>
We are rendering more posts by appending them to the #my-posts block. After that, check to see if there are more pages left. If so, replace the current pagination block (which at this point contains “loading” image) with a new pagination. Otherwise, we remove the pagination controls and unbind the scroll event from window, as there is no point in listening to it anymore.
At this point, our infinite scrolling is ready. Even if a user has JavaScript disabled in the browser, it will be presented with the default pagination that has some styling applied thanks to the bootstrap-will_paginate gem.
One thing worth mentioning is that scrolling will fire loads of scroll events. If you want to delay handling of this event you can use an OpenSource library BindWithDelay written by Brian Grinstead. To use it, simply download it and include it in the project. Then, make the following modifications to the script:
pagination.js.coffee
$(window).bindWithDelay 'scroll', ->
  # the code
, 100
This will delay firing the event by 100ms. $(window).off('scroll'); inside the index.js.erb will still unbind the event, so no modifications is needed there.
This ends the first part of the article. In the next part we are going to talk about the “Load more” button and some problems that arise when using infinite scrolling. Thanks for reading and see you soon!
Frequently Asked Questions (FAQs) on Infinite Scrolling in Rails
How Can I Implement Infinite Scrolling in Rails Using Hotwire?
Hotwire is a new approach by Basecamp for building modern web applications without using much JavaScript. It’s a set of libraries that makes it easy to build server-rendered HTML applications. To implement infinite scrolling in Rails using Hotwire, you need to follow these steps:
1. Install Hotwire in your Rails application.
2. Create a new model and controller for your infinite scrolling feature.
3. In your controller, define an action that fetches the next set of records and renders them.
4. In your view, use the turbo-frame tag to wrap your records and the ‘Load more’ button.
5. Update your ‘Load more’ button to send a GET request to your new action using data-turbo-action="replace".
6. Finally, update your action to check if the request was made by Turbo, and if so, only render the new records and the updated ‘Load more’ button.
How Can I Use Stimulus.js for Infinite Scrolling in Rails?
Stimulus.js is a JavaScript framework that works well with Rails. It’s designed to read HTML-based data attributes to connect elements to specific JavaScript behaviors. Here’s a basic guide on how to use Stimulus.js for infinite scrolling in Rails:
1. Install Stimulus.js in your Rails application.
2. Create a new Stimulus controller for your infinite scrolling feature.
3. In your controller, define a method that fetches the next set of records and appends them to your list.
4. In your view, use data attributes to connect your list and your ‘Load more’ button to your new Stimulus controller.
5. Update your ‘Load more’ button to call your new method when clicked.
6. Finally, update your method to check if there are more records to load, and if not, hide the ‘Load more’ button.
How Can I Implement Infinite Scrolling in Rails Using Turbo?
Turbo is a part of Hotwire that provides a set of techniques for speeding up page changes and form submissions, without requiring much JavaScript. Here’s how you can implement infinite scrolling in Rails using Turbo:
1. Install Turbo in your Rails application.
2. Create a new model and controller for your infinite scrolling feature.
3. In your controller, define an action that fetches the next set of records and renders them.
4. In your view, use the turbo-frame tag to wrap your records and the ‘Load more’ button.
5. Update your ‘Load more’ button to send a GET request to your new action using data-turbo-action="replace".
6. Finally, update your action to check if the request was made by Turbo, and if so, only render the new records and the updated ‘Load more’ button.
How Can I Create an Infinite Scrolling Blog Roll in Rails?
Creating an infinite scrolling blog roll in Rails involves fetching and rendering posts in batches, and loading more posts when the user reaches the end of the page. Here’s a basic guide:
1. In your PostsController, define an action that fetches the next batch of posts and renders them.
2. In your view, use JavaScript to detect when the user has scrolled to the bottom of the page, and if so, send a GET request to your new action.
3. Update your action to check if there are more posts to load, and if not, return a status of 204 No Content.
4. Finally, in your JavaScript, append the new posts to your blog roll and update the scroll event listener if there are more posts to load.
How Can I Implement Infinite Scrolling in Rails Using JavaScript?
Implementing infinite scrolling in Rails using JavaScript involves detecting when the user has scrolled to the bottom of the page, and loading more content when this happens. Here’s a basic guide:
1. In your controller, define an action that fetches the next set of records and renders them.
2. In your view, use JavaScript to detect when the user has scrolled to the bottom of the page, and if so, send a GET request to your new action.
3. Update your action to check if there are more records to load, and if not, return a status of 204 No Content.
4. Finally, in your JavaScript, append the new records to your list and update the scroll event listener if there are more records to load.
Ilya Bodrov is personal IT teacher, a senior engineer working at Campaigner LLC, author and teaching assistant at Sitepoint and lecturer at Moscow Aviations Institute. His primary programming languages are Ruby (with Rails) and JavaScript. He enjoys coding, teaching people and learning new things. Ilya also has some Cisco and Microsoft certificates and was working as a tutor in an educational center for a couple of years. In his free time he tweets, writes posts for his website, participates in OpenSource projects, goes in for sports and plays music.