How to Create an Ecommerce Site with React


In this tutorial, we’ll look at how to build a very simple ecommerce web application with React. It won’t be the next Shopify, but hopefully it will serve as a fun way to demonstrate how well suited React is to building dynamic and engaging user interfaces.
The app will demonstrate a basic cart management system, as well as a simple method of handling user authentication. We’ll make use of React Context as an alternative to state management frameworks such as Redux or MobX, and we’ll create a fake back end using the json-server package.
Below is a screenshot of what we’ll be building:

The code for this application is available on GitHub.
Key Takeaways
- Utilize React Context for state management to simplify data flow across the application, avoiding the complexities of Redux or MobX.
- Implement user authentication and a fake backend using json-server and json-server-auth to simulate real-world application scenarios.
- Leverage React Router for navigation and Axios for making AJAX requests to handle data fetching and other HTTP requests effectively.
- Incorporate the Bulma CSS framework to streamline the styling process and ensure a responsive and attractive UI.
- Use jwt-decode to handle JWTs for secure authentication processes, ensuring that user credentials are managed safely.
- Manage application state and user sessions with local storage to maintain user data and cart contents persistently across sessions.
- Extend functionality by implementing additional features like product addition, cart management, and checkout processes, demonstrating a full-fledged ecommerce workflow.
Prerequisites
This tutorial assumes you have a basic knowledge of JavaScript and React. If you are new to React, you might like to check out our beginner’s guide.
To build the application, you’ll need a recent version of Node installed on your PC. If this isn’t the case, then head over to the Node home page and download the correct binaries for your system. Alternatively, you might consider using a version manager to install Node. We have a tutorial on using a version manager here.
Node comes bundled with npm, a package manager for JavaScript, with which we’re going to install some of the libraries we’ll be using. You can learn more about using npm here.
You can check that both are installed correctly by issuing the following commands from the command line:
node -v
> 12.18.4

npm -v
> 6.14.8
With that done, let’s start off by creating a new React project with the Create React App tool. You can either install this globally, or use npx, like so:
npx create-react-app e-commerce
When this has finished, change into the newly created directory:
cd e-commerce
In this application, we’ll use React Router to handle the routing. To install this module, run:
npm install react-router-dom
We’ll also need json-server and json-server-auth to create our fake back end to handle authentication:
npm install json-server json-server-auth
We’ll need axios for making Ajax requests to our fake back end.
npm install axios
And we’ll need jwt-decode so that we can parse the JWT that our back end will respond with:
npm install jwt-decode
Finally, we’ll use the Bulma CSS framework to style this application. To install this, run the following command:
npm install bulma
Getting Started
First, we need to add the stylesheet to our application. To achieve this, we’ll add an import statement to include this file in the index.js file in the src folder. This will apply the style sheet across all the components in the application:
import "bulma/css/bulma.css";
Context Setup
As previously mentioned, we’ll be using React Context throughout our app. This is a relatively new addition to React and provides a way to pass data through the component tree without having to pass props down manually at every level.
If you’d like a refresher on using context in a React application, check out our tutorial “How to Replace Redux with React Hooks and the Context API”.
In complex applications where the need for context is usually necessary, there can be multiple contexts, with each having its own data and methods relating to the set of components that requires the data and methods. For example, there can be a ProductContext for handling the components which use product-related data, and another ProfileContext for handling data related to authentication and user data. However, for the sake of keeping things as simple as possible, we’ll use just one context instance.
In order to create the context, we create a Context.js file and a withContext.js files in our app’s src directory:
cd src
touch Context.js withContext.js
Then add the following to Context.js:
import React from "react";
const Context = React.createContext({});
export default Context;
This creates the context and initializes the context data to an empty object. Next, we need to create a component wrapper, which we’ll use to wrap components that use the context data and methods:
// src/withContext.js

import React from "react";
import Context from "./Context";

const withContext = WrappedComponent => {
  const WithHOC = props => {
    return (
      <Context.Consumer>
        {context => <WrappedComponent {...props} context={context} />}
      </Context.Consumer>
    );
  };

  return WithHOC;
};

export default withContext;
This might look a little complicated, but essentially all it does is make a higher-order component, which appends our context to a wrapped component’s props.
Breaking it down a little, we can see that the withContext function takes a React component as its parameter. It then returns a function that takes the component’s props as a parameter. Within the returned function, we’re wrapping the component in our context, then assigning it the context as a prop: context={context}. The {...props} bit ensures that the component retains any props that were passed to it in the first place.
All of this means that we can follow this pattern throughout our app:
import React from "react";
import withContext from "../withContext";

const Cart = props => {
  // We can now access Context as props.context
};

export default withContext(Cart);
Scaffolding Out the App
Now, let’s create a skeleton version of the components we’ll need for our app’s basic navigation to function properly. These are AddProducts, Cart, Login and ProductList, and we’re going to place them in a components directory inside of the src directory:
mkdir components
cd components
touch AddProduct.js Cart.js Login.js ProductList.js
In AddProduct.js add:
import React from "react";

export default function AddProduct() {
  return <>AddProduct</>
}
In Cart.js add:
import React from "react";

export default function Cart() {
  return <>Cart</>
}
In Login.js add:
import React from "react";

export default function Login() {
  return <>Login</>
}
And finally, in ProductList.js add:
import React from "react";

export default function ProductList() {
  return <>ProductList</>
}
Next, we need to set up up the App.js file. Here, we’ll be handling the application’s navigation as well as defining its data and methods to manage it.
First, let’s set up up the navigation. Change App.js as follows:
import React, { Component } from "react";
import { Switch, Route, Link, BrowserRouter as Router } from "react-router-dom";

import AddProduct from './components/AddProduct';
import Cart from './components/Cart';
import Login from './components/Login';
import ProductList from './components/ProductList';

import Context from "./Context";

export default class App extends Component {
  constructor(props) {
    super(props);
    this.state = {
      user: null,
      cart: {},
      products: []
    };
    this.routerRef = React.createRef();
  }

  render() {
    return (
      <Context.Provider
        value={{
          ...this.state,
          removeFromCart: this.removeFromCart,
          addToCart: this.addToCart,
          login: this.login,
          addProduct: this.addProduct,
          clearCart: this.clearCart,
          checkout: this.checkout
        }}
      >
        <Router ref={this.routerRef}>
        <div className="App">
          <nav
            className="navbar container"
            role="navigation"
            aria-label="main navigation"
          >
            <div className="navbar-brand">
              <b className="navbar-item is-size-4 ">ecommerce</b>
              <label
                role="button"
                class="navbar-burger burger"
                aria-label="menu"
                aria-expanded="false"
                data-target="navbarBasicExample"
                onClick={e => {
                  e.preventDefault();
                  this.setState({ showMenu: !this.state.showMenu });
                }}
              >
                <span aria-hidden="true"></span>
                <span aria-hidden="true"></span>
                <span aria-hidden="true"></span>
              </label>
            </div>
              <div className={`navbar-menu ${
                  this.state.showMenu ? "is-active" : ""
                }`}>
                <Link to="/products" className="navbar-item">
                  Products
                </Link>
                {this.state.user && this.state.user.accessLevel < 1 && (
                  <Link to="/add-product" className="navbar-item">
                    Add Product
                  </Link>
                )}
                <Link to="/cart" className="navbar-item">
                  Cart
                  <span
                    className="tag is-primary"
                    style={{ marginLeft: "5px" }}
                  >
                    { Object.keys(this.state.cart).length }
                  </span>
                </Link>
                {!this.state.user ? (
                  <Link to="/login" className="navbar-item">
                    Login
                  </Link>
                ) : (
                  <Link to="/" onClick={this.logout} className="navbar-item">
                    Logout
                  </Link>
                )}
              </div>
            </nav>
            <Switch>
              <Route exact path="/" component={ProductList} />
              <Route exact path="/login" component={Login} />
              <Route exact path="/cart" component={Cart} />
              <Route exact path="/add-product" component={AddProduct} />
              <Route exact path="/products" component={ProductList} />
            </Switch>
          </div>
        </Router>
      </Context.Provider>
    );
  }
}
Our App component will be responsible for initializing the application data and will also define methods to manipulate this data. First, we define the context data and methods using the Context.Provider component. The data and methods are passed as a property, value, on the Provider component to replace the object given on the context creation. (Note that the value can be of any data type.) We pass the state value and some methods, which we’ll define soon.
Next, we build our application navigation. To achieve this, we need to wrap our app with a Router component, which can either be BrowserRouter (like in our case) or HashRouter. Next, we define our application’s routes using the Switch and Route components. We also create the app’s navigation menu, with each link using the Link component provided in the React Router module. We also add a reference, routerRef, to the Router component to enable us to access the router from within the App component.
To test this out, head to the project root (for example, /files/jim/Desktop/e-commerce) and start the Create React App dev server using npm start. Once it has booted, your default browser should open and you should see the skeleton of our application. Be sure to click around and make sure all of the navigation works.
Spinning up a Fake Back End
In the next step, we’ll set up a fake back end to store our products and handle user authentication. As mentioned, for this we’ll use json-server to create a fake REST API and json-server-auth to add a simple JWT-based authentication flow to our app.
The way json-server works is that it reads in a JSON file from the file system and uses that to create an in-memory database with the corresponding endpoints to interact with it. Let’s create the JSON file now. In the route of your project, create a new backend folder and in that folder create a new db.json file:
mkdir backend
cd backend
touch db.json
Open up db.json and add the following content:
{
  "users": [
    {
      "email": "regular@example.com",
      "password": "$2a$10$2myKMolZJoH.q.cyXClQXufY1Mc7ETKdSaQQCC6Fgtbe0DCXRBELG",
      "id": 1
    },
    {
      "email": "admin@example.com",
      "password": "$2a$10$w8qB40MdYkMs3dgGGf0Pu.xxVOOzWdZ5/Nrkleo3Gqc88PF/OQhOG",
      "id": 2
    }
  ],
  "products": [
    {
      "id": "hdmdu0t80yjkfqselfc",
      "name": "shoes",
      "stock": 10,
      "price": 399.99,
      "shortDesc": "Nulla facilisi. Curabitur at lacus ac velit ornare lobortis.",
      "description": "Cras sagittis. Praesent nec nisl a purus blandit viverra. Ut leo. Donec quam felis, ultricies nec, pellentesque eu, pretium quis, sem. Fusce a quam."
    },
    {
      "id": "3dc7fiyzlfmkfqseqam",
      "name": "bags",
      "stock": 20,
      "price": 299.99,
      "shortDesc": "Nulla facilisi. Curabitur at lacus ac velit ornare lobortis.",
      "description": "Cras sagittis. Praesent nec nisl a purus blandit viverra. Ut leo. Donec quam felis, ultricies nec, pellentesque eu, pretium quis, sem. Fusce a quam."
    },
    {
      "id": "aoe8wvdxvrkfqsew67",
      "name": "shirts",
      "stock": 15,
      "price": 149.99,
      "shortDesc": "Nulla facilisi. Curabitur at lacus ac velit ornare lobortis.",
      "description": "Cras sagittis. Praesent nec nisl a purus blandit viverra. Ut leo. Donec quam felis, ultricies nec, pellentesque eu, pretium quis, sem. Fusce a quam."
    },
    {
      "id": "bmfrurdkswtkfqsf15j",
      "name": "shorts",
      "stock": 5,
      "price": 109.99,
      "shortDesc": "Nulla facilisi. Curabitur at lacus ac velit ornare lobortis.",
      "description": "Cras sagittis. Praesent nec nisl a purus blandit viverra. Ut leo. Donec quam felis, ultricies nec, pellentesque eu, pretium quis, sem. Fusce a quam."
    }
  ]
}
We’re creating two resources here — users and products. Looking at the users resource, you’ll notice that each user has an ID, an email address and a password. The password appears as a jumble of letters and numbers, as it’s encrypted using bcryptjs. It’s important that you don’t store passwords in plain text anywhere in your application.
That said, the plain text version of each password is simply “password” — without the quotes.
Now start up the server by issuing the following command from the root of the project:
./node_modules/.bin/json-server-auth ./backend/db.json --port 3001
This will start json-server on http://localhost:3001. Thanks to the json-server-auth middleware, the users resource will also give us a /login endpoint that we can use to simulate logging in to the app.
Let’s try it out using https://hoppscotch.io. Open that link in a new window, then change the method to POST and the URL to http://localhost:3001/login. Next, make sure the Raw input switch is set to on and enter the following as the Raw Request Body:
{
  "email": "regular@example.com",
  "password": "password"
}
Click Send and you should receive a response (further down the page) that looks like this:
{
  "accessToken": "eyJhbGciOiJIUzI1NiIsInR5cCI6IkpXVCJ9.eyJlbWFpbCI6InJlZ3VsYXJAZXhhbXBsZS5jb20iLCJpYXQiOjE2MDE1Mzk3NzEsImV4cCI6MTYwMTU0MzM3MSwic3ViIjoiMSJ9.RAFUYXxG2Z8W8zv5-4OHun8CmCKqi7IYqYAc4R7STBM"
}
That is a JSON Web Token, which is valid for an hour. In a normal app with a proper back end, you’d save this in the client, then send it to the server whenever you requested a protected resource. The server would validate the token it received and if everything checked out, it would respond with the data you requested.
This point is worth repeating. You need to validate any request for a protected resource on your server. This is because the code that runs in the client can potentially be reverse engineered and tampered with.
Here’s a link to the finished request on Hoppscotch. You just need to press Send.
If you’d like to find out more about using JSON Web Tokens with Node.js, please consult our tutorial.
Implementing Authentication in the React App
For this section we’re going to need the axios and jwt_decode packages in our app. Add the imports to the top of the App.js file:
import axios from 'axios';
import jwt_decode from 'jwt-decode';
If you take a look at the top of the class, you’ll see that we’re already declaring a user in state. This is initially set to null.
Next, we need to make sure the user is loaded when the application starts up by setting the user on component mount, as shown below. Add this method to the App component, which loads the last user session from the local storage to the state if it exists:
componentDidMount() {
  let user = localStorage.getItem("user");
  user = user ? JSON.parse(user) : null;
  this.setState({ user });
}
Next, we define the login and logout methods, which are attached to the context:
login = async (email, password) => {
  const res = await axios.post(
    'http://localhost:3001/login',
    { email, password },
  ).catch((res) => {
    return { status: 401, message: 'Unauthorized' }
  })

  if(res.status === 200) {
    const { email } = jwt_decode(res.data.accessToken)
    const user = {
      email,
      token: res.data.accessToken,
      accessLevel: email === 'admin@example.com' ? 0 : 1
    }

    this.setState({ user });
    localStorage.setItem("user", JSON.stringify(user));
    return true;
  } else {
    return false;
  }
}

logout = e => {
  e.preventDefault();
  this.setState({ user: null });
  localStorage.removeItem("user");
};
The login method makes an Ajax request to our /login endpoint, passing it whatever the user entered into the login form (which we’ll make in a minute). If the response from the endpoint has a 200 status code, we can assume the user’s credentials were correct. We then decode the token sent in the server’s response to obtain the user’s email, before saving the email, the token and the user’s access level in state. If everything went well, the method returns true, otherwise false. We can use this value in our Login component to decide what to display.
Note that the check for the access level is a very superficial one here and that it wouldn’t be difficult for a logged-in, regular user user to make themselves an admin. However, assuming requests for protected resources are validated on the server before a response is sent, the user wouldn’t be able to do much more than see an extra button. Server validation would ensure that they wouldn’t be able to get at any protected data.
If you wanted to implement a more robust solution, you could make a second request to get the current user’s permissions when a user logs in, or whenever the app loads. This is unfortunately outside the scope of this tutorial.
The logout method clears the user from both state and local storage.
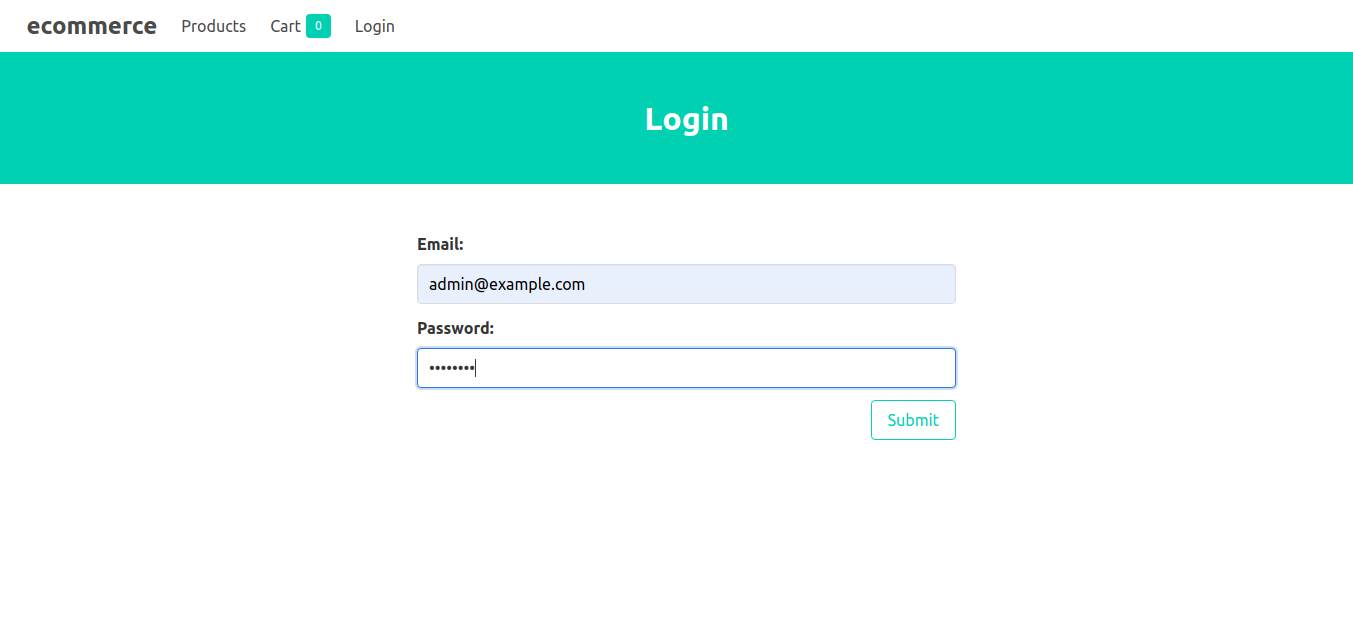
Creating the Login Component
Next, we can deal with the Login component. This component makes use of the context data. For it to have access to these data and methods, it has to be wrapped using the withContext method we created earlier.
Alter src/Login.js like so:
import React, { Component } from "react";
import { Redirect } from "react-router-dom";
import withContext from "../withContext";

class Login extends Component {
  constructor(props) {
    super(props);
    this.state = {
      username: "",
      password: ""
    };
  }

  handleChange = e => this.setState({ [e.target.name]: e.target.value, error: "" });

  login = (e) => {
    e.preventDefault();

    const { username, password } = this.state;
    if (!username || !password) {
      return this.setState({ error: "Fill all fields!" });
    }
    this.props.context.login(username, password)
      .then((loggedIn) => {
        if (!loggedIn) {
          this.setState({ error: "Invalid Credentails" });
        }
      })
  };

  render() {
    return !this.props.context.user ? (
      <>
        <div className="hero is-primary ">
          <div className="hero-body container">
            <h4 className="title">Login</h4>
          </div>
        </div>
        <br />
        <br />
        <form onSubmit={this.login}>
          <div className="columns is-mobile is-centered">
            <div className="column is-one-third">
              <div className="field">
                <label className="label">Email: </label>
                <input
                  className="input"
                  type="email"
                  name="username"
                  onChange={this.handleChange}
                />
              </div>
              <div className="field">
                <label className="label">Password: </label>
                <input
                  className="input"
                  type="password"
                  name="password"
                  onChange={this.handleChange}
                />
              </div>
              {this.state.error && (
                <div className="has-text-danger">{this.state.error}</div>
              )}
              <div className="field is-clearfix">
                <button
                  className="button is-primary is-outlined is-pulled-right"
                >
                  Submit
                </button>
              </div>
            </div>
          </div>
        </form>
      </>
    ) : (
      <Redirect to="/products" />
    );
  }
}

export default withContext(Login);
This component renders a form with two inputs to collect the user login credentials. On submission, the component calls the login method, which is passed through the context. This module also makes sure to redirect to the products page if the user is already logged in.
If you now go to http://localhost:3000/login, you should be able to log in with either of the above mentioned name/password combos.
Creating the Product Views
Now we need to fetch some products from our back end to display in our app. We can again do this on the component mount in the App component, as we did for the logged-in user:
async componentDidMount() {
  let user = localStorage.getItem("user");
  const products = await axios.get('http://localhost:3001/products');
  user = user ? JSON.parse(user) : null;
  this.setState({ user,  products: products.data });
}
In the code snippet above, we’ve marked the componentDidMount lifecycle hook as being async, which means we can make a request to our /products endpoint, then wait for the data to be returned before sticking it into state.
Next, we can create the products page, which will also act as the app landing page. This page will make use of two components. The first is ProductList.js, which will show the page body, and the other is the ProductItem.js component for each product in the list.
Alter the Productlist component, as shown below:
import React from "react";
import ProductItem from "./ProductItem";
import withContext from "../withContext";

const ProductList = props => {
  const { products } = props.context;

  return (
    <>
      <div className="hero is-primary">
        <div className="hero-body container">
          <h4 className="title">Our Products</h4>
        </div>
      </div>
      <br />
      <div className="container">
        <div className="column columns is-multiline">
          {products && products.length ? (
            products.map((product, index) => (
              <ProductItem
                product={product}
                key={index}
                addToCart={props.context.addToCart}
              />
            ))
          ) : (
            <div className="column">
              <span className="title has-text-grey-light">
                No products found!
              </span>
            </div>
          )}
        </div>
      </div>
    </>
  );
};

export default withContext(ProductList);
Since the list is dependent on the context for data, we wrap it with the withContext function as well. This component renders the products using the ProductItem component, which we’re yet to create. It also passes an addToCart method from the context (which we’re also yet to define) to the ProductItem. This eliminates the need to work with context directly in the ProductItem component.
Now let’s create the ProductItem component:
cd src/components
touch ProductItem.js
And add the following content:
import React from "react";

const ProductItem = props => {
  const { product } = props;
  return (
    <div className=" column is-half">
      <div className="box">
        <div className="media">
          <div className="media-left">
            <figure className="image is-64x64">
              <img
                src="https://bulma.io/images/placeholders/128x128.png"
                alt={product.shortDesc}
              />
            </figure>
          </div>
          <div className="media-content">
            <b style={{ textTransform: "capitalize" }}>
              {product.name}{" "}
              <span className="tag is-primary">${product.price}</span>
            </b>
            <div>{product.shortDesc}</div>
            {product.stock > 0 ? (
              <small>{product.stock + " Available"}</small>
            ) : (
              <small className="has-text-danger">Out Of Stock</small>
            )}
            <div className="is-clearfix">
              <button
                className="button is-small is-outlined is-primary   is-pulled-right"
                onClick={() =>
                  props.addToCart({
                    id: product.name,
                    product,
                    amount: 1
                  })
                }
              >
                Add to Cart
              </button>
            </div>
          </div>
        </div>
      </div>
    </div>
  );
};

export default ProductItem;
This element displays the product on a card and also provides an action button to add the product to the user’s cart.
Adding a Product
Now that we have something to display in our store, let’s create an interface for admin users to add new products. First, let’s define the method to add the product. We’ll do that in the App component, as shown below:
addProduct = (product, callback) => {
  let products = this.state.products.slice();
  products.push(product);
  this.setState({ products }, () => callback && callback());
};
This method receives the product object and appends it to the array of products, then saves it to the app state. It also receives a callback function to execute on successfully adding the product.
Now we can proceed to fill out the AddProduct component:
import React, { Component } from "react";
import withContext from "../withContext";
import { Redirect } from "react-router-dom";
import axios from 'axios';

const initState = {
  name: "",
  price: "",
  stock: "",
  shortDesc: "",
  description: ""
};

class AddProduct extends Component {
  constructor(props) {
    super(props);
    this.state = initState;
  }

  save = async (e) => {
    e.preventDefault();
    const { name, price, stock, shortDesc, description } = this.state;

    if (name && price) {
      const id = Math.random().toString(36).substring(2) + Date.now().toString(36);

      await axios.post(
        'http://localhost:3001/products',
        { id, name, price, stock, shortDesc, description },
      )

      this.props.context.addProduct(
        {
          name,
          price,
          shortDesc,
          description,
          stock: stock || 0
        },
        () => this.setState(initState)
      );
      this.setState(
        { flash: { status: 'is-success', msg: 'Product created successfully' }}
      );

    } else {
      this.setState(
        { flash: { status: 'is-danger', msg: 'Please enter name and price' }}
      );
    }
  };

  handleChange = e => this.setState({ [e.target.name]: e.target.value, error: "" });

  render() {
    const { name, price, stock, shortDesc, description } = this.state;
    const { user } = this.props.context;

    return !(user && user.accessLevel < 1) ? (
      <Redirect to="/" />
    ) : (
      <>
        <div className="hero is-primary ">
          <div className="hero-body container">
            <h4 className="title">Add Product</h4>
          </div>
        </div>
        <br />
        <br />
        <form onSubmit={this.save}>
          <div className="columns is-mobile is-centered">
            <div className="column is-one-third">
              <div className="field">
                <label className="label">Product Name: </label>
                <input
                  className="input"
                  type="text"
                  name="name"
                  value={name}
                  onChange={this.handleChange}
                  required
                />
              </div>
              <div className="field">
                <label className="label">Price: </label>
                <input
                  className="input"
                  type="number"
                  name="price"
                  value={price}
                  onChange={this.handleChange}
                  required
                />
              </div>
              <div className="field">
                <label className="label">Available in Stock: </label>
                <input
                  className="input"
                  type="number"
                  name="stock"
                  value={stock}
                  onChange={this.handleChange}
                />
              </div>
              <div className="field">
                <label className="label">Short Description: </label>
                <input
                  className="input"
                  type="text"
                  name="shortDesc"
                  value={shortDesc}
                  onChange={this.handleChange}
                />
              </div>
              <div className="field">
                <label className="label">Description: </label>
                <textarea
                  className="textarea"
                  type="text"
                  rows="2"
                  style={{ resize: "none" }}
                  name="description"
                  value={description}
                  onChange={this.handleChange}
                />
              </div>
              {this.state.flash && (
                <div className={`notification ${this.state.flash.status}`}>
                  {this.state.flash.msg}
                </div>
              )}
              <div className="field is-clearfix">
                <button
                  className="button is-primary is-outlined is-pulled-right"
                  type="submit"
                  onClick={this.save}
                >
                  Submit
                </button>
              </div>
            </div>
          </div>
        </form>
      </>
    );
  }
}

export default withContext(AddProduct);
This component does a number of things. It checks if there is a current user stored in context and if that user has an accessLevel of less than 1 (that is, if they’re an admin). If so, it renders the form to add a new product. If not, it redirects to the main page of the app.
Once again, please be aware that this check can easily be bypassed on the client. In a real-world app, you’d perform an extra check on the server to ensure the user is permitted to create new products.
Assuming that the form is rendered, there are several fields for the user to fill out (of which name and price are compulsory). Whatever the user enters is tracked in the component’s state. When the form is submitted, the component’s save method is called, which makes an Ajax request to our back end to create a new product. We’re also creating a unique ID (which json-server is expecting) and passing that along, too. The code for this came from a thread on Stack Overflow.
Finally, we call the addProduct method which we received via context, to add the newly created product to our global state and reset the form. Assuming all of this was successful, we set a flash property in state, which will then update the interface to inform the user that the product was created.
If either the name or price fields are missing, we set the flash property to inform the user of this.
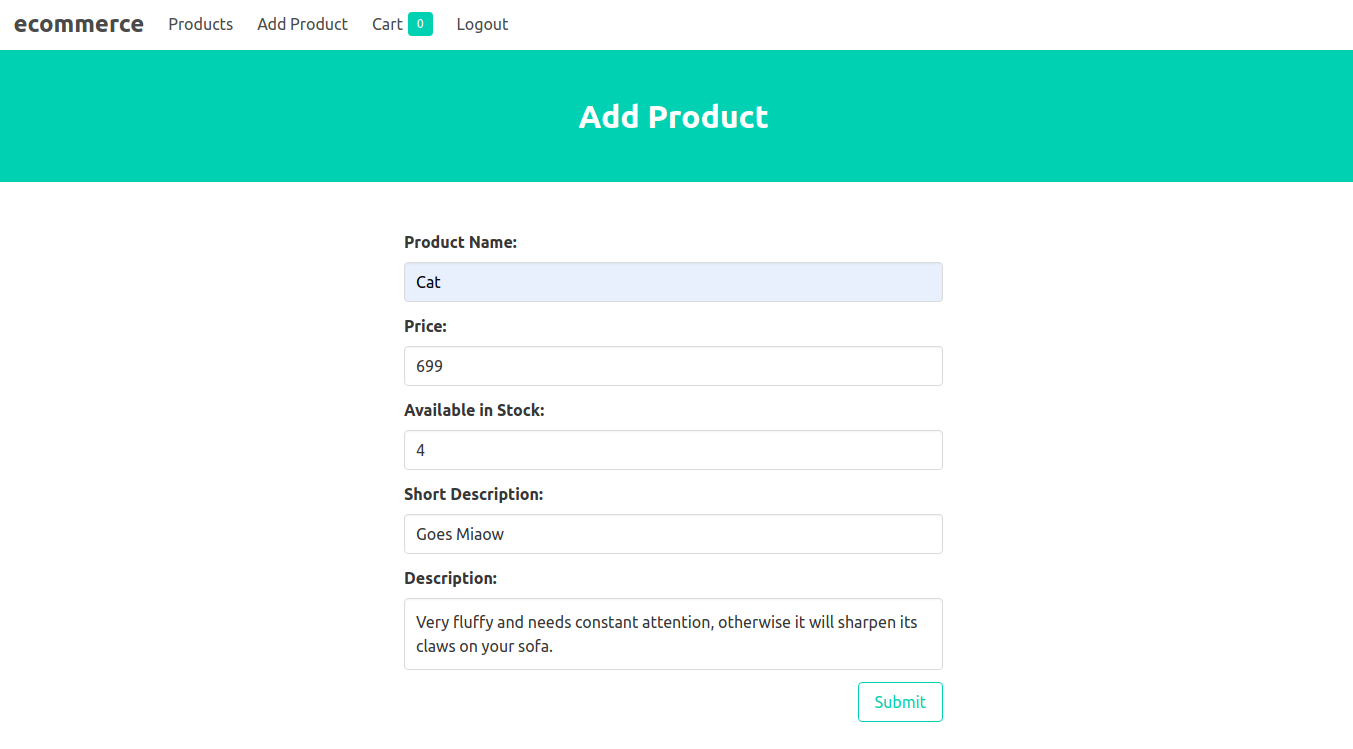
Take a second to check your progress. Log in as admin (email: admin@example.com, password: password) and ensure that you see an Add Product button in the navigation. Navigate to this page, then use the form to create a couple of new products. Finally, head back to the main page and make sure the new products are showing up in the product list.
Adding Cart Management
Now that we can add and display products, the final thing to do is implement our cart management. We’ve already initialized our cart as an empty object in App.js, but we also need to make sure that we load the existing cart from the local storage on component load.
Update the componentDidMount method in App.js as follows:
async componentDidMount() {
  let user = localStorage.getItem("user");
  let cart = localStorage.getItem("cart");

  const products = await axios.get('http://localhost:3001/products');
  user = user ? JSON.parse(user) : null;
  cart = cart? JSON.parse(cart) : {};

  this.setState({ user,  products: products.data, cart });
}
Next, we need to define the cart functions (also in App.js). First, we’ll create the addToCart method:
addToCart = cartItem => {
  let cart = this.state.cart;
  if (cart[cartItem.id]) {
    cart[cartItem.id].amount += cartItem.amount;
  } else {
    cart[cartItem.id] = cartItem;
  }
  if (cart[cartItem.id].amount > cart[cartItem.id].product.stock) {
    cart[cartItem.id].amount = cart[cartItem.id].product.stock;
  }
  localStorage.setItem("cart", JSON.stringify(cart));
  this.setState({ cart });
};
This method appends the item using the item ID as key for the cart object. We’re using an object rather than an array for the cart to enable easy data retrieval. This method checks the cart object to see if an item with that key exists. If it does, it increases the amount; otherwise it creates a new entry. The second if statement ensures that the user can’t add more items than are actually available. The method then saves the cart to state, which is passed to other parts of the application via the context. Finally, the method saves the updated cart to local storage for persistence.
Next, we’ll define the removeFromCart method to remove a specific product from the user cart and clearCart to remove all products from the user cart:
removeFromCart = cartItemId => {
  let cart = this.state.cart;
  delete cart[cartItemId];
  localStorage.setItem("cart", JSON.stringify(cart));
  this.setState({ cart });
};

clearCart = () => {
  let cart = {};
  localStorage.removeItem("cart");
  this.setState({ cart });
};
The removeCart method removes a product using the provided product key. It then updates the app state and local storage accordingly. The clearCart method resets the cart to an empty object in state and removes the cart entry on local storage.
Now, we can proceed to make the cart user interface. Similar to the list of products, we achieve this using two elements: the first, Cart.js, which renders the page layout, and a list of cart items using the second component, CartItem.js:
// ./src/components/Cart.js

import React from "react";
import withContext from "../withContext";
import CartItem from "./CartItem";

const Cart = props => {
  const { cart } = props.context;
  const cartKeys = Object.keys(cart || {});
  return (
    <>
      <div className="hero is-primary">
        <div className="hero-body container">
          <h4 className="title">My Cart</h4>
        </div>
      </div>
      <br />
      <div className="container">
        {cartKeys.length ? (
          <div className="column columns is-multiline">
            {cartKeys.map(key => (
              <CartItem
                cartKey={key}
                key={key}
                cartItem={cart[key]}
                removeFromCart={props.context.removeFromCart}
              />
            ))}
            <div className="column is-12 is-clearfix">
              <br />
              <div className="is-pulled-right">
                <button
                  onClick={props.context.clearCart}
                  className="button is-warning "
                >
                  Clear cart
                </button>{" "}
                <button
                  className="button is-success"
                  onClick={props.context.checkout}
                >
                  Checkout
                </button>
              </div>
            </div>
          </div>
        ) : (
          <div className="column">
            <div className="title has-text-grey-light">No item in cart!</div>
          </div>
        )}
      </div>
    </>
  );
};

export default withContext(Cart);
The Cart component also passes a method from the context to the CartItem. The Cart component loops through an array of the context cart object values and returns a CartItem for each. It also provides a button to clear the user cart.
Next is the CartItem component, which is very much like the ProductItem component but for a few subtle changes:
Let’s create the component first:
cd src/components
touch CartItem.js
Then add the following content:
import React from "react";

const CartItem = props => {
  const { cartItem, cartKey } = props;

  const { product, amount } = cartItem;
  return (
    <div className=" column is-half">
      <div className="box">
        <div className="media">
          <div className="media-left">
            <figure className="image is-64x64">
              <img
                src="https://bulma.io/images/placeholders/128x128.png"
                alt={product.shortDesc}
              />
            </figure>
          </div>
          <div className="media-content">
            <b style={{ textTransform: "capitalize" }}>
              {product.name}{" "}
              <span className="tag is-primary">${product.price}</span>
            </b>
            <div>{product.shortDesc}</div>
            <small>{`${amount} in cart`}</small>
          </div>
          <div
            className="media-right"
            onClick={() => props.removeFromCart(cartKey)}
          >
            <span className="delete is-large"></span>
          </div>
        </div>
      </div>
    </div>
  );
};

export default CartItem;
This component shows the product info and the number of items selected. It also provides a button to remove the product from the cart.
Finally, we need to add the checkout method in the App component:
checkout = () => {
  if (!this.state.user) {
    this.routerRef.current.history.push("/login");
    return;
  }

  const cart = this.state.cart;

  const products = this.state.products.map(p => {
    if (cart[p.name]) {
      p.stock = p.stock - cart[p.name].amount;

      axios.put(
        `http://localhost:3001/products/${p.id}`,
        { ...p },
      )
    }
    return p;
  });

  this.setState({ products });
  this.clearCart();
};
This method checks to see that a user is logged in before it proceeds. If the user isn’t logged in, it redirects the user to the login page using the router reference we attached to the Router component earlier.
Typically, in a regular ecommerce site, this is where the billing process would take place, but for our application, we’ll just assume the user has paid and therefore remove their purchased items from the list of available items. We’ll also use axios to update the stock level in our back end.
With this, we’ve succeeded in completing our basic shopping cart.
Conclusion
In the course of this tutorial, we’ve used React to scaffold out the interface of a basic shopping cart. We used context to move data and methods between multiple components and json-server to persist the data. We also used json-server auth to implement a basic authentication flow.
This application is by no means a finished product and could be improved upon in many ways. For example, the next step would be to add a proper back end with a database and to carry out authentication checks on the server. You could also give admin users the ability to edit and delete products.
I hope you enjoyed this tutorial. Please don’t forget that the code for this application is available on GitHub.
Want to dive into more React? Check out React Design Patterns and Best Practices and plenty of other React resources on SitePoint Premium.
Frequently Asked Questions (FAQs) about Creating an Ecommerce Site with React
What are the prerequisites for creating an ecommerce site with React?
Before you start creating an ecommerce site with React, you should have a basic understanding of JavaScript, HTML, and CSS. Knowledge of ES6 features like arrow functions, classes, and modules is also beneficial. Familiarity with the basics of React such as components, state, and props is essential. Additionally, understanding of Node.js and Express.js can be helpful as they are often used in conjunction with React for backend development.
How can I manage state in my React ecommerce application?
State management is a crucial aspect of any React application. For simple applications, React’s built-in state management capabilities might be sufficient. However, for complex ecommerce applications, you might need to use libraries like Redux or MobX. These libraries provide a more structured way to manage state, making it easier to track changes and debug your application.
How can I handle user authentication in my React ecommerce site?
User authentication is a critical part of any ecommerce site. You can handle user authentication in your React application using various methods. One common approach is to use JSON Web Tokens (JWT). You can also use authentication libraries like Passport.js, or services like Firebase Authentication or Auth0.
How can I integrate a payment gateway into my React ecommerce site?
Integrating a payment gateway into your React ecommerce site can be done using various libraries and services. Stripe and PayPal are two popular choices that provide React libraries. These services handle all the complexities of payment processing, including security and compliance, making it easier for you to focus on your application’s functionality.
How can I ensure the security of my React ecommerce site?
Security is a paramount concern for any ecommerce site. In a React application, you can ensure security by following best practices like sanitizing user input to prevent XSS attacks, using HTTPS for secure data transmission, and storing sensitive information securely. Additionally, using security libraries and services can help enhance the security of your application.
How can I optimize the performance of my React ecommerce site?
Performance optimization is crucial for providing a smooth user experience. In React, you can optimize performance by using techniques like lazy loading, code splitting, and memoization. Additionally, using tools like React Profiler can help you identify performance bottlenecks in your application.
How can I handle errors in my React ecommerce application?
Error handling is an important part of any application. In React, you can handle errors using error boundaries, a feature that allows you to catch JavaScript errors anywhere in your component tree, log them, and display a fallback UI.
How can I test my React ecommerce application?
Testing is a crucial part of the development process. In React, you can use testing libraries like Jest and React Testing Library to write unit and integration tests. For end-to-end testing, tools like Cypress can be used.
How can I deploy my React ecommerce site?
There are various platforms where you can deploy your React ecommerce site. Some popular choices include Vercel, Netlify, and AWS Amplify. These platforms provide features like continuous deployment, serverless functions, and scalable hosting.
How can I keep my React ecommerce site updated with the latest React features?
Keeping your React ecommerce site updated with the latest React features can be done by regularly checking the official React blog and documentation. Additionally, using tools like Dependabot can help you keep your dependencies up to date.
Deven is an entrepreneur, and full-stack developer, constantly learning and experiencing new things. He currently manages CodeSource.io & Dunebook.com and actively working on projects like Netflare