Automate Recurring Tasks with Grunt.js

Key Takeaways
- Grunt.js is a command-line tool that automates repetitive tasks like CSS preprocessing, minifying code for production, image optimization, and more, significantly saving developers’ time and reducing errors.
- To use Grunt, one needs to install Node.js and Grunt’s Command Line Interface tools on their computer, followed by adding package.json and Gruntfile.js to the project. The package.json file lists the packages for the project while the Gruntfile configures the tasks to run.
- The matchdep module simplifies the process of installing new plugins for projects, eliminating the need to manually add a line to the Gruntfile for each new task, thereby saving setup time.
- Grunt can be used in conjunction with other tools like Bower and Yeoman, and can be integrated with continuous integration systems like Jenkins, Travis CI, and CircleCI, enhancing the efficiency of the workflow.
I’m a recent convert to using Grunt.js to run tasks that are an essential part of my development workflow. Grunt is a command-line tool that lets you run a heap of tasks in one command, all customized to your liking and tailored to your project’s needs. It helps me automate repetitive jobs like CSS preprocessing, or minifying code for a production environment.
After moving to Grunt in a team environment at Happy Cog, it’s helped us solve new problems that we didn’t even foresee using it for, like image optimization, database syncing, and WordPress theme management. Read on to learn how to automate front-end Sass and JavaScript tasks with Grunt, and how to get your project using it in no time.
Pick a Task
Grunt’s community of developers mean there’s a plugin for most any task you’d like to perform and automate. Yet I’ve found that the easiest way to get started with Grunt is to pick one or two essential processes you want to automate, and get those running on your project. As a front end developer, my most crucial tasks are Sass compilation and JavaScript concatenation. This article assumes you have Sass 3.3 installed. To create a practice directory, download or clone my grunt-js-base project to your machine and check out index.html in the browser.
As it happens, the Grunt.js plugin repository lists two officially maintained plugins that will serve these purposes: Uglify for JS minification (and more), and grunt-contrib-sass.
Install Node.js and Grunt’s Command Line Interface
Before we can install these plugins, we need Node.js on our computer. Luckily, it’s an easy install for Windows or Mac OS. Just go to nodejs.org and click the big green INSTALL button to download.
Once you’ve installed Node.js, you need Grunt’s Command Line Interface tools on your computer. From a terminal window, run npm install -g grunt-cli. If you get a permissions error, I suggest reading this article on npm. This article, written by Isaac Schlueter, will teach you how to install modules without using sudo.
Add package.json to Your Project
You need two files for every project that uses Grunt – package.json and Gruntfile.js. Start by adding package.json to your project folder, in the root. You can use the basic contents from the Grunt.js setup instructions, substituting with your project’s info. With time you’ll evolve your own starter kit for projects. Here’s my default Grunt project‘s package.json:
{
  "name": "grunt-js-base",
  "version": "0.1.0",
  "devDependencies": {
    "grunt": "~0.4.2",
    "grunt-contrib-uglify": "~0.2.2",
    "matchdep": "*"
  },
  "repository": {
    "type": "git",
    "url": "git://github.com/cfarm/grunt-js-base.git"
  },
  "author": "Catherine Farman",
  "homepage": "http://cfarman.com"
}
As you can see, a package.json file is a set of JSON objects and properties that describe the packages for your project. The most important part of this file that will change as you add plugins to your project is the devDependencies object. The properties defined here are all the modules necessary for your project to be developed and tested. In our case, so far we have the Grunt module itself, the Uglify plugin, and a module called matchdep, which we’ll explore in a moment.
Every time you add a new plugin to your project, you’ll update this devDependencies list with the plugin name and the version number. For now, save the above file in your project’s root folder to get started.
Add Gruntfile.js to Your Project
Along with package.json, you need to add a Gruntfile to the root of your project. My default Gruntfile looks like this. Again, this is just a set of JSON objects and properties that we will customize to set up our tasks to run however we’d like. Most of your Grunt configuration will take place in this file.
Save Setup Time with the matchdep Plugin
Notice the second line of my Gruntfile has the following special instruction:
require("matchdep").filterDev("grunt-*").forEach(grunt.loadNpmTasks);This instruction invokes the matchdep module to make it easier to install new plugins for my projects. Whenever you add a new task, you usually have to install the Node module for your project, then add a line to your project’s Gruntfile to load the task. With this line above and the matchdep plugin installed, you can skip that step whenever you add a new plugin to your project, saving setup time.
Install Plugins for Your Project
Though the Sass and Uglify plugins we’ll be using are listed in package.json, we need to take another step to actually install them on our computer. Navigate to the project directory on the command line and run npm install to get these modules added to your project. A successful install will look something like this:
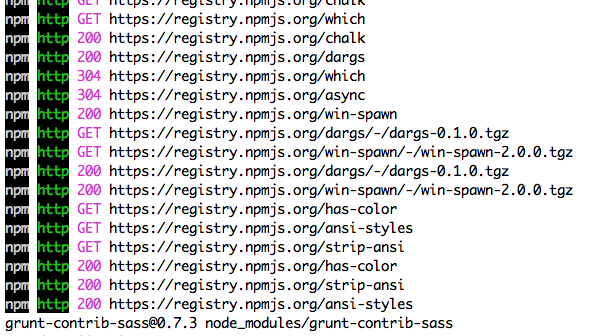
Notice that a new folder has been created in your project root called node_modules – all the plugin dependencies live here.
The grunt Command
Now for the moment of truth! Run the following command (inside your project directory still):
grunt
Your terminal should look like this:
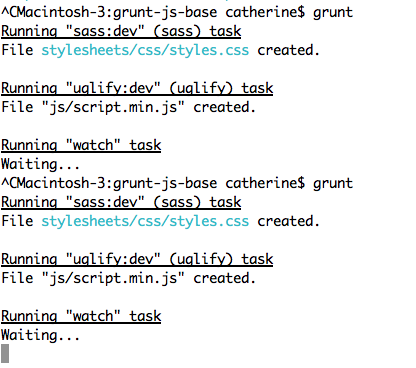
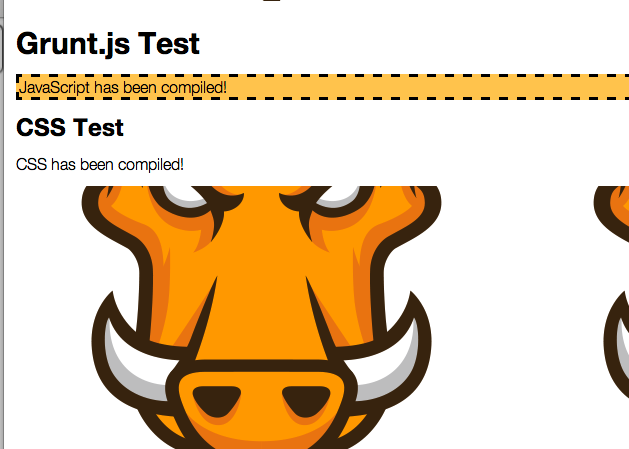
And if you’re using my starter grunt project, you can check out index.html in your browser to see that Grunt has run its task, compiling your Sass to CSS and uglifying your JavaScript:
If you get any syntax errors, Grunt will tell you which line to fix. Once you’re ready to try again you’ll hit Ctrl+C to quit watching and run grunt again to run your tasks.
Anatomy of a Gruntfile
If you’re curious what’s going on with Grunt, take a look at Gruntfile.js to see how our tasks are defined.
sass: {
  options: {
    precision: 5
  },
  dev: {
    options: {
      style: 'nested', // compact, compressed, nested or expanded
      sourcemap: true
    },
    files: {
      'stylesheets/css/styles.css' : 'stylesheets/scss/styles.scss'
    }
  },
  prod: {
    files: {
      'stylesheets/css/styles.css' : 'stylesheets/scss/styles.scss'
    }
  }
},
Inside Grunt’s initConfig section we’re setting creating our task objects. For both Sass and Uglify, I’m setting up two different tasks: a default task that runs when the grunt command is invoked, and a production task that runs under grunt production. The options are different for each to reflect a local development environment’s needs versus the finalized output for a production website.
Try running grunt production and then look at your output files, script.min.js and styles.css. Compare them to the output created by the default grunt task to see the difference.
Conclusion
There’s a whole world of Grunt plugins out there, and lots of problems they can solve for you as you’re building your projects. Search for tasks at http://gruntjs.com/plugins. Once you find a plugin that interests you, use npm install to add the module to your computer. And, don’t forget to add the plugin to your package.json file. Once it’s installed and listed in package.json, you’ll need to add task options to Gruntfile.js. Finally, at the bottom of Gruntfile.js, add your task’s command to either the development task, production task, or both to make it available as a grunt task.
You can also add tasks to your Watch tasks in Gruntfile.js if you want to watch for changes to files that trigger the task to run (useful for front end changes). This will keep the Grunt task running in your terminal and files will compile whenever you save them, so you don’t have to run the grunt command more than once while you’re working.
Now that you’re automating your common tasks in Grunt, you’ll find your workflow improving enormously.
Frequently Asked Questions about Automating Recurring Tasks with Grunt
What is Grunt and why is it important for automating tasks?
Grunt is a JavaScript task runner that automates repetitive tasks like minification, compilation, unit testing, and linting. It uses a command-line interface to run custom tasks defined in a file known as the Gruntfile. Grunt’s importance lies in its ability to automate tasks, thus saving developers a significant amount of time. It also helps in reducing errors that can occur during manual repetition of tasks.
How do I install Grunt?
To install Grunt, you first need to have Node.js and npm installed on your system. Once you have these, you can install Grunt by running the command npm install -g grunt-cli in your terminal. This installs Grunt’s command line interface globally on your system.
How do I create tasks in Grunt?
Creating tasks in Grunt involves defining them in the Gruntfile. This file is a valid JavaScript or CoffeeScript file that goes into your project’s root directory. Inside this file, you can load and configure tasks, and define your own tasks. A basic task definition looks like this:grunt.registerTask('default', ['jshint', 'qunit', 'concat', 'uglify']);
What is the Gruntfile and what does it do?
The Gruntfile is the configuration file for Grunt. It is a JavaScript or CoffeeScript file that sits in the root directory of your project. It contains all the instructions and configurations for the tasks that Grunt will run. It is where you load Grunt plugins, configure tasks, and define your own tasks.
How do I use Grunt plugins?
Grunt plugins are Node.js modules that provide additional functionality to Grunt. To use a Grunt plugin, you first need to install it using npm. Once installed, you can load the plugin in your Gruntfile using the grunt.loadNpmTasks method. After loading the plugin, you can configure it by adding a property to the grunt.initConfig method.
How do I run Grunt tasks?
To run Grunt tasks, you use the grunt command followed by the name of the task. For example, to run a task named ‘test’, you would use the command grunt test. If you want to run multiple tasks at once, you can separate them with a colon, like grunt task1:task2.
Can I use Grunt with other tools like Bower and Yeoman?
Yes, Grunt can be used in conjunction with other tools like Bower and Yeoman. Bower is a package manager that can be used to manage dependencies for your project, while Yeoman is a scaffolding tool that helps to kickstart new projects. Grunt can be used to automate tasks in these tools, making your workflow even more efficient.
How do I debug Grunt tasks?
Debugging Grunt tasks can be done using the --debug flag when running your tasks. This will output additional debugging information to the console. You can also use the grunt.log methods to output custom debugging information.
Can I use Grunt with continuous integration systems?
Yes, Grunt can be used with continuous integration systems like Jenkins, Travis CI, and CircleCI. You can configure these systems to run your Grunt tasks whenever code is pushed to your repository, ensuring that your code is always tested and ready for deployment.
How do I keep my Gruntfile organized?
Keeping your Gruntfile organized can be achieved by splitting it into multiple files using the load-grunt-config plugin. This allows you to have a separate file for each task configuration, making your Gruntfile easier to manage and maintain.
Catherine Farman is a Developer with experience building standards-based websites using HTML, CSS and Javascript for Happy Cog, Yarn.com, Ben & Jerry's, Coldwell Banker, Soccer.com and more. Catherine has taught responsive web design, Javascript, and Sass courses for Girl Develop It. She lives in Philadelphia and when she’s not at a computer enjoys sewing, soccer, food, bikes and books.