2FA in Laravel with Google Authenticator – Get Secure!

Key Takeaways
- Implementing 2FA in Laravel with Google Authenticator enhances security by requiring both a password and a verification code generated on the user’s device.
- Google Authenticator uses the Time-Based One-Time Password (TOTP) algorithm, allowing it to operate offline, unlike other 2FA methods that require internet connectivity.
- Setup involves adding specific packages via Composer, updating Laravel’s configuration, and modifying database migrations to store 2FA secrets securely.
- The application flow includes routes and controllers to enable, disable, and validate 2FA, ensuring users can manage their authentication settings smoothly.
- The process of enabling 2FA involves generating a secret key, displaying a QR code for the user to scan, and storing the encrypted key in the database.
- Throttling is used on the validation route to protect against brute force attacks, limiting attempts to 5 per minute based on IP address.
This article was peer reviewed by Jad Bitar, Niklas Keller, Marco Pivetta, and Anthony Chambers. Thanks to all of SitePoint’s peer reviewers for making SitePoint content the best it can be!

There are many ways an attacker can get a user’s password. It could happen through social engineering, key logging, or by some other nefarious means. Passwords alone are not enough to protect users from their accounts being compromised, specially if an attacker somehow has their credentials.
To get around this serious shortcoming, the concept of two-factor authentication (2FA) was created. A password, which is one factor, is not enough to authenticate a user. The notion is that a user must use something they have (first factor) and something they know (second factor) to authenticate. A password is something the user knows. For the “something they have” part, many things can be used. Some solutions use biometrics, like a fingerprint, voice pattern recognition, or iris scan. These are relatively expensive solutions. Other second factor authentication methods include one-time passwords (OTP). These are passwords that are generated on a device and good for use once. Typically there are two types of OTPs; counter based, and time based. Using 2FA is better than just username and password alone because it is very difficult for an attacker to procure both the password and the second factor.
In this tutorial, we will use Laravel and Google Authenticator to demonstrate how to implement 2FA in a webapp. Google Authenticator is just one implementation of the Time-Based One-Time Password (TOTP) algorithm, RFC 6238. This industry standard is used in a lot of various 2FA solutions. There are some advantages of Google Authenticator over some other 2FA solutions on the market. After you download the app to your smartphone, you can use it offline. Many other 2FA solutions need to be connected somehow; they send an SMS message, or a push notification, or even call the smartphone with a recorded message. This is not good for users that might be in a location where their phone is cut off from the outside world, like in an office located in the basement of a building.
How the TOTP works is that the server generates a secret key. This secret key is then passed to the user. The secret key is used in combination with the current Unix timestamp to generate a six digit number, using a keyed-hash message authentication code (HMAC) based algorithm. This six digit number is the OTP. It changes every 30 seconds.
Setup
Homestead
This article assumes Laravel Homestead is installed. It is not necessary to use it, but the commands might differ slightly if you use a different environment and requires PHP 7. If you are not familiar with Homestead and want to produce similar results as this article aims to produce, please visit this SitePoint article that shows how to setup Homestead.
Composer
Create a new Laravel project.
composer create-project --prefer-dist laravel/laravel Project
Make sure you go to the project folder
cd Project
There is a Laravel package that includes a PHP version of the Google Authenticator. We will use it in this project. First, we will include Antonio Carlos Ribeiro’s Laravel package using Composer. We will also install a library to do Base32 encoding in constant time.
composer require pragmarx/google2fa
composer require paragonie/constant_time_encoding
After Composer has installed the package, we must now tell Laravel about it. Open config/app.php and add PragmaRX\Google2FA\Vendor\Laravel\ServiceProvider::class, to the providers array. Also, add 'Google2FA' => PragmaRX\Google2FA\Vendor\Laravel\Facade::class, to the aliases array.
Scaffolding
Laravel includes scaffolding to create all the controllers, views, and routes needed for basic user registration, login, etc. We will use the auth scaffolding to quickly build the login and registration screens.
php artisan make:auth
We will modify some of the auto-generated code to add two-factor authentication.
Database and Models
We need to store the secret key used to create the one-time password in the user’s record. To do this, create a migration for the new database column needed.
php artisan make:migration add_google2fa_secret_to_users
Open the newly created migration file located in the database/migrations folder. It will be named something like 2016_01_06_152631_add_google2fa_secret_to_users.php. Replace the contents of the file with the code below:
<?php

use Illuminate\Database\Schema\Blueprint;
use Illuminate\Database\Migrations\Migration;

class AddGoogle2faSecretToUsers extends Migration
{
    /**
     * Run the migrations.
     *
     * @return void
     */
    public function up()
    {
        Schema::table('users', function ($table) {
            $table->string('google2fa_secret')->nullable();
        });
    }

    /**
     * Reverse the migrations.
     *
     * @return void
     */
    public function down()
    {
        Schema::table('users', function ($table) {
            $table->dropColumn('google2fa_secret');
        });
    }
}
When the migration is run, the column google2fa_secret is added to the users table. When the migration is rolled back, that column is removed from the table.
Next, we will run the migration to set up the database tables.
php artisan migrate
Now that the column google2fa_secret has been added to the users table, we should update the App\User model to make it a bit more secure. By default, if the program converts the data from an instance of App\User to JSON, the contents of the google2fa_secret column will be a part of the JSON object. We will block this action. Open the App\User model, app/User.php, and add the array element google2fa_secret as a string to the hidden attribute.
Routes
Open up the web routes file routes/web.php and add the following routes to the bottom:
Route::get('/2fa/enable', 'Google2FAController@enableTwoFactor');
Route::get('/2fa/disable', 'Google2FAController@disableTwoFactor');
Route::get('/2fa/validate', 'Auth\AuthController@getValidateToken');
Route::post('/2fa/validate', ['middleware' => 'throttle:5', 'uses' => 'Auth\AuthController@postValidateToken']);
The routes we added do various things.
When a user goes to /2fa/enable, it will create the 2FA secret key and provide instructions on how to configure their device to use it. When a user goes to /2fa/disable, it will remove the 2FA secret key from the user’s account so that they can log in without having to provide the one-time password. After a user authenticates with their username and password, if they have a 2FA secret key set up, they will be redirected to /2fa/validate via a HTTP GET. This route shows a form where they can put in their one-time password. When the user submits the form, it goes to /2fa/validate via a HTTP POST. This route makes sure the one-time password passed in by the user is valid. The route also uses the throttle Laravel middleware. If an attacker has your password, it is easy to go through all combinations of the 6-digit token in an automated way. The throttle is set for a maximum of 5 requests per minute. Laravel’s throttle middleware is based on IP address. This article just shows you the concept of throttling and doesn’t protect against a distributed brute force attack. In a production implementation, consider doing throttling based on user.
Controllers
We will create a new controller to enable and disable 2FA support for a user:
php artisan make:controller Google2FAController
Open the new controller Google2FAController and replace the contents with the code below:
<?php
namespace App\Http\Controllers;
use Crypt;
use Google2FA;
use Illuminate\Http\Request;
use App\Http\Controllers\Controller;
use Illuminate\Foundation\Validation\ValidatesRequests;
use \ParagonIE\ConstantTime\Base32;
class Google2FAController extends Controller
{
use ValidatesRequests;
/**
* Create a new authentication controller instance.
*
* @return void
*/
public function __construct()
{
$this->middleware('web');
}
/**
*
* @param \Illuminate\Http\Request $request
* @return \Illuminate\Http\Response
*/
public function enableTwoFactor(Request $request)
{
//generate new secret
$secret = $this->generateSecret();
//get user
$user = $request->user();
//encrypt and then save secret
$user->google2fa_secret = Crypt::encrypt($secret);
$user->save();
//generate image for QR barcode
$imageDataUri = Google2FA::getQRCodeInline(
$request->getHttpHost(),
$user->email,
$secret,
200
);
return view('2fa/enableTwoFactor', ['image' => $imageDataUri,
'secret' => $secret]);
}
/**
*
* @param \Illuminate\Http\Request $request
* @return \Illuminate\Http\Response
*/
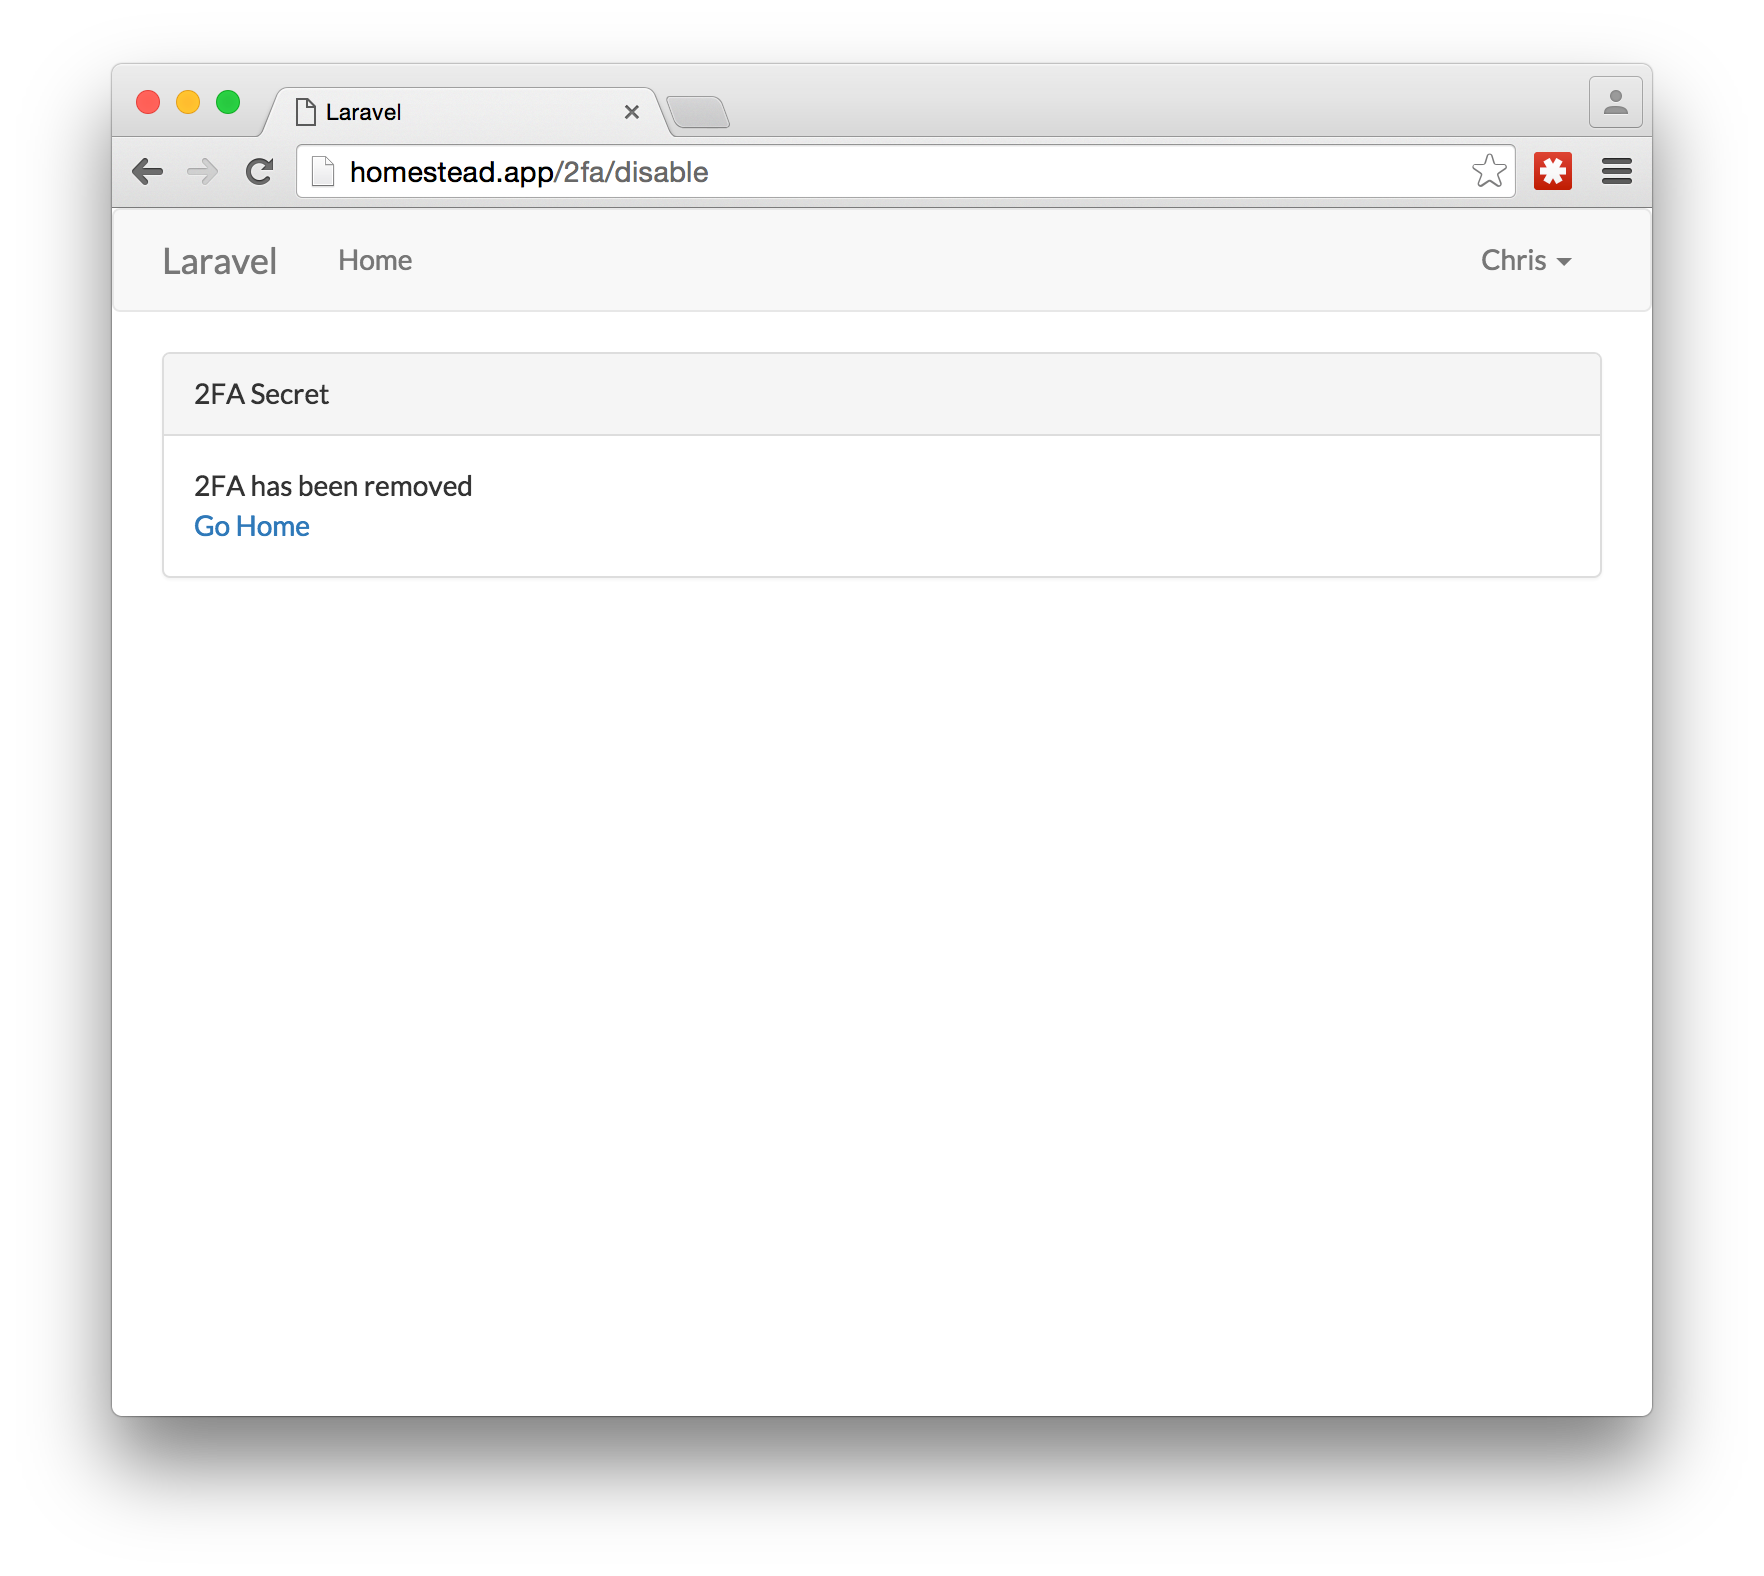
public function disableTwoFactor(Request $request)
{
$user = $request->user();
//make secret column blank
$user->google2fa_secret = null;
$user->save();
return view('2fa/disableTwoFactor');
}
/**
* Generate a secret key in Base32 format
*
* @return string
*/
private function generateSecret()
{
$randomBytes = random_bytes(10);
return Base32::encodeUpper($randomBytes)
}
}
The method, enableTwoFactor(), gets executed when a user wants to setup 2FA. First, it generates a new secret key. Unfortunately at this time, the key generation function inside the 2FA library does not use a cryptographically secure PRNG, so we use the random_bytes() function to create the bytes for our secret key and Base32 encode it. Then, the method stores an encrypted version of the secret key to the users table.
Next, a 200x200px QR barcode image that contains the secret key and other metadata needed for the Google Authenticator mobile app is generated. This image is encoded in the Data URI scheme so we can inline it into the webpage. Next, the enableTwoFactor view is loaded to display the QR barcode and the secret key as text, just in case they use a RFC 6238 compatible app that can’t read QR barcodes.
The disableTwoFactor() method is called when a user wants to disable 2FA. It puts a null value into the database for the secret key and then displays a view that says that 2FA has been disabled.
Now, we will make a few modifications to the Auth controller. Open app/Http/Controllers/Auth/AuthController.php and put the following lines of code near the top in the use section:
use Cache;
use Illuminate\Http\Request;
use Illuminate\Support\Facades\Auth;
use Illuminate\Contracts\Auth\Authenticatable;
use App\Http\Requests\ValidateSecretRequest;
After a user authenticates, the Auth controller sees if there is an authenticated() method. If so, the controller executes that method. By default, the scaffolding does not create the authenticated() method. We will create this method and use it to prompt someone to put in the one-time password if they have set up the 2FA secret key. Inside the same AuthController class, add the following method:
    /**
     * Send the post-authentication response.
     *
     * @param  \Illuminate\Http\Request $request
     * @param  \Illuminate\Contracts\Auth\Authenticatable $user
     * @return \Illuminate\Http\Response
     */
    private function authenticated(Request $request, Authenticatable $user)
    {
        if ($user->google2fa_secret) {
            Auth::logout();

            $request->session()->put('2fa:user:id', $user->id);

            return redirect('2fa/validate');
        }

        return redirect()->intended($this->redirectTo);
    }
If the user has set up 2FA, this method logs out the user, saves their user id to the session, and redirects them to a page where they can enter the one-time password. If the user does not have 2FA set up, it redirects them to the homepage without logging them out.
The getValidateToken() method displays the page where a user can enter in their one-time password. In the AuthController class, add this method:
    /**
     *
     * @return \Illuminate\Http\Response
     */
    public function getValidateToken()
    {
        if (session('2fa:user:id')) {
            return view('2fa/validate');
        }

        return redirect('login');
    }
If the session with the user id does not exist, the user gets redirected to the login page. If the user id is set in the session, the view is shown.
Once the user clicks the “Validate” button on the one-time password page, the request is routed to the postValidateToken() method. Add the following code to the AuthController class:
    /**
     *
     * @param  App\Http\Requests\ValidateSecretRequest $request
     * @return \Illuminate\Http\Response
     */
    public function postValidateToken(ValidateSecretRequest $request)
    {
        //get user id and create cache key
        $userId = $request->session()->pull('2fa:user:id');
        $key    = $userId . ':' . $request->totp;

        //use cache to store token to blacklist
        Cache::add($key, true, 4);

        //login and redirect user
        Auth::loginUsingId($userId);

        return redirect()->intended($this->redirectTo);
    }
Before this method is run, validation is done via the ValidateSecretRequest form request class. If validation fails, the postValidateToken() method is not executed. After validation, the one-time password is added to a blacklist for 4 minutes. This is done because the 2FA library allows codes up to 4 minutes old to be valid and we don’t want a user to be able to reuse a code during that window. Next, the user is logged into the system and redirected to the homepage.
Lastly, make sure that in the AuthController class, the redirectTo property is set to /home. This redirects users to the homepage /home instead of the welcome page / after login.
Form Request
To create a new form request class, execute the following command:
php artisan make:request ValidateSecretRequest
Open app/Http/Requests/ValidateSecretRequest.php and replace the contents with the code below:
<?php

namespace App\Http\Requests;

use Cache;
use Crypt;
use Google2FA;
use App\User;
use App\Http\Requests\Request;
use Illuminate\Validation\Factory as ValidatonFactory;

class ValidateSecretRequest extends Request
{
    /**
     *
     * @var \App\User
     */
    private $user;

    /**
     * Create a new FormRequest instance.
     *
     * @param \Illuminate\Validation\Factory $factory
     * @return void
     */
    public function __construct(ValidatonFactory $factory)
    {
        $factory->extend(
            'valid_token',
            function ($attribute, $value, $parameters, $validator) {
                $secret = Crypt::decrypt($this->user->google2fa_secret);

                return Google2FA::verifyKey($secret, $value);
            },
            'Not a valid token'
        );

        $factory->extend(
            'used_token',
            function ($attribute, $value, $parameters, $validator) {
                $key = $this->user->id . ':' . $value;

                return !Cache::has($key);
            },
            'Cannot reuse token'
        );
    }

    /**
     * Determine if the user is authorized to make this request.
     *
     * @return bool
     */
    public function authorize()
    {
        try {
            $this->user = User::findOrFail(
                session('2fa:user:id')
            );
        } catch (Exception $exc) {
            return false;
        }

        return true;
    }

    /**
     * Get the validation rules that apply to the request.
     *
     * @return array
     */
    public function rules()
    {
        return [
            'totp' => 'bail|required|digits:6|valid_token|used_token',
        ];
    }
}
We are doing three things in this file;
- Setting up two custom validator rules
- Making sure that the user is authorized to do this request
- Defining what the validation rules for this request are.
In the class constructor, we set up the custom validator rules. The first rule makes sure that the user has presented a valid TOTP token. The second rule makes sure the user hasn’t submitted a token on the blacklist. Normally, custom validator rules are used for many different requests and so defined in the AppServiceProvider class. But, since these rules are only being used in one request, we put it in this class’ constructor.
The authorize() method checks and sees if it can get a user record based on the user id stored in the session. If this doesn’t work, then the request is not considered authorized.
The rules() method defines the validation rules. The rules say that the token must not be empty, be a six digit number, be valid, and not be on the user’s blacklist.
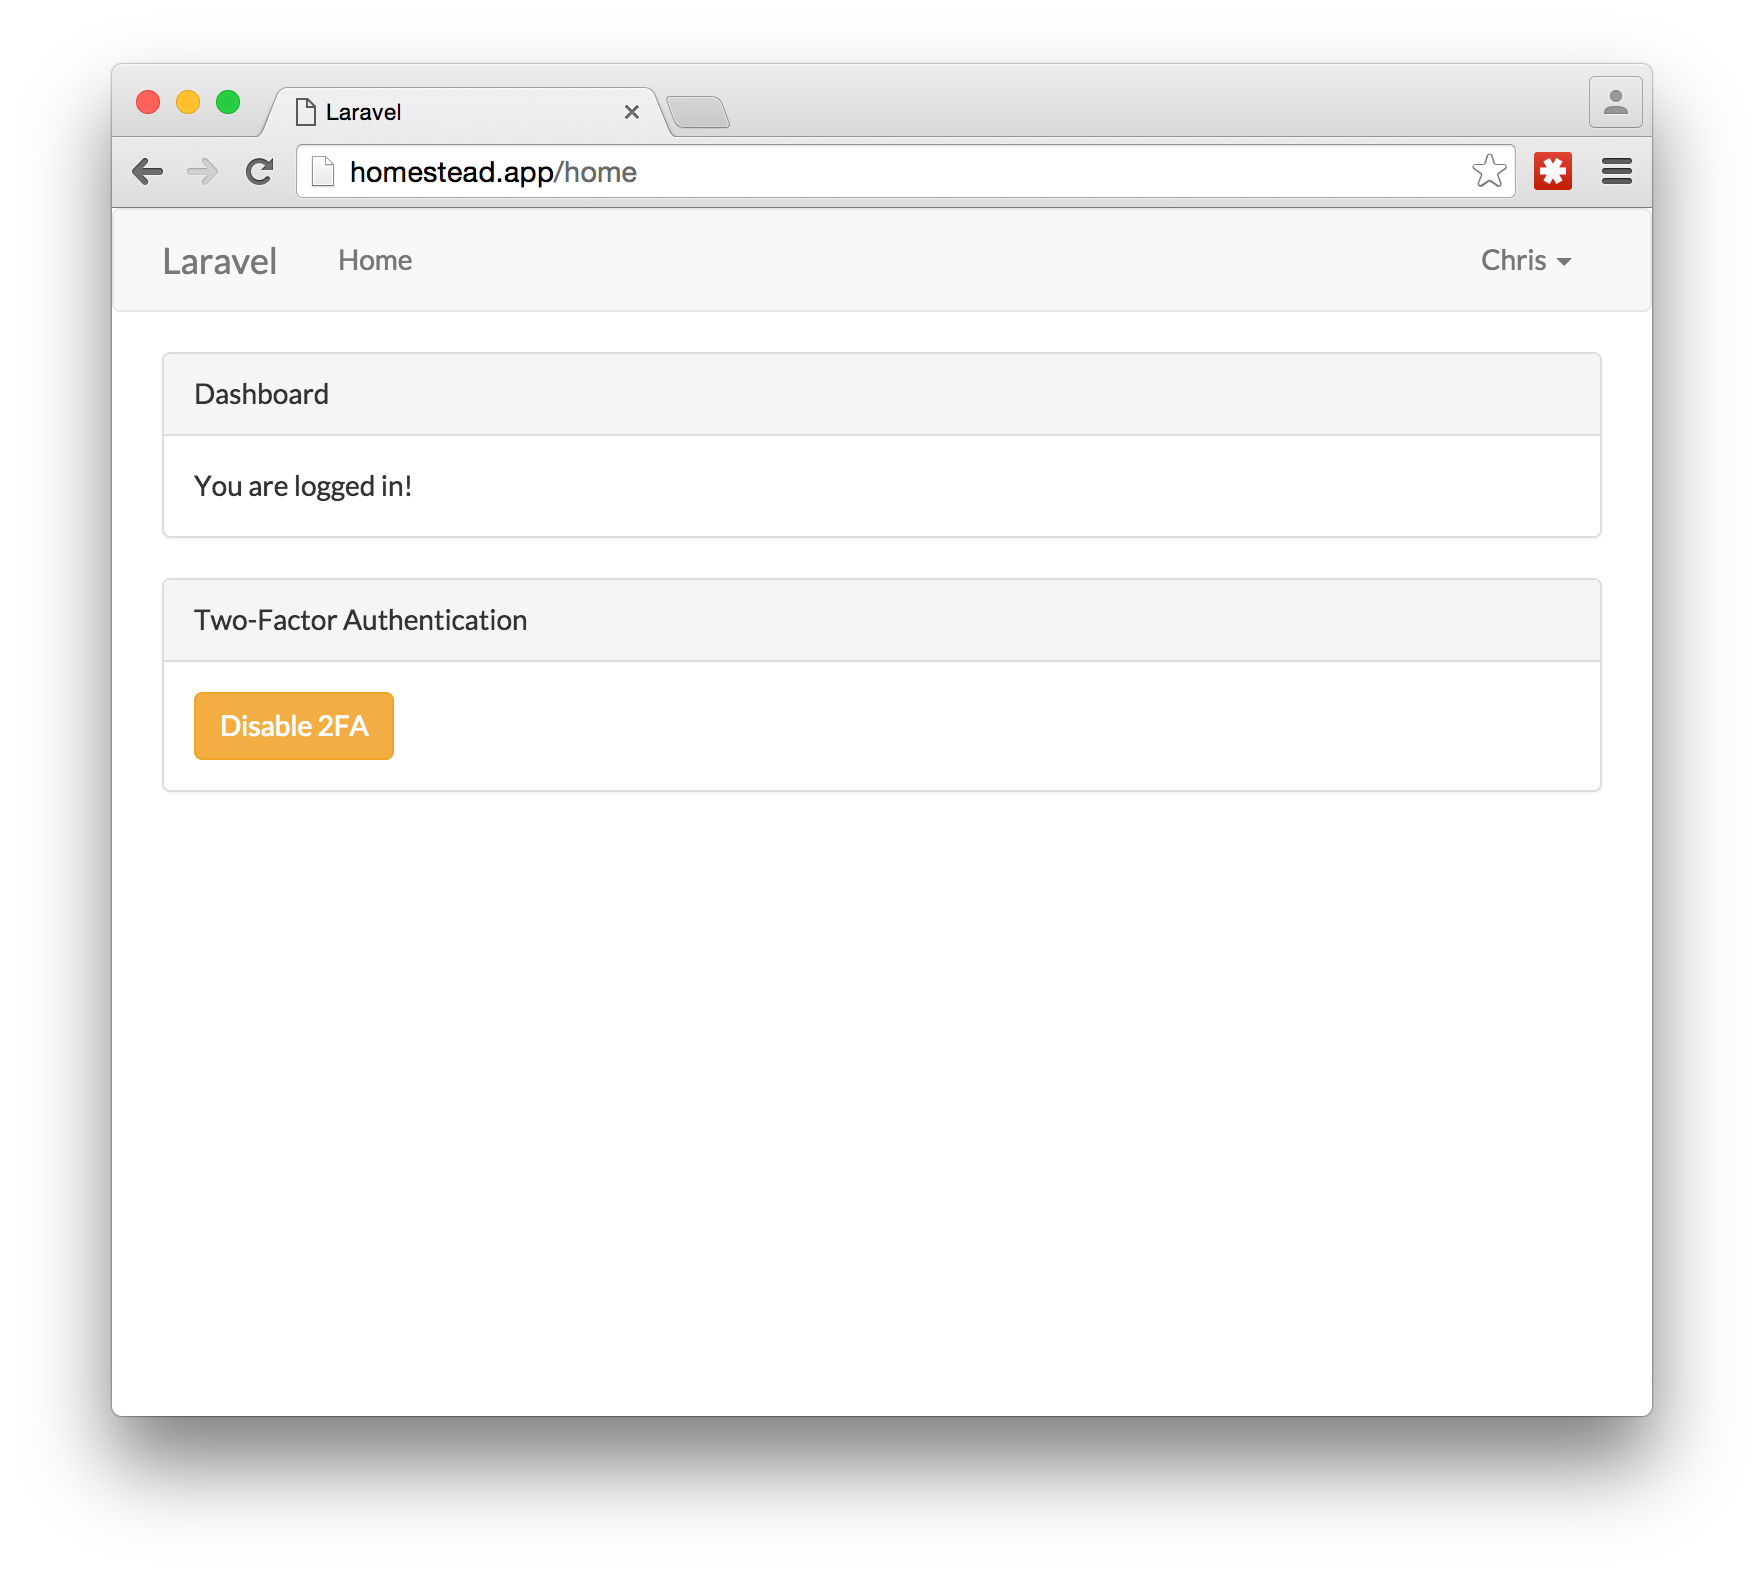
Views
On the homepage, we need to add a section that allows a user to enable or disable 2FA. Open resources/views/home.blade.php and add the following code just before the last closing div tag:
    <div class="row">
        <div class="col-md-10 col-md-offset-1">
            <div class="panel panel-default">
                <div class="panel-heading">Two-Factor Authentication</div>

                <div class="panel-body">
                    @if (Auth::user()->google2fa_secret)
                    <a href="{{ url('2fa/disable') }}" class="btn btn-warning">Disable 2FA</a>
                    @else
                    <a href="{{ url('2fa/enable') }}" class="btn btn-primary">Enable 2FA</a>
                    @endif
                </div>
            </div>
        </div>
    </div>
When the user does not have the google2fa_secret field set, then a button is shown that allows them to enable 2FA. When the google2fa_secret field is set, then a button is shown that allows them to disable 2FA.
For this project, we will create some new views. We will put them in their own directory. Create the directory 2fa in the views folder:
mkdir resources/views/2fa
Let’s create the page that displays the secret key with instructions on how to configure the user’s 2FA device. Create the view file enableTwoFactor.blade.php in the newly created resources/views/2fa folder and put the following contents into it:
@extends('layouts.app')
@section('content')
<div class="container spark-screen">
<div class="row">
<div class="col-md-10 col-md-offset-1">
<div class="panel panel-default">
<div class="panel-heading">2FA Secret Key</div>
<div class="panel-body">
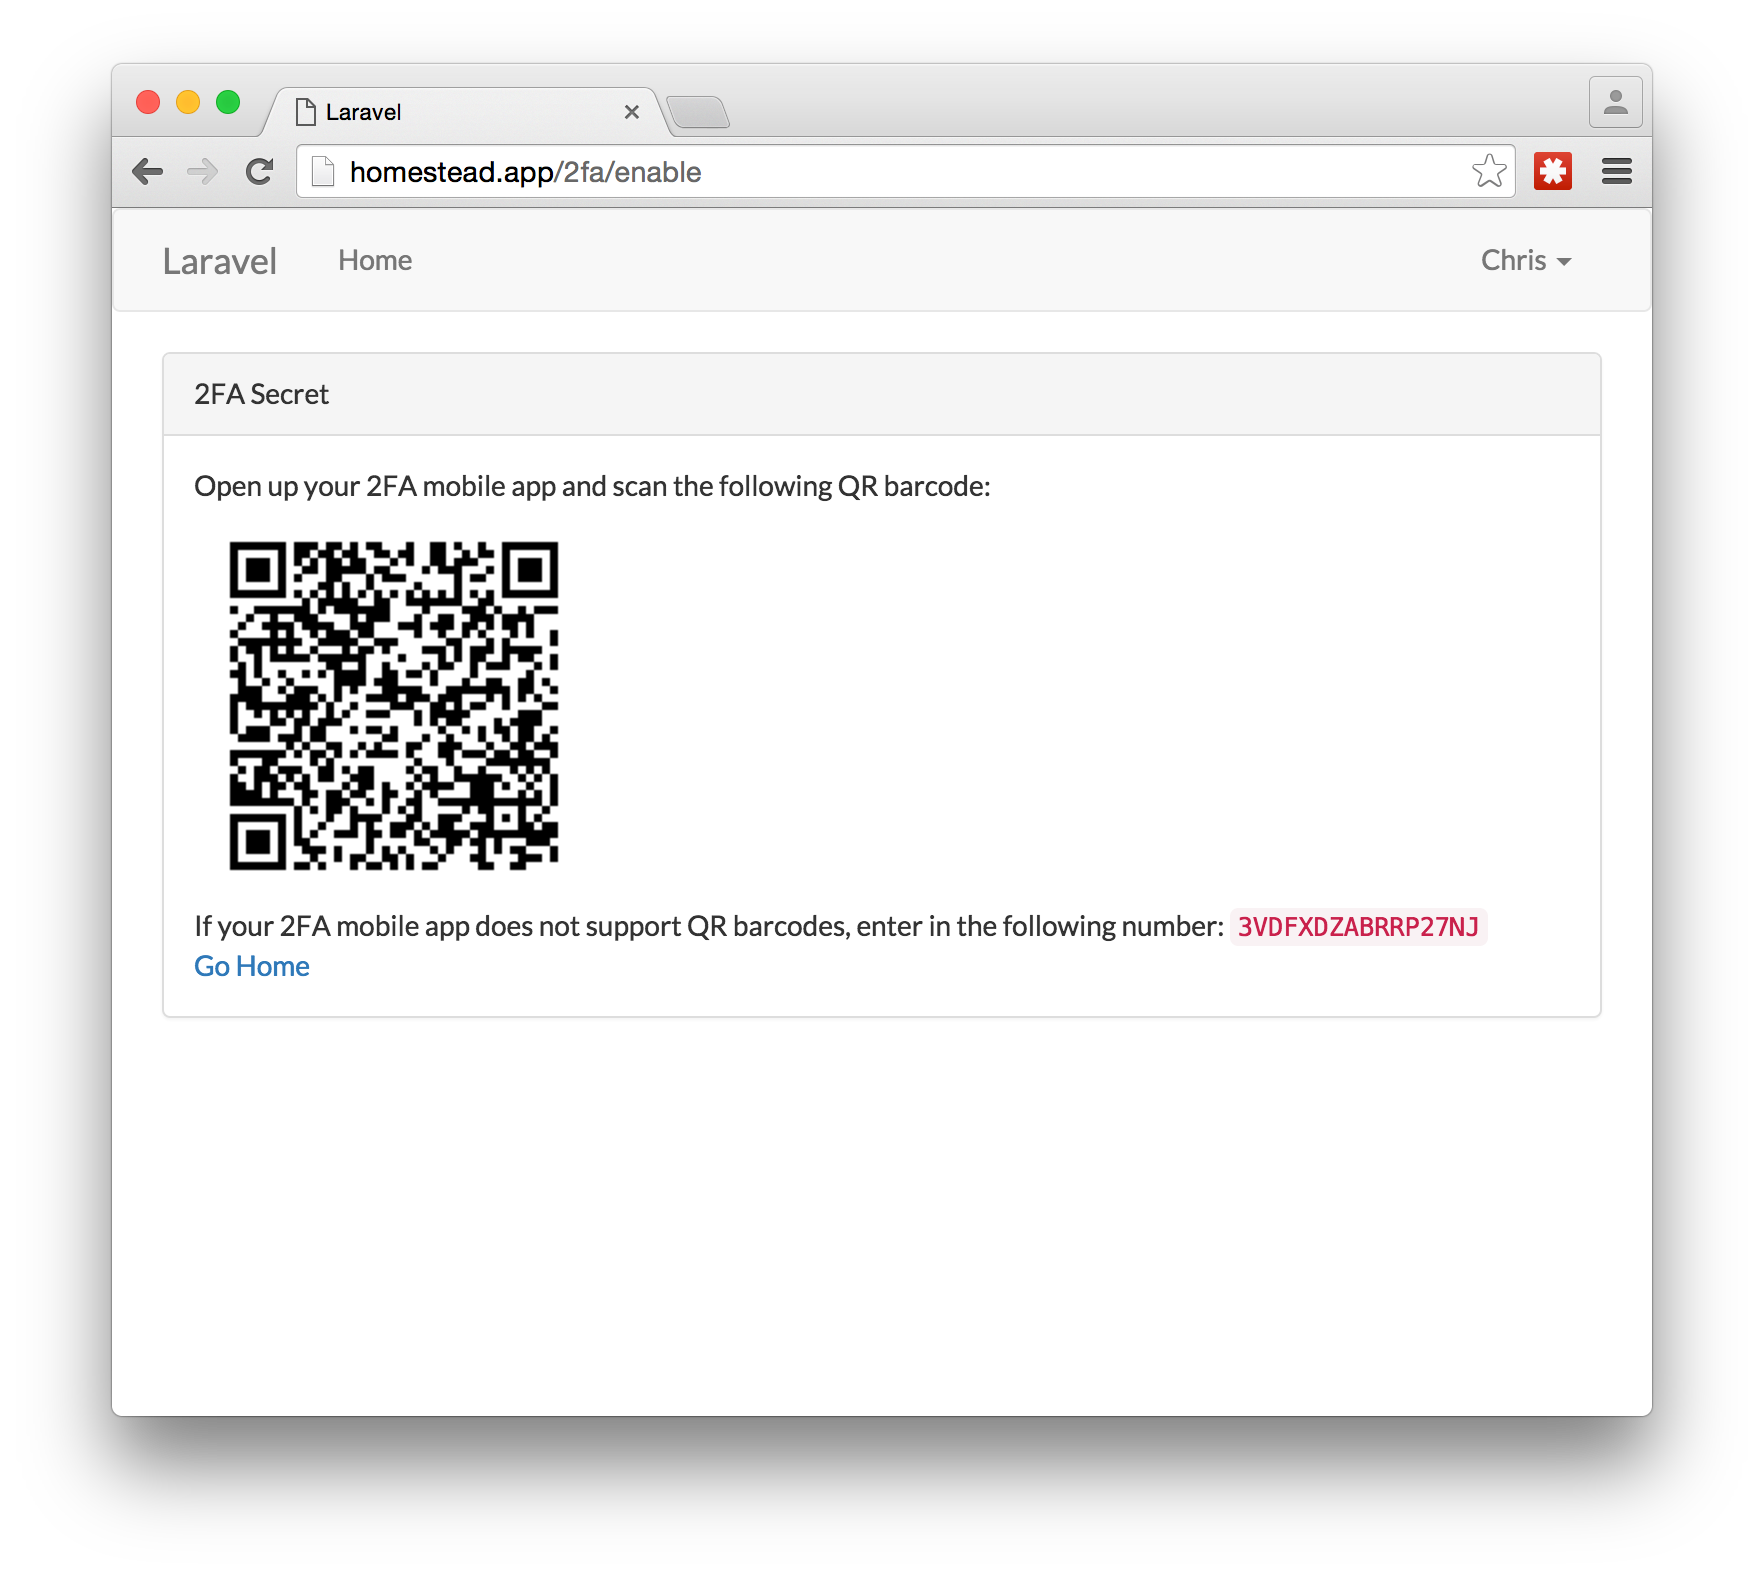
Open up your 2FA mobile app and scan the following QR barcode:
<br />
<img alt="Image of QR barcode" src="{{ $image }}" />
<br />
If your 2FA mobile app does not support QR barcodes,
enter in the following number: <code>{{ $secret }}</code>
<br /><br />
<a href="{{ url('/home') }}">Go Home</a>
</div>
</div>
</div>
</div>
</div>
@endsection
If a user decides to disable 2FA, create a page to let them know it has been disabled. Create a file called disableTwoFactor.blade.php in the resources/views/2fa folder and put the following code into it:
@extends('layouts.app')

@section('content')
<div class="container spark-screen">
    <div class="row">
        <div class="col-md-10 col-md-offset-1">
            <div class="panel panel-default">
                <div class="panel-heading">2FA Secret Key</div>

                <div class="panel-body">
                    2FA has been removed
                    <br /><br />
                    <a href="{{ url('/home') }}">Go Home</a>
                </div>
            </div>
        </div>
    </div>
</div>
@endsection
After the user authenticates with their email and password, we need a page where a user can enter in their one-time password generated from their 2FA device. Create a new file called validate.blade.php in the resources/views/2fa folder and put the following view code into it:
@extends('layouts.app')

@section('content')
<div class="container spark-screen">
    <div class="row">
        <div class="col-md-8 col-md-offset-2">
            <div class="panel panel-default">
                <div class="panel-heading">2FA</div>

                <div class="panel-body">
                    <form class="form-horizontal" role="form" method="POST" action="/2fa/validate">
                        {!! csrf_field() !!}

                        <div class="form-group{{ $errors->has('totp') ? ' has-error' : '' }}">
                            <label class="col-md-4 control-label">One-Time Password</label>

                            <div class="col-md-6">
                                <input type="number" class="form-control" name="totp">

                                @if ($errors->has('totp'))
                                <span class="help-block">
                                    <strong>{{ $errors->first('totp') }}</strong>
                                </span>
                                @endif
                            </div>
                        </div>

                        <div class="form-group">
                            <div class="col-md-6 col-md-offset-4">
                                <button type="submit" class="btn btn-primary">
                                    <i class="fa fa-btn fa-mobile"></i>Validate
                                </button>
                            </div>
                        </div>
                    </form>
                </div>
            </div>
        </div>
    </div>
</div>
@endsection
Testing it Out
We should now have all the pieces in place to make the example work.
You can use any RFC 6238 compatible program, but to follow along with this tutorial, please use Google Authenticator. First, go to the Apple iTunes App Store or the Google Play Store and download the app.
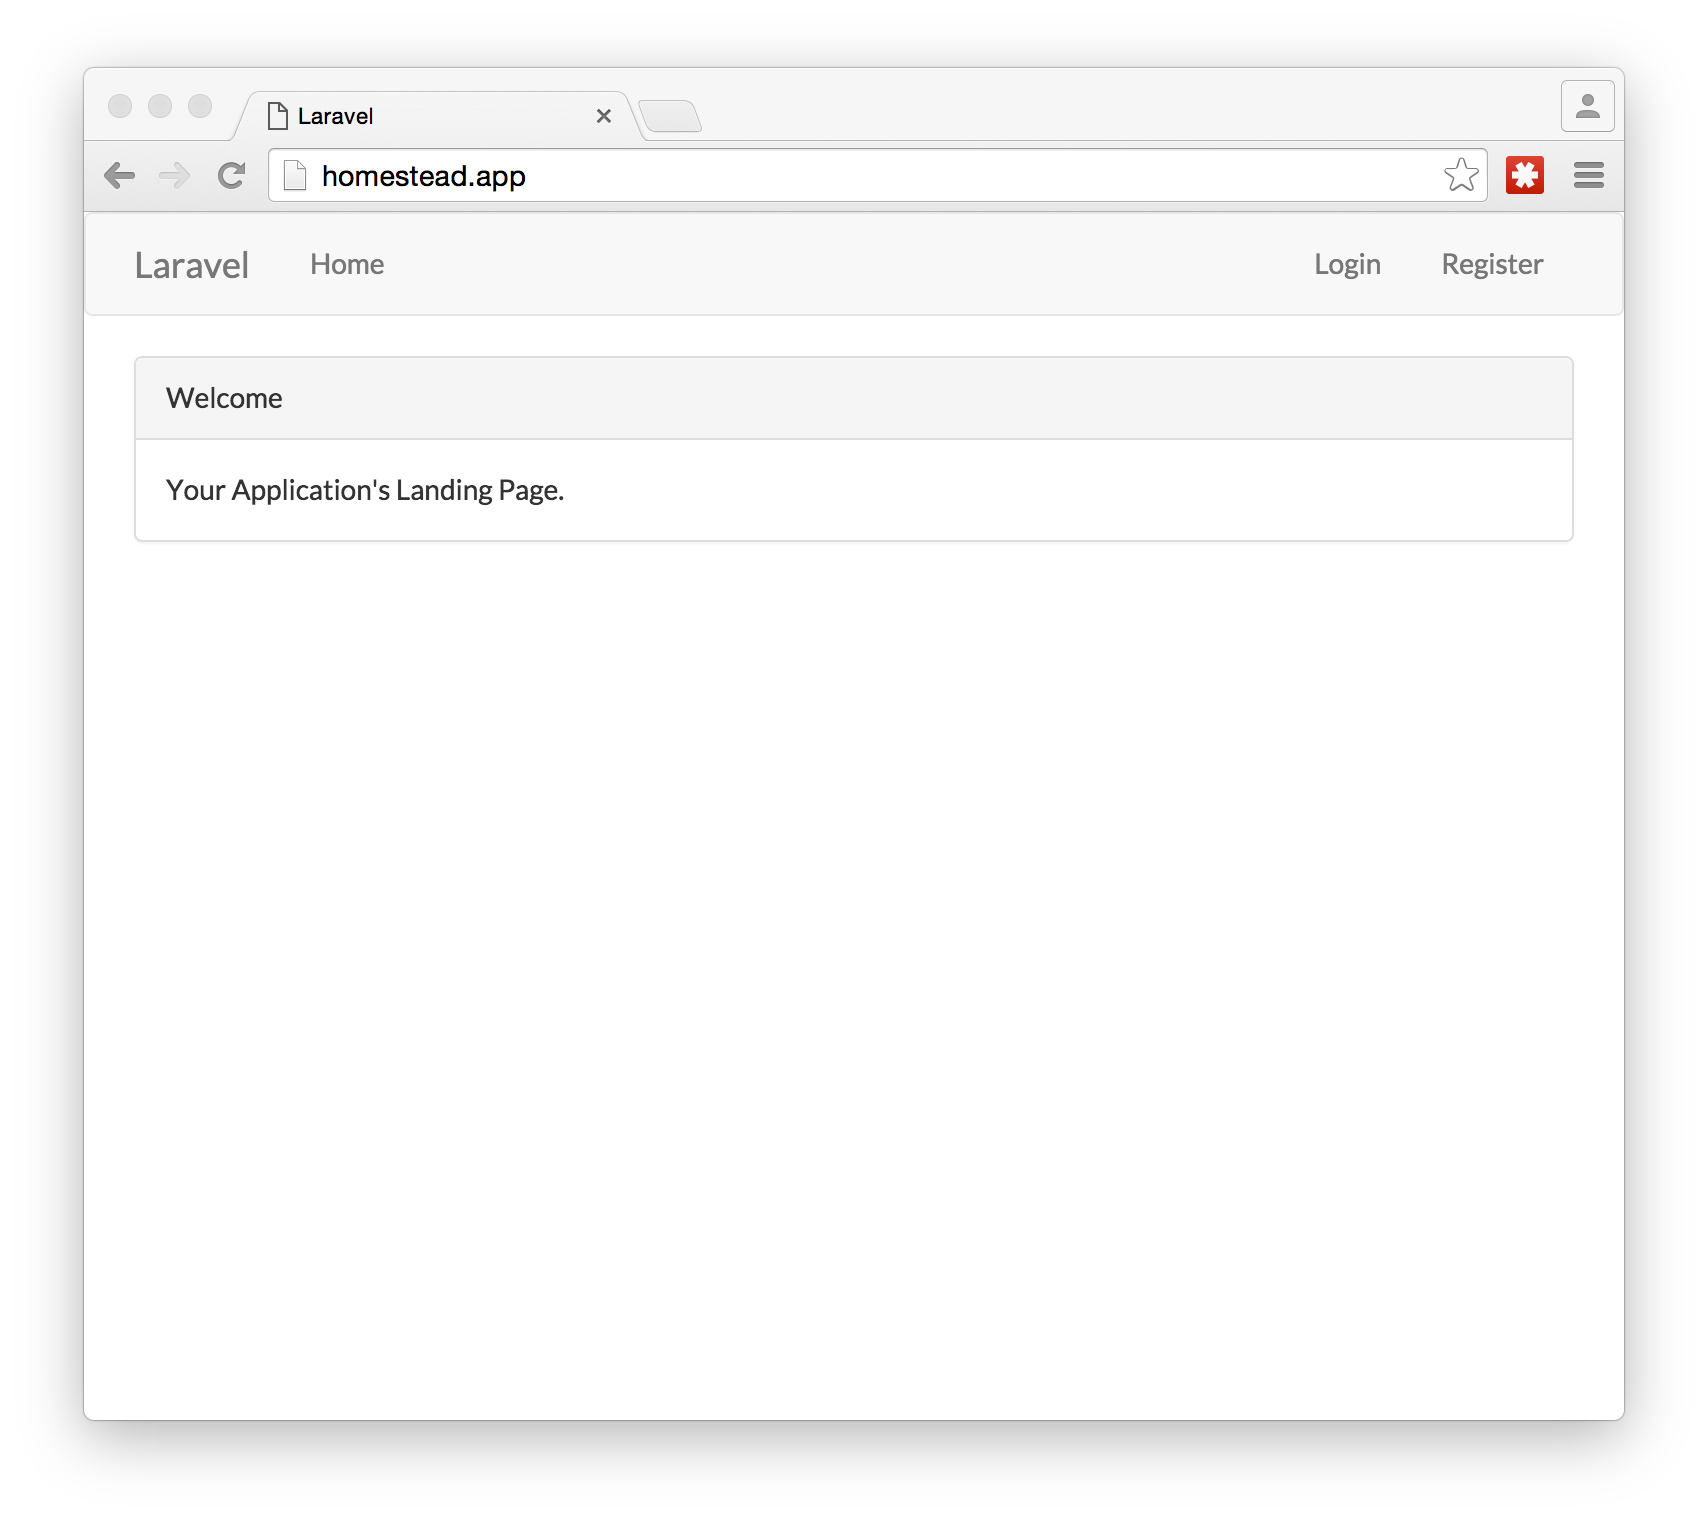
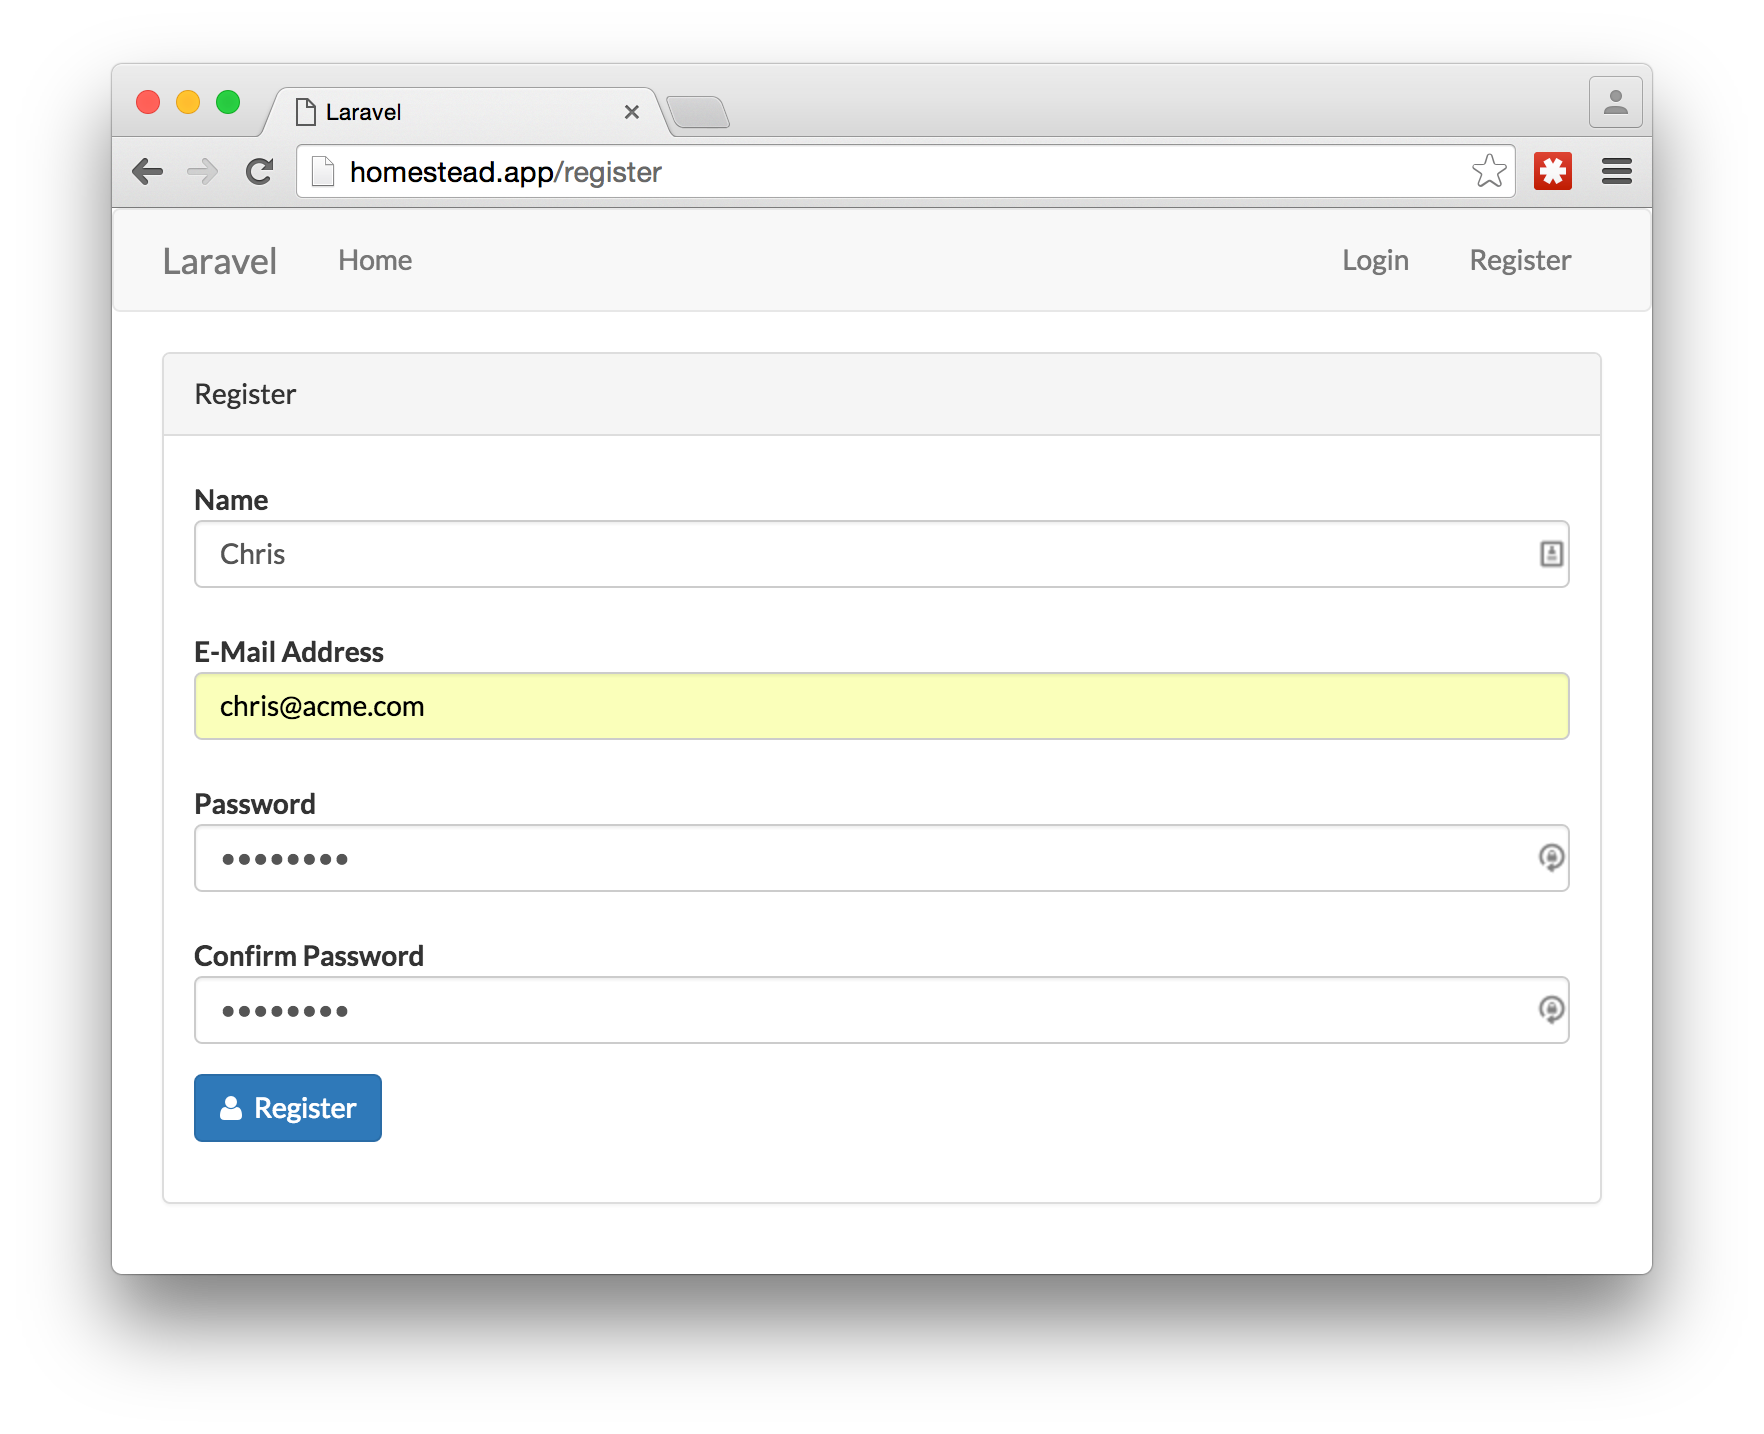
Next, open up the landing page of the app at http://homestead.app. You should see a welcome page. In the upper right hand corner, there is a sign-up link. Click on it and register for a new account.
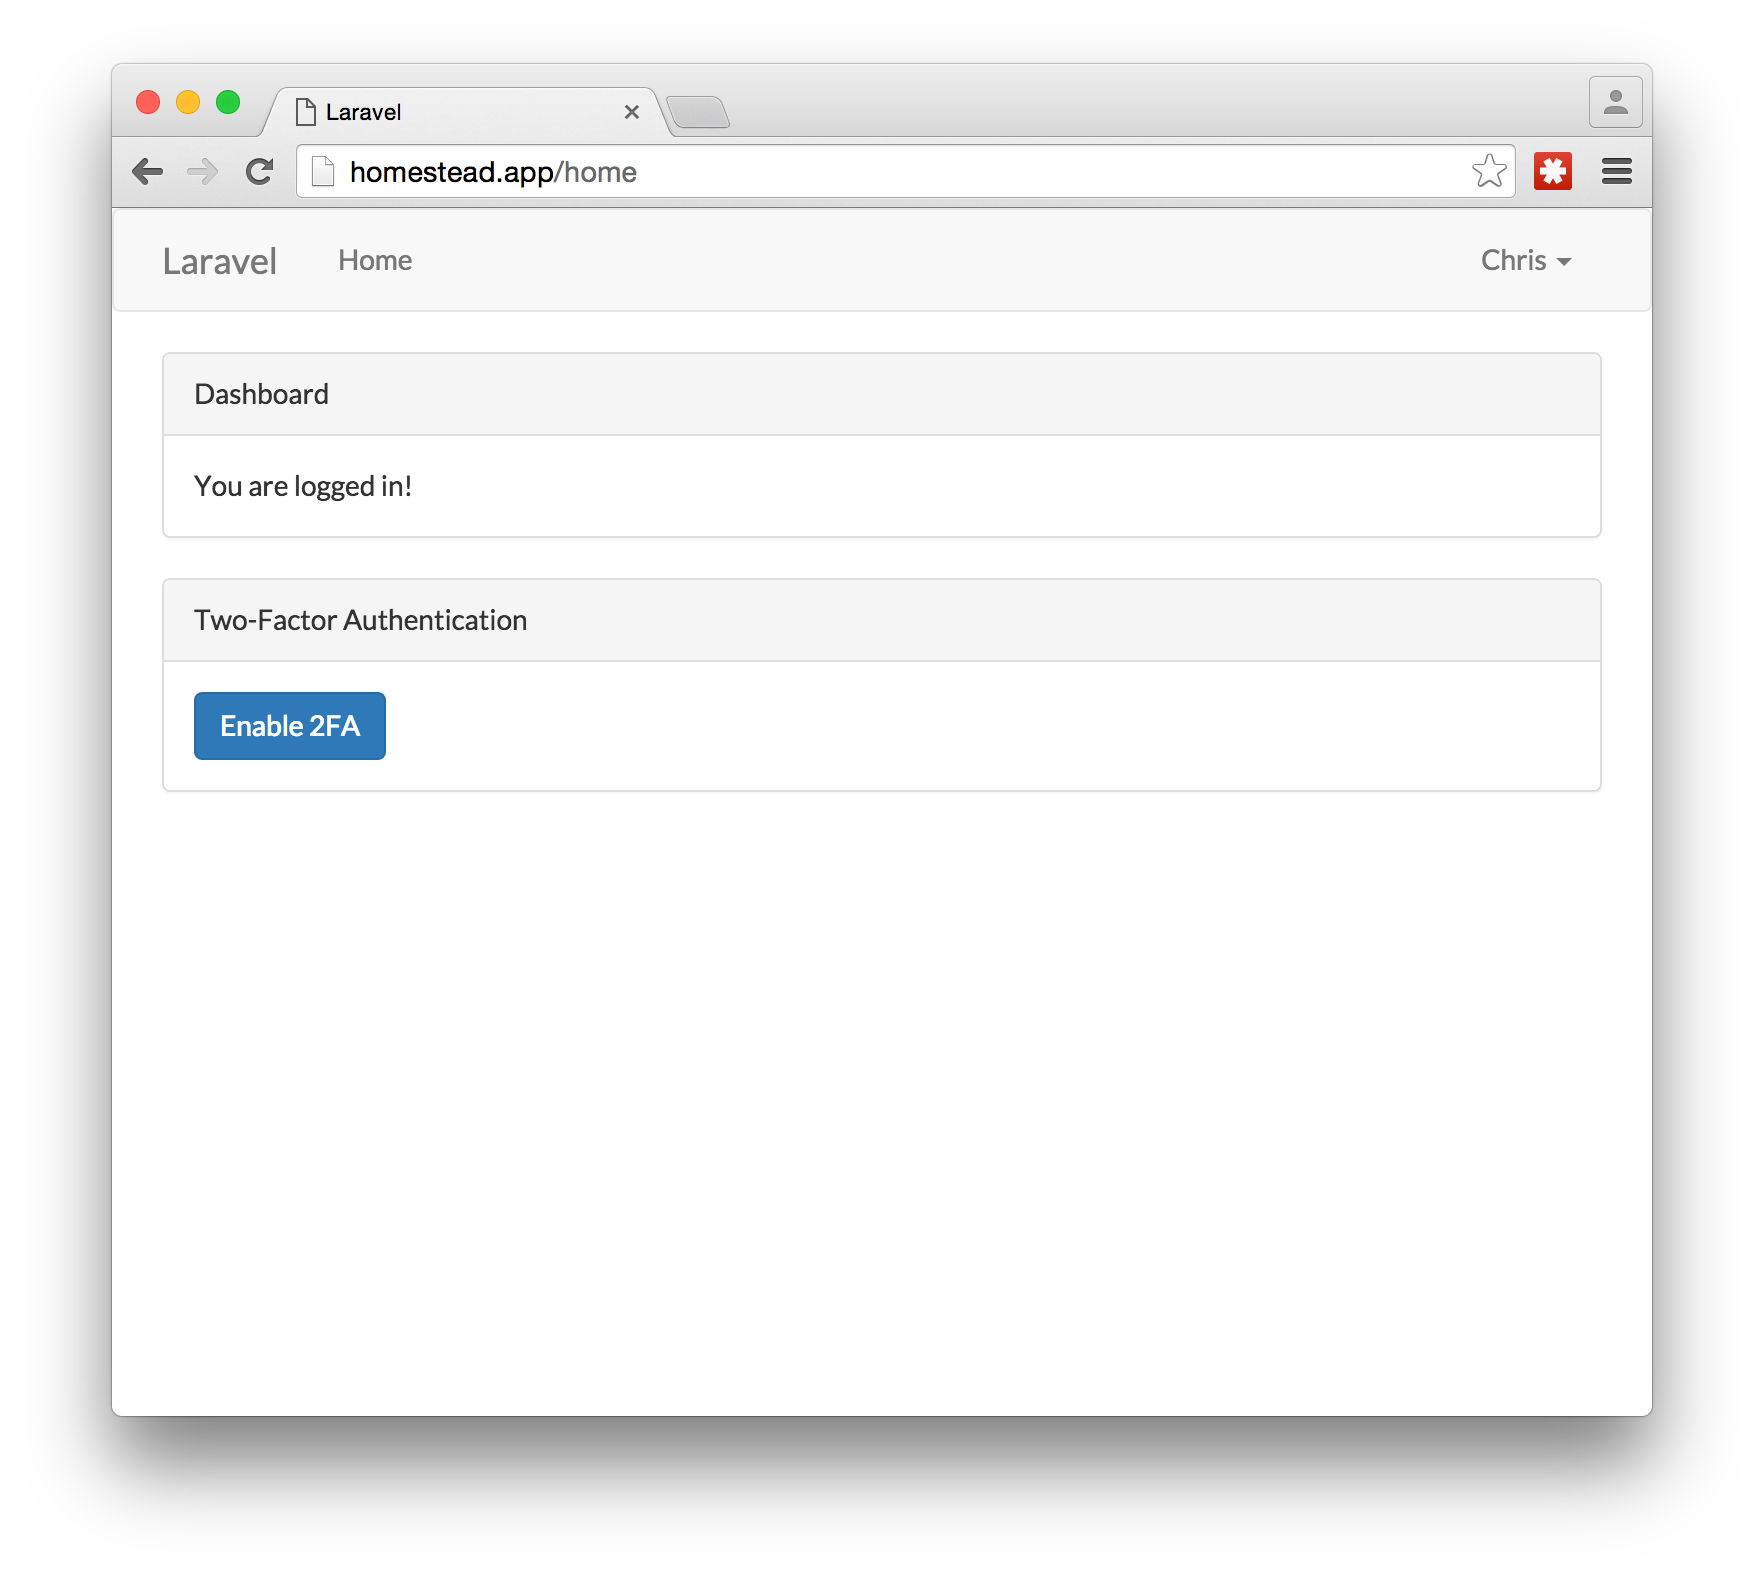
Once you register for a new account, you should be automatically logged in and redirected to the homepage. On this page, you should see a section that talks about Two-Factor Authentication and enabling it. Click on the button to enable 2FA.
On the screen, you should see a QR barcode. This is the secret key that the app generated that you need to load into your 2FA mobile app.
Open up the Google Authenticator app and click on the add button at the bottom of the screen. It should ask if you want to scan a barcode or manually enter in the secret key. Pick the first option.
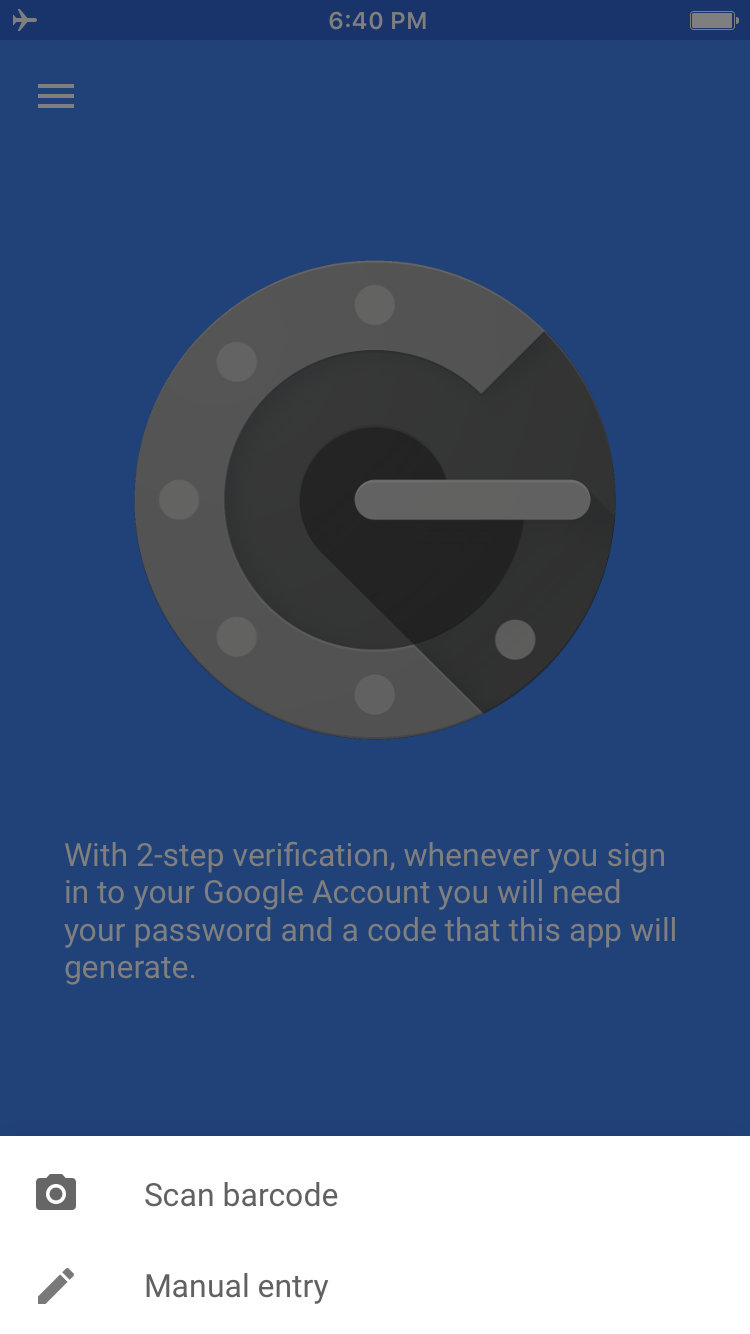
Hold the phone up to the screen of your computer to scan the barcode. After the QR barcode is scanned, there should be a new entry in the list of one-time passwords.
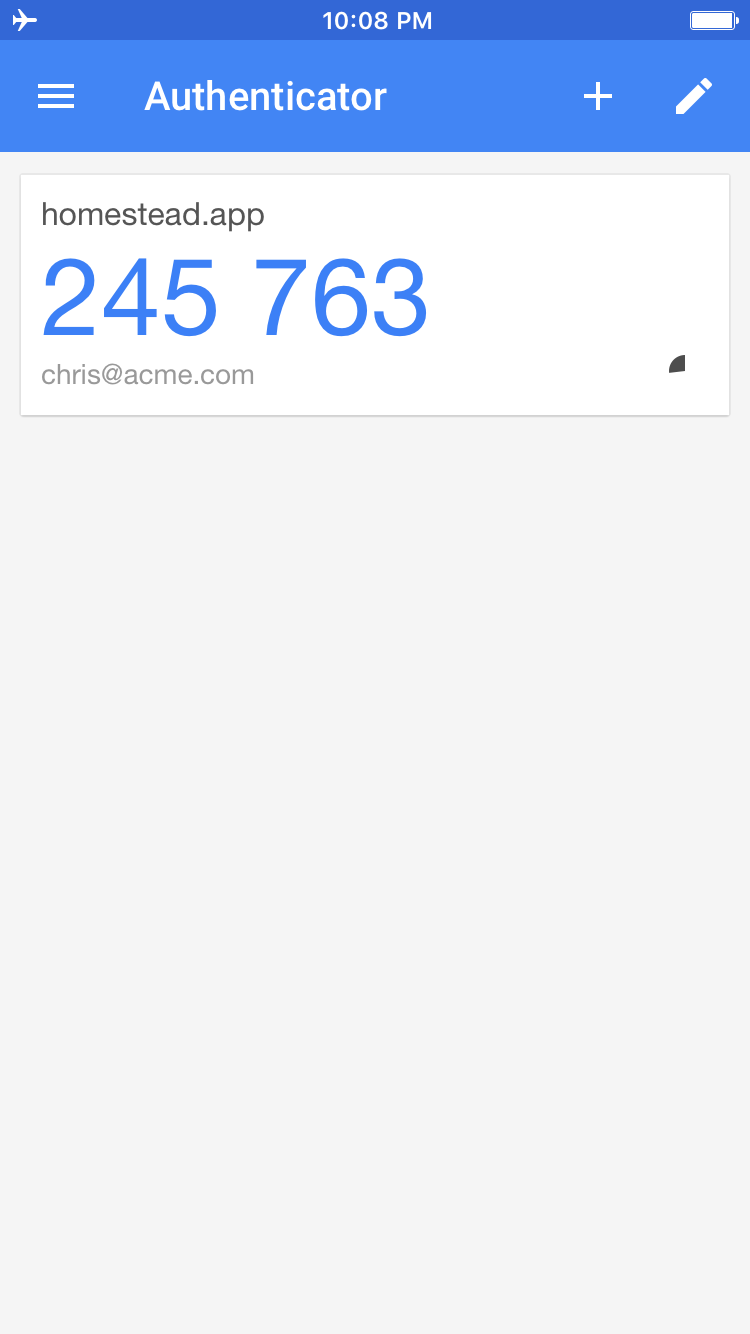
Next, log out of the webapp, and re-login. This time, after you use your email and password, you should see a screen that asks for the one-time password.
Make sure the Google Authenticator app is open and put the number that is currently being displayed into the webpage and submit the value.
After that, you should be authenticated and be directed to the homepage.
If you want to disable the 2FA, you can do it on the homepage by clicking on the “Disable 2FA” at the bottom.
There will be a confirmation page saying that 2FA has been disabled.
Now you can log in without the one-time password.
Conclusion
By default, the login process and TOTP setup process does not happen via HTTPS. In a production environment, make sure it happens over HTTPS.
In this article, we have seen how adding a one-time password to the authentication process makes logging in more secure. Next, we walked through building an app in Laravel that uses an implementation of Google Authenticator to do 2FA.
If you would like to see the completed example, it is located on Github.
Frequently Asked Questions (FAQs) on 2FA in Laravel with Google Authenticator
How Can I Install Google2FA in Laravel?
To install Google2FA in Laravel, you need to use Composer, a tool for dependency management in PHP. Run the command composer require pragmarx/google2fa-laravel in your terminal. This command will download and install the Google2FA package in your Laravel project. After installation, you can publish the config file by running php artisan vendor:publish --provider="PragmaRX\Google2FALaravel\ServiceProvider".
How Can I Generate a Secret Key for 2FA in Laravel?
After installing Google2FA, you can generate a secret key by using the generateSecretKey() method. This method will return a unique secret key for each user. You can store this key in your database for future use. Here is an example of how to use this method: $user->google2fa_secret = $google2fa->generateSecretKey();.
How Can I Generate a QR Code for 2FA in Laravel?
Google2FA provides a method called getQRCodeInline() to generate a QR code. You need to pass the company name, the user’s email, and the secret key to this method. The method will return a QR code in SVG format. Here is an example: $QR_Image = $google2fa->getQRCodeInline($companyName, $userEmail, $secretKey);.
How Can I Validate a 2FA Code in Laravel?
To validate a 2FA code, you can use the verifyKey() method provided by Google2FA. This method takes the secret key and the user’s input as parameters and returns true if the input matches the 2FA code. Here is an example: $isValid = $google2fa->verifyKey($secretKey, $userInput);.
How Can I Enable 2FA for a User in Laravel?
To enable 2FA for a user, you need to generate a secret key for the user and store it in your database. Then, you can use this key to generate a QR code for the user. The user can scan this QR code with their Google Authenticator app to enable 2FA.
How Can I Disable 2FA for a User in Laravel?
To disable 2FA for a user, you can simply remove the user’s secret key from your database. Without the secret key, the user will not be able to generate a valid 2FA code.
How Can I Handle 2FA in Laravel Middleware?
You can handle 2FA in Laravel middleware by creating a custom middleware that checks if the user has enabled 2FA. If 2FA is enabled, the middleware can redirect the user to a 2FA verification page. If the user has not enabled 2FA, the middleware can allow the request to proceed.
How Can I Test 2FA in Laravel?
To test 2FA in Laravel, you can use Laravel’s built-in testing features. You can create a test user with 2FA enabled, generate a valid 2FA code for this user, and then use this code to make a request to your application. Laravel will automatically verify the 2FA code and return the appropriate response.
How Can I Customize the 2FA Verification Page in Laravel?
You can customize the 2FA verification page by editing the view file that is responsible for rendering this page. You can change the layout, add custom styles, and modify the form fields as per your requirements.
How Can I Handle 2FA Errors in Laravel?
You can handle 2FA errors in Laravel by using Laravel’s built-in error handling features. If the verifyKey() method returns false, you can throw a custom exception. You can then catch this exception in your error handler and display an appropriate error message to the user.
Chris is an App Development Manager for one of the top medical schools in Southern California. He has contributed to a few open source PHP projects.


Published in
·APIs·Authentication·Frameworks·Laravel·Libraries·Patterns & Practices·PHP·Security·Standards·February 17, 2016


Published in
·APIs·CMS & Frameworks·E-Commerce·Frameworks·Laravel·Libraries·PHP·Web Services·January 17, 2017
Published in
·APIs·CMS & Frameworks·Frameworks·Laravel·Libraries·Miscellaneous·PHP·Web Services·June 19, 2017