Vagrant has changed the way I work. In this article I discuss how Vagrant, a tool for creating and managing virtual environments, helps me work more efficiently. I will then introduce Varying Vagrant Vagrants (VVV), an evolving Vagrant configuration purpose-built for WordPress developers.
Are You Still Using WAMP/MAMP?
If you’re reading this, there is a high chance that you have used local development in the past. We all have gone through this. WAMP/WampServer, LAMP or MAMP, we’ve all had nightmares developing with them. Most of the time I was developing using WAMP (Windows), then I changed my development environment to Linux. It was the best thing I have ever done.
If you’ve ever worked in a team, you have probably come across the scenario where someone says “It works on my machine”. Or perhaps you’ve lost time losing your development environment when you’ve switched computers or bought a new laptop.
Working on different projects, often requires different PHP versions, and different extensions. Sometimes there are conflicts with extensions. Things may break. Let’s not even talk about differences in the operating system, that’s another level of nightmare.
But what I hate the most, is messing with my primary system. I don’t want to my system to become dirty. I don’t want to install something and to forget that it is there. Projects finish but (usually) extensions and configurations stay there, and then you have to reconfigure everything.
But don’t worry, I think those days are over. I’ve been experimenting with Vagrant for a while and it has permanently changed the way I work.
Say Hello to Vagrant
So why use Vagrant? Vagrant is a tool that makes it easier to configure virtual systems. You can also use a single configuration when collaborating to make sure all of your team has the same development environment. This way you can spend more time building things, rather than fixing systems. After all we are developers, not System Administrators.
As we know, every project has it’s own libraries, dependencies and it’s own configurations. With Vagrant we can build a dedicated environment for every project, and share this configuration so we’re all on the same page when developing in a team.
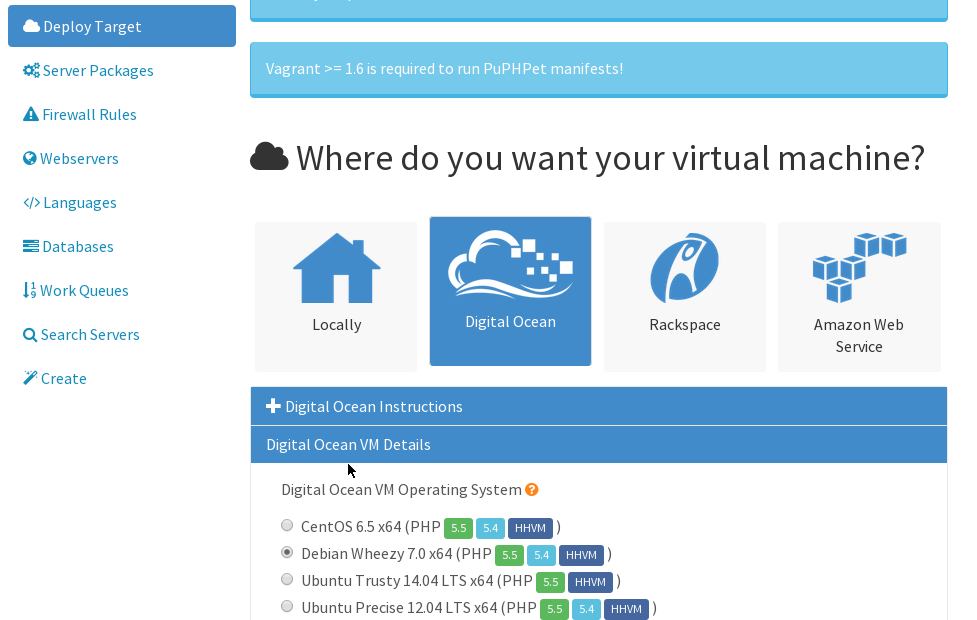
Vagrant is mature. You are free to create a configuration from scratch or use one that’s predefined. There are lots of tools and scripts to help you create and manage your Vagrant configurations, one of which is PuPHPet. With PuPHPet, you can configure environments for a local system, Digital Ocean, AWS and Rackspace. I’m not a System Administrator, but I’ve been able to create configurations for these environments with great success.
There are many configurations specifically for WordPress too. The most well known is Varying Vagrant Vagrants or (VVV) for short.
What Is VVV?
VVV is a Vagrant configuration for WordPress developers. The environment is flexible, easy to edit and focused on high traffic, production environments. By using VVV, you get production ready configurations to work with on your own systems, right away.
What Comes with VVV?
Here are all the goodies you get when you install VVV:
- Ubuntu 14.04 LTS (Trusty Tahr)
- WordPress Develop
- WordPress Stable
- WordPress Trunk
- WP-CLI
- nginx 1.6.x
- mysql 5.5.x
- php-fpm 5.5.x
- memcached 1.4.13
- PHP memcache extension 3.0.8
- PHP xdebug extension 2.2.5
- PHP imagick extension 3.1.2
- PHPUnit 4.0.x
- ack-grep 2.04
- git 1.9.x
- subversion 1.8.x
- ngrep
- dos2unix
- Composer
- phpMemcachedAdmin
- phpMyAdmin 4.1.14 (multi-language)
- Opcache Status
- Webgrind
- NodeJs Current Stable Version
- grunt-cli Current Stable Version
You can use many different sites on one VVV configuration. It’s the perfect environment to develop themes and plugins on, but that’s not all, it makes contributing to WordPress core easier. It also has Composer and Grunt preinstalled to help you work faster and smarter.
VVV helps you develop for WordPress in the right way, using best practices.
Installing VVV
To install VVV you need to have VirtualBox and Vagrant installed on your machine:
After installing Vagrant, you can then use it from your terminal. I’m using Debian here, it should be the same on Windows and Mac.
You can now grab VVV from the GitHub repository:
git clone https://github.com/Varying-Vagrant-Vagrants/VVV.git wordpress-vvv
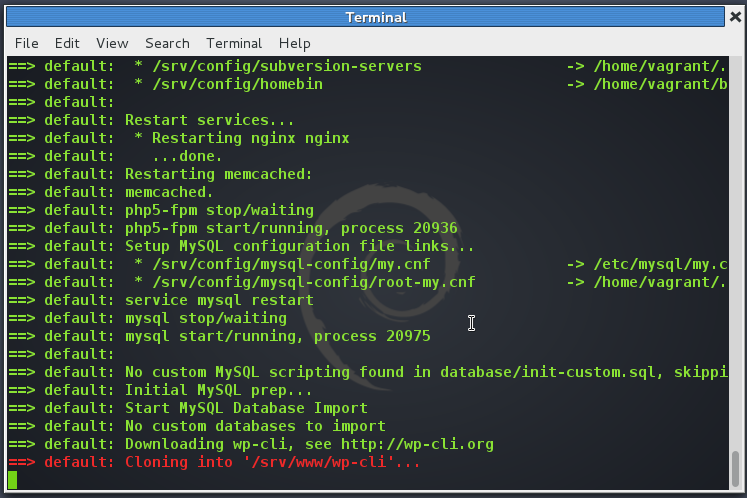
Next, navigate to wordpress-vvv folder and execute vagrant up:
cd wordpress-vvv
vagrant up
This command will read the configuration and build the entire system for you. The first time it will download the “Ubuntu 14.04 Trusty 64 bit” image from vagrantcloud. Next time you execute vagrant up for another project that depends on this image, it will load it from the cache. You can check your cached images by executing:
vagrant box list
If the installation process gets a bit slow, don’t worry, give it time.
As mentioned above, VVV installs a lot of components. git, composer, wp-cli, grunt-cli, nodeJs and a lot of other tools. But what caught my eye is that VVV included a lot of debugging and profiling tools. By default, it installs Webgrind, Opcache Status and xdebug. VVV also uses nginx by default.
After the successful installation, navigate to the default IP address 192.168.50.4 in your web browser. You’ll be greeted with a simple interface that gives us access to various tools and different WordPress installations.
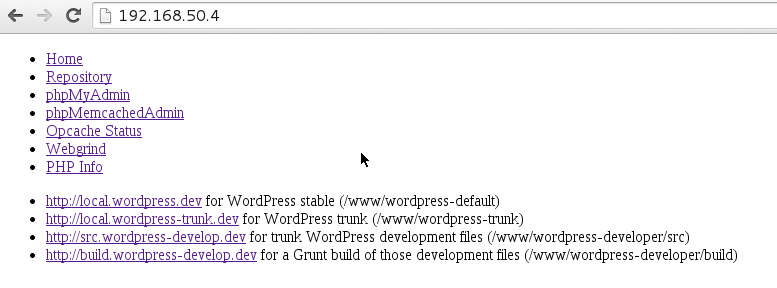
You can now go to any of the installations and experiment. You can find all of these files in the www directory. There are many folders within www, but just focus on wordpress-default and wordpress-develop. Usually, you’ll want to work with the wordpress-default folder. If you’re feeling a bit geeky or adventurous, you might be interested in trying out the latest development version, wordpress-trunk.
The wordpress-default installation is what you will use if you want to create a new theme or plugin. To log in to the Administration Dashboard, the default username is admin and the password is password. Head over to VVV docs for more information on default MySQL accounts and database names for each installation. Finally, the wordpress-develop installation is the folder that you will use if you want to contribute to the WordPress core.
Extra Plugins
There is a Vagrant plugin that I recommend installing to help make managing your hosts much easier. The plugin is called vagrant-hostsupdater and it updates your hosts file when you execute vagrant up, reload and resume.
This plugin reads the configuration for the IP address of the virtual machine and for the hostname and updates the host file accordingly. To install this plugin, execute:
vagrant plugin install vagrant-hostsupdater
Configuration
When Vagrant starts the installation, it firstly looks at the Vagrantfile. This file contains all of the configuration. I’m not going to cover every line, just a couple of values that I think are important.
The first value is the RAM of the VM. By default it’s 512 MB. If you want more, just change this value to a higher one:
v.customize ["modifyvm", :id, "--memory", 512]
The second value that I found important is the IP configuration. This is the IP address that the VM will use by default. If you experience any networking issues, here’s where you can change the default value of the IP address:
config.vm.network :private_network, ip: "192.168.50.4"
The last value is the config folder. This config maps 2 folders, the config folder is on host and /srv/config is on the VM:
config.vm.synced_folder "config/", "/srv/config"
In the config folder you’ll find the configuration of PHP, WordPress, MySQL, nginx and more. After updating the Vagrantfile, make sure to provision this with vagrant provision. This way all of the changes will be applied.
Further Reading
If you’re interested in learning more about Vagrant and VVV, here are few links for further reading:
- The Official VVV GitHub Page
- Give Vagrant a Place in Your Workflow
- Build Virtual Machines Easily With PuPHPet
Conclusion
As you can see, Varying Vagrant Vagrants is focused on providing the perfect development environment for theme and plugin developers, as well as WordPress core contributors. The tools that VVV offers are powerful and geared towards building high performance sites.
VVV might be a bit overwhelming for beginners, but the time it can save WordPress developers makes it well worth learning.
What do you think about VVV? Do you have experience using it? Do you recommend another Vagrant configuration? Let us know in the comments below.
 Aleksander Koko
Aleksander is young developer who loves to play with the newest web technologies. In his free time, he reads about PHP, Firefox OS or experiments with a new language. Currently, his main interests are PHP design patterns, laravel, dart and cloud.